Wellcraft Deck/Stringer replacment (1988 Classic 170)

Joined
Aug 8, 2007
Messages
16
Hello,
I recently finished a deck repair on my '88 Wellcraft Classic 170. I used alot of information from these forums, so I'm posting the process and lessons learned so that it can help others. Feedback is welcomed.

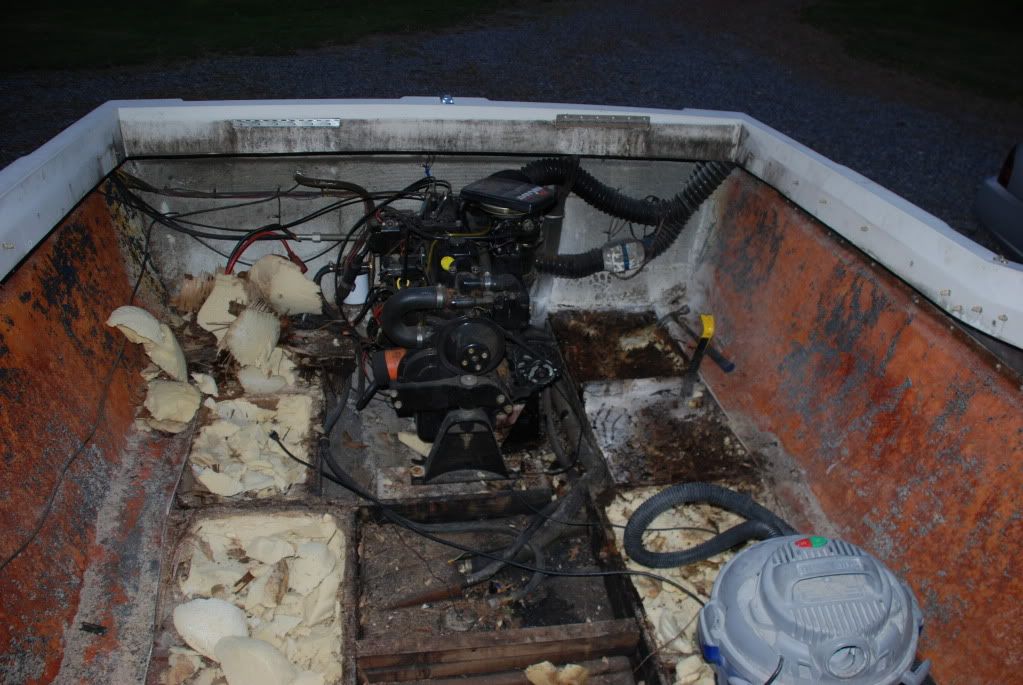
It started with me stepping through the floor while prepping the boat this spring. Little did I know how bad it really was. Here is the boat with the seats and carpet out:
DSC_5538.jpg
 
Joined
Aug 8, 2007
Messages
16
Re: Wellcraft Deck/Stringer replacment (1988 Classic 170)

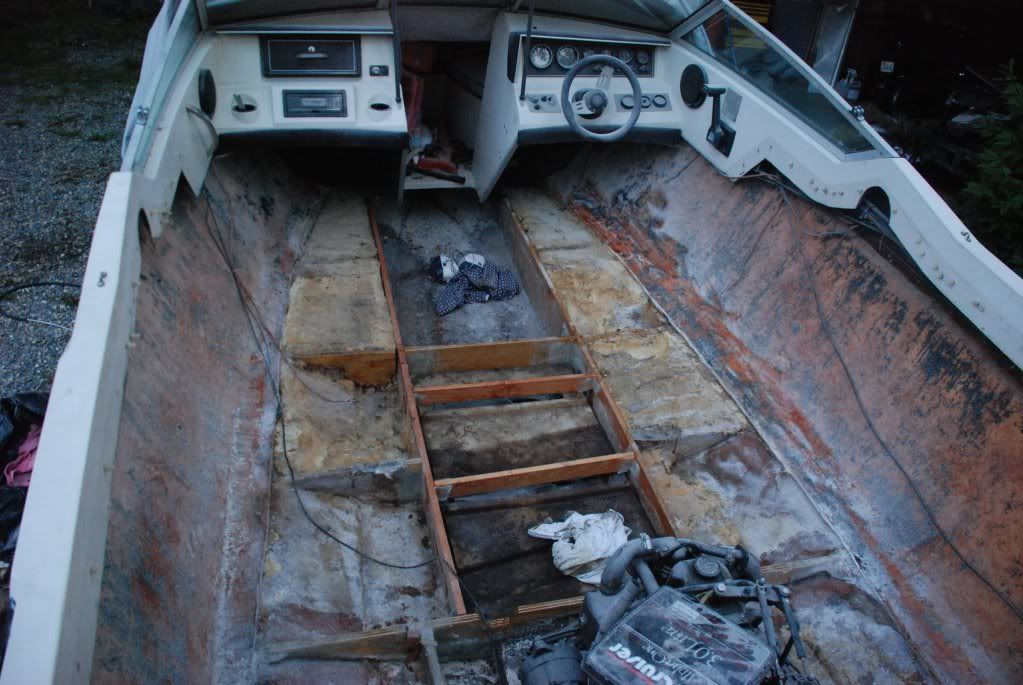
I started by using a circular saw to cut out the existing deck. I cut about 1" from the edge and used a 4" grinder and cut-off wheel in the tight spots. Much of it was completely rotted and was easy to remove. Other sections required prying screws out that a previous owner must have put in.

A note on Safety: Use a respirator and goggles! A tyvek suit is also great for keeping the fiberglass off. That stuff will make you itch for days.

Deck Off:
DSC_5764.jpg
 
Joined
Aug 8, 2007
Messages
16
Re: Wellcraft Deck/Stringer replacment (1988 Classic 170)

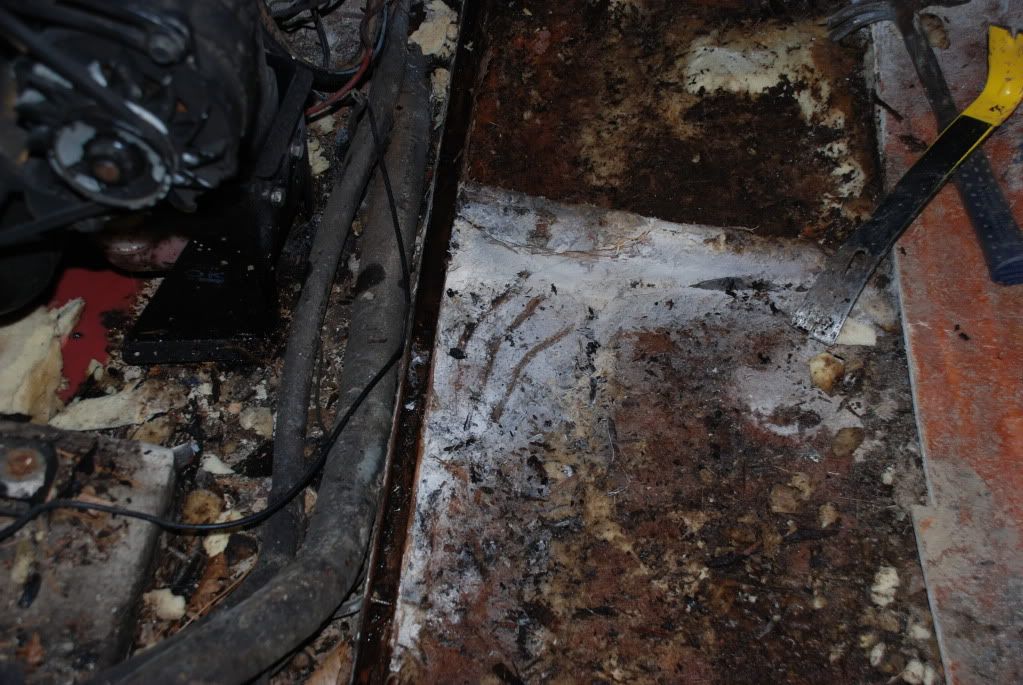
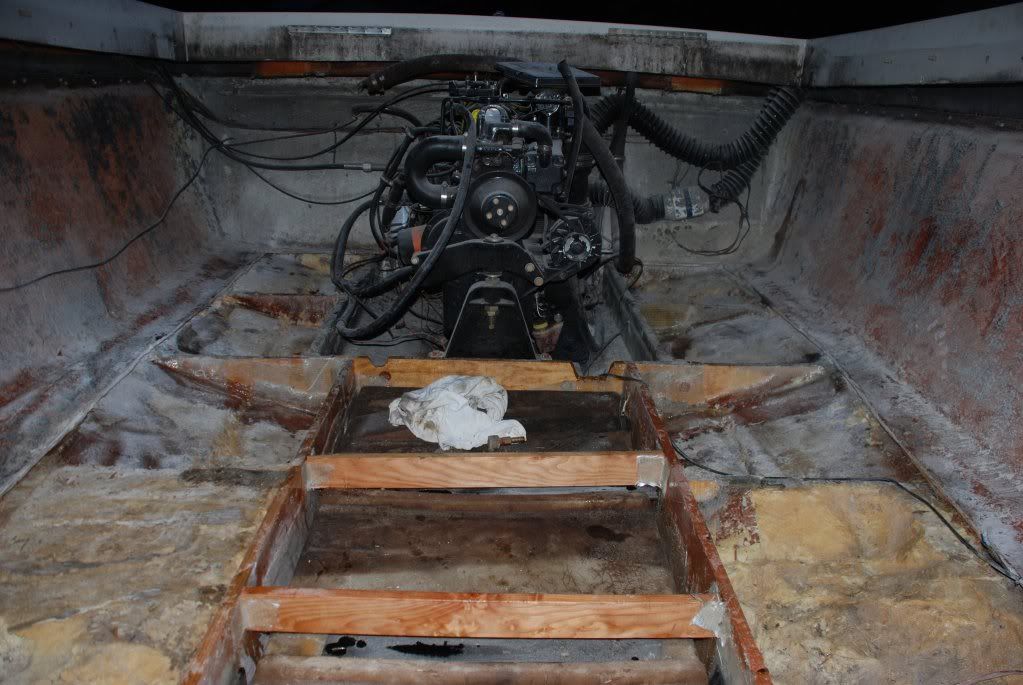
What fun, this is where I found that the rear stringers were rotten. I was able to dig/pry them out of the fiberglass channels with a little work. Most of it was like dirt. A wonder bar, chisel, and screwdriver were very helpful but this step took some time.
I also removed the gas tank and much of the water logged foam. To remove the foam I used a shovel and the wonderbar again.

DSC_5766.jpg


As I proceeded, I soon found that the crossmembers were shot, as were the main stringers. Luckily, the transom was fine. Almost all the stringer rot can be attributed to screws that a previous owner used to hold down the seat and replacement decking.

I removed the main stringers by cutting the fiberglass tabbing at the hull using the 4" grinder with the cutoff wheel. The main stringers go all the way to the bow, but much is unreachable under the console. This is where I got lazy :redface: and cut as much out as I could reach. I also only cut the inner tabbing (where the gastank sits).
 
Joined
Aug 8, 2007
Messages
16
Re: Wellcraft Deck/Stringer replacment (1988 Classic 170)

Now it was time to spend money. I decided epoxy was the only way to go because of its bonding strength and ability to seal the wood. I ended up using AeroMarine 300/21 because it was priced right and had good reviews. 3 gallons was perfect!
http://www.amazon.com/AeroMarine-300-Epoxy-Resin-Gallon/dp/B0047R0I18/ref=pd_cp_hi_1

For lumber, I used treated 1x6 pine for the rear stringers (since they had the most rot), and 1x10 Douglass Fir for the main stringers (for strength). I also used exterior 3/4" BC ply for the cross members. One sheet was enough. I used 1/2" BC exterior for the deck (2 sheets). The Douglass fir was from a local mill, while the rest was from Lowes. If I could get marine grade ply locally I probably would have done so (despite the cost) and used it for the crossmembers and rear stringers. Hopefully the exterior grade will hold up ...

For fiberglass, I kept watching Ebay until I found what I needed. I used 5 yards x 50" of 1708 weave/mat for the stringer repair. For the deck I used 6oz weave, about 15' x 60".

Then there were the high density rollers that I got from Lowes ... they fell apart within 30 minutes of coming in contact with epoxy so I don't recommend them. Buy something made for epoxy.

Plenty of acetone was also needed, I went through a bit over a gallon.

A lot of rubber gloves, some sanding disks for the orbital sander, metal paint tray, and stainless screws rounded out what I needed.

Yes, the bill will seem to get larger every day. I estimate the above ran about $650, but I don't want to actually sum up the total cost :facepalm:
 
Joined
Aug 8, 2007
Messages
16
Re: Wellcraft Deck/Stringer replacment (1988 Classic 170)

With the stringers removed, I started cleaning the surrounding fiberglass. I used a 60grit flapper wheel on the 4" grider to do most of this work, and an 80grit disk for the random orbital sander. I also used acetone to finish cleaning it.

I made the rear stringers out of the 1x6 treated pine. This was just a straight rip on the table saw. For the cross-member, I laid a straight edge across the remaining 1" of deck and took measurements from the hull up to this point (minus about 5/8"). I used these measurements to mock up a cross-member out of cardboard, and tweaked that until it fit right. This was then traced onto the plywood.

For the main stringers, I took several measurements from the hull up to where the deck would be and drew out what they would look like. A bandsaw would have been real helpful to cut out the main stringers due to the "bow" on the bottom, but a little jigsaw worked just fine.

All lumber received 2-3 coats of epoxy, especially on the ends or where the grain was 'loose'.

I left the rear stringer fiberglass channels in place and squeezed the new stringers into them. I used PL as a bedding compound, and coated the inside of the channels and the stringer with epoxy. The channels were clamped with C-Clamps, using a strip of wood on each side to distribute the force. After this setup, I wrapped the stringers with the 1708.

The cross-member was bedded the same way, but there was no existing channel, so I used the 1708 to tab into the hull. I used three layers of the 1708 fiberglass for the tabbing, being sure the fiberglass ends were well epoxied. Each layer was slightly narrower than the last. I didn't wrap the top ... not sure if I should have or not.

The main stringers were then installed, using the PL for bedding and then tabbing in with the 1708.

After installing the gas tank, I added two 2x2 joists to give the floor strength in that area. I screwed these into the stringers and added some fiberglass tabs which didn't turn out very pretty ... but it's functional.

Several lessons learned:
1. I should have used a router to round the top of each stringer, making it easier to cover with fiberglass and avoid voids. I didn't and it made the fiberglass work difficult
2. I should have used thickened "peanut butter" epoxy to create fillets where the stringers met the hull, again to avoid voids and make the tabbing easier.

Photo of the finished stringer work:
258968_1726951057504_1350245090_31411443_6068820_o.jpg


258968_1726951017503_1350245090_31411442_2696427_o.jpg
 
Joined
Aug 8, 2007
Messages
16
Re: Wellcraft Deck/Stringer replacment (1988 Classic 170)

Next was the floor, which was made out of 1/2" BC exterior grade pine. I made the floor out of three pieces ... rear, middle, and front, keeping the seams at the cross-members. I took plenty of measurements and cut the pieces out and test fitted them. Each fit pretty tightly between the existing 1" edge of floor.

At this step I probably should have used pour-able foam, but my laziness/cheapness kicked in and I filled the floor compartments with extrude polystyrene (Foamular), cut to fit and packed full.

The floor pieces were then coated with plenty of epoxy and were ready to install. I used PL on the stringer tops to help bond the floor to them, and screwed them in with countersunk stainless screws. I tabbed the new floor to the hull using nice wide pieces of 1708 (8"?), and tabbed the floor pieces together using 4" strips.

DSC_7386.jpg
 
Joined
Aug 8, 2007
Messages
16
Re: Wellcraft Deck/Stringer replacment (1988 Classic 170)

I can walk in my boat again without having to have excellent balance! Now I can have that extra beer while I work ...

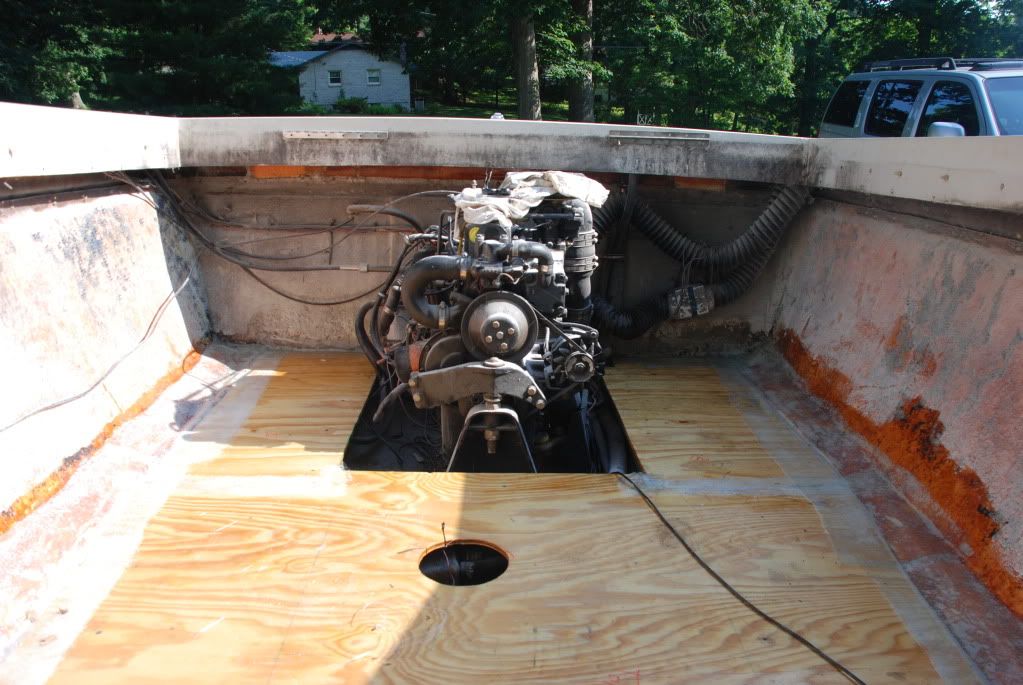
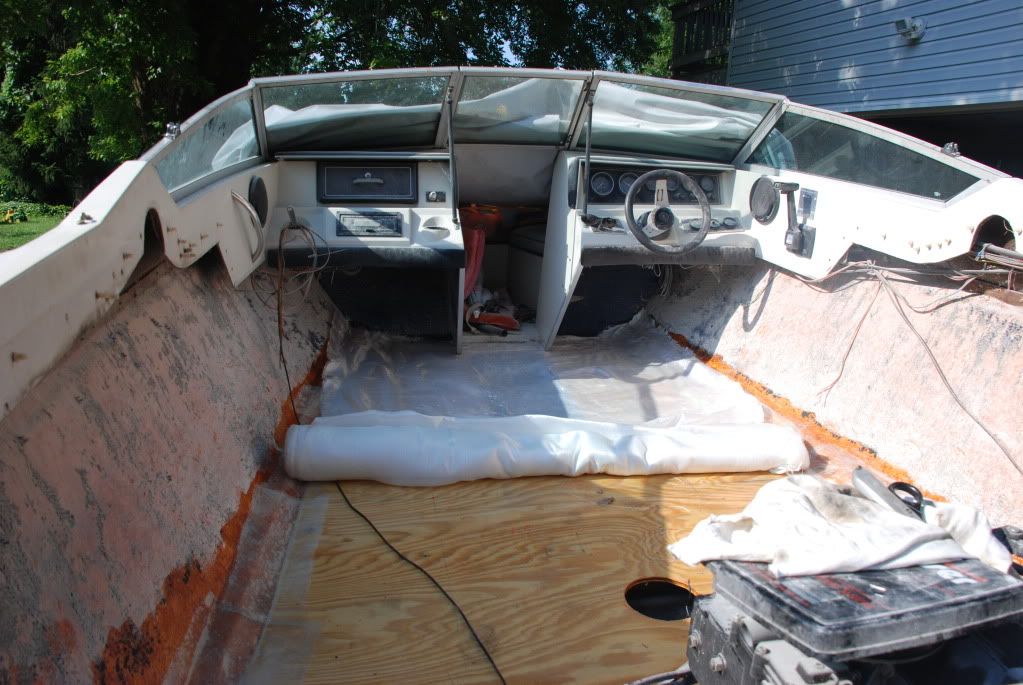
DSC_7384.jpg


I rolled out the fiberglass cloth and cut it to fit. The cloth was wetted with the epoxy using a roller to push out air. All wrinkles and air pockets need to be removed at this stage, so take your time. 3 more coats were added after the preceding coat cured until the surface was pretty smooth.

At this point, I could have put the carpet in and saved alot of prep time, but I am very anti-carpet in boats. I did some sanding with the 80 grit to prep the surface for paint, and spent alot of time cleaning up the sides.
 
Joined
Aug 8, 2007
Messages
16
Re: Wellcraft Deck/Stringer replacment (1988 Classic 170)

I used Rustoleum topside primer and paint to finish things off, with some anti-slip pumice added.
http://www.amazon.com/gp/product/B000BZX09C/ref=noref?ie=UTF8&s=hi&psc=1

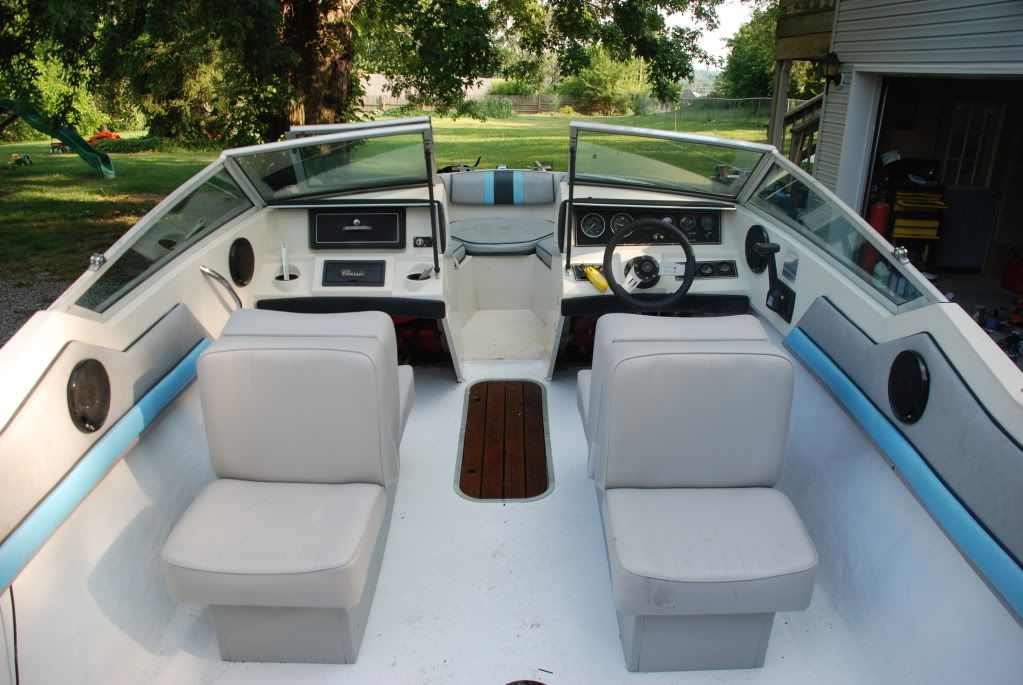
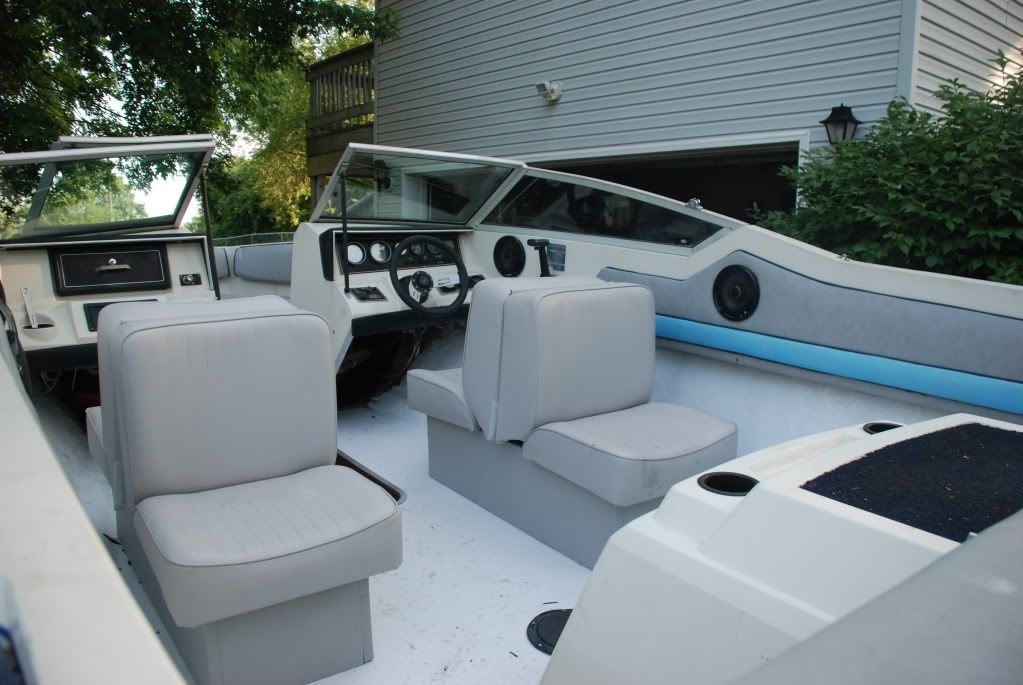
I went with some Wise seats from Walmart ... not the best but much better than what was in there. I epoxied in seat mounts so to prevent the chance of water penetrating into the floor at any point. I also made a new rear motor firewall (not sure what this is called) and side seat supports. I ended up using polyester resin from the local parts store to finish these pieces.

Final pics:
DSC_7452.jpg


DSC_7463.jpg


I don't think I'll ever do this much repair to a boat again. It look several long weekends and many evening hours after work. Lots of itchy fiberglass and plenty of scrapes, cuts, and gouges. But, at least she should hold up for many years and my total cost including the purchase is much less than a comparable 17' boat.

So, to anyone looking to take on this kind of project ... good luck and I hope to see some of your end results.
 

Woodonglass

Supreme Mariner
Joined
Dec 29, 2009
Messages
25,927
Re: Wellcraft Deck/Stringer replacment (1988 Classic 170)

Nice work on the deck and stringers.

I noticed you did NOT say anything about the TRANSOM. Usually a boat with this much ROT in the Deck and Stinger has issues with the Transom as well. I would be a shame to have to tear out all or a portion of the deck just to have to reapair a bad transom in the near future.
 
Joined
Aug 8, 2007
Messages
16
Re: Wellcraft Deck/Stringer replacment (1988 Classic 170)

Surprisingly, the transom is fine, no moisture or soft spots!
 

wellcraft19

Petty Officer 1st Class
Joined
Jun 21, 2011
Messages
201
Re: Wellcraft Deck/Stringer replacment (1988 Classic 170)

I'm always impressed by "you guys" that undertake this type of work.

I "hope" my interior is in good shape, but BADLY want to remove carpet and glass the entire interior. But, cannot even think about it until the house is done (a project now into its 4th year...).
 
Joined
Aug 8, 2007
Messages
16
Re: Wellcraft Deck/Stringer replacment (1988 Classic 170)

It's been over a year and the floor seems to be holding up well. I would advise against normal topside paint for the floor. I ended up repainting it this summer (1 hr job, but I'd still rather not have to). I'm slowly working on the trim detail and front seats, and now it's sporting a wakeboard tower.
 
Top