1975 Omega Restore, the project goes on.

thrillhouse700

Senior Chief Petty Officer
Joined
Aug 5, 2009
Messages
778
Re: 1975 Omega Restore, the project goes on.

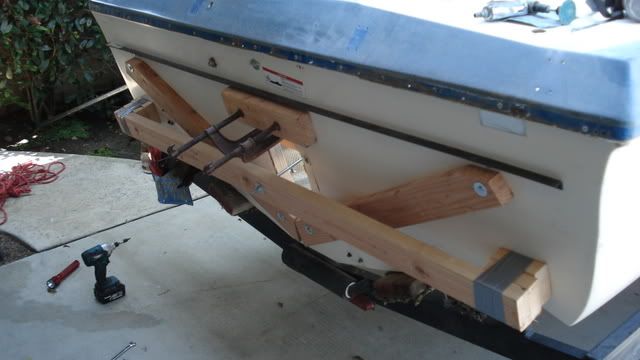
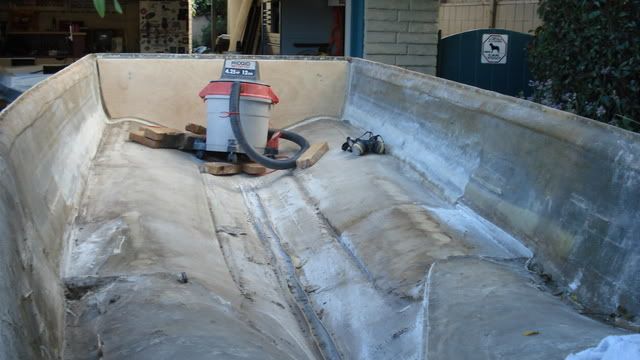
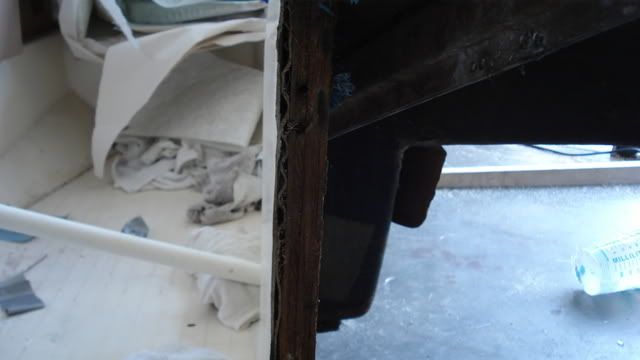
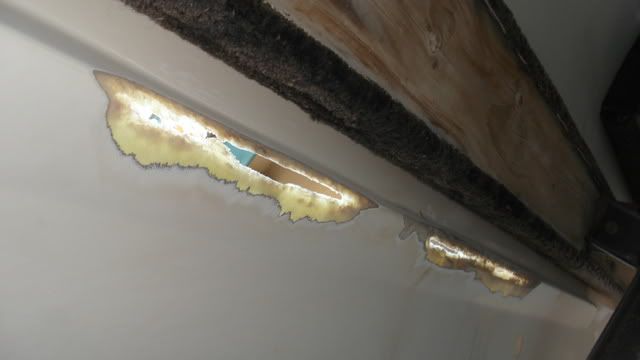
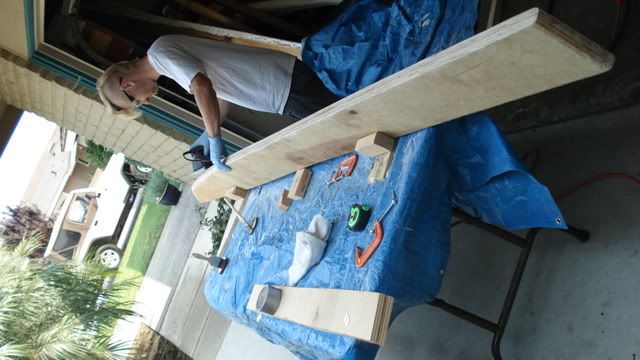
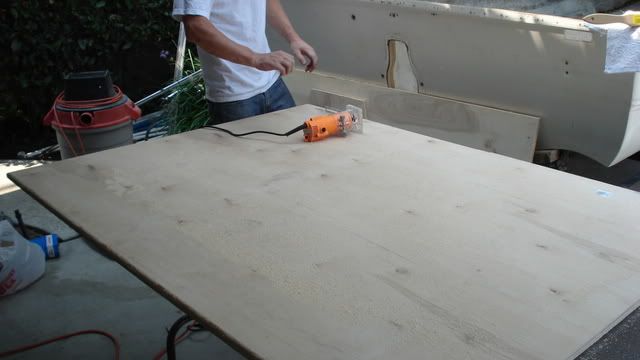
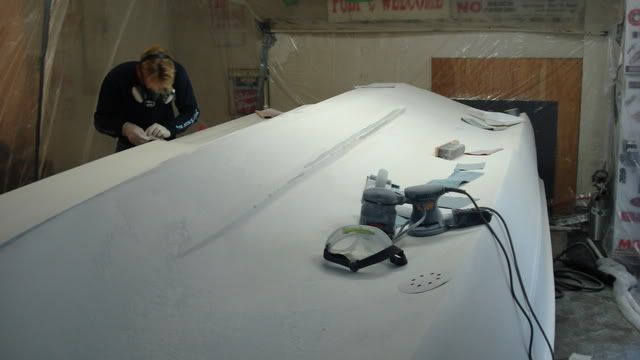
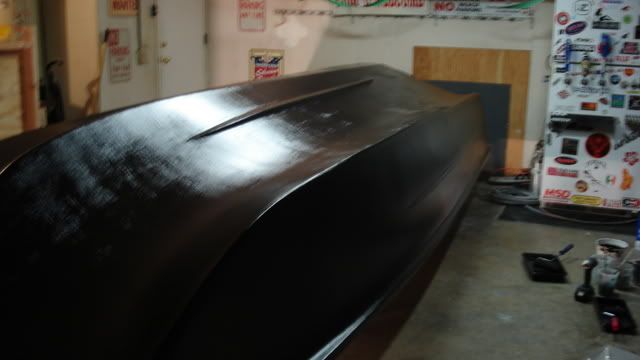
Today we got more transom work done.

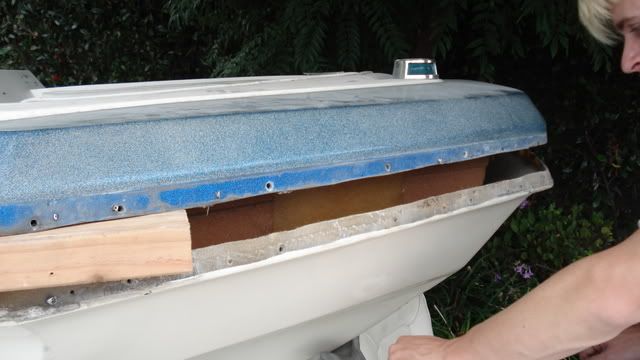
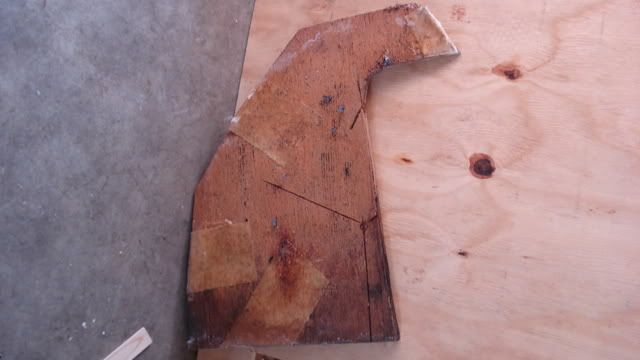
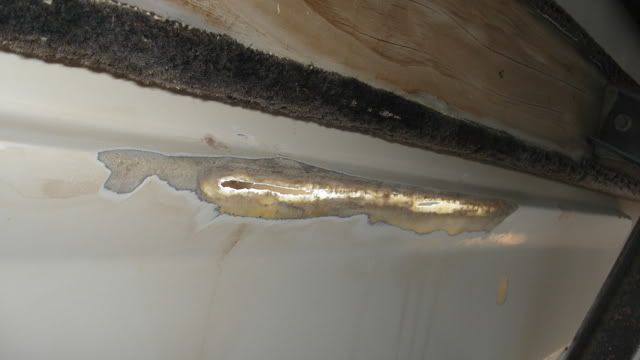
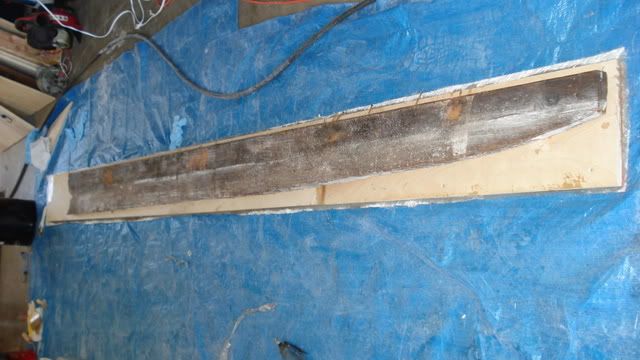
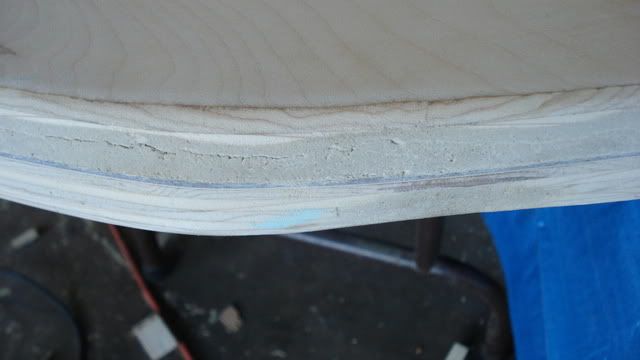
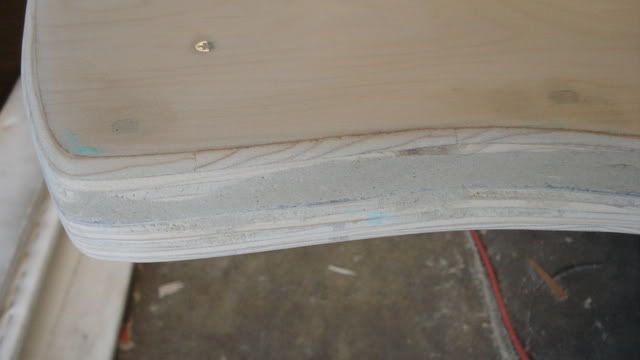
Here is the transom almost completely sanded down and beveled
Transomalmostdone.jpg


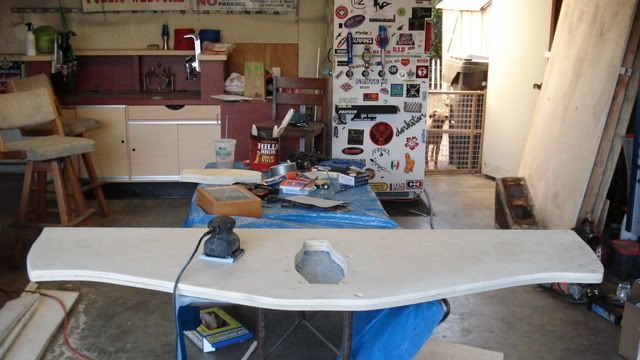
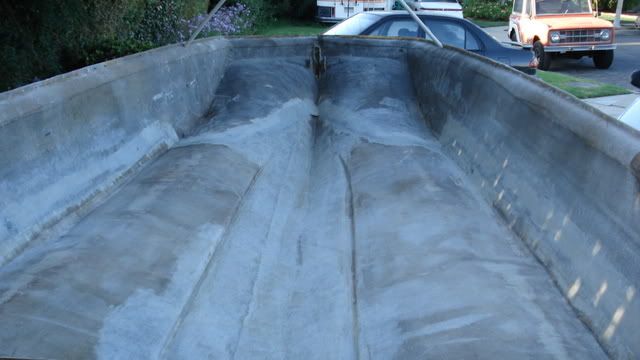
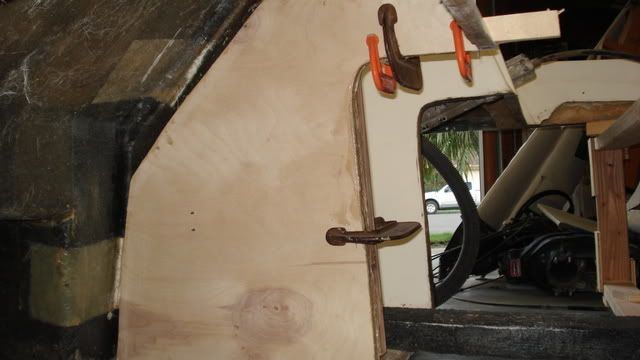
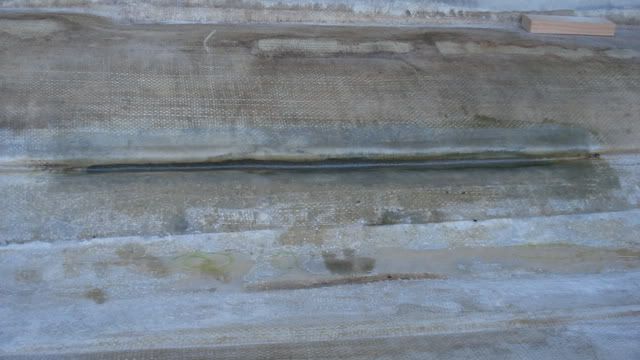
Here is the lamination of the transom
Transomlaminated2.jpg


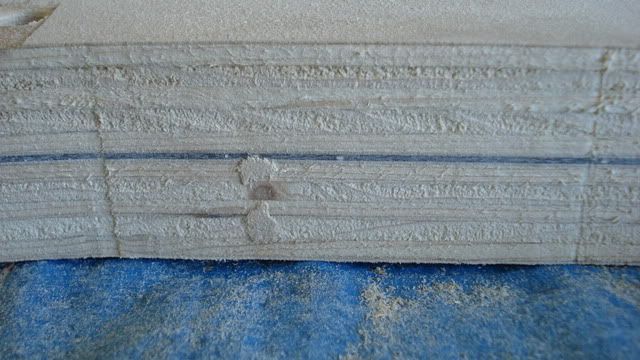
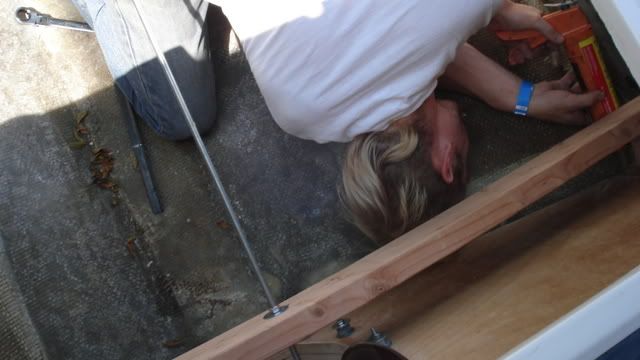
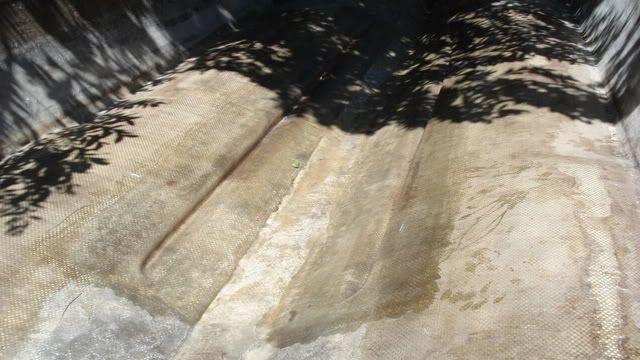
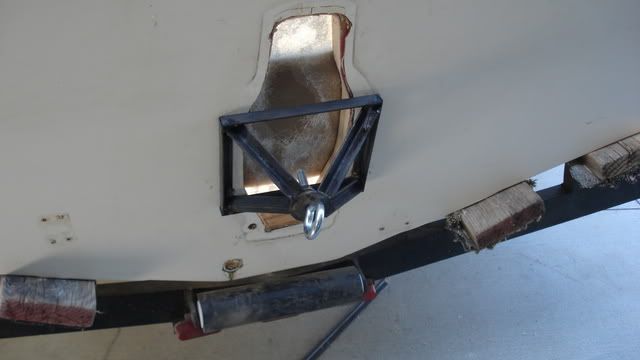
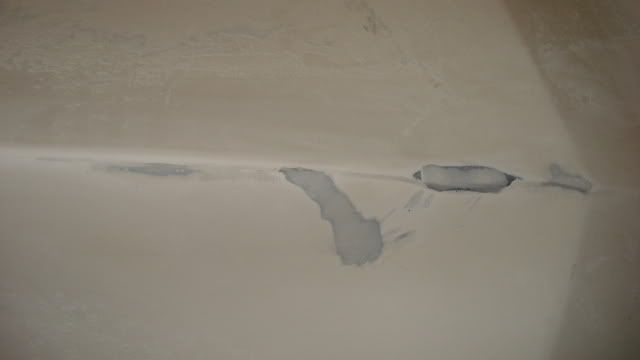
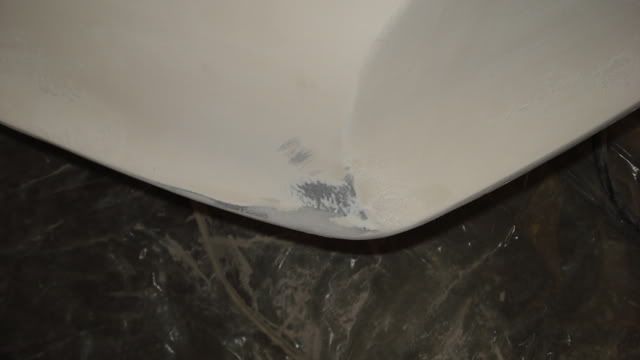
We noticed it was a little uneven on the bottom edge that was cut at a bevel so we chalked the inside of the hull and then placed the transom inside and bolted it in loosely.
Chalk.jpg


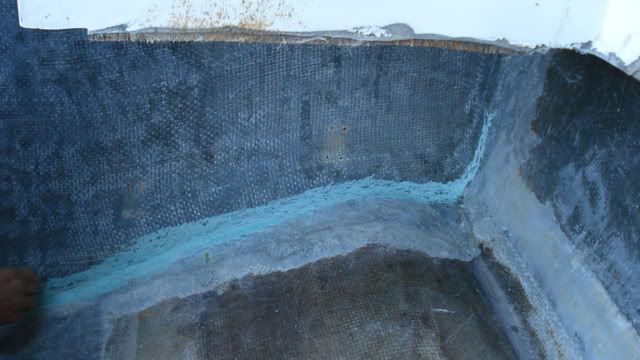
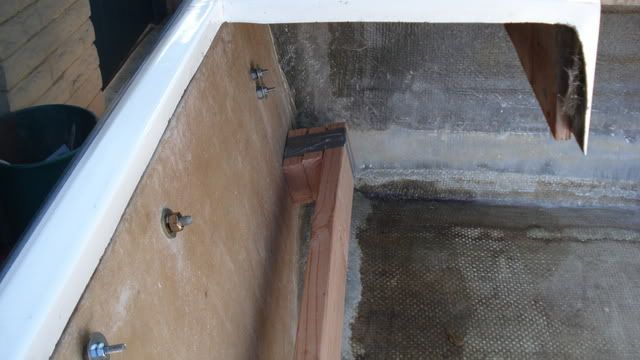
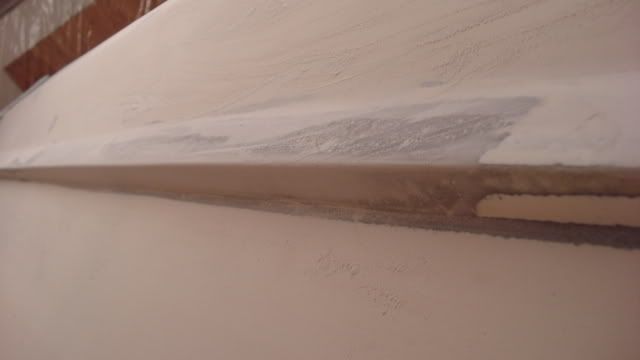
We had two spots where it was making contact with the hull
Contactpoints.jpg


Contactpoints2.jpg


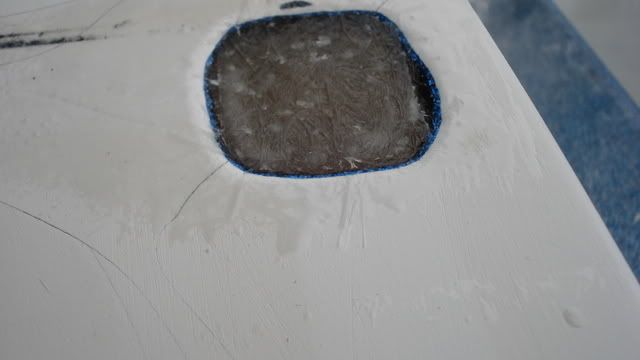
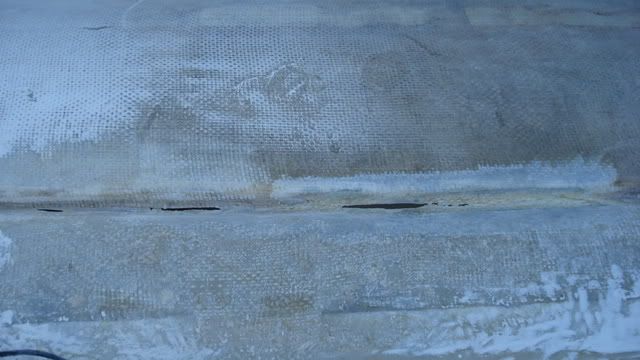
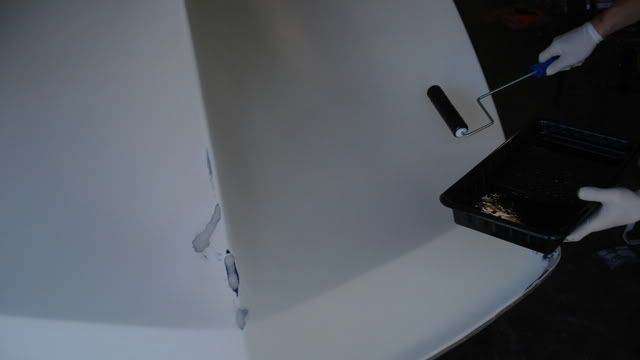
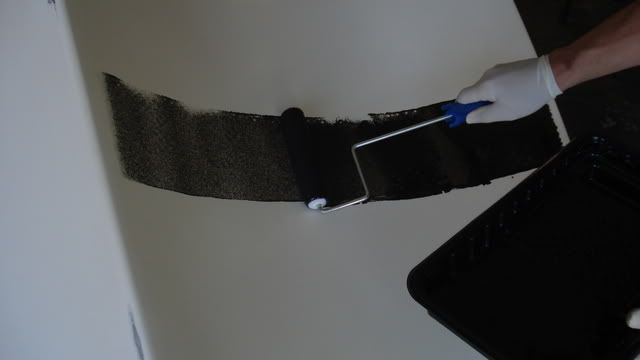
We took down the high spots and then found a good fit. Got one side glassed sorry no picture due to one very stubborn air bubble that we had to hold down for over an hour. I am pretty sure there is still a slight bubble :(
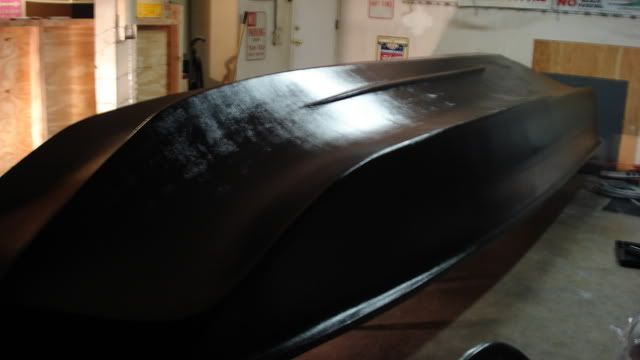
 

fordmugg

Petty Officer 2nd Class
Joined
Apr 29, 2008
Messages
133
Re: 1975 Omega Restore, the project goes on.

good job....when you are done you will have a boat your proud of ...i know i felt that way when i painted my boat.....keep up the good work
 

thrillhouse700

Senior Chief Petty Officer
Joined
Aug 5, 2009
Messages
778
Re: 1975 Omega Restore, the project goes on.

A much needed update to the boat.
So up until now we have put in the transom permanently.
TransomClampInside2.jpg


We made a 2x4 clamp to press down the sides of the transom, it worked really well.
TransomClampinside.jpg

TransomClamp.jpg

TransomClamp3.jpg


After that we popped the cap, the reason we popped the cap after the transom was installed was because we wanted to keep the shape of the hull as much as possible, figured the transom was a good solid structural piece that would help with that.
http://i256.photobucket.com/albums/hh190/thrillhouse700
/CapPopped.jpg
CapPopped2.jpg


I think I can only put 6 pictures so..........
 

thrillhouse700

Senior Chief Petty Officer
Joined
Aug 5, 2009
Messages
778
Re: 1975 Omega Restore, the project goes on.

continued....
CapOnstandinGarage.jpg


BareHull.jpg


we built a lil roll around frame for the cap.
CrappyRollaroundcapstand.jpg

HFDolly.jpg

ground out the rest of the fiberglass tabs from the old deck and stringer.
BareHullWTransom.jpg

Here she is all clean
HullMostlyGroundout.jpg
 

thrillhouse700

Senior Chief Petty Officer
Joined
Aug 5, 2009
Messages
778
Re: 1975 Omega Restore, the project goes on.

Here are the dogs wondering whats wrong with these guys
PuppiesWatching.jpg


Did a little bit of work on the cap then realized it sucked and put it off until later haha
This is the windshield mounting holes, we decided not to just grind out the cracks and patch them. Due to them having a windshield attached to them we ground out all the cracked glass around them, beveled the edges, glued in a piece of 1/4" ply underneath and laid in layers of glass to build back up. (sorry no pic of my bevel I forgot)
PuppiesWatching.jpg

Windshieldholecutout.jpg

Windshieldholefixed.jpg


When we work on the cap more we will finish off the spider cracks and voids with PB.

We also partially tackled the wood on the sides of the consoles
Consolesidewood.jpg

Removed old wood, it literally took cutting the tabs and then hitting it with a hammer and chisel 2-3 times.
Centerconsolebare.jpg
 

thrillhouse700

Senior Chief Petty Officer
Joined
Aug 5, 2009
Messages
778
Re: 1975 Omega Restore, the project goes on.

Old piece
Oldconsolewood.jpg


new piece clamped in, we will most likely paint these with deck paint.
newconsolewoodpled.jpg


Next part of the resto was very important, we found out why the thing was taking on water before. While I was underneath the boat on the crawler I saw brown water marks, after wiped clean you could see small cracks in the gelcoat.
Now after working so long with water leak cars I new this was a point of water entry and possibly exit when the boat was out of the water. Sorry I did not get pics of the brown gunk and small cracks.

Long story short after grinding out the cracks and layers of delaminated glass we had this.
CracksGroundout.jpg


after more grinding
Holefeatheredandenlarged.jpg

and more.....
Awesomehole.jpg


Took your guys advice and did a two sided repair, first we laid in glass on the top
CSMinhole.jpg
 

thrillhouse700

Senior Chief Petty Officer
Joined
Aug 5, 2009
Messages
778
Re: 1975 Omega Restore, the project goes on.

Then we laid a piece of csm on the bottom after we beveled it. Then we put one more layer of csm on top covered with a 14" wide strip of woven.
Holespatchedinside.jpg

You can't even tell we had a hole from the top. From the bottom we then used some of oops PB (Kinda we cant find 1/4" chopped, the guy at the fiberglass place said to use milled fibers, bubbles and cabosil) Once we flip the hull over we will smooth it all out.

Next we built the stringer and cut out our deck boards
Stringerold.jpg

We did not use the old stringer as a template because of how the deck boards sit on those "Voids" on the side of the boat. They are not 100% level, and only about 30% of the deck boards were touching the stringer.
ShapingNewStringer.jpg

Rounding the edges of the deck with our awesome 21 dollar harbor freight trim router. Basically a fan motor with a 1/4" collet on it.
Roundingedgesonnewdeck.jpg


We are ALMOST ready to flip the hull, we decided to install the stringer and glass it in as well as the bilge box to give the hull for rigidity before we flip it.
We built this thingy to help us flip the boat.
Liftingbracketinstalled2.jpg

LiftingBracketinuse.jpg


That's it for now! Sorry for the delay in updates, About to head over now and work on the boat and BBQ for the holiday haha.
 

thrillhouse700

Senior Chief Petty Officer
Joined
Aug 5, 2009
Messages
778
Re: 1975 Omega Restore, the project goes on.

Trying to figure out how we are going to flip this thing over. Its going to be really awkward with all the weight on the bottom. Anyways we are nervous, wish us luck!
 

thrillhouse700

Senior Chief Petty Officer
Joined
Aug 5, 2009
Messages
778
Re: 1975 Omega Restore, the project goes on.

Well here is another update.
We got it flipped over onto our roll around frames we built so we can roll it in and out of the garage. We built a PVC and plastic sheet prep booth to keep the dust out of the garage.
We started doing our prep work for sanding, ground out all the spider cracks in the gel coat, and ground out the small dings, put some PB in them and sanded them down. The PB needs some serious elbow grease to get smooth and even.

IndoorBooth.jpg


Prep.jpg


Bow eye area (will get pics of the inside when we flip it back over)
FillingCracks4.jpg

FillingNose.jpg


Remember this god awful mess?
Awesomehole.jpg


Here is what it looks like from the underside now. Has one layer of CSM and filler on the bottom, 3 or 4 (cant remember) layers of CSM on the inside and 2 layers of woven. This is after the gaps were filled and sanded down, then my buddy shaped the corner. It looks better than the other side which is still OEM haha.
Undersideofcrack.jpg


We are low on funds right now, but once we get the primer in and one more 320 sanding down on the primer we shall paint.

Anyone know how small of scratches the primer will fill? We have some that are maybe small paperclip wire thickness. I tried filling them with pb but when you squeegee over it, most of it comes out.
 

thrillhouse700

Senior Chief Petty Officer
Joined
Aug 5, 2009
Messages
778
Re: 1975 Omega Restore, the project goes on.

Haha get some damn money and buy us paint!
 

chrishayes

Senior Chief Petty Officer
Joined
Apr 9, 2009
Messages
691
Re: 1975 Omega Restore, the project goes on.

Hey bud, I am sorry man, never saw your thread til now! I wish I wouldve know, I wouldve been there for much more help. Sorry. Really, I know it is frustrating to keep asking and not get any answers or at least someone to bounce ideas off. I am here for ya. No expert but I have certainly been around now. Not to mention I have read extensively on here for the past 5 months so if I dont know, I can at least either tell you what others have done or just link you there for yourself. I know you have read my thread so you know I have covered many of the things you are going to need to do. Got anything pressing now that you need some help with? SO far I would say that you have done a fine job man! Theres more than one way to get a boat done and as long as you prep well and use some common sense it is kinda hard to screw it up! Let me know if I can help in any way:cool: Again, nice work so far! Transom looks great along with your patchwork and ingenuity on building the clamps and stands.
 

thrillhouse700

Senior Chief Petty Officer
Joined
Aug 5, 2009
Messages
778
Re: 1975 Omega Restore, the project goes on.

Thanks chris!!! I keep up on all your guys projects so that we got ideas for ours. We have learned a ton from this forum already.
 

system-f

Senior Chief Petty Officer
Joined
Dec 3, 2008
Messages
667
Re: 1975 Omega Restore, the project goes on.

This is an awesome build. It has already given me tons of ideas for mine. What did you use between the layers of wood for the transom?
 

thrillhouse700

Senior Chief Petty Officer
Joined
Aug 5, 2009
Messages
778
Re: 1975 Omega Restore, the project goes on.

We used a layer of CSM between the layers, Got the idea from OOPs' thread. But we PLed it to the outer skin because we were afraid of air bubbles in the fiberglass.
 

thrillhouse700

Senior Chief Petty Officer
Joined
Aug 5, 2009
Messages
778
Re: 1975 Omega Restore, the project goes on.

We got one half of the boat done with 220 grit today. It feels so smooth cant wait to finish it with 320 and throw the primer on. Just a note to those that are going to paint or prep. Don't expect things to go fast after you do all your patch work. Because as your sanding you WILL find more patch work that needs to be done. Today we did our 3rd set of patches on spots that got away from us. Hopefully this will be our last patches.
 

thrillhouse700

Senior Chief Petty Officer
Joined
Aug 5, 2009
Messages
778
Re: 1975 Omega Restore, the project goes on.

another update, The Lost Cause and I primered the boat with DuPont 2 part epoxy primer that is supposed to be bullet proof. We have a lot of smoothing and sanding to do because we did not properly thin out the first coat. Luckily its on the bottom of the boat, the sides look great. Here are the pics.

Readytopaint.jpg


Painting.jpg


PrimeredBlack.jpg


PrimeredBlack2.jpg


Comments and advice always welcome!
 

83vert

Petty Officer 1st Class
Joined
Sep 10, 2009
Messages
394
Re: 1975 Omega Restore, the project goes on.

Lookin awesome. That boat is going to be real nice when your done.
 

thrillhouse700

Senior Chief Petty Officer
Joined
Aug 5, 2009
Messages
778
Re: 1975 Omega Restore, the project goes on.

Thanks for the kind words. Due to us not following the directions of the primer to the t we will be doing some heavy sanding this weekend............ Still haven't decided on paint to use yet. People post up and lets hear some opinions.
 

HVAC Cruiser

Lieutenant
Joined
Sep 12, 2009
Messages
1,254
Re: 1975 Omega Restore, the project goes on.

Looking Good Thrillhouse you?re doing an incredible job. As far as paints go I have been looking at Interlux Perfection.
Well got to go, got to kill some Zombies LOL :D
 
Top