Stringer repair

bjf66

Chief Petty Officer
Joined
Dec 6, 2016
Messages
406
plenty of glassing, grinding,and filling
tidying up the rear step up on engine hatch
wrapped the top-side-bottom in glass 2oz csm/17oz bi-axle
filled
contoured the the top so has better lines in blending into hatch
filling and glassing in sides of hatch tomorrow
 

Attachments

  • photo324643.jpg
    photo324643.jpg
    94.2 KB · Views: 1
  • photo324644.jpg
    photo324644.jpg
    110.1 KB · Views: 0
  • photo324645.jpg
    photo324645.jpg
    102.2 KB · Views: 0
  • photo324646.jpg
    photo324646.jpg
    105 KB · Views: 0

mickyryan

Rear Admiral
Joined
Apr 18, 2016
Messages
4,210
Scott

yes clearance becomes an issue with some of these larger exhaust
I picked up another set of KE r/covers before xmas which had valve spring squirters installed but essential same 2-piece cover


I have a set of LS Chev exhaust that I accumulated sometime ago, wont be using as running BBC, if someone is interested

too bad they wouldnt fit my trophy lol :)
 

bjf66

Chief Petty Officer
Joined
Dec 6, 2016
Messages
406
little more work on hatch yesterday
filled sides in last night with gurit board glassed both sides
then wrapped 1oz csm/17oz bi-axle cloth around the lip onto bottom of hatch
sanded
filled with skim coat of micro spheres
more sanding tomorrow then wrap the top of the hatch back under lip,
more sanding then ready for some primer
hallelujah bring on the beers

this job was bigger than I originally thought
 

Attachments

  • photo324683.jpg
    photo324683.jpg
    112.7 KB · Views: 0
  • photo324684.jpg
    photo324684.jpg
    111.6 KB · Views: 0
  • photo324685.jpg
    photo324685.jpg
    106.5 KB · Views: 0

bjf66

Chief Petty Officer
Joined
Dec 6, 2016
Messages
406
due to Coronavirus escalation in Asia, and banned form travel, company says sit on arse at home and do paperwork for next 6 weeks
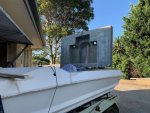
Okay back into boat today
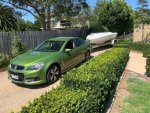
Unfortunately need to organise new car and don't really want to hand back the Holden SS Storm 6 litre Chev/6 speed Auto sedan, loved driving these cars for last 12 years, but time has come to upgrade. In Oze the family sedan, SUV gets to tow the boat as well
With 2100kg towing weight its getting hard to find new vehicle with towing capacity to replace the Holden V8, as our car industry is now official in the toilet and GM says no more holden V8's.
There the replacement holden/Chev is GM Opel Iinsignia 3.6 Litre V6 (USA badge Buick Regal), with the 9 speed Auto badge as Holden hatch back All Wheel Drive VRX 235KW. The top of range VRX goes quite well
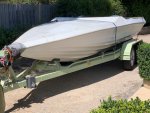
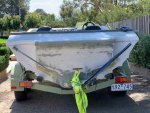
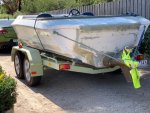
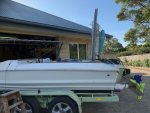
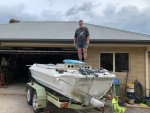
However my concern was havent actually weight the boat and trailer

So today rolled the out of garage took it for a ride to the weigh bridge in Rosebud to blow the dust out of it
The tow ball weight: 70kg (154lb)
Boat, trailer and Car: 3700 kg (8140lbs)
Trailer and Boat: 1880kg (4136lb),
Trailer: 550kg (1210lbs)
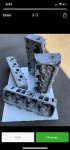
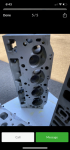
Boat: 1330kg (2926lbs) cast iron block, cast iron heads, no fuel, no hatch one battery, so need to add another 300kg., should be 1600-1700kg (3500-3700lb
so look like holden VRX will tour the boat without any issues

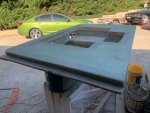
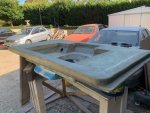
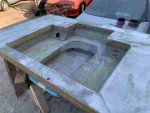
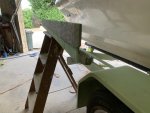
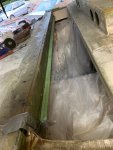
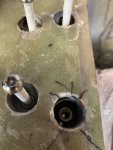
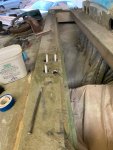
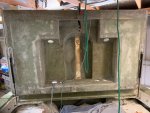
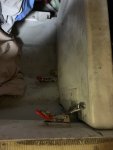
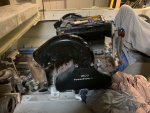
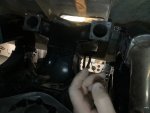
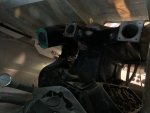
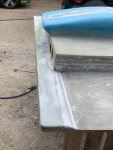
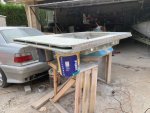
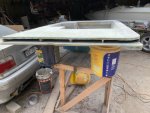
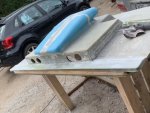
Back into finishing last of glassing on hatch
Then can fit hinges and then finish fitting hatch to hull
 

Attachments

  • photo325413.jpg
    photo325413.jpg
    119 KB · Views: 0
  • photo325414.jpg
    photo325414.jpg
    131.8 KB · Views: 0
  • photo325415.jpg
    photo325415.jpg
    127.7 KB · Views: 0
  • photo325416.jpg
    photo325416.jpg
    174.6 KB · Views: 0

bjf66

Chief Petty Officer
Joined
Dec 6, 2016
Messages
406
spent few hours over weekend and this afternoon tidying up the rear cap where the hatch and hinges will mate to
pulled out the router and cleaned edge of the cap to get a nice straight edge
then routed the insert piece which have laminated a step so I can install whether seal on top which hatch will close on to

seems so simple from a distance but took a few hours to get this right
then insert 3 location pins so could locate the insert being glued on to rear cap so it remained in same location
mixed up the peanut butter and screwed into place

Need to fill ends and encapsulate the new lamination with 1oz csm/17 oz biaxle, so nice and water tight

next job to drill out the cap where bolts go through for hinge and fill with PB to get some solid mass

then have made some aluminium plates to go underneath the cap and hatch to spread the load of the bolt and stainless steel hinges
 

Attachments

  • photo325755.jpg
    photo325755.jpg
    86.1 KB · Views: 1
  • photo325756.jpg
    photo325756.jpg
    100.4 KB · Views: 0
  • photo325757.jpg
    photo325757.jpg
    91.1 KB · Views: 0

bjf66

Chief Petty Officer
Joined
Dec 6, 2016
Messages
406
found some other Keith Eickett 2 piece valve covers on another website, purchased them a month ago, and cant get tracking from seller after all the promises
disappointing more of this BS is going on with scammers
need to make sure we use a little protection....... with paypal
anyways got the $$ back, but really wanted the parts
seller says he has posted
if parts turn up happy to resend the $$

But too much time wasting going through all this crap, some people have no credibility and will screw with you in anyway they can
 

bjf66

Chief Petty Officer
Joined
Dec 6, 2016
Messages
406
used 20mm dia hole saw to open up hole and then decided that I would epoxy in 8mm x 40mm long nut couplings
Used thread tape around bolt thread to centralise the hinge and coupling in correct position
then after epoxy was set simple screwed bolts out

had trouble getting 8mm x 120mm stainless torx bolts, so made them up with 40mm long bolts and welded stainless threaded rod onto bolt, seemed to work okay
 

Attachments

  • photo326921.jpg
    photo326921.jpg
    83.6 KB · Views: 1
  • photo326922.jpg
    photo326922.jpg
    101.5 KB · Views: 0

bjf66

Chief Petty Officer
Joined
Dec 6, 2016
Messages
406
hinges in and seem to have even clearance around the hatch
tided off rope front and back to get the hatch at 90 degree angle to install
using 2*10mm x 700mm long 650Nm gas struts
They were $15 up at Bunnings
will see how they go, and then look at some stainless gas struts once finalised
 

Attachments

  • photo326923.jpg
    photo326923.jpg
    99.2 KB · Views: 1
  • photo326924.jpg
    photo326924.jpg
    114.2 KB · Views: 0

bjf66

Chief Petty Officer
Joined
Dec 6, 2016
Messages
406
cleaned up some of the fibreglass around the hatch
gave it the iso-100kg weight check
or as we say in Australia the fat barstard test
all good
haven't put the bulk head in yet
now to continue to play around with top cap and filling back of hatch
more grinding and fibreglassing
 

Attachments

  • photo326991.jpg
    photo326991.jpg
    94.4 KB · Views: 2

bjf66

Chief Petty Officer
Joined
Dec 6, 2016
Messages
406
last week epoxied 200x50x6mm aluminium plates onto underside of the hatch
The plates were drilled and tapped for 8mm stainless bolts

ended up using 22mm /10mm x 700mm long gas struts with 650NM rating (143lbs) each

Raining today, fertilized the garden just before 12mm rain good timing, everyone happy

raining ...back into garage to continue the hatch build and fitting of the gas struts

Fitted one strut first to see how the force would go with lifting the hatch (weight: 38kg)
I used baggage scale to check the force to lift hatch and it needed 18kg upward force this is to much
Fitted 2nd struct, and checked upward pressure required to lift hatch is came in at 4kg (9lb), very comfortable
not too sure whether to swap them over for slightly lower force 550NM, or just run as is

will need some clips to hold the hatch closed, not sure which ones to go for whether I use the rubber or stainless steel

Vacuumed the inside of boat out, fibreglass dust everywhere

Need to put the bulk head back in and look at contouring the shape to suit the underside of the hatch
 

bjf66

Chief Petty Officer
Joined
Dec 6, 2016
Messages
406
fitting the bulkhead into boat, was going to fibreglass it in place, but thought it would be better if it was able to be removed in case we needed more room in boat for maintenance and repairs when lying down hopefully wont be needing to do this.

so came up with idea of using adjustable stainless toggle clamps and lynch pin to hold them closed
figured 4 would work
fabricated some stop clocks which epoxied into boat so the bulk head sits up against and then clamped in place

made up some aluminium blocks 12mm thick, drilled and tapped for 6mm bolts to hold toggle clamp on to boat
epoxied the aluminium block on to 4 locations on boat
seems to work okay, thinking of using similar setup for hatch to hold shut as don't want hatch flipping up and turning into large parachute...this could be new emergency braking system ?
 

Attachments

  • photo328211.jpg
    photo328211.jpg
    62.9 KB · Views: 0

bjf66

Chief Petty Officer
Joined
Dec 6, 2016
Messages
406
was looking for some Chev BB aluminium heads for another 556 ci short block I was putting together.
Thought I would try and save some weight approx. 35kg saving per pair between iron and aluminium
came across 2 pairs of mercury 525efi heads that couldn't say no too.
bare casting # 843425
right price
good timing
nice to scoop a good deal
 

Attachments

  • photo328212.jpg
    photo328212.jpg
    69.9 KB · Views: 0
  • photo328213.png
    photo328213.png
    688.6 KB · Views: 0
  • photo328214.png
    photo328214.png
    704.5 KB · Views: 0
  • photo328216.png
    photo328216.png
    892.2 KB · Views: 0

bjf66

Chief Petty Officer
Joined
Dec 6, 2016
Messages
406
ripped out the twin fuel tanks today, so I could finish off cutting the 10mm stainless bolts which were recess into floor with 32mm hole saw and 50mm coupling nut.
cut S/S thread rod to length, and then finished expoxy filling the recessed hole
 

Attachments

  • photo328415.jpg
    photo328415.jpg
    71.7 KB · Views: 0

bjf66

Chief Petty Officer
Joined
Dec 6, 2016
Messages
406
was reviewing how to fit the twin throttle bodies on to the PFM EFI tunnel ram manifold, need twin 75mm throttle bodies or use an adapter to go up to 105mm Dia throttle bodies, then have common linkage

Now the saddle fuel tanks are out of the way, removed bulk head, much easier with the bulk head being on the toggle clamps removed in 60 sec

closed the hatch then looked at the space from engine bay side
Need sufficient room to fabricate for the 2 * turbos
was thinking that I may need to cut off some of the length of the collector on the 30 degree aluminium exhaust and then weld another flange to this,
but maybe able to fabricate stainless steel pipe work to support the twin turbos straight onto existing 30 degree water cooled pipes
 

Attachments

  • photo328416.jpg
    photo328416.jpg
    110.6 KB · Views: 0
  • photo328417.jpg
    photo328417.jpg
    64.8 KB · Views: 0
  • photo328418.jpg
    photo328418.jpg
    59.2 KB · Views: 0
  • photo328419.jpg
    photo328419.jpg
    58.3 KB · Views: 0
  • photo328420.jpg
    photo328420.jpg
    66.3 KB · Views: 0
Top