99 Super Hawk. Repair, Transform, Rig

fishrdan

Admiral
Joined
Jan 25, 2008
Messages
6,989
Re: 99 Super Hawk. Repair, Transform, Rig

Good job on getting the windshield re-aligned!

And now I'm looking at the livewell and thinking do I really need a 30 gallon livewell that can house a world class musky or could I do something more productive with that space?

I guess that all depends if you need that big livewell. I love the one in my boat as I've boated 4' fish before, or it's big enough to catch a bunch of small fish. There's a slot in the middle of the tank, so you could put a divider in there and use 1/2 for bait and the other 1/2 for fish.

If all else fails, it would make a good beer cooler :D (I lined the outside of my livewell with sheet foam as I keep an ice slurry in there, keeps the fish in good condition out here in the desert.)
 

83mulligan

Senior Chief Petty Officer
Joined
Feb 7, 2009
Messages
687
Re: 99 Super Hawk. Repair, Transform, Rig

Dan, when we fish Salmon we bring a fish box (cooler). the one in the back is 28 inches long. Not big enough for salmon, but good for most else. Thinking along your lines of putting a smaller baitwell/beer cooler up front and some storage on other side. Maybe leave middle open. I don't know. Just thinking about stuff.
 

83mulligan

Senior Chief Petty Officer
Joined
Feb 7, 2009
Messages
687
Re: 99 Super Hawk. Repair, Transform, Rig

got my battery cables in today so I can move the batteries up front and move some weight away from the stern. Bought a 1/0 for the 90 Hp and a 2 Ga for the T8 Kicker. I'll need to build in some battery boxes under the consoles and I think that is going to require pouring some foam underneath for floor support because the lip the leading edge of the front deck sits on a half inch, maybe of aluminum crosser. I suppose I could also scab in a support piece for the deck to the aluminum crossing rib to give the deck some substance to sit on. I'll probably go with the foam though just to give the batteries full support underneath.
 

83mulligan

Senior Chief Petty Officer
Joined
Feb 7, 2009
Messages
687
Re: 99 Super Hawk. Repair, Transform, Rig

ramping up for a big weekend of boat projects including:

Cut and Install Deck for Bow.
Build and install transom pad to raise kicker up 2"
Move Batteries Up to under Helm
Install 2nd Bilge Pump
Install FF/GPS
Install Marine Radio
Install Fish Hawk Unit
Figure Device for Connecting Steering on Both Outboards.
Remove VRO Tank and begin Pre-Mixing.
Run Boat to see if leaks are fixed.

Man, that's a long list. Hopefully I can accomplish a good part of it. Have a Salmon Tournament I want to fish a week from Saturday.
 

fishrdan

Admiral
Joined
Jan 25, 2008
Messages
6,989
Re: 99 Super Hawk. Repair, Transform, Rig

WHEW! That's a big list.

Git-r-Dun :D

I'll need to build in some battery boxes under the consoles....

How much room do you have between the consoles? I want to build a battery compartment between my consoles to get the batts out of the stern, and also make a step going up onto the front deck. When I have a cooler (step) between the consoles it's much easier to get between the windshield's narrow gap. I just find it easier stepping up/down, before or after, going through the windshield.
 

83mulligan

Senior Chief Petty Officer
Joined
Feb 7, 2009
Messages
687
Re: 99 Super Hawk. Repair, Transform, Rig

Ugh, I put in a ton of time, but didn't accomplish nearly as much as I wanted. Seems like every project had setbacks and took longer than I needed it to. Just have to keep plugging away a little at a time this week and get ready for the fishing tourney next saturday.

1) Started by running the 1/0 wires. Oh man, I thought that was gonna take an hour or so, ended up taking way more. Getting that big wire into the motor and hooked up was a chore. While I was in there I also disconnected the VRO wiring and removed the VRO tank from the boat. I'm going to pre-mix going forward based on the age of the motor and not knowing its service history. Last thing I want is to blow up a power head.

2) After the VRO tank was out I couldn't live with the oily mess back there so I spent a good deal of time giving the back end a wash down with some de-greaser and elbow grease. It looks much better. Still some spots to get to.

3) Ran wires to bow. This of course could not be simple. I want to make sure there is good separation between the power cables and transducer cables so I'm running the power cables low in the gunnel boxes. Of course, they had to be removed temporarily to drill out the bulkhead aft in order to get the wires into them. While in there i fixed up the speakers which were not mounted flush because the previous owner didn't take the time to enlarge the cutout big enough.

4) Installed thru hull fitting for 2nd bilge pump. Glad I tested the pump before putting it in. It came off my old boat and has been sitting for 4 years. It doesn't work. I'll have to pick one up this week.

5) Removed Livewell. Need to buy plugs for the hoses. Did this for two reasons. One, so i could put the sub deck under it. Two, its too big for me and going on ebay. Still kicking around ideas for the bow.

6) Cut two sections for deck under livewell and consoles. The old pieces were so rotted I wasn't able to use them for templates. So, I had to scribe templates using cardboard and then trace them onto 3/4 outdoor ply.

Question: If I'm going to paint these, do I need to do any extra sealing on them or use an oil based primer and oil based paint and that is good?

7) Cut out section of back deck so I can access bolts and a backing plate for mounting transducers.

8) Drained carbs on Johnson 90 and used a small wire to try and clean out high speed jets which are accessed through drain holes. Also, pulled fuel filter for inspection. I was HORRIBLE. Probably at least 30% surface area blocked by gunk. Need to find one of these quick. I don't think this model is cleanable.

Well, reading that, it makes me feel better like I accomplished something. Put a lot of hours in and It's getting there slowly but surely. If someone could answer the paint question I would appreciate it!

I will post many pics of the work tomorrow. Too tired tonight.
 

83mulligan

Senior Chief Petty Officer
Joined
Feb 7, 2009
Messages
687
Re: 99 Super Hawk. Repair, Transform, Rig

WHEW! That's a big list.

Git-r-Dun :D


How much room do you have between the consoles? I want to build a battery compartment between my consoles to get the batts out of the stern, and also make a step going up onto the front deck. When I have a cooler (step) between the consoles it's much easier to get between the windshield's narrow gap. I just find it easier stepping up/down, before or after, going through the windshield.

Dan, about 20" between consoles. I have a picture I'll post tomorrow to show the area under the deck.
 

83mulligan

Senior Chief Petty Officer
Joined
Feb 7, 2009
Messages
687
Re: 99 Super Hawk. Repair, Transform, Rig

Here are some pics of the deck fabrication:

First I got a piece of cardboard and scribed the hull edge onto it


I cut out the cardboard and traced it onto a piece of ply, cut it out and dry fit it. It fit well so I mirrored it for the other side.


Some quick and dusty work with the grinder and a flap wheel disc to reveal the hull angle.


They fit awesome. Next is to replace the sides and back of the console and build in battery compartments. My question. Can I use an oil base primer and oil based paint to seal it up? I don't know if I'll end up covering with vinyl or leaving painted but I need protection for the rest of the season.
 

Woodonglass

Supreme Mariner
Joined
Dec 29, 2009
Messages
25,924
Re: 99 Super Hawk. Repair, Transform, Rig

Can I use an oil base primer and oil based paint to seal it up? I don't know if I'll end up covering with vinyl or leaving painted but I need protection for the rest of the season.

Sure, why not. That should last for the rest of the season. I'd recommend thinning some polyurethane sealer with 50% Mineral spirits first to saturate and soak into the wood. Let it dry for 24 hrs to seal the wood and then start the painting. The Oil Based Rustoleum Pro paint and primer will last a long time.
 

83mulligan

Senior Chief Petty Officer
Joined
Feb 7, 2009
Messages
687
Re: 99 Super Hawk. Repair, Transform, Rig

Sure, why not. That should last for the rest of the season. I'd recommend thinning some polyurethane sealer with 50% Mineral spirits first to saturate and soak into the wood. Let it dry for 24 hrs to seal the wood and then start the painting. The Oil Based Rustoleum Pro paint and primer will last a long time.
Thanks Woody! I knew there were issues with paint and other things adhering to epoxy, so I was hoping to avoid that issue down the road.
 

83mulligan

Senior Chief Petty Officer
Joined
Feb 7, 2009
Messages
687
Re: 99 Super Hawk. Repair, Transform, Rig

Well, got two transducers mounted and cables run thru transom nice and high with watertight (supposedly) fittings that I altered a bit to make them more watertight and 5200. 5200 on a lot of existing screws and fittings. Ran cables here and there and everywhere. Broke down and bought two battery boxes to get me by this fall. Running out of time to do things with wood and do it correctly so it will have to wait. Sealed the deck pieces I cut with Poly thinned with mineral spirits per woodonglass suggestion. Plugging along. Boat is a mess and all taken apart. Seems daunting but some things are coming together. Three more nights to whip her in shape for the weekend.

What's everyone's opinion on a 4 stroke fuel additive (for my yamaha T8)???
 

83mulligan

Senior Chief Petty Officer
Joined
Feb 7, 2009
Messages
687
Re: 99 Super Hawk. Repair, Transform, Rig

Couldn't finish it all up in time for the tournament I was hoping to fish in. I did get it fishable since then. I spent a significant amount of time leveling up and securing the two console sections so they were square, plumb, and the walkthrough closed properly. I need to remount one transducer for the ff. I don't know what happened, but its crooked and too high. Probably working on it in a dark garage with a head lamp didn't help there. No big deal though. Big motor goes through periods where it runs great and then other times it lags and surges and runs rough at low idle. I think the carbs need to be pulled and cleaned. I don't believe its anything more than that, although I did order new fuel line to replace the tired old stuff that I have. The old stuff is easy to compress and kink and I'd guess is delaminating on the inside based on its outside appearance. Hmm, what else. Put an old hatch for a front sub floor access. Mounted some battery boxes rather than rebuilding the console structures at this time. I'll do that when winter arrives. Got downriggers mounted and rod holders too. Caught a few salmon. That's the update for now. I'll try and get some progress pics up soon.
 

83mulligan

Senior Chief Petty Officer
Joined
Feb 7, 2009
Messages
687
Re: 99 Super Hawk. Repair, Transform, Rig

Fisherdan, any idea on the depth, width, length, capacity of your fuel tank? This winter I really want to get rid of the one mine has at the splashwell and put on below decks. Distributing that weight more evenly over the boat would help alot for the kind of fishing I do and interior design that I would like. Especially with the 110 pound kicker I have on the back now. I'm not sure how much room I have there, but I bet its the same as your boat.
 

fishrdan

Admiral
Joined
Jan 25, 2008
Messages
6,989
Re: 99 Super Hawk. Repair, Transform, Rig

The tank is a Moeller 27 gallon belly tank. Dimensions somewhere around 48-52 long, 27-28 wide and 8" deep to 6" at the edges. It's a hard to find tank, and I'd have to do some digging to find the model number...
 

83mulligan

Senior Chief Petty Officer
Joined
Feb 7, 2009
Messages
687
Re: 99 Super Hawk. Repair, Transform, Rig

The tank is a Moeller 27 gallon belly tank. Dimensions somewhere around 48-52 long, 27-28 wide and 8" deep to 6" at the edges. It's a hard to find tank, and I'd have to do some digging to find the model number...
Dan, thanks for the info. I'm pretty sure I don't have 28" width. Guess I won't know for sure what will fit until this winter when I can pull the floor.
 

83mulligan

Senior Chief Petty Officer
Joined
Feb 7, 2009
Messages
687
Hey all.......Hunting season came and went, then a brutal winter with temps so cold I wasn't going to work in the garage. I've been back at it though, working on the boat the past couple of weeks. The forum seems more stable now, so I'll start posting some pics of what I've done and get back in the loop here.
 

83mulligan

Senior Chief Petty Officer
Joined
Feb 7, 2009
Messages
687
Here are some pics of the projects I've done since my last update last fall.............

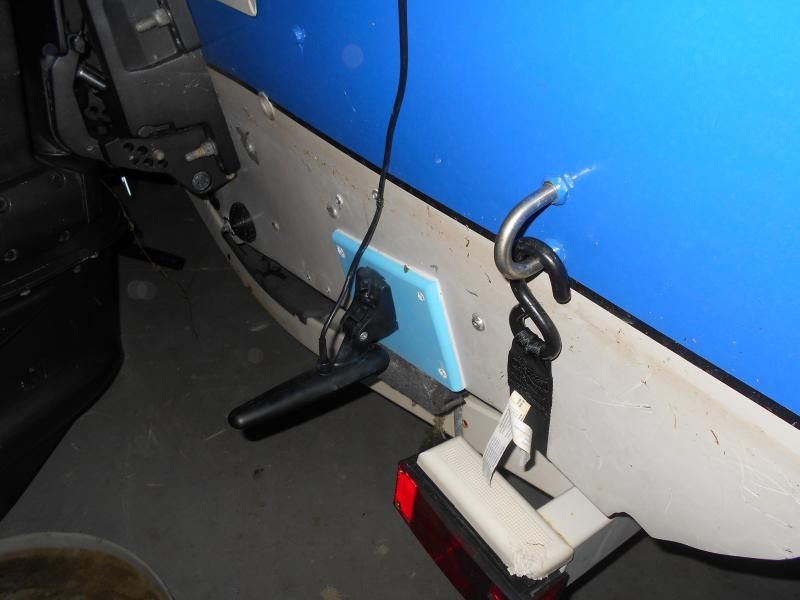
I remounted the transducer for my fish finder on a uhmw piece


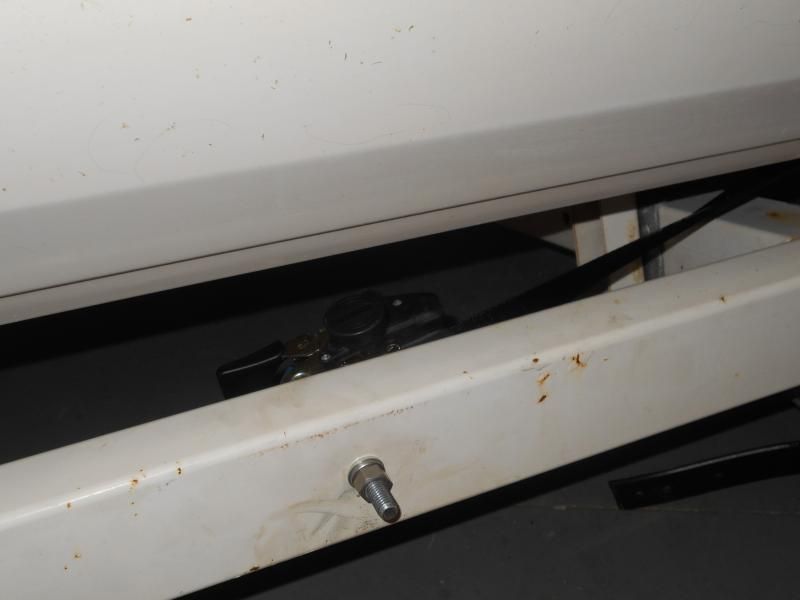
Installed a pair of retractable transom straps on my trailer


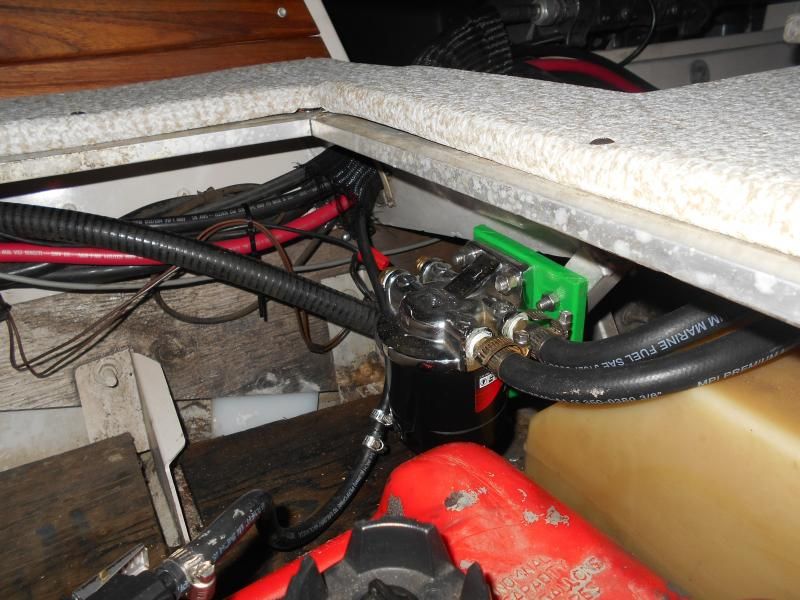
Installed new fuel lines for the Johnson and mounted my fuel/water seperator


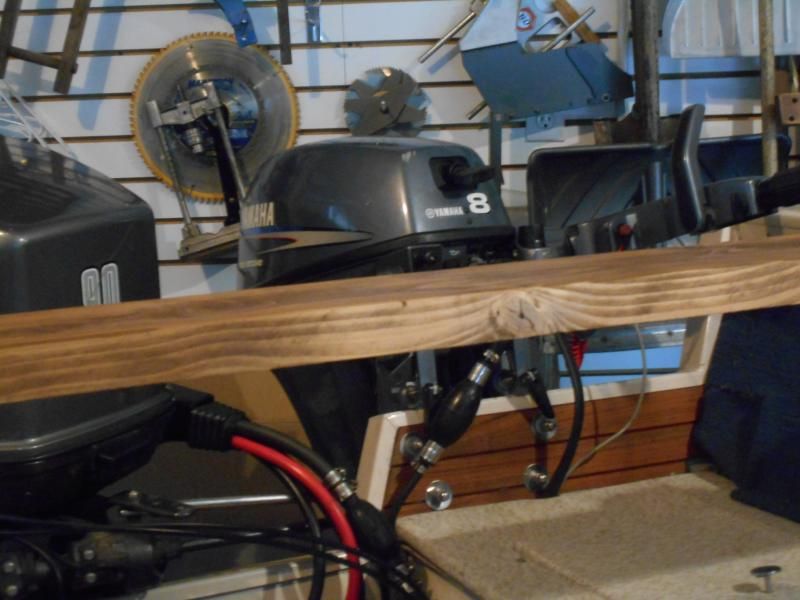
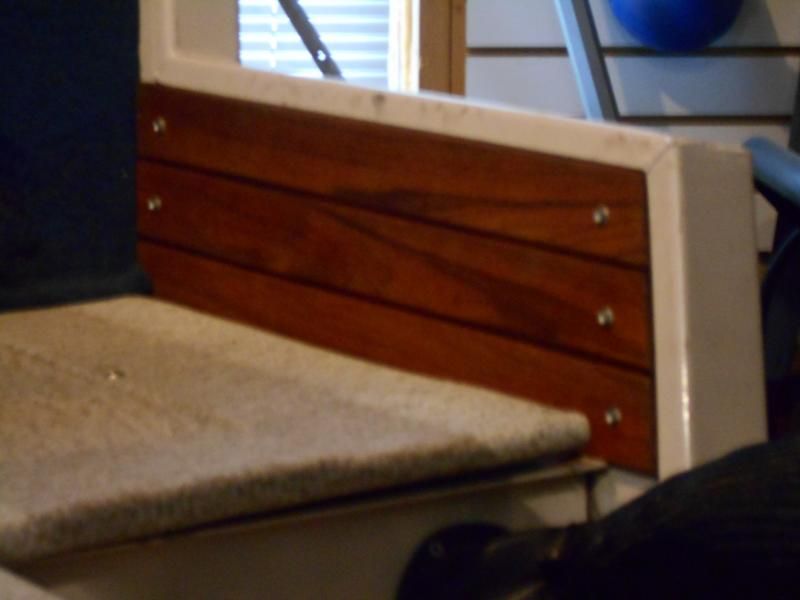
Permanent mounted the Yamaha T8 using some salvaged Teak on the inner and outer transom


Cleaned up more of the salvaged teak and matched the inner transom opposite the kicker motor
 

83mulligan

Senior Chief Petty Officer
Joined
Feb 7, 2009
Messages
687
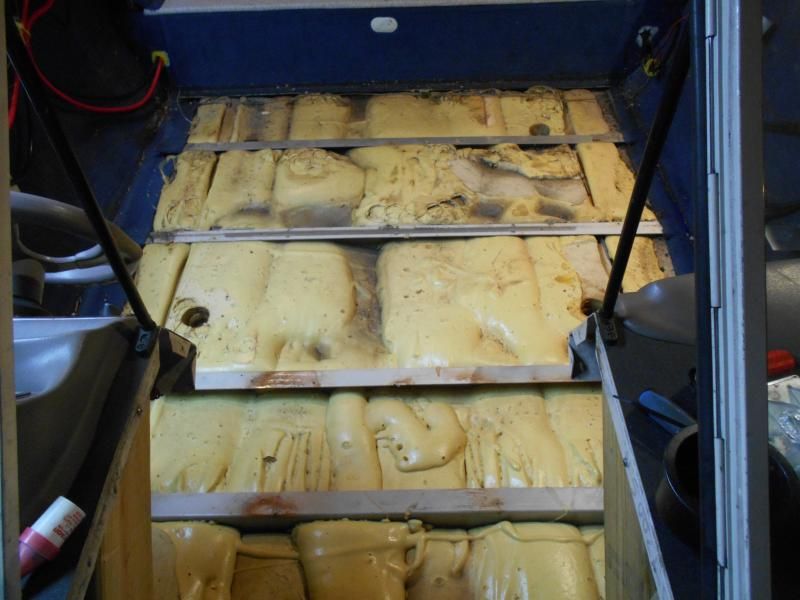
I ordered some vinyl for the deck and some other small places. So, tonight I got into taking out the two deck boards. Wow, lots of foam!
 

83mulligan

Senior Chief Petty Officer
Joined
Feb 7, 2009
Messages
687
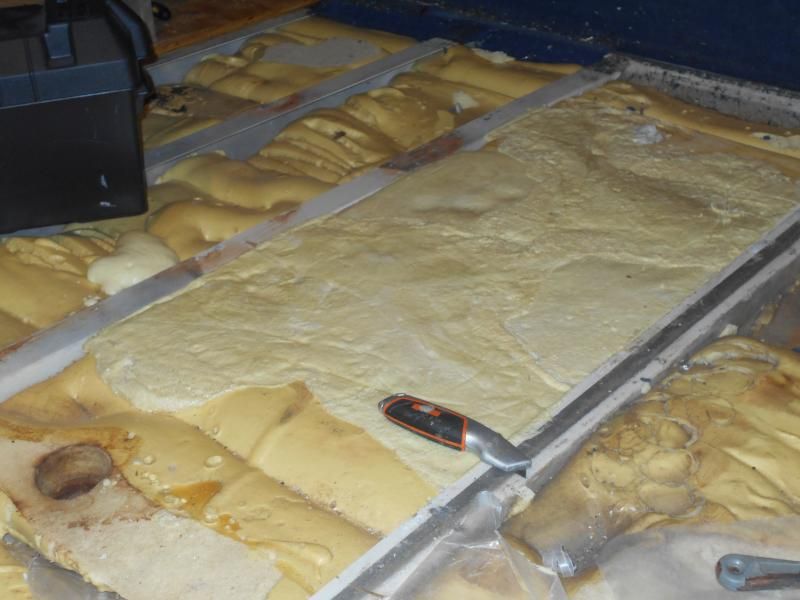
I have a lot of pourable foam from my other project, so I thought I'd use it here to level out the foam that Crestliner poured. This way I can use the sheets of 1/2" ply that have been in my basement for four years on the deck! I plan to seal them with three coats epoxy and the rib spacing along with the foam support should make it solid as a rock.

I'm using small, controlled pours and putting wax paper on top. Then i put a piece of ply over it with a battery on top and am working along each section between the ribs. I'm going to be careful to make sure not to block drainage to the bilge along the sides. Here is a pic of my progress
 

83mulligan

Senior Chief Petty Officer
Joined
Feb 7, 2009
Messages
687
Well, my nautalex arrived tonight! A little earlier than expected so I need to spend the evening templating the floor, cutting it out and getting that first coat of epoxy resin on it. Anyone know how long between coats of epoxy????
 
Top