1981 Bellboy Bandit Saga

MTboatguy

Fleet Admiral
Joined
Jul 8, 2010
Messages
8,988
Thank you! I was just informed of this as well. Its Varathane Spar w/ UV proctectant oil based (i'll post a picture of what I bought later tonight.) I had the Minwax from a past project, and thought it might work. Glad I didn't apply it to my teak yet.

Thanks everyone for the comments! Appreciate it. REDRIG, I will certainly take a picture when the boat comes back. Also do you know for certain it has wood stringers? My 1972 Bellboy i/o had fiberglass stringers. The brochure listed above has your year and make, with the WEBCOR. AMI-American Marine Industries only had glass stringers. It was their patent and design. They started making boats for the Military for Mine-sweeping in WWII, Korea, and were said to be one of the first companies to make fiberglass boats. Please post some pictures of your boat, I would love to see it! Would be very interesting to see wood stringers in these boats.

Here is my old 1972 BellBoy i/o. It had Fiberglass stringers, the only wood was the engine mounts. This is when I first bought it, its maiden voyage. And Before it was plagued by cancerous rot....

img20110430175123.jpg

img1049xb.jpg


And the Crippling rot, that made me get rid of her. After replacing the 5 ply floor once, it was enough for me. As well the Many issues I had with the White Anchor, a re-power was too rich for my blood. I loved the boat, but never ever was fond of the i/o setup.

image.jpg

Looks like you are launching out there on Sauvies Island, in one of the channels.
 

NAT1VE

Petty Officer 2nd Class
Joined
Aug 7, 2015
Messages
116
Hey MT. This actually is the upper Clackamas, at the time (2011-12) this was a brand new boat ramp. This is Estacada Lake, it was a short distance from where I used to live. Does very much look like Sauvies though.:joyous:
 

Redrig

Master Chief Petty Officer
Joined
Oct 13, 2009
Messages
849
Native , Yes I am positive that mine has wooden stringers, I am currently in the process of adding a ski locker into her for storage so I have been under the deck to verify they are wooden.

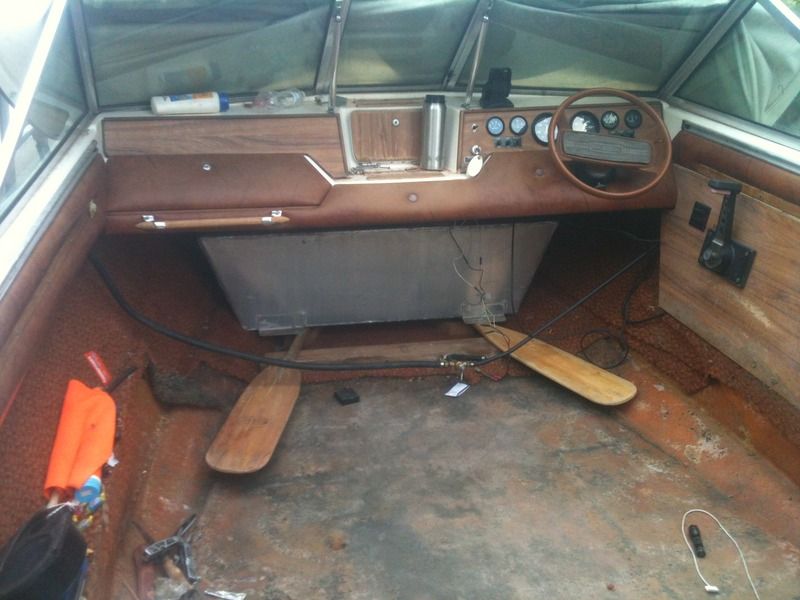
I have a few pictures uploaded.


thats the massive gas tank my grandpa installed with a shot of the front. (thats why I am adding the ski locker ) she just has absolutely no storage becasue of that.

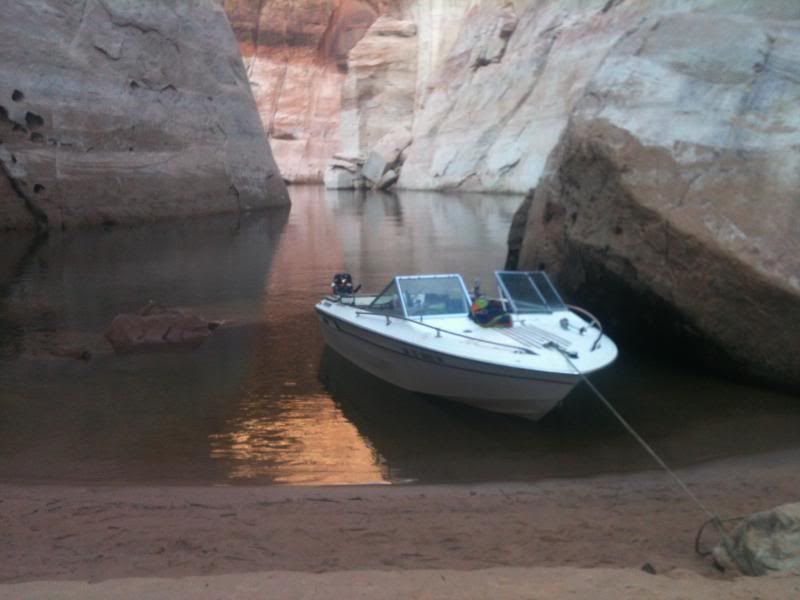
here it is in action.


I wil get soem more pics and the stringers for you once I upload them.
 

Redrig

Master Chief Petty Officer
Joined
Oct 13, 2009
Messages
849
and yes , please post up that whole bellboy catalog form the 70's . I havent been able to find any info on them.
 

NAT1VE

Petty Officer 2nd Class
Joined
Aug 7, 2015
Messages
116
and yes , please post up that whole bellboy catalog form the 70's . I havent been able to find any info on them.


She is absolutely beautiful man! So weird they had wood stringers in your year. I wonder if that was the year Fiberform took over some of their builds. I'll chat with my neighbor who used to work in Bellingham in the shipyards, and knew some of BellBoy (AMI) builders while up there. I have a full catalog for our boats and an original brochure from my old 72'. Over the years I have watched the internet and random swap meets for any information or old ads/brochures on our boats and only have come up with 3. I nearly had a Dealer poster, but was outbid :blue: Would have been quite a thing to have, and I was planning to have them re-printed. When I asked the gentlemen who won the bid if he was willing to have a copies made, he said "No.."

If I had my boat here I would take a picture of where my ski-locker is located in the boat, so you could have a reference. I should be getting it back next week, and if you haven't cut it out yet, I'll post it.

Thanks again REDRIG for sharing, I really appreciate that. I am like you, a fiend and advocate for these boats.:D
 

NAT1VE

Petty Officer 2nd Class
Joined
Aug 7, 2015
Messages
116
Well I finished the waterpump today, but have to make a trip to marine-west :lol: tomorrow for some "Quicksilver 2-4-C" for the Driveshaft splines. Otherwise I can bolt the Lower unit back together and i'll be one more step toward finishing the motor maintenance. I am glad I decided to go with my "Gut" and replace T-stats and Waterpump. As they were completely gone! Still have to wait on the hoses along with a few more parts from Evinrude BRP.

The old housing, which had a hairline crack at the base...

IMG_1712.jpg


The very worn cup, plate and impeller:
IMG_1725.jpg

IMG_1727.jpg


The Shaft had about a fingernail groove on it, sanded with some 150 grit emery cloth, per the manual and its back to normal. :)
IMG_1729.jpg


New parts and Evinrudes sealing compound. I wish they would have told me I was going to use about a ketchup packets worth when they sold it to me...
IMG_1723.jpg

IMG_1722.jpg


All back together, but what are these parts? Extra key and O-ring?? I used all the parts that came off my engines LU, plus the -o-ring below the impeller the kit said must be used. Anyone?

IMG_1741.jpg

IMG_1744.jpg


:thumb:
 

Woodonglass

Supreme Mariner
Joined
Dec 29, 2009
Messages
25,924
Make sure when you stab her back in that you get the pump and the water tube all aligned and back together. I THINK that I might not have done that on mine cuz no water is gettin to the top!!!
 

MTboatguy

Fleet Admiral
Joined
Jul 8, 2010
Messages
8,988
Might just be extras that got dumped in the package by mistake, I seem to always end up with extra stuff when I purchase for my boat motors.
 

NAT1VE

Petty Officer 2nd Class
Joined
Aug 7, 2015
Messages
116
Make sure when you stab her back in that you get the pump and the water tube all aligned and back together. I THINK that I might not have done that on mine cuz no water is gettin to the top!!!


Thanks wood! I used some dishsoap on the tube and grommet, went back together perfectly!

Just wanted to post this for REDRIG. This is the correct brochure/Ad for our model boats. The one I have currently is for 70's Era. As well man, I would definitely double check the stringers on your boat. Because every model says it has WebCor? Check it out and enjoy brother!

This is courtesy of BellBoy Boats on Facebook. I couldn't believe my eyes when I saw my boat what it looked like on the showroom floor. They should have yours in there too! Here's the link Rig. https://www.facebook.com/60877752921...e=1&permPage=1

Now I know why there is a piece of Teak engraved with "1810 Bandit"

18582_838995636188738_335810332767316928_n.jpg


I hope one day I can find one of these "BeachCombers"

11041645_838995606188741_3885482129144462143_n.jpg
 
Last edited:

Redrig

Master Chief Petty Officer
Joined
Oct 13, 2009
Messages
849
Nice find ! Mine looks to be the ballerina model. ( for some reason I don't like the sound of that ) I may just tell everyone it's a bandit haha . Idk it's hard to see on my phone but is there an io bandit model ? My interior is identical to that one

I am with you on that beachcomber , that is sharp .

It's looking like mine was rebuilt sometime before my grandpa got it , cuz yeah they all have the web core hull . Interesting
 
Last edited:

NAT1VE

Petty Officer 2nd Class
Joined
Aug 7, 2015
Messages
116
Nice find ! Mine looks to be the ballerina model. ( for some reason I don't like the sound of that ) I may just tell everyone it's a bandit haha . Idk it's hard to see on my phone but is there an io bandit model ? My interior is identical to that one

I am with you on that beachcomber , that is sharp .

It's looking like mine was rebuilt sometime before my grandpa got it , cuz yeah they all have the web core hull . Interesting

Red yours does look like the "Ballerina" but I thought it was the "Barracuda" because yours has slick sides and there are options listed for the rail and such. Along with yours being an I/O. I bet yours is most likely the "Barracuda" with added rails.

These must be models too, because the Bandit has the drain plug on the upper port side of the hull LOL it does say in the middle *"prices and specifications subject to change without notice"* so I take that as they probably added things to a later brochure or possibly dealer options.
 
Last edited:

Redrig

Master Chief Petty Officer
Joined
Oct 13, 2009
Messages
849
Red yours does look like the "Ballerina" but I thought it was the "Barracuda" because yours has slick sides and there are options listed for the rail and such. Along with yours being an I/O. I bet yours is most likely the "Barracuda" with added rails.

These must be models too, because the Bandit has the drain plug on the upper port side of the hull LOL it does say in the middle *"prices and specifications subject to change without notice"* so I take that as they probably added things to a later brochure or possibly dealer options.

I guess it could be the barracuda model, the one they have in the pic looks to be a bare bones model. But mine has all of add ons with the exception of the ski locker, looks just like that balleriina pic .

Thanks again for posting those
 
Last edited:

NAT1VE

Petty Officer 2nd Class
Joined
Aug 7, 2015
Messages
116
Hey everyone, been awhile since I have updated my progress. Boat is still at the shop and I am slowly making progress with the others parts of the vessel. Salmon fishing has been real Hot out here in the Ocean/Bays on Oregon's Coast and I have been out as much as I can lately.

Here is why progress has been slow, I blame my co-workers! Though I really need to finish the Boat so I can get out and start breaking her in. here is some fish-porn for you fellow fisherman!

IMG_0800.jpg

IMG_1896.jpg

IMG_0806.jpg

IMG_1917.jpg

IMG_1918.jpg


Lately I have been working on miscellaneous interior parts, getting things squared away for when I get the boat back. To immediately start on the re-upholstery. So far I completed my center console and the base to the front seats, all the teak is completely refurbished too.

Now for some actual work! Could they have used enough brad-staples on the carpet for this thing!!!

IMG_1733.jpg


Thought this was pretty cool, while un-wrapping the carpet I found the makers trademark. "Lejay 1979"

IMG_1732.jpg

IMG_1734.jpg

IMG_1738.jpg


This is what I used to protect the wood, It shouldn't see much water anyways, as it is tucked under my dash. I used 3 coats, and wet-sanded with 600 in between coats.

IMG_1737.jpg
 

NAT1VE

Petty Officer 2nd Class
Joined
Aug 7, 2015
Messages
116
After 3 coats, I feel that it will survive the PNW weather. If not, I can always make an replica in less than 45 minutes.

IMG_1739.jpg

IMG_1740.jpg


Here Are a few quick pictures of the teak and arm-rests all finished.

IMG_1750.jpg

IMG_1754.jpg

IMG_1781.jpg


Back to the Center Console: I used 10 oz. Marine Carpet that I had left over from my previous boat.

Tracing out my cuts-
IMG_1783.jpg

IMG_1785.jpg


Applying that new-new :biggrin-new:
IMG_1784.jpg

IMG_1787.jpg

IMG_1789.jpg

IMG_1790.jpg


The new back piece cut out and ready to be tacked down, the other piece was completely rotted. So surprised the whole thing wasn't the same.
IMG_1802.jpg

IMG_1801.jpg
 

NAT1VE

Petty Officer 2nd Class
Joined
Aug 7, 2015
Messages
116
Starting to look like something...

IMG_1804.jpg


Here is the Before and After: about 93.4% complete at this point.
IMG_1806.jpg


Almost there...
.
IMG_1809.jpg


Voila` All new!
IMG_1820.jpg


IMG_1821.jpg


I'll post more of the seats tomorrow, Having some major internet connectivity issues! I feel like I am using 56k !!!!!.
 

gm280

Supreme Mariner
Joined
Jun 26, 2011
Messages
14,593
Nice work there. I do like the sequenced pictures as well. We love pictures on these forums. Keep posting... :thumb:
 

Mark72233

Ensign
Joined
Jul 11, 2014
Messages
926
NAT1VE, you are doing some nice work there. I have never been up in your neck of the woods nor have I ever fished for Salmon but like any type of fishing that looks fun, I just cant get past you wearing a jacket that we would wear during the winter down here. Yesterday It was 93* degrees with a feels like 103* with the humidity. I wish we had some cooler temps.
 

NAT1VE

Petty Officer 2nd Class
Joined
Aug 7, 2015
Messages
116
NAT1VE, you are doing some nice work there. I have never been up in your neck of the woods nor have I ever fished for Salmon but like any type of fishing that looks fun, I just cant get past you wearing a jacket that we would wear during the winter down here. Yesterday It was 93* degrees with a feels like 103* with the humidity. I wish we had some cooler temps.


Thanks guys!

Yeah here in Oregon, we don't call it the "Beach", around here it is called the "Coast". Most the time even during our summer months the ambient temperature at the coast is about 72*. The afternoon winds kick up and it will bring the temperature down quite a bit. Where I live in the city, that day. It was 95* and at the coast the very same day it was cold and windy, only reaching 62*.

If you ever get the chance to do some Salmon or Steelhead fishing, definitely give it a Go! These Fish are head-shakers and powerful fighters. Tightlines everyone! Will be posting more tonight on the progress I have made on the seat buckets.
 

NAT1VE

Petty Officer 2nd Class
Joined
Aug 7, 2015
Messages
116
As promised, here are the Seat buckets all finished up. :joyous: The old wood was rubbish and dry-rotten, as well untreated. Fortunately this boat was stored inside most of its life.

IMG_1816.jpg

IMG_1818.jpg


It doesn't look to be all that bad, but I promise it is. I only weigh about 185 and when I sat in one of the seats the side practically fell off. Though the frames are made of plastic which is pretty cool.

IMG_1829.jpg

IMG_1834.jpg

IMG_1831.jpg

IMG_1833.jpg
 

NAT1VE

Petty Officer 2nd Class
Joined
Aug 7, 2015
Messages
116
Very simple, straight forward design. I used some aluminum angle to re-enforce the corners, screws instead of nails, and of course some "Tite-Bond" glue. Now it's very solid and after the treating it with some more Spar Varathane should be good to go! I will be adding rubber strips on the base of the buckets, and 3M 5200. So the bottoms wont be resting on the floor of the boat.

IMG_1905.jpg


After measuring and cutting, I didn't take many pictures of the process, because I was solo with nobody to hold my pieces while assembling the buckets. Here is the finished product and close-ups of the bracing:

IMG_1913.jpg

IMG_1908.jpg


On the corner braces(wood) I used extrerior 1 1/4" screws and glue to help bond it all together.
IMG_1912.jpg

IMG_1911.jpg

IMG_1907.jpg

IMG_1906.jpg


And all finished up! Right now they're drying. I used about 6 coats on them LOL. I'll post pictures after they're done baking.

IMG_1916.jpg
 
Top