1973 Glastron V-156 Sportster Floor/Stringer Restoration

jmink

Seaman
Joined
Jan 27, 2014
Messages
64
Re: 1973 Glastron V-156 Sportster Floor/Stringer Restoration

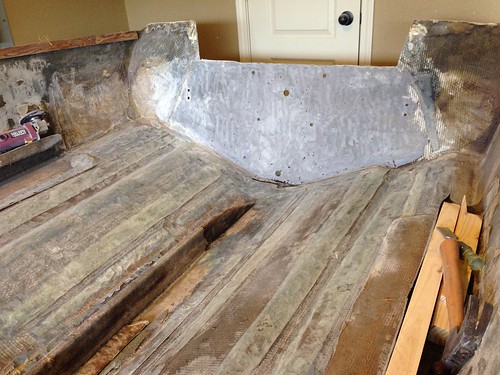
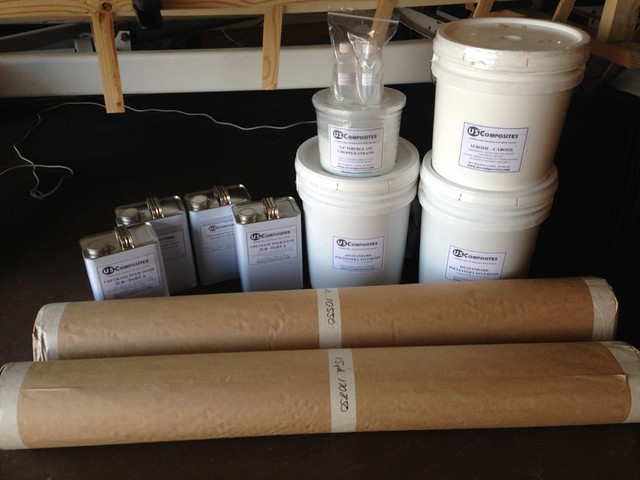
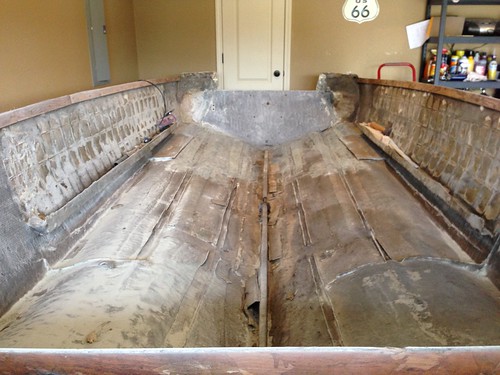
I do have a question about removing these boxes in the picture

13543539134_93ed46ca4b.jpg

I am debating on what to do with them as far as putting them back in after deconstruction. What should I do? I am planning on adding foam underneath deck.
 
Last edited:

Mud Puppy

Petty Officer 1st Class
Joined
Sep 8, 2013
Messages
276
Re: 1973 Glastron V-156 Sportster Floor/Stringer Restoration

Tri-Hulls due to the hulls configuration tend to hold their shape much better than a v-hull.

I agree with Wood on this one! I took the floor and stringers out of mine last fall and have pulled it to and from the shop a dozen times, sat outside all winter under a tarp on an old roller trailer. Since I had some hull work to do anyway, I wasn't real concerned. Just for grins, I looked over the hull this past weekend and took some measurements and they are exactly as they were when I first took them last fall.

These older boats usually had some pretty thick glass on them and the cathedrals in the hull just make them pretty rigid.

One thing different though, my hull cap is still attached making it a little more stable. I only cut the cap at the stern to get to the transom.

Looking good so far!

Oh, BTW, mine had a hidden drill bit treasure too! Mine was grinning out through the bottom of the hull in the bilge and encased in resin.
 

Auger01

Petty Officer 1st Class
Joined
Aug 15, 2009
Messages
201
Re: 1973 Glastron V-156 Sportster Floor/Stringer Restoration

BTW, when you get around to removing the glue residue on the sides, M.E.K. is your huckleberry.
 

jmink

Seaman
Joined
Jan 27, 2014
Messages
64
Re: 1973 Glastron V-156 Sportster Floor/Stringer Restoration

I agree with Wood on this one! I took the floor and stringers out of mine last fall and have pulled it to and from the shop a dozen times, sat outside all winter under a tarp on an old roller trailer. Since I had some hull work to do anyway, I wasn't real concerned. Just for grins, I looked over the hull this past weekend and took some measurements and they are exactly as they were when I first took them last fall.

These older boats usually had some pretty thick glass on them and the cathedrals in the hull just make them pretty rigid.

One thing different though, my hull cap is still attached making it a little more stable. I only cut the cap at the stern to get to the transom.

Looking good so far!

Oh, BTW, mine had a hidden drill bit treasure too! Mine was grinning out through the bottom of the hull in the bilge and encased in resin.


Thanks for that makes me feel a bit better about ripping the old boat down. That drill bit just made me laugh; if I would have done something like that on the job I would have never heard the end of it. Glad to know I'm not the only drill bit finder. :D
 

jmink

Seaman
Joined
Jan 27, 2014
Messages
64
Re: 1973 Glastron V-156 Sportster Floor/Stringer Restoration

BTW, when you get around to removing the glue residue on the sides, M.E.K. is your huckleberry.

Anything associated with a Tombstone quote has to be good!
 

Woodonglass

Supreme Mariner
Joined
Dec 29, 2009
Messages
25,924
Re: 1973 Glastron V-156 Sportster Floor/Stringer Restoration

The foam boxes, not only provide additional flotation, but are also somewhat structural in nature. I'd advise you to seriously consider replacing them as they are.;)
 

Auger01

Petty Officer 1st Class
Joined
Aug 15, 2009
Messages
201
Re: 1973 Glastron V-156 Sportster Floor/Stringer Restoration

If it was just foam, you could put an equivalent amount under the floor and the only drawback is that the boat might not float upright or level if it was swamped. However, the plywood shell of the boxes does add strength to hull and probably helps transmit the force from the transom to the hull.

I would just clean them up and paint them later if the foam isn't too waterlogged.

With all the grinding you are going to be doing, I would also think about that 7" grinder at HF and some 36 grit disks.
 

jmink

Seaman
Joined
Jan 27, 2014
Messages
64
Re: 1973 Glastron V-156 Sportster Floor/Stringer Restoration

The foam boxes, not only provide additional flotation, but are also somewhat structural in nature. I'd advise you to seriously consider replacing them as they are.;)

I would just clean them up and paint them later if the foam isn't too waterlogged.

I thought they were more for structural supports rather than floatation. I had been kicking around making a modification, but now that you two guys have shed some light. Looks like I will more than likely keep them how they are now. What is the best way to check for water in them without destroying them? I am fairly confident they are completely dry, but I haven't checked throughout.

- Josh
 

jbcurt00

Moderator
Staff member
Joined
Oct 25, 2011
Messages
24,877
Re: 1973 Glastron V-156 Sportster Floor/Stringer Restoration

get a 2" pc of PVC @ 2ft long

cut teeth in one end & use it as a boring bit to drill down thru the foam until you contact the hull. Remove the core sample of foam & watch for the bore hole to refill w/ water. If the bore sample is wet, discolored or smells funky, the foam has been compromised & should be removed & replaced.

It happens fairly often that all outward signs suggest sound, uncompromised foam, but once you core it or start to remove it, it is in fact waterlogged, the hard exterior shell just made it appear to be sound.
 

jmink

Seaman
Joined
Jan 27, 2014
Messages
64
Re: 1973 Glastron V-156 Sportster Floor/Stringer Restoration

get a 2" pc of PVC @ 2ft long

cut teeth in one end & use it as a boring bit to drill down thru the foam until you contact the hull. Remove the core sample of foam & watch for the bore hole to refill w/ water. If the bore sample is wet, discolored or smells funky, the foam has been compromised & should be removed & replaced.

It happens fairly often that all outward signs suggest sound, uncompromised foam, but once you core it or start to remove it, it is in fact waterlogged, the hard exterior shell just made it appear to be sound.

Thanks for the tip! Will give it a go.

-Josh
 

Woodonglass

Supreme Mariner
Joined
Dec 29, 2009
Messages
25,924
Re: 1973 Glastron V-156 Sportster Floor/Stringer Restoration

Make a foam Drill something like this, Piece of 2" pvc and a wooden dowel...
foamsampler-1.jpg
 

jmink

Seaman
Joined
Jan 27, 2014
Messages
64
Re: 1973 Glastron V-156 Sportster Floor/Stringer Restoration

Looking good. If at all possibile, resist the urge to remove all the sringers at the same time. If you replace all the stringers except the center one, then remove and replace it after the outboard stringers are in, the chances of the hull being deformed are greatly decreased.

When I redid my stringers, I didnt put "notches" in them for the 1"x4" that was used to bridge the seams in the plywood floor. I just taped the edges of the plywood from the top with several layers of 6" fiberglass tape and it worked well. If you want to use gellcoat instead of carpet for the floor, it would mean that you would have more work with the fairing the deck, but it might still be worth it.

I am really leaning towards not notching the stringers to add the seam bridges.
 

jigngrub

Fleet Admiral
Joined
Mar 19, 2011
Messages
8,155
Deck joints should rest on top of stringers or bulkheads for maximum strength and a very solid feeling deck under foot.


jmink

Seaman
Joined
Jan 27, 2014
Messages
64
Project Update

Finally got back to working on the boat after being on hiatus for the past two months. In this newest video I discuss/show removing the transom and stringers.


jmink

Seaman
Joined
Jan 27, 2014
Messages
64
Project Update
I finished with the grinding & sanding of the hull! Take a look at the details of the worst part of the boat deconstruction to date.


Photos below are from beginning to end.


Last edited:

GT1000000

Rear Admiral
Joined
Jul 13, 2011
Messages
4,916
Thanks again for making and sharing the videos...they will really be helpful to the ones following behind us, to see what lies ahead...great job!
Progress is looking fantastic and at this rate, you'll be in the home stretch in no time!:cool:
 

jmink

Seaman
Joined
Jan 27, 2014
Messages
64
Thanks again for making and sharing the videos...they will really be helpful to the ones following behind us, to see what lies ahead...great job!
Progress is looking fantastic and at this rate, you'll be in the home stretch in no time!:cool:


Thanks! I know how much it means to me to find a video or photo of something when I am in research mode, so I am trying to help out the next guy. Can't wait to start installing some things for a change!
 

jmink

Seaman
Joined
Jan 27, 2014
Messages
64
Project Update
The long awaited day has finally arrived along with my fiberglass supplies from U.S. Composites.


Last edited:
Top