Water in inline 6

nathanhooper

Petty Officer 2nd Class
Joined
Apr 21, 2010
Messages
176
Where are all the definite places water can get in a cylinder on an I-6? I would like to start diagnosing this problem, but I can only think of two areas. The end cap seal, and the exhaust gasket. Water is only getting into the very bottom cylinder. What are the diagnostic test to run? I really don't want to just start tearing the thing apart until I have a good base knowledge of what I am dealing with. Pictures are always a good thing to have for me, I am a visual person when dealing with these things. I read another post that gives me some hope, the guy has had a problem with water also and it only takes a couple of hours now to pull his power head off. lol. I would like to do it only once, if any. I just figure if we kick this ball around enough it might help to see where the weakness is. Thanks in advance.
 

Faztbullet

Supreme Mariner
Joined
Mar 2, 2008
Messages
15,679
Re: Water in inline 6

If #6 cylinder its seals or crankshaft grooved where seals ride, any other cylinder it could be exhaust plate,cracked sleeve,hole in top of cylinder jugg,chipped reed (3&4). If cranshaft is grroved you can get a speedi-sleeve to repair it.
 

nathanhooper

Petty Officer 2nd Class
Joined
Apr 21, 2010
Messages
176
Re: Water in inline 6

thanks Fazt, do you happen to have any pictures? I am thinking seals as it has sit for the last 6 or so years untouched. I guess it could be a groved crankshaft, but I did have the L.U. off replacing water pump and that part of the crankshaft looked immaculate. So I would think that if the sealing surface of the crankshaft around the pump was not worn, then the sealing surface of the lower oil seal would more than likely be in the same shape? I know they are two different parts, but just trying to talk it out. Only way of knowing is going to be to pull the power head huh?

Also, I posted this one other place, but under a different topic. Could I use some sort of seal "revive" oil to flood that lower crankcase and try to "swell" the seal if it is not cracked, just a bit dry? Or if it is just dry would just running the thing for a while improve the condition of it? I know for a fact there is not much water getting in, and I have only run it less than an hour of total run time since I have gotten it after it sat for all those years. Just throwing out some thoughts here.
 

achris

More fish than mountain goat
Joined
May 19, 2004
Messages
27,468
Re: Water in inline 6

Do you have a manual?

Any attempt to rework the seal without replacing it will be a very short term solution. Bite the bullet and pull the powerhead. It's not that scary... Heck, I can have my entire engine out in under 2 hours, and that's a 4.3l V6 inboard! Your tiny little outboard is just a 1 hour job! :D:D:D

Chris......
 

nathanhooper

Petty Officer 2nd Class
Joined
Apr 21, 2010
Messages
176
Re: Water in inline 6

I do have a manual. It is very vague on this though. I seriously do not mind pulling it, but I would love to have a game plan before doing it. You know, all the right parts, knowing what I am looking for, tools, etc. I am definitely not scared of it. I just don't want to turn it into another month long project is all. I would not mind getting another manual if it has more/better info. 1979 90hp.

I wish I had a picture of what the seal looks like and what the power head looks like pulled off, so on and so forth.

Thanks for the feedback guys
 

achris

More fish than mountain goat
Joined
May 19, 2004
Messages
27,468
Re: Water in inline 6

I do have a manual. It is very vague on this though....

Sounds like a seloc or clymer.... Trash-can it! Get a genuine manual, you'll thank me. Really.

The genuine manual takes you through the removal procedure step by step. And has many pictures.

Chris.......
 

nathanhooper

Petty Officer 2nd Class
Joined
Apr 21, 2010
Messages
176
Re: Water in inline 6

So how do you know it is a genuine manual or not? What does one look like or say on the cover. A lot of the manuals touted as genuine appear to say seloc or clymer.
 

achris

More fish than mountain goat
Joined
May 19, 2004
Messages
27,468
Re: Water in inline 6

So how do you know it is a genuine manual or not? What does one look like or say on the cover. A lot of the manuals touted as genuine appear to say seloc or clymer.

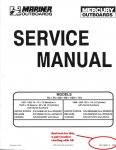
If it says seloc or clymer on it, it is NOT genuine.... This is the cover of a genuine manual...

attachment.php


Chris.........
 

Attachments

  • ___Service manual cover (600 x 781).jpg
    ___Service manual cover (600 x 781).jpg
    56.1 KB · Views: 0

nathanhooper

Petty Officer 2nd Class
Joined
Apr 21, 2010
Messages
176
Re: Water in inline 6

Thanks. Found one on ebay. Says it was revised in 1979? That is the year my motor was built, and I know from looking around that that year seems to be a funny year for motors, some were built one way some another. Would this be a good thing that it was revised? What should I expect to pay for one? Any questions to ask the seller of the manual?
 

emckelvy

Commander
Joined
Jan 16, 2004
Messages
2,506
Re: Water in inline 6

There are (2) seals pressed into the bearing end cap at the bottom of the motor. Water dumps down the common area in the exhaust tower and if these seals are worn/leaking, crankcase vacuum can suck water up into the cylinder. This is not only bad for the piston and rod bearings, but very hard on the ball bearing pressed onto the end of the crankshaft.

The only solution for this is to remove the powerhead, pull the bearing end cap, and renew the (2) seals.

The minimum parts you'll need for this job are (2) crankshaft seals; (1) bearing cap O-ring; (1) powerhead-to-exhaust plate gasket.

You don't have to split the crankcase in order to remove the bearing cap. There are threaded holes in the cap which will allow you to use a harmonic balance puller or other suitable pulling device to yank that cap right outa there. Just don't pry on the mounting bolt 'ears' of the bearing cap or you'll probably break them.

The seals are pressed into the cap, lips on both seals pointing downwards. Before driving the old seals out of the cap, note their positions. You'll want to install the new seals in exactly the same position as the old ones (i.e. how deep they are in the cap). This is important as there are fuel/oil bleed holes drilled into the cap and if you install the seals at the incorrect depth, you may block one of these holes.

You'll note that the cap can only be installed in one orientation, as the (3) bolts are not symmetrical. The cap is easily tapped back into place with a mallet, you just have to make sure it goes in even. The tolerances here are quite tight and it'll get stuck if cocked even a wee bit to the side.

One caveat, check the ball bearing in the bottom carefully, it's had water going past it and may have been compromised.

If this bearing requires replacement, you'll have to split the crankcase as the bearing is pressed onto the crank and requires a wedge-type puller or equivalent to remove. Plus the bearing must be heated to around 150 deg in a small oven to expand the inner race enough to slide onto the crankshaft.

If the end of the crankshaft where the seals ride is chewed up, there is a "seal saver" kit (think, "Speedi-Sleeve") you can get from Mercury. The sleeve drives over the end of the crank to provide a clean, smooth surface for the seals to ride upon. This sleeve would be installed after any bearing work since it would interfere with removal/reinstallation of the crank ball bearing.

Anyway, that's just a brief overview of the job, the service manual will fill in the fine details. Hopefully you've caught it before the ball bearing has gone South, that'll make the job a lot simpler.

HTH.............ed
 

nathanhooper

Petty Officer 2nd Class
Joined
Apr 21, 2010
Messages
176
Re: Water in inline 6

Thanks for the detailed reply. I am having mixed emotions now though, lol. When you are not sure on how to do something then its easy to say you'll get around to doing it when you understand what it is your supposed to do. You laid it out so that the common shade tree mechanic could get in there and do it. So now I cannot claim ignorance. Time is the only issue that will hold me back now. I doubt if the bearing is bad. The motor sat for 5-6 years without being started, so I am 99% sure its a dried up seal. I had the L.U. off for servicing and there is no sign of wear on any parts that are visible. The motor seems in immaculate condition considering its age.

How long, start to finish, would you think it would take a guy to do it? I need also to look up the part numbers for those parts you indicated I would need. I definitely want them on hand for the job. I do not like to have things sitting apart for too long, even though I try to detail the breakdown with pictures and such, it is a lot better to have it fresh in your mind to put the thing back together.
 
Top