My Starcraft Falcon 14 Project

Rainbow hunter

Petty Officer 3rd Class
Joined
May 3, 2012
Messages
84
So, while I wait for the engine problem in my SS 18 project to resolve itself (see thread http://forums.iboats.com/showthread.php?t=551485$) I figured I may as well get started on my little 1964 Falcon 14 project. I spotted this boat in a yard at Eagle Lake last fall where I like to go two or three times a year and chase the renowned Lahaunton trout. Eagle is a high saline level lake and only two fish can live in that water, the big trout and the toowie chub upon which the trout dine much of the year.

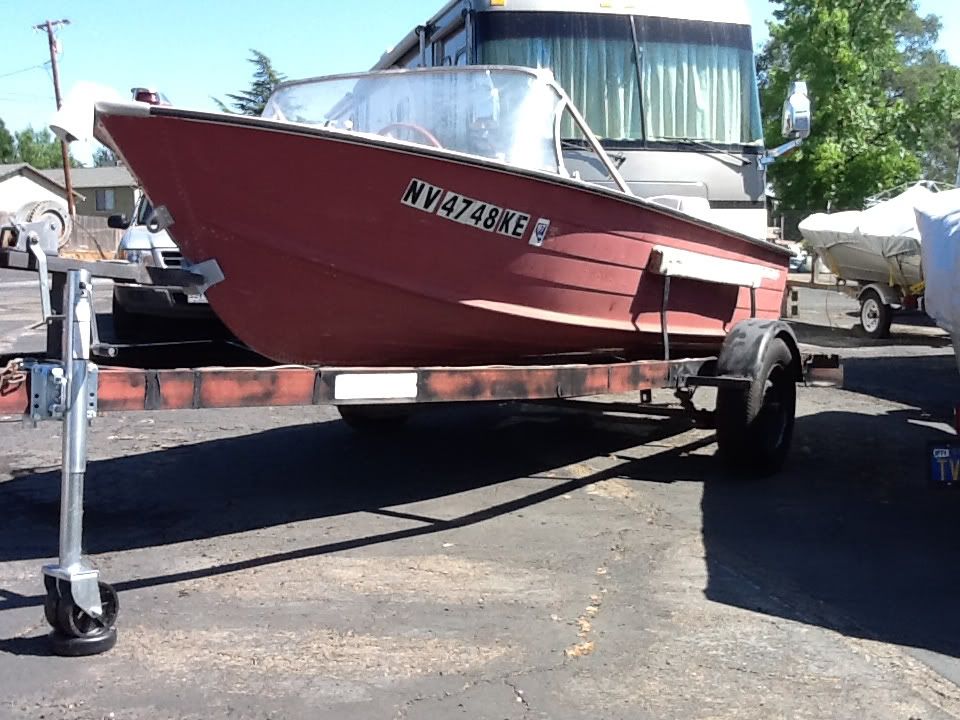
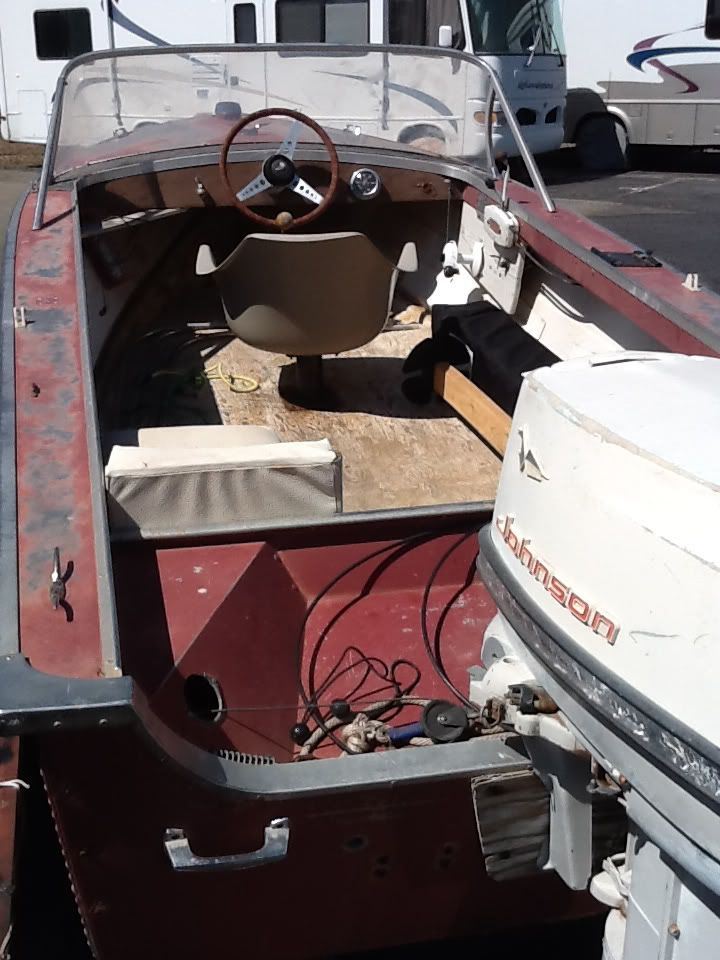
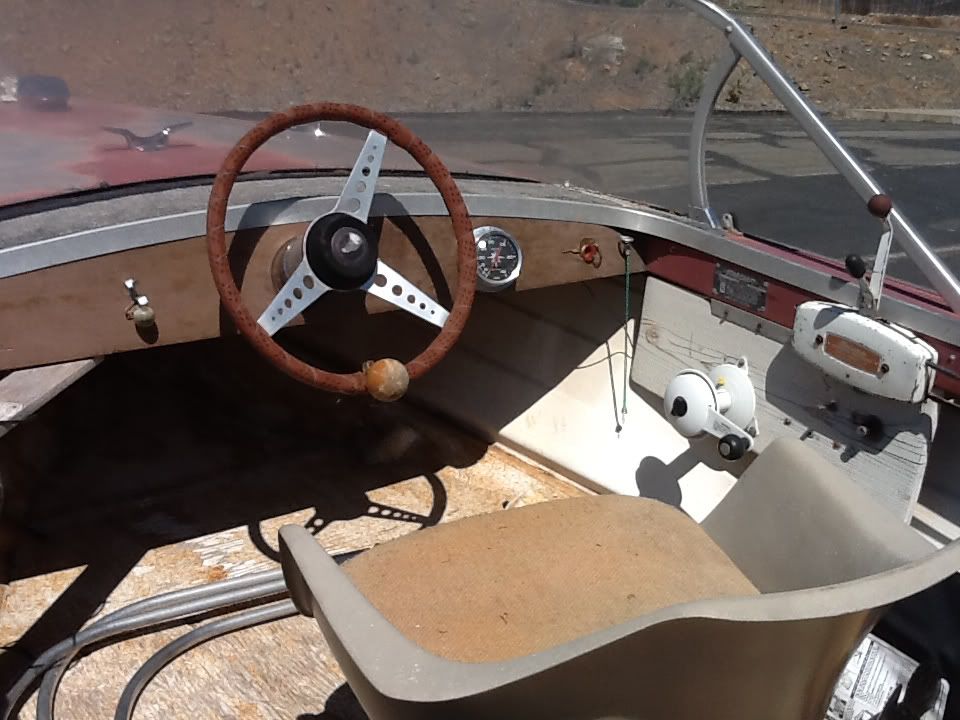
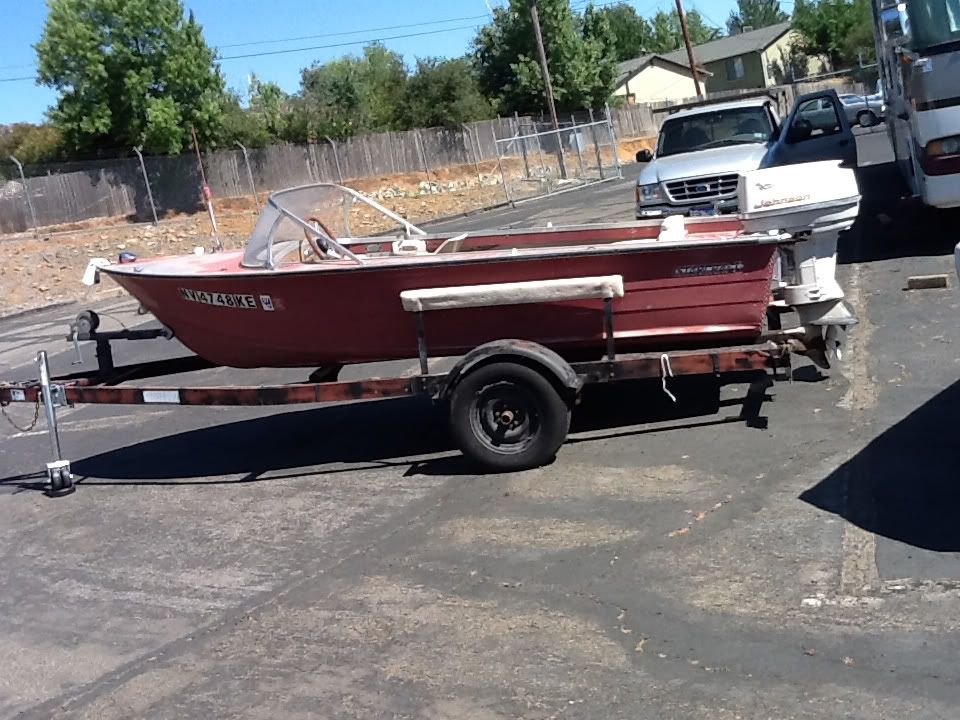
The boat originally had a $450 price tag on it, but due to circumstances that in included a debilitating heart attack suffered by the seller, I was able to acquire the the boat, trailer with two new tires and a clear title for $200. Since I was towing my own boat at the time (a 14' Gregor), And was just a couple of days from leaving for my winter home in Mexico, I had to leave the boat with the seller. When we returned to CA for the Xmas holidays a friend and I went up to the lake and hauled it home. It's been resting in the RV storage yard where I live since then. Here's what she looked like when I got her home:
934b5c48.jpg


9e6a88f1.jpg


0b01853b.jpg


6d9cc70e.jpg


So what got me interested in this boat? I just happen to love the looks of this boat. It has a beautiful line to it. On the water it will look very nice, very much like EZs Jet Star. It's rated for 40 hp and that should make this boat fly low. Loaded, I doubt it will weigh more than 450 lbs. I examined the hull fairly carefully. The exterior aluminum is straight as an arrow, the transom is in good shape, the windshield is whole but has a couple of inconspicuous cracks, and all the hardware is present and in good condition. On the negative side, the motor is a 1963 Johnnyrude and shows some hard use though it still has 115 lbs compression. The paint is gone, the floor is shot, what there are for seats are useless, no fuel tanks, and a fair number if holes that will have to be patched or plugged. Actually, this one looks to be a comparatively straight forward restore/repaint. I'm looking forward to getting this,thing back on the,water looking pretty.

Ive already stripped the hull interior and hopefully tomorrow, I'll get her pressure washed inside and out. Then I'll post some more pics,of the progress.

RH
 

64osby

Admiral
Joined
Jul 28, 2009
Messages
6,816
Re: My Starcraft Falcon 14 Project

Great deal!

If that motor has 115 compression it will run just fine, everything else on it is very simple to work on.
 

barato2

Commander
Joined
Dec 7, 2010
Messages
2,956
Re: My Starcraft Falcon 14 Project

love the boat, and the central dirving position. is that an anchor windlass next to seat or what?
 

kfa4303

Banned
Joined
Sep 17, 2010
Messages
6,094
Re: My Starcraft Falcon 14 Project

Sweeet deal! You're in the right place. Keep us posted. We love pics :)
 

InMotion

Commander
Joined
Nov 3, 2011
Messages
2,080
Re: My Starcraft Falcon 14 Project

Great boat and deal!!!! Love the knob on the steering wheel... very uncle buckish!!!!! Somehow that's gotta stay!!!

Enjoy!!!!
 

Rainbow hunter

Petty Officer 3rd Class
Joined
May 3, 2012
Messages
84
Re: My Starcraft Falcon 14 Project

love the boat, and the central dirving position. is that an anchor windlass next to seat or what?

Yes, it's an anchor windlass, but it isn't working properly so I'll have to see if it's fixable. Only cranks up and the down release doesn't seem to work.
 

Rainbow hunter

Petty Officer 3rd Class
Joined
May 3, 2012
Messages
84
Re: My Starcraft Falcon 14 Project

Did I make the mistake of saying this looks like a fairly simple restoration? Remarks like that aways seem to bight me in the buttttttt!

Yesterday I pulled all of the controls and electrical wiring. Small boat, big, long job done right. This morning I removed the windshield and a couple other odds and ends and took her to the wash rack for pressure washing. Things go downhill from there.

As I said before, when I bought it I examined the hull and it appeared to be straight as an arrow. What I didn't say was that the boat and three others were located under a large tree loaded with drunk bees, yellow jackets to be exact, thousands and thousands of them. They were harmless for the most part, but the boats were covered in bees and you had to be careful where you put your hands. I've never seen anything like it, because yellow jackets are usually pretty vicious in large packs. But these bees were drunker than a peach orchard goat on whatever that tree was supplying them. However, there was no way I was going to lie on the ground and crawl underneath with literally thousands of bees crawling on the ground and on everything else. Thus, a crossmember in the trailer hid from view two rows of bolts holding in one of the ribs. It probably wouldn't have made a lot of difference to me, because the sheet metal was otherwise straight.

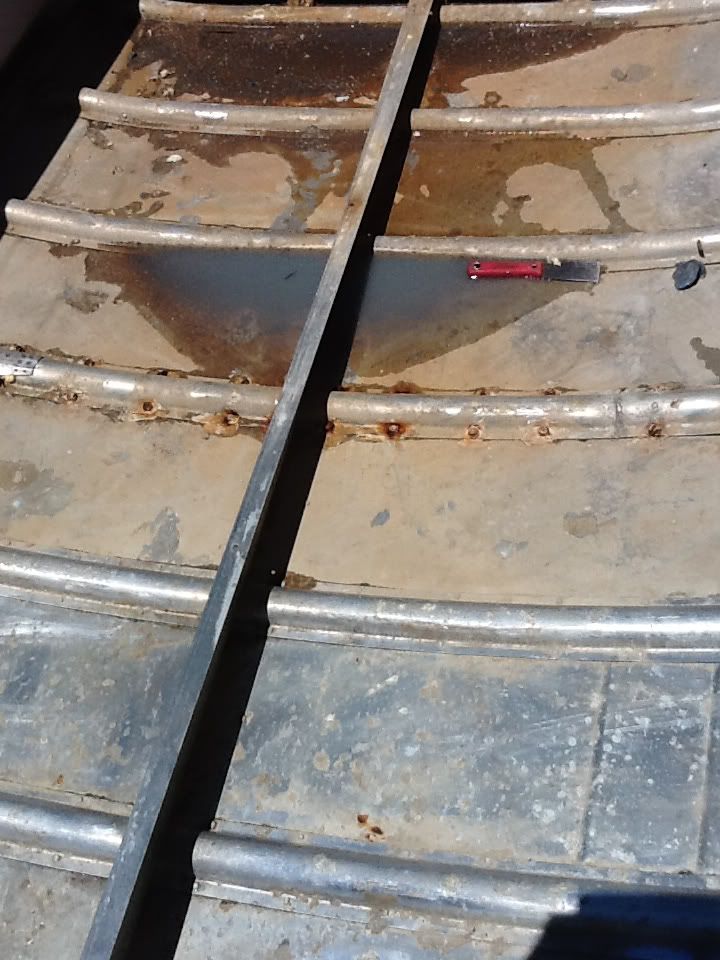
So after removing the floor, the foam and cleaning up the mess I could see the rib was broken in two places, about 6 or 8 inches in from each gunwhale. On one side it shows evidence of an amature welding attempt. The rib was removed by drilling out all rivets and then replaced with 1/4X20 bolts and loads of 5200.

So I proceeded with pressure washing. Rather I should say hand scrubbing with brillo pads, scotch pads and comet, simple green,etc, for hours. I started about 10am and quit at 3pm. No lunch break, just sweat and scrub. So here are some pics and, I hope, a bit of explanatory narrative.

Darn, I just spent an hour putting pictures and comments with,this then accidentally hit the back button on my browser and lost it all. Starting over tomorrow.


Got one pic that goes here that doesn't want to cooperate, so I'm going to put in the others and try to fix this one later. Copy below pretty well explains it.

Floor is out, foam to come out. When some PO had this apart to repair the broken rib they glued the foam blocks together and to the floor with spray foam. In addition, they filled every orifice they could find (except maybe the one they should have filled) with spray foam including the centerline drains and I've spent hours with a set of dental pics removing that stuff. Ought to be a law against spray foam within 100 yds of any boat.

5cbb46e4.jpg


This shot shows the floor about half finished. Gives you an idea of what I was up against. The crap on the bottom would not come up except by hand scrubbing with steel wool and cleanser like the Brillo pads. You can also see the bolted in rib and the weld that broke just in front of the putty knife.

32236d3a.jpg


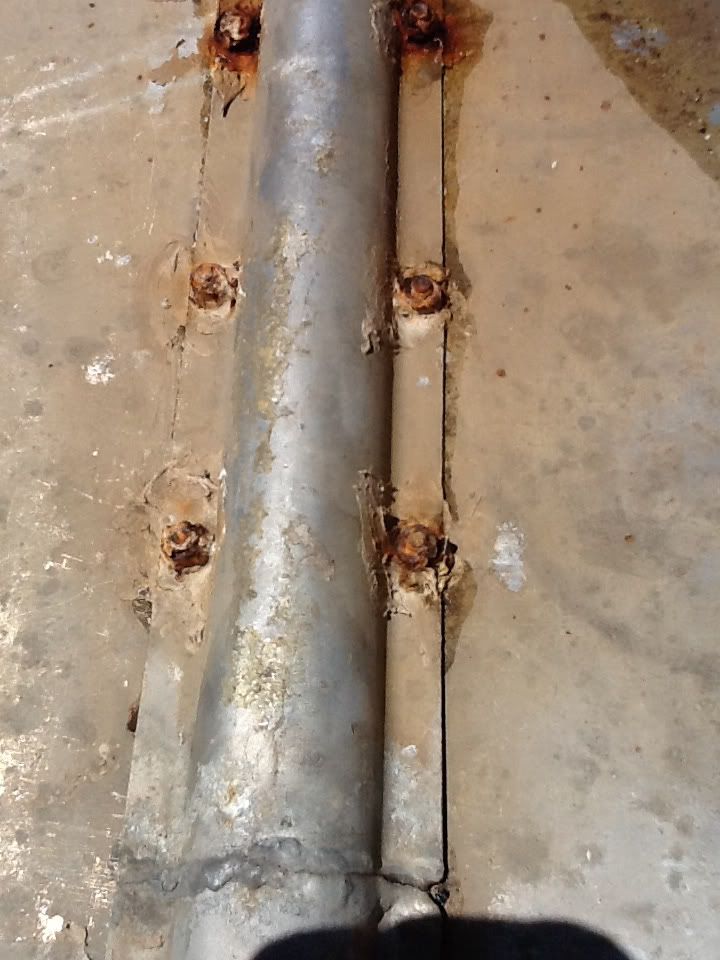
Now here's the really big problem, and I'm looking for all the advice I can get re this issue. This is the broken rib previously repaired by the PO (bottom of pic). It's also broken in the same spot,on the other end. BIG PROBLEM IS, most of the rest of the ribs show obvious signs of corrosion at the same location and on both sides for the most part. In other words, they all need a reinforcement repair of some kind. When I cleaned out between the ribs and the hull a lot of crap came out and I'm guessing it may have caused part of the problem. Also, the floor in this thing was only 5/8 plywood and appears to have been resting on this spot.
Ive got more photos to go with this, but gotta close for now. Have an appointment in about 45 min.
 

jbcurt00

Moderator
Staff member
Joined
Oct 25, 2011
Messages
25,030
Re: My Starcraft Falcon 14 Project

I feel your pain w/ the foam. Mine has a nice heavy coat of truck bedliner material covering the entire inside of the hull up to the chine on the sides, and up to the transom (covers the knee braces too:facepalm:) in the stern. And whoever did it took extra time to cover the ends of the ribs, fill all the limber holes in every rib, and at every lapline in the hull, that little void got filled too.

I'll give them dedication to purpose & excellent coverage, but jeez, why'd ya go & do that. Makes for a miserable day working with the stripper needed to get it off & uncoverage the drainage holes:mad:

Give the pix another shot today, maybe someone can point you to getting a replacement rib or a repair that doesn't involve a 1000 bolts & a gallon of 5200. Barato2, I think, just got some great welding done on 2 tears in his hull. They turned out great.

Cracked a rib in 2 places out at either end, wonder how that happened:confused:
 

jasoutside

Supreme Mariner
Joined
Dec 20, 2009
Messages
13,269
Re: My Starcraft Falcon 14 Project

Sheesh, I'm not so sure I want to see those photos, sounds like a mess!!!
 

Rainbow hunter

Petty Officer 3rd Class
Joined
May 3, 2012
Messages
84
Re: My Starcraft Falcon 14 Project

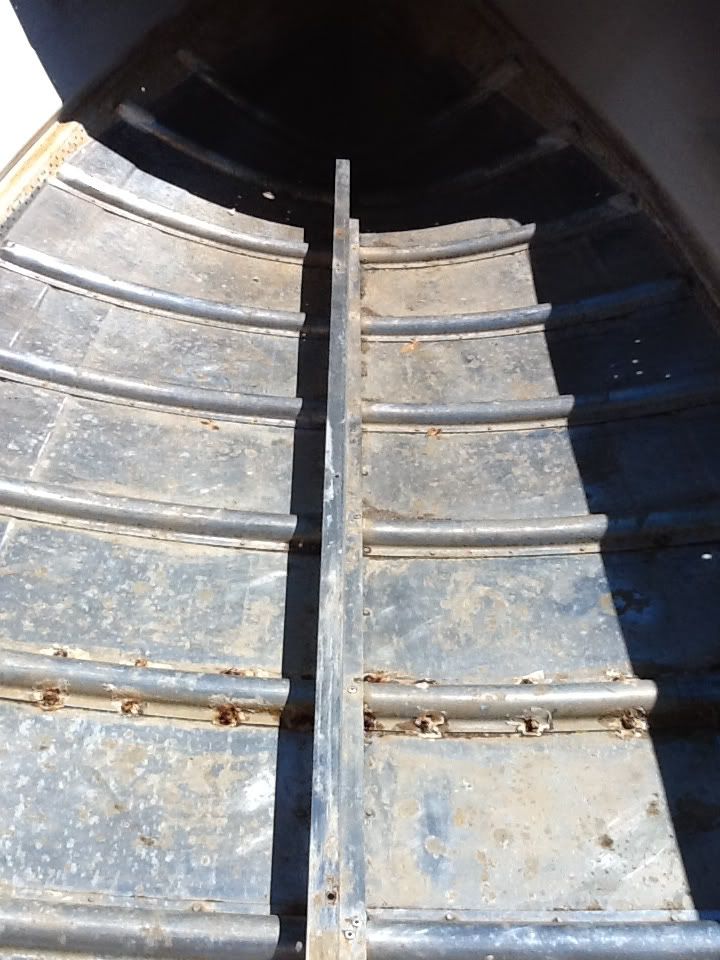
So here's the rest of the interior clean up photos.

d5d4e69f.jpg


This is how she looks after pressure washing/scrubbing out. All the spots on the floor are either pitting from corrosion or etching from the spray foam. I'll take some fine sandpaper in my palm sander to clean this up further, then fill pits with something like JB Weld to seal them up.

Couple of questions: working with automotive sheet metal there are a couple of solutions we use to clean up rust pitting before further body work. Is there a similar solution for use on aluminum? We also use a couple of epoxy rust converters like POR 15 that penetrate rust and seal it from doing further damage. Does anyone have experience in using these type products on aluminum?

e46cbe5b.jpg


Note the dark pitted area in this rib. This pitting takes place on both sides of the hull in a line parallel to the lap bend in the hull sheet metal which you see directly underneath the pitted area of the rib. In several instances this pitting goes completely through the rib. I believe I'll have to weld some reinforcing at each of these locations.

9c5318d4.jpg


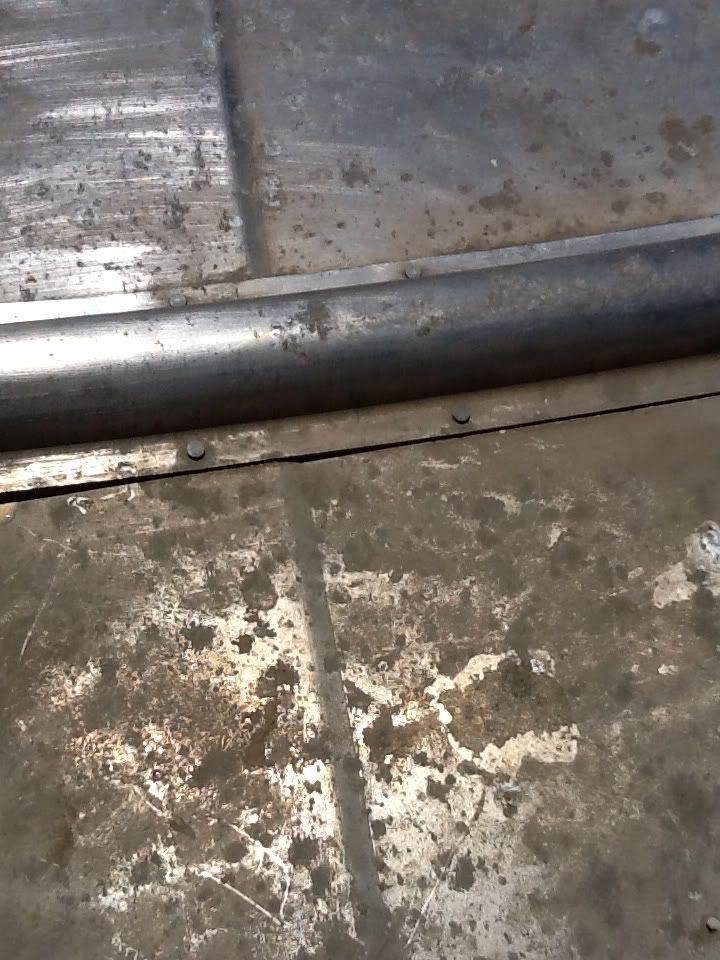
And here is something I haven't come across in any other boat. Note the straight line in this pic that almost looks like a crack in the aluminum. In fact, when I first began to uncover it, I thought that's what it was. But this line runs from between the first and second rib ( forward) to the last rib at the stern and on both sides of the centerline. I crawled underneath to look for the crack, but there is no evidence of it on the bottom. I can only figure that it is a score intentionally put there during manufacture to aid in forming and preventing wrinkles. They are perfectly straight, equa-distant from the centerline. Anyone seen these in another falcon or Jet?

Thanks for,any info you can share.
 

Rainbow hunter

Petty Officer 3rd Class
Joined
May 3, 2012
Messages
84
Re: My Starcraft Falcon 14 Project

A little correction to my remarks in the first post to this thread: I said "on the water it will look very much like EZ's Jet Star" but I meant Lakelovers Jet Star. My apologies to you both, but I'm getting to the age where I have many memory lapses only to find a couple of days later I've made another dumb mistake. Just like buying old boats.:p
 

InMotion

Commander
Joined
Nov 3, 2011
Messages
2,080
Re: My Starcraft Falcon 14 Project

I suspect that score line is from the manufacturing process as well. From what I understand a stress crack would have a wider gap and would not be so symetrical.

I would suspect as well that those bolts?? that hold the rib down are not SS... may be why the corrosion is centered around it. Is the corrosion elsewhere on the inside of the hull... can't remember... Also, I would thing 5200 would work better on the inside of the hull on the corrosion --- a: it smears and will likely stick better to those shallow corroded bits b: it's a whole lot cheaper when covering a larger area like that c: I'm thinking it'll just work better. JB Weld comes in two small little tubes you mix together (if you haven't used it before!)... as such a caulking tube of 5200 and a trowl that you never want again will cover that like thinset for a tiling job ---- peanut butter on a sandwich!!

Just my two cents. Hope this helps you!

Jim
 

Dirt_Farmer

Petty Officer 2nd Class
Joined
May 2, 2011
Messages
109
Re: My Starcraft Falcon 14 Project

My SS has the score lines like that all over the place, on mine the rivets are all installed on the lines.

My very amateur opinion on the corrosion, as long as there are no through holes, clean it with a stainless wire brush, and paint the whole area with gluvit or coat-it. That's what I am doing on my transom, it had a few pin holes I filled with JB weld, then I am coating the rest of the pitted area with coat-it

Good Luck, Jeff
 

Rainbow hunter

Petty Officer 3rd Class
Joined
May 3, 2012
Messages
84
Re: My Starcraft Falcon 14 Project

My SS has the score lines like that all over the place, on mine the rivets are all installed on the lines.

My very amateur opinion on the corrosion, as long as there are no through holes, clean it with a stainless wire brush, and paint the whole area with gluvit or coat-it. That's what I am doing on my transom, it had a few pin holes I filled with JB weld, then I am coating the rest of the pitted area with coat-it

Good Luck, Jeff

Thanks Jeff. That is one of the methods I am considering for sure. I think gluevitt is probably the way to go. But before I do any of that I have to solve the problem of the broken and marginal ribs. Going to try to get with the big welding shop guys here in Auburn and discuss with them what they think is the best approach to the rib problems and what they think it will cost to weld everything up.
 

Rainbow hunter

Petty Officer 3rd Class
Joined
May 3, 2012
Messages
84
Re: My Starcraft Falcon 14 Project

Hi guys. Been a few days since I've had anything very significant to add here what with the holiday and the Admiral wanting to go to Reno for the weekend. But I did get some research done and a par le voux with the guys at the welding shop. They were not excited about my problems. Of course they started out thinking they were going to have to do everything from taking the broken rib out, cleaning it all up and re-welding it, installing it, etc. After I explained that I'd be doing all the dirty grunt work they liked the idea a bit better.

Anyway, they said they could weld up the holes in the boat bottom and weld and reinforce the broken rib and reinforce the other ribs where necessary, all for a cost of about $400 or so @ $100 an hour, provided I brought it to them properly cleaned up and prepared for welding with the boat up-side-down and I'd have to bring my own help to right it when the time came for fitting the rib. In other words, unless I'm ready to spend a whopping sum of money, they only want to run the MIG.

So, I went home and Starcraft gazed some more. I concluded I needed to talk to the people at Fastenal about how best to fasten in the rib. Fortunately, they have a store less than a block away. They said forget rivets unless I want to buy a very expensive riveter that also needs a bigger compressor than I have to operate it. They came up with a half inch long, low profile head, 1/4X20 Aluminum bolt and Nylock nut and an aluminum washer that will go back in the already drilled out holes. Coupled with a marine-grade hole sealer (they were pushing a Permatex product, not 5200; anyone ever try it?) they felt it would do the job nicely. Total cost for bolts, nuts and washers was $38. Much more appealing than dropping $400 at the welding shop.

So now I've removed the broken rib, spent a good three or four hours cleaning it up and getting rid of the old attempted rib weld residue as well as the spray foam and 5200 residue. Went through three medium size and one small wire brush getting it cleaned up, then used a non ferrous wheel on my angle grinder to carve out the welding mess. Now it's ready to bolt back in to the boat for a pre-fit as soon as I get the rest of the bottom cleaed up.

On the smooth surface of the bottom, I'm just going to hit it lightly with some 220 grit paper and my palm sander. Then I have some 3" wire brushes that will go in my die grinder and I'll use those to clean up riveted areas and ribs that I can't get to with the sander. Hardest part will be under the splash well.

Once that's accomplished, hopefully by the first of the week, it's off to the welding shop where my plan is have them tack weld the rib bolted in place in the boat so it's curvature is correct, then pull the rib and let them complete the weld and reinforcement as necessary. I may also have have them put some reinforcement on a couple other ribs that show signs of weakness at the same locations.

I did finally figure out why this rib broke with no damage to the boat bottom. The boat is on a trailer made for a 15 or 16 foot boat and the bunks don't fit properly. The forward end of the bunks on the trailer are about one inch beyond the rib that broke. Two forces we're at work. First, the wet wood floor sagged and came into contact with this rib on both sides of the boat as'it did with most of the ribs. This long term, winter weather wet contact caused corrosion at this point. Second, when I bought the boat, it was about a mile and half to the lake, about half of which was down a rough dirt road. There were no tie down strap/s on the back or across the boat; I brought my own to get it home. They were letting this boat bounce around on those short bunks on trips to and from the lake. Viola, broken rib.

Ill get some pics up to go with this in a day or two when I bot the rib in.
 

North Beach

Commander
Joined
Sep 29, 2008
Messages
2,022
Re: My Starcraft Falcon 14 Project

RH, just make sure you use the 5200 on those bolts and you should be just fine.
 

64osby

Admiral
Joined
Jul 28, 2009
Messages
6,816
Re: My Starcraft Falcon 14 Project

Sounds like you got the cause and the fix figured out.

A mess for sure but still easier and less cost than any FG boat repair, keep it up.
 

Bwana Don

Lieutenant Commander
Joined
Oct 20, 2009
Messages
1,951
Re: My Starcraft Falcon 14 Project

That sucks. $400 yikes.:eek: You get coffee or a milk shake with that while you wait.

I wonder (out loud) if you could take a pipe and bend/hammer a new rib. One that would fit over the broken area. Then rivet it over the damaged portion. Like a sister rib.

Good luck.
 

Rainbow hunter

Petty Officer 3rd Class
Joined
May 3, 2012
Messages
84
Re: My Starcraft Falcon 14 Project

That sucks. $400 yikes.:eek: You get coffee or a milk shake with that while you wait.

I wonder (out loud) if you could take a pipe and bend/hammer a new rib. One that would fit over the broken area. Then rivet it over the damaged portion. Like a sister rib.

Good luck.

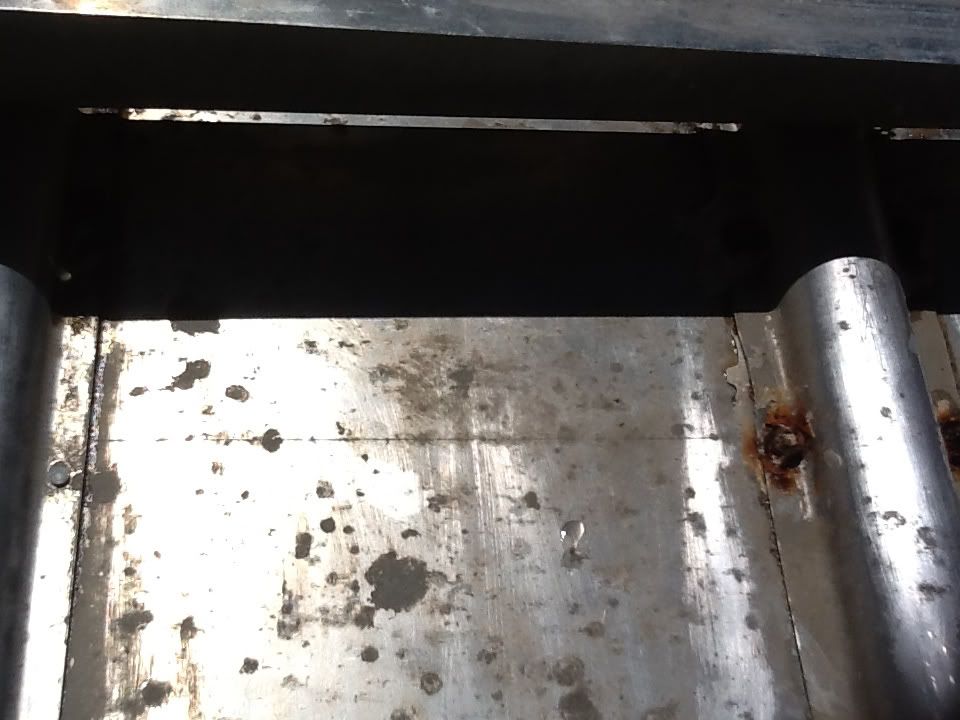
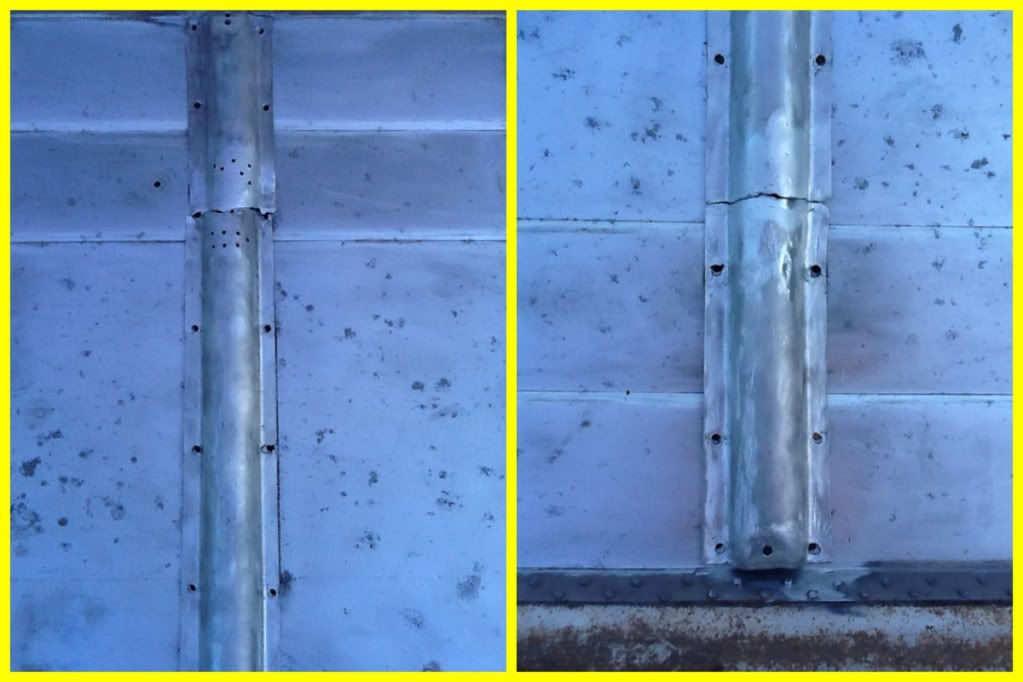
Oh that i had the magic to form a new rib. Talk about the God particle. It would be pretty difficult to make a rib without an English Wheel because it's a compound curve. The rib is half round to give it strength and it's also curved end to end to form bottom support. Below are photos showing the broken rib after clean up. Left pic is starboard side, right pic is port; I was too lazy to put the port pic on the port side, etc., after I'd already put them in. Bluish color is due to the shade I have over the boat.

b5607e9e.jpg


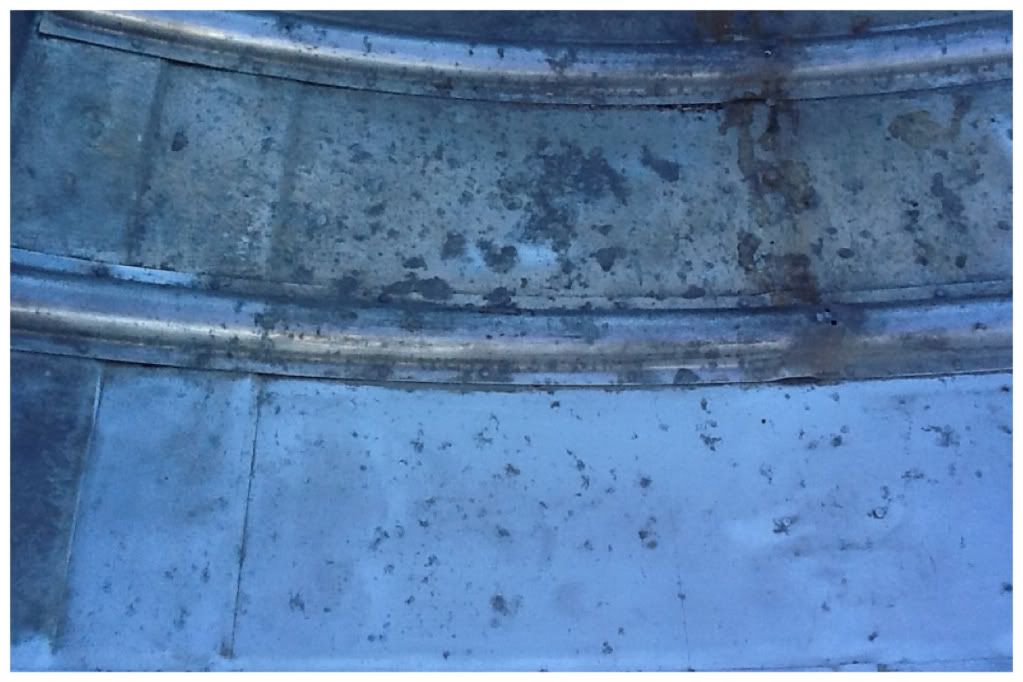
Below is a before and after type photo of cleaning the bottom up. I'm convinced that the floor in this boat was copper sulfated so called marine plywood, though i cannot tell by looking at what came out of the boat because everything that might have been in the wood is completely leached out. It sat outdoors for several winters in the rain and sometimes being filled with snow. It was half inch ply with one coat of cheap white paint that is mostly gone. It sagged, it dripped and it corroded the bejesus out of the floor. There are a great many pits that will need to be filled, but I've only found one pit that actually went through the floor and left a very small hole. Its hard work sanding the bottom and wire brushing all the riveted areas. I'm about 2/3rds done with that part. Then I'll bolt the broken rib back in place, tack weld it, remove it for finish welding and reinforcement and probably reinforce some spots on other ribs. Then it will be time to fill the deep pits, gluvitt the seams, then treat the bare aluminum with alumaprep or the solution from the POR 15 people and then coat the entire bottom and inside transome with POR 15. Finally, that will have to be painted over because POR 15 is UV sensitive and I may well have to leave it uncovered through the winter as I do not expect to finish this project until after I return from my winter stint in Mexico next May.
2431400c.jpg
 
Last edited:
Top