Force 120 /125 crankshaft compatibility

chris2020

Cadet
Joined
Jun 9, 2020
Messages
9
Hello,
​​​​​​ . I recent picked up a 91 Bayliner Capri with the Force 120 L drive. Long story short, the engine block is shot and I need to find another powerhead so I can turn around and get rid of this thing. I only bought it thinking that I could probably repower with a merc powerhead. Apparently that's not so simple. Anyway it has the 15 spline crank. There are several Force 125 outboards available right now for around $500. Is there any differences I need to be aware of? I already found a 1996 120hp outboard, but that would have been the 13 spline shaft. Bummer. Any other repower options that I'm missing? Again, it is my understanding that most/all of the force engines used the same bolt pattern and is just a matter of matching splines. Just looking for some confirmation from someone in the know before I spend another dime. Thanks, Chris
 

chris2020

Cadet
Joined
Jun 9, 2020
Messages
9
So there basically is this adapter or extension between the engine crank and the drive. The splined part as 15 spline, both ends into a 15 spline coupling, both ends. There must be an adapter somewhere to allow the 13 shaft engine to be used. There certainly seems to be the room to make one/fit one if this thing was in there!
 

Attachments

  • photo332040.jpg
    photo332040.jpg
    1.2 MB · Views: 0
  • photo332041.jpg
    photo332041.jpg
    1.4 MB · Views: 0

jerryjerry05

Supreme Mariner
Joined
May 7, 2008
Messages
17,939
What I do when comparing parts.
I find a site then open 2 windows and then bring up the years and models.
Seems the 91 L drive crank fits only the L drives??
Find a machine shop to build the adaptor??

Mercury Outboard Parts by Year (Mercury, Mariner, Mark, Force, Chrysler, Sears, SportJet) Force Outboard 1990 120HP 120LD90C L-DRIVE Crankshaft and Piston
Mercury Outboard Parts by Year (Mercury, Mariner, Mark, Force, Chrysler, Sears, SportJet) Force Outboard 1991 120HP H120LD91B L-DRIVE Crankshaft and Piston
Mercury Outboard Parts by Year (Mercury, Mariner, Mark, Force, Chrysler, Sears, SportJet) Force Outboard 1991 120HP H120LD91D L-DRIVE Crankshaft and Piston
Mercury Outboard Parts by Year (Mercury, Mariner, Mark, Force, Chrysler, Sears, SportJet) Force Outboard 1989 125HP H125LD89B L-DRIVE Crankshaft and Piston
Mercury Outboard Parts by Year (Mercury, Mariner, Mark, Force, Chrysler, Sears, SportJet) Force Outboard 1989 125HP 125LD9B L-DRIVE Crankshaft and Piston
Mercury Outboard Parts by Year (Mercury, Mariner, Mark, Force, Chrysler, Sears, SportJet) Force Outboard 1989 125HP 125LD9A L-DRIVE Crankshaft and Piston
Mercury Outboard Parts by Year (Mercury, Mariner, Mark, Force, Chrysler, Sears, SportJet) Force Outboard 1990 120HP H120LD90B L-DRIVE Crankshaft and Piston
Mercury Outboard Parts by Year (Mercury, Mariner, Mark, Force, Chrysler, Sears, SportJet) Force Outboard 1990 120HP H120LD90A L-DRIVE Crankshaft and Piston
Mercury Outboard Parts by Year (Mercury, Mariner, Mark, Force, Chrysler, Sears, SportJet) Force Outboard 1991 120HP 120LD91D L-DRIVE Crankshaft and Piston
Mercury Outboard Parts by Year (Mercury, Mariner, Mark, Force, Chrysler, Sears, SportJet) Force Outboard 1990 120HP H120LD90C L-DRIVE Crankshaft and Piston
Mercury Outboard Parts by Year (Mercury, Mariner, Mark, Force, Chrysler, Sears, SportJet) Force Outboard 1990 120HP 120LD90B L-DRIVE Crankshaft and Piston
Mercury Outboard Parts by Year (Mercury, Mariner, Mark, Force, Chrysler, Sears, SportJet) Force Outboard 1990 120HP 120LD90A L-DRIVE Crankshaft and Piston
Mercury Outboard Parts by Year (Mercury, Mariner, Mark, Force, Chrysler, Sears, SportJet) Force Outboard 1989 125HP H125LD89A L-DRIVE Crankshaft and Piston
Mercury Outboard Parts by Year (Mercury, Mariner, Mark, Force, Chrysler, Sears, SportJet) Force Outboard 1991 120HP 120LD91B L-DRIVE Crankshaft and Piston


Need Help Finding Parts? Chat Now​
 

Redbarron%%

Chief Petty Officer
Joined
Dec 7, 2017
Messages
479
I wonder why so many different crankshaft spline setups? It has to cost money to set up a different machining setup to create them. I bought a Sport Jet 90 boat for parts and found out that there is a difference in the 1993 and 4. Anybody need the older crank?
 

chris2020

Cadet
Joined
Jun 9, 2020
Messages
9
Well, I decided to go ahead and buy the '96 outboard. 145-150 compression on all four cylinders. The guy started and ran it in front of me. I'll update as I progress. At least it may be useful to someone else in the future.
 

chris2020

Cadet
Joined
Jun 9, 2020
Messages
9
I have a shop working on my spline adapter, BUT I found a new issue.. I pulled the exhaust manifold from the original engine, and see that a good chunk of the bridge in the middle is burnt/melted. What purpose does this bridge even serve? Could I cut it out all together, or at least smooth it out? I can't see why it is necessary since in a non l-drive this area is wide open just lets the exhaust move freely and down through the lower unit. Seems like more of a restriction than anything, UNLESS its primary purpose is for added support for the extra weight hanging off of the side of the manifold for the exhaust elbow and just happens to be shaped to direct exhaust to minimize interference. Still seems like I should be able to cut it right out without much negative effect though. Pics shortly - I have to reduce file size to upload them...
 

chris2020

Cadet
Joined
Jun 9, 2020
Messages
9
Here we go....
 

Attachments

  • photo333786.jpg
    photo333786.jpg
    1.5 MB · Views: 0
  • photo333787.jpg
    photo333787.jpg
    1.3 MB · Views: 0

chris2020

Cadet
Joined
Jun 9, 2020
Messages
9
Ok! I said I would update, so here we go... Bottom line, it worked. I had it out on Lake Superior last weekend, pulled the kids skiing and tubing, and had a great day.
The shaft adapter worked great. Simple enough solution to use the '96 powerhead once I found someone to cut the splines.
The wiring harnesses were slightly different between the '91 stuff in the boat and the '96 motor. Fortunately, the boat the 96 motor came from was being scrapped, so I was able to cut that wiring harness, basically keeping boat side of the pigtail that would plug into the motor. From there I was able to basically wire up an adapter so that everything is still plug and play. No cutting of any of my boat wires or the wires on the new motor.
The exhaust manifold - I did cut that bridge out that I had asked about previously. So far, no ill effect from doing so. The exhaust plate when set up as an outboard doesn't have anything like it, so I went ahead and tried it. If I do have a problem, there are plenty more manifolds available on ebay.
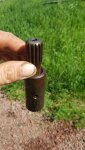
So I got the motor installed and was testing things in the yard. That is when I found the next problem - stuck in forward. After reading various threads here about people accidentally removing the shift fork pivot screw, it seemed like that fit what was going on, so I disassembled the lower unit. Knowing no history on this boat, I felt this to be a good decision anyway to see for myself what condition the internals were in. The good news - gears, bearings,clutch dogs all looked great. The bad news - the hinge pin and clutch fork were terribly bent, well beyond reuse. I found an 85hp Force on Facebook for $100, bought it, disassembled, and used the clutch fork from there(and now have more extra parts, and can still sell parts from the powerhead to get my money back from it.) The female threads in the lower unit case were stripped out from trying to get that pin out, so I ended up making a new pin from a 5/16 Stainless allen screw, and grinding down the threads and shaft. (A lathe would have made this a lot simpler! Someday...) I also of course had to re-tap new threads in the lower unit itself. No big deal, just another minor setback. I put the lower unit back together and all is well.
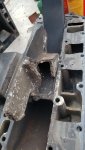
Since I was this far, I figured it would be incredibly silly to not dig in a little deeper into the l-drive assy itself to see what serviceable parts may need attention. I'm glad I did. The driveshaft/ujoint assy was in great shape, so I greased it up good, squeezing out all the old grease and cleaning up the excess. From what I've read, it is claimed to be a non rebuildable part with a cost of $500+. I'm not sure why it wouldn't be rebuildable, as it is nothing more than two u-joints. Maybe they are a wierd size/hard to find. Regardless, they were good. There is a sealed bearing that was shot, but it is a common bearing and found one at the local auto parts store. It is all back together now, and mechanically speaking, I know what I am dealing with and everything under the motor should be reliable for a while. Engine problems- well that's always an unknown when something is going to break down, but at least I know the whole drivetrain is good to go.
Next minor obstacle- the trim. I removed all the relays from the original system and thought I could use the ones that are mounted directly to the '96 powerhead. Nope. What I didn't realize at the time is that the Ldrive trim uses a 2 wire trim motor, and the '96 outboard trim uses a 3 wire. On the two wire setup, not only do the relays have to switch witch wire is hot to select which way the motor spins, but also grounds the other wire. In the 3 wire version the solenoids only energize one hot wire or the other, and the 3rd wire is the ground. I would like to mount the 3 wire motor in the boat, but I'm not sure that will be worth the hassle. It will be just as easy to reinstall the 5 pin relay setup that was originally in there(new relays of course). For our trip this past weekend I just touched the trim motor wires to the battery a couple times to adjust as necessary as my wife drove. It got us on the water for the day, but obviously I will need to finish fixing it right.
The 96 motor does have a tell tale stream, but is extremely weak to non-existant at low rpms(impeller is new). The motor never overheated though, as I was constantly watching and paying attention to it. I did ground the overheat sensor just to test and make sure that the buzzer does indeed work - it does. From my understanding, this tell tale is after the thermostat. I see where some people have added one before the thermostat to try to get a better reading of the impeller condition. I may try that. That's about it for now, hope it helps someone else down the road!
 
Last edited:

chris2020

Cadet
Joined
Jun 9, 2020
Messages
9
Thanks! I also did move the tell tale yesterday, to the other port before the thermostat, and it made all the difference!
 
Top