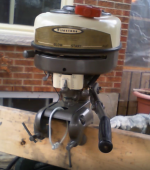
Firestone 2hp 10A130 restoration project

Plankwalker

Petty Officer 3rd Class
Joined
Sep 28, 2020
Messages
79
Paint anxiety
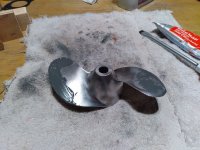
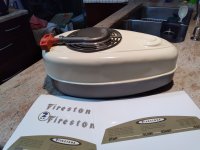
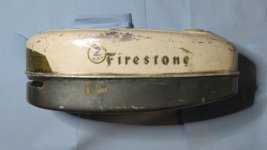
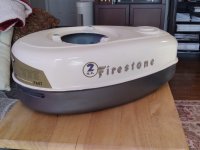
You can see in the photo how the clear coat paint is causing the paint underneath to wrinkle. I am going to try a different brand to see if it makes a difference. in then mean time, I will strip the paint off this propeller yet again. Check out the entire restoration here: Garage Sanctuary - YouTube
Some of my previous links to specific videos may not work, as I had to repost some videos. my bad.
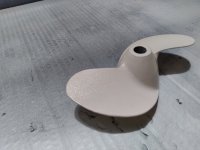
20210331_200937.jpg
 

Meames1

Petty Officer 2nd Class
Joined
Dec 14, 2020
Messages
157
Yep, different chemistry paints causing lifting. Usually, that has to do with a more aggressive solvent in the top coat (in this case your clear) than in the base coat causing it to break down the solids in the base layer. Try to use the same brand paint and clear. Also common when mixing lacquer, enamel, and urethane's. Which can be tough as it's not always easy to tell by the can what type paint you are getting. Good Luck !

BTW, nice little project

Edit: I just re-read a page back and saw how both paint and clear are / were Rustoleum. My one complaint about Rustoleum is the length of time for it to cure. I suspect maybe the first coat was not fully cured when you put on subsequent coats and it was still off-gassing and "soft" when you put on their clear...which may be a more aggressive solvent to flash quicker as it's clear and would help with not getting dust etc in the finish. The combination of the clear flashing quicker (having a hotter solvent) and the still curing base coat could also cause the lifting you're getting.
 
Last edited:

Plankwalker

Petty Officer 3rd Class
Joined
Sep 28, 2020
Messages
79
Yep, different chemistry paints causing lifting. Usually, that has to do with a more aggressive solvent in the top coat (in this case your clear) than in the base coat causing it to break down the solids in the base layer. Try to use the same brand paint and clear. Also common when mixing lacquer, enamel, and urethane's. Which can be tough as it's not always easy to tell by the can what type paint you are getting. Good Luck !

BTW, nice little project

Edit: I just re-read a page back and saw how both paint and clear are / were Rustoleum. My one complaint about Rustoleum is the length of time for it to cure. I suspect maybe the first coat was not fully cured when you put on subsequent coats and it was still off-gassing and "soft" when you put on their clear...which may be a more aggressive solvent to flash quicker as it's clear and would help with not getting dust etc in the finish. The combination of the clear flashing quicker (having a hotter solvent) and the still curing base coat could also cause the lifting you're getting.
Thanks for the input. I have another brand of clear coat coming in the mail and will be testing it on the prop and test strips before attempting the final finish on the tank.
 

Plankwalker

Petty Officer 3rd Class
Joined
Sep 28, 2020
Messages
79
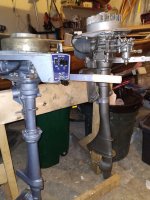
This is the third time I have stripped this propeller. Perhaps it is the universe's way of telling me I really should fill in some of those scratches.
20210401_191155.jpg
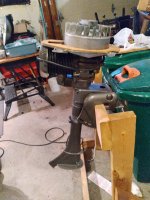
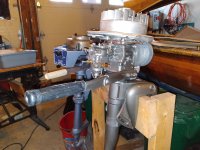
I attached the engine to the midsection, but did not film it. Its kind of straight forward. By the way, I had to remove the flywheel again because I forgot to check the point gap. I could have tested it while I had the plate sitting in a box for the past couple of months. Turned out the gap was spot-on at 0.020". I will make sure to film the lower unit going on for the hell of it. Looking forward to testing it.
Garage Sanctuary - YouTube
20210401_191212.jpg
After this project, I have a car rebuild and impeller replacement to do on a 1977 2hp Evinrude and some stripping and varnishing to do on a 14' wherry before May. I better get my buttocks in gear.
 
Last edited:

Plankwalker

Petty Officer 3rd Class
Joined
Sep 28, 2020
Messages
79
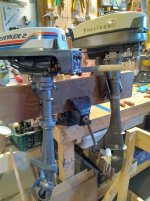
Almost ready for testing. Checked the compression cold. I got it up form 50psi to 65. Not great, but I hope once the engine is warmed up, the rings will expand and bring it up more. I am waiting for new fuel lines. I opted to install an inline filter as well. In the photos, you also see a 77 Evinrude that I just complete a tune up on. Gearcase seals and o-ring replaced, carb rebuild and a new water pump.. Compression on this is a solid 90psi cold.
20210405_130916.jpg20210405_130931.jpg
 

Plankwalker

Petty Officer 3rd Class
Joined
Sep 28, 2020
Messages
79
Ready for testing.
Its done. Nothing left to do but add fuel and try it out.
But, before I do, I ordered a tachometer so I could tune in the correct RPM.
It will be here in a week.
two engines.jpg
 

Plankwalker

Petty Officer 3rd Class
Joined
Sep 28, 2020
Messages
79
I AM DONE!!!! I tuned the fuel mixture to keep the RPM to around 3700, a bit under the 4000 the engine is rated for. Now I need to finish restoring the boat I want to use it on. If you have any questions or comments, you best leave a comment on the youtube channel. See you out on the water.
Garage Sanctuary - YouTube
final.png
 

Plankwalker

Petty Officer 3rd Class
Joined
Sep 28, 2020
Messages
79
LESSONS LEARNED FROM SHAKEDOW

I have had a chance to use the Firestone 2hp (Westbend/Elgin) out on the water and I have learned a few lessons.

1) Gas melts paint. That is, solvent based spray paints will not stand up to fuel spills, carburetor leaks, and leaking gaskets. The solution is to use 2K paint, that is, two part epoxy paints. In my case, I will try and put on a 2K clear coat over my existing finish.

2) Mystery carburetor leaks. When I tilt my engine forward, fuel would drip out the carburetor. I checked the high speed fuel needle and this lead me to discover that the fuel was leaking out of the main air intake.
I thought that maybe my float was adjusted too high and brought in too much fuel and it spilled over the top when tilted. Turns out the issue was very simple. I left the fuel spigot open. When the engine is tilted, the float drops and the needle opens. If the fuel spigot is open, the carb just fills with fuel and eventually fills out the air intake.

3) Metal & Fabric gaskets need to be rebuilt. The gaskets between the crankcase and exhaust, and the lower unit are a combination of fabric and metal. You need to dismantle these completely, cut new fabric, and then reassemble them. Don't forget to use additional fabric gaskets between all metal to metal contacts and use gasket sealer. In my shakedown, I had fuel leaking out the seam between the lower unit the engine block.

Right now, the poor little engine is dismantled again and waiting for paint touch ups, and 2K clear coats. Newly rebuilt gaskets are done and once the painting is done, the engine will be rebuilt and hopefully the second shakedown will go better. Otherwise, I find the engine is very reliable and a pleasure to use.
 

Plankwalker

Petty Officer 3rd Class
Joined
Sep 28, 2020
Messages
79
The little Firestone is all put back together now. The parts got 3-4 coats of 2-part epoxy clear coat. Redid the gasket seals between the engine block and mid section. I also added an inline fuel spigot. The old brass one is good, but still lets a bit of gas seep through. It runs so well. It starts with a slow pull and the RPM range is from 800 to 4000.
I took a quick video of the engine out on the water.
 
Top