Bravoitis Fix . . .

Status
Not open for further replies.

tpenfield

Moderator
Staff member
Joined
Jul 18, 2011
Messages
18,019
As follow up to my over heating thread from last year (an issue which seems to be resolved), I did discover the beginning stages of Bravoitis on my Port outdrive. So, I planned on doing the Bravoitis fix on both drives as a preemptive measure.

Fast-forward to now . . . the company that I work for is having some building renovation work done and they have asked that everyone 'work from home' over the next 2 weeks ( yea, right :D ). So, I have started in on the Bravoitis fix.

I know that with the engines out of the boat, the fix is pretty much a slam-dunk . . . but . . . the engines are too heavy for me to lift :rolleyes: , so I'm doing this with the engines in the boat.

I got the bell housings off . . .
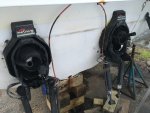
IMG_9890.jpg

. . . and have removed the inlet hose that leads to the sea water pump and also removed the hose fitting that attaches to the transom assembly. Of course during that process I dropped a 7/16" box wrench into the abyss on the starboard drive. I could see it still within the area of the transom assembly, but as I tried to reach it, it went further into no-mans land :facepalm: I may have to pull the gimball bearing out to get my hand in there to pull it out. If I don't get the wrench out, I'm sure with my luck it will find its way into the driveshaft coupler area and make a spectacular noise and associated destruction when least needed. :rolleyes:

Anyway, I digress . . .

I have run into a bit of an issue that I'd like to get some collective wisdom and ideas on . . .

Since there is some Bravoitis already started, the insert removal tool (see below)
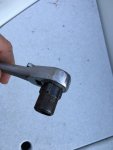
IMG_9892.jpg

does not want to go into the now restricted fitting on the inside of the transom assembly (the insert at the bell housing was no problem) . . . I assume that it is the same insert in both ends of the tube :noidea: . The fact that access to that area is difficult with the engines in the way makes it even more difficult. but the standard plastic inserts now seem to be smaller than the tool needs, so it won't go in. the port side outdrive is a bit more severe and the plastic fitting is partially collapsed. The starboard side is intact although shrunken to the point where the tool won't fit.

I have these 'kits' from Mercruiser (quicksilver) to replace the standard hose installation.
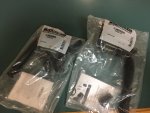
IMG_9893.jpg

I chose these kits versus the Hardin kit, because they are plastic in the critical area instead of stainless steel, which in my mind would just add to the root cause of Bravoitis (i.e. galvanic corrosion). I believe that AllDodge used this kit when he was referb'ing his boat a year or two ago.

Anyway, I am wondering since I am not able to remove the plastic inserts that would free up the hose from the inside, should I attempt to cut the hose from the outside and bore into the remainder of the hose to get hose and fitting out?

Not sure if anyone has direct experience or advice, but before I fully open the can of worms, I'd thought I'd float the question out there for comment.

Also, any additional advise (short of getting a new boat, as we have already discussed that ideas :rolleyes: ) is welcome and appreciated.

T. I. A.
 

alldodge

Moderator
Staff member
Joined
Mar 8, 2009
Messages
41,870
Yep those plastic inserts squeeze down once installed. I cut the hose and used a flat blade screw drive and drove it out from the stern toward the motor. Came out pretty quick.

As for the wrench, maybe try a magnetic retrieval tool to grab it
 

tpenfield

Moderator
Staff member
Joined
Jul 18, 2011
Messages
18,019
Yep those plastic inserts squeeze down once installed. I cut the hose and used a flat blade screw drive and drove it out from the stern toward the motor. Came out pretty quick.

As for the wrench, maybe try a magnetic retrieval tool to grab it

Thanks AD . . . sounds like a good idea.

As for the wrench . . . last time I took the engine out of my boat, I nearly doubled my wrench inventory :D
 
Last edited:

tpenfield

Moderator
Staff member
Joined
Jul 18, 2011
Messages
18,019
Cutting the hose and pounding out the insert from the outside in worked great :thumb:

Here are a few pix

Cutting the hose to expose the insert . . .
IMG_9895.jpg

I broke the insert up with a screw driver and a bit of pounding.
IMG_9897.jpg

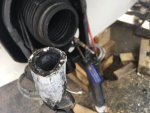
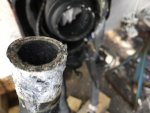
After a bit of persuasion the hose came out. This one is the port side, you can see the deformation of the hose end caused by the early stages of Bravoitis.

IMG_9898.jpg

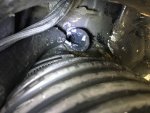
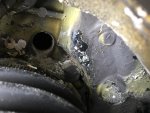
Here is the opening where the hose is secured . . . a fair amount of corrosion dust is present.
IMG_9899.jpg

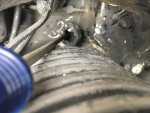
Here is the same for the Starboard outdrive . . . not as bad, no signs of deformation, but plenty of corrosion dust.
IMG_9907.jpg

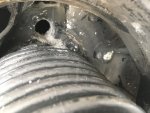
Here is the opening . . .
IMG_9909.jpg

I got to get me one of those round wire brushes to clean up the transom opening, then do a bit of prep work and painting. Then install the new kits.

One thing about these 'kits' it seems that they are more resilient to the 'crushing' effect of corrosion in that area, but do not really do much to prevent further corrosion. Thoughts? . . .
 

alldodge

Moderator
Staff member
Joined
Mar 8, 2009
Messages
41,870
One thing about these 'kits' it seems that they are more resilient to the 'crushing' effect of corrosion in that area, but do not really do much to prevent further corrosion. Thoughts? . . .

Have to agree, the corrosion of the housing will remain an issue. The prevention is still something we have to tend with. Being in fresh I didn't give it much of a thought
 

scoflaw

Ensign
Joined
Jun 2, 2010
Messages
962
trying to cool big blocks with a 3/4" inlet hose that's prone to corrosion seems like a waste of time. Thru hulls with 1 1/2" thru strainers to the pumps is the way to go. Your drives will actually run cooler with that 3/4" hose disconnected at the bell housing.
 

tpenfield

Moderator
Staff member
Joined
Jul 18, 2011
Messages
18,019
trying to cool big blocks with a 3/4" inlet hose that's prone to corrosion seems like a waste of time. Thru hulls with 1 1/2" thru strainers to the pumps is the way to go. Your drives will actually run cooler with that 3/4" hose disconnected at the bell housing.

Yes, not to mention that these kits are nearly impossible to install with the engine still in the boat :facepalm: I had about a 2 hour fail today trying to install the starboard drive hose. I may take you up on your suggestion. . . only problem is that I'd probably have to remove the engines to get a thru-hull installed near the transom. . . . Maye it could go a few feet forward :noidea:
 

scoflaw

Ensign
Joined
Jun 2, 2010
Messages
962
My thru hulls are forward of the engines 2006 280sundancer with closed cooled 5.0's. Install looks simple enough.....hoses and routing could be an issue
 

Bondo

Moderator
Staff member
Joined
Apr 17, 2002
Messages
70,891
last time I took the engine out of my boat, I nearly doubled my wrench inventory
biggrin.gif

Ayuh,.... Now, That's Funny,....

A through-hull can be installed in 'bout any of the wetted surface,....
No need to be extreme aft,....
 

alldodge

Moderator
Staff member
Joined
Mar 8, 2009
Messages
41,870
Turn the helm to full port. This allowed me to get enough room to replace
 

tpenfield

Moderator
Staff member
Joined
Jul 18, 2011
Messages
18,019
Turn the helm to full port. This allowed me to get enough room to replace

Yes, did that. It seems that I cannot get the fitting lined up well enough so that the bolts will go back in. I can catch a single thread, but then at about 1/2 turn the bolt binds up. I can thread the bolt in all by itself, and the bolt has enough clearance going thru the fitting to grab a few threads, but without being able to see directly, it is all guess work, and the whole thing is being quite uncooperative. :rolleyes:

What is making the starboard tougher is the tie-rod that goes across from the starboard steering arm to the port steering arm adds one more thing that is in the way.

After a couple hours at it, I gave up for the day. Gonna take another run at it today . . . usually that helps . . . if I go away and come back at it the next day. I'm thinking if I can wedge something in between the fitting and the coupler (which is about 3/4" away) to hold the fitting in place I can free up the hand to focus on the bolt and not trying to hold the fitting and the bolt.
 

tpenfield

Moderator
Staff member
Joined
Jul 18, 2011
Messages
18,019
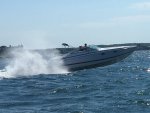
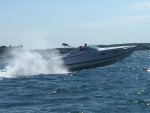
As far as converting to thru-hull water pick-ups . . . If I went that route (eventually), I would like to get the positioning as close to the transom as possible (maybe within a couple feet) as we often 'catch some air' when out in the bay, as per the picture below.

F-330-Waves.jpg

So, I would not want to be sucking air all too often
 

Attachments

  • F-330-Waves.jpg
    F-330-Waves.jpg
    226.3 KB · Views: 5

camalot

Petty Officer 2nd Class
Joined
Jul 24, 2012
Messages
144
Your quite a ways into the job now so you might as well finish what your doing, but we don't even change them out anymore. We just fit a thru hull water feed and be done with it, the average boat take 4 hours to do.
We tend to put the strainer pick-up just in front of the engine if allowed, this gives you access to turn the sea **** off and makes it easier to install. This works really well for the 496 2004 and up which can go into guardian after around 10 seconds @ WOT but not give any codes as to why.

The only tell tail is in the freeze frame and "block pressure" reading of around 7 psi, engine temp and manifold temp are all good but just not enough water flow for the end so it will switch you off but not give a code.
 

alldodge

Moderator
Staff member
Joined
Mar 8, 2009
Messages
41,870
Can see the tie rod being an issue, also the intake plenum. I did my Rinker which is a carb. Installed the upper one first and just let the fitting hang down. There was enough room to get it over the line.

guardian......"block pressure" reading of around 7 psi

Those water pressure sensors cause more issues then almost anything else on the motor. The pump does just fine pulling sufficient water thru the drive for most apps. A few times a years folks are trying to figure out how to bypass them.
 

camalot

Petty Officer 2nd Class
Joined
Jul 24, 2012
Messages
144
Those water pressure sensors cause more issues then almost anything else on the motor. The pump does just fine pulling sufficient water thru the drive for most apps. A few times a years folks are trying to figure out how to bypass them.

Your right the pressure sensors are quite troublesome, but that was not what I was trying to get across;), the stock 7/8 hole/hose is marginal at best trying to feed a 1"1/4 pump. Coupled with the 2004-up 496 ecm/pcm will set the guardian, 7 psi will not set a "low block pressure" alarm but the ecm/pcm can/will predict that it does not like the 7psi @ WOT and shut you down before any over heat condition is reached.

On the same engine after the thru hull intake was fitted we could see 23 psi WOT
 

alldodge

Moderator
Staff member
Joined
Mar 8, 2009
Messages
41,870
I understood your point, my point is that same 7/8 ID line works without issues of keeping motors cool on even higher HP motors.
 

tpenfield

Moderator
Staff member
Joined
Jul 18, 2011
Messages
18,019
Well, this morning I started in on the port outdrive, figuring that . . . yes, this one might be the easier of the two. :) . . . After two hours, I'm not making much progress. I think the Merc kit is a bad design . . . really meant to be fitted with the engine out of the boat, and maybe even the transom assembly out of the boat.

I'm thinking that the Hardin kit may have been better, but that train has left the station.

I've added a bit of bevel to the end of the plastic tube segment of the hose assembly, which goes through the transom. It seems the hose/tube assembly needs to go in very straight in order to slide through the rubber press fitting and then on through the the installation fixture provided with the kit.. With the square edge of the tube, it either hangs up inside the rubber fitting or is misaligned going through the tool fixture.

Definitely not a slam-dunk as far as installing it.
 
Last edited:

alldodge

Moderator
Staff member
Joined
Mar 8, 2009
Messages
41,870
I found it works if you use soap, and have the bolts just holding the rubber piece in. Once it slides in, it can be pulled back out some if need be
 
Status
Not open for further replies.
Top