4.3 Wet to Dry-Joint Conversion.

XjasonX

Cadet
Joined
Feb 5, 2023
Messages
7
Hey Gang,

My boats being a boat again and would like to get some opinions. I’ve recently installed a new rebuilt engine. I reused the old risers and manifolds since they were less than two years old. They looked ok other than a gasket leak which killed the previous motor. The gasket surfaces were machined and cleaned up nice but it’s still developing an external leak at the gasket. Thinking it was a gasket issue I replaced them again, this time with the BARR ones which they recommend sealing with aviation gasket sealer, unfortunately there still leaking.

I’m over it at this point and would like to update them with the new style dry joints. Is it’s possible to swap out my wet style manifolds and risers with the newer dry joint type for my 4.3 Vortec engine. The boat currently has 3 inch spacer blocks with a 7 degree wet style riser. The research I’ve done, it seems possible but it gets a bit confusing with the 3 inch spacer blocks. If I buy the 7 degree dry joint riser, manifold and 3 inch blocks will it be a direct replacement? Are there any pros/cons that I should be aware of if I do make the swap?

Addition information about the engine in question,
It’s operates in SoCal Saltwater, it has a half closed cooling system and the engine number falls in this range - 4.3L (GEN +) (4BBL) Reman - 1G400000 & Up
 

alldodge

Moderator
Staff member
Joined
Mar 8, 2009
Messages
42,014
You can go from wet to dry and from half to full closed cooling, just need to know what your starting with.

Which thermostat housing do you have?
 

XjasonX

Cadet
Joined
Feb 5, 2023
Messages
7
Thanks alldodge, I have what looks like a normal automotive (except is appears to be brass) t-stat housing. The hose goes directly to the heat exchanger. The T-stat opens at 160.
 
Last edited:

alldodge

Moderator
Staff member
Joined
Mar 8, 2009
Messages
42,014
Post pic please because there are several models. The model will determine how hoses need to be routed
 

Lou C

Supreme Mariner
Joined
Nov 10, 2002
Messages
12,607
I recall reading about this because I thought of converting my OMC over to the Merc dry joint style. I have had the OMC/Volvo style wet joints on it for 7 years and no leaks so far (also Barr aftermarket).
Reading up on it, for a Merc that came with wet joint originally, there is a kit to allow you to use the original Y pipe, which otherwise would have had to been changed. Barr also makes an aftermarket version of this, pricing is better than Merc's for sure. Can't answer the question of what the spacer blocks add to the conversion in terms of angles/etc.
On your wet joints, here are a few points that might be worth re-visiting...
After machining did you check the flatness of the sealing surfaces with a straight edge and feeler gauges? Should be less than .003" variation...
Also are you sure that the bolts are not bottoming out and are fully tightening down the elbows to the manifolds? It might be worth running a thread chaser through the threads to make sure they thread in all the way.....
 

XjasonX

Cadet
Joined
Feb 5, 2023
Messages
7
4.3 .png

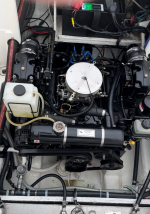
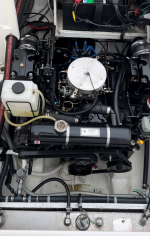
Alldodge, Here’s a photo of how the Tstat and cooling system are.

@Lou C, I’ll be honest I left some information out because I didn’t think it was important. The rebuild I originally received had a noise which I shipped back to the builder. They made it right and send me another motor. When I put the original motor in I did check the flatness with a straight edge and they were okay. I used the smallest feeler gauge I had. .003 sounds about right. I didn’t think anything about it at the time so I cleaned up the surfaces and reinstalled the exhaust. Since then I’ve gone through 4 gaskets trying to seal up the exhaust. After the exhaust was machined I did check the studs to confirm I had enough threads to clamp the exhaust down. There was more than enough threads to accomplish clamping the exhaust. In the last installation I did notice some pitting on the exhaust but it did seem minor, I thought the gasket should have been more then capable of sealing it up.

My reasoning for just replacing at this point is because spending another $300 to machine the surfaces for now half life manifolds just seems like Im stepping over dollars to pick up dimes. I don’t trust what’s on there and want to move forward, for hopefully worry free boating 😂.
 

Attachments

  • 4.3 Tstat.png
    4.3 Tstat.png
    5.4 MB · Views: 9

alldodge

Moderator
Staff member
Joined
Mar 8, 2009
Messages
42,014
Thanks
It's a after market closed cooling, so I guess your about stuck with a half system instead of full system. Not that it couldn't be done, but with take some more thinking

Anyway, this LINK shows all the parts
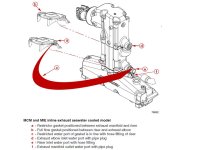
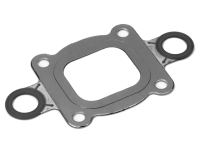
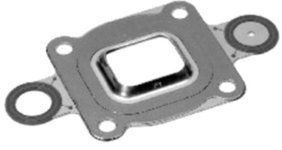
Item 12 or 20 (listed twice) is the gasket and there are two types, restrictive (864850A02) and closed. You need the restrictive ones if buying the gaskets separately

Found the 7* elbow, and 90* (above)
Can get the 3 inch riser kit with all the parts using item 19 (864929A1) for open cooling. Your block is closed but exhaust is open

The 90* is Merc
The 7* is Barr
 

Lou C

Supreme Mariner
Joined
Nov 10, 2002
Messages
12,607
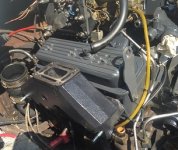
When you say you saw some pitting on the exhaust, do you mean the sealing surfaces? If so that might be the problem, when new they should be free of pits and well machined. Here's an old pic of mine from when I installed them 7 years ago.
 

Attachments

  • Manifold installation with 2 long bolts 2....2.jpg
    Manifold installation with 2 long bolts 2....2.jpg
    56.1 KB · Views: 8

stresspoint

Lieutenant Junior Grade
Joined
Sep 19, 2022
Messages
1,035
if i had to take a guess ! , start looking for a crack in the component's. sometimes these can be hard to see but there are tests available that will show the smallest crack in steel.
 

XjasonX

Cadet
Joined
Feb 5, 2023
Messages
7
Thank you everyone for providing input.

Alldodge, from my novice understanding when checking the Mercruiser exhaust gasket bulletin the system I would fall under reference 4c, with the water exiting out the heat exchanger to the both manifold elbows at the bottom. While this is a conversation and my setup is somewhat unique, is there a reason I would use the restricted over the open ones that the bulletin calls for?

When I had replaced the original manifolds it did have the restrictive ones installed above the spacers, after much research and confusion I followed the bulletin and installed the 4 (open) slot gaskets on the upper and lower surfaces of the spacer.

@Lou C, you are correct there was some very minor pitting on the surfaces, they weren’t new, I had installed them on the previous motor. I block sanded them to a clean finish but they were still visible, mostly around the exhaust discharge. One thing I did notice was the water passages were eroding at the top edge on all 4 slots at the manifold surface. The center discharge port looked like it had a decent amount of area to seal still /shrug.

One other reason I’m prone to do the conversion it’s for the turbulators, I have found that if I don’t keep the exhaust warm it tends to pool up condensation inside the manifold, which I verified with a boroscope, the Sierra risers have a small port on the top that I can stick a camera down for a visual check.

*edit
To clarify, the condensation seems to be from excessive idling and warm up.
 
Last edited:

Lou C

Supreme Mariner
Joined
Nov 10, 2002
Messages
12,607
I think once the sealing surfaces get narrowed down it’s time to change em.
 

alldodge

Moderator
Staff member
Joined
Mar 8, 2009
Messages
42,014
Old style man restrictor gasket help keep mans full of water. By restricting some of the flow, this allows both sides to be full and closer to even. If no restriction is used then one side is always a bit warmer then the other. Could get into it further but you need manual 37 when using dry joint
Dry will place hose on top of man

Slide1.JPG27_864547a02 gasket full flow.png27_864850A02 Open gasket.jpeg
 
Top