2003 Yamaha F25 Runaway Throttle on Start

WasabiBobby

Cadet
Joined
Feb 15, 2024
Messages
10
I've been working on fixing up my 2003 Yamaha F25 ESRB that has sat for a few years. I've replaced the motor oil, fuel filter, spark plugs, and impeller. I went ahead and wrote off the old fuel system outside of the engine. Brand new tank, lines, fuel/water separator, fittings, and gas.

It actually started up fairly easily for about a minute on the first try. Eventually it started chugging slower and slower, then shut off. From there it really did not seem to want to start. I checked to ensure the primer bulb was firm, kept trying, it would hit a couple times very slowly, and then stop. After going through this a few times, it started right up, ran like it should for an instant, and almost immediately accelerated like I was giving it full throttle (it was still in neutral). I shut it down, restarted it, and the same thing happened. When it did it a third time I shut it down and decided to step back and re-assess.

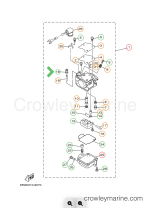
Fuel is leaking inside the engine. Lines are in good shape, not leaking near the fuel filter, and things are moving as-expected when I manipulate the throttle. The only thing clearly amiss is the "Plunger Cap Cover" which is torn. I can see a small amount fuel leaking from there when I manipulate the throttle.
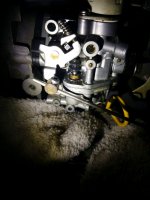
54279.jpegScreenshot 2024-02-15 at 18-57-56 CARBURETOR - 2003 Outboard 25hp F25ESRB Crowley Marine.png
From my limited understanding this is related to the Starter Assembly. Obviously this needs replacing but I want to ensure I am addressing the root cause of the problem here. Is something else likely causing the runaway throttle and the damaged cap cover? Could this damaged cover and the resultant leakage lead to the issues I've described? If I am replacing this are there other likely issues I should go ahead address in the carb when I replace this part since it has sat for three years? If so, looking at parts pricing, is there any reason I should opt for a rebuild over a complete replacement assembly for $70 if it ends up being more economical? Thanks in advance for any input.
 

99yam40

Fleet Admiral
Joined
Sep 7, 2008
Messages
9,094
motor needs more fuel and air to rev up or timing has to be advanced.
if the throttle plates are still closed off, I would be checking to see what the timing is doing with a timing light
 

WasabiBobby

Cadet
Joined
Feb 15, 2024
Messages
10
motor needs more fuel and air to rev up or timing has to be advanced.
if the throttle plates are still closed off, I would be checking to see what the timing is doing with a timing light
Based on the rate of acceleration I am pretty confident it's getting more than enough fuel and air now. It's revving like it is wide-open throttle almost immediately after starting despite being in neutral. It went to starting almost immediately and continuously accelerated. I shut it down within 10-15s each time it did this as I was worried it might damage something. It accelerated like this in neutral so the throttle plates should have still been closed.

I do not have a timing light and have not used one before. I have friends who are more experienced that could help me with diagnosing this. Is it safe for me to try this with the acceleration like I have going on? Other than being at a wide-open RPM it seems to be running fine.
 

99yam40

Fleet Admiral
Joined
Sep 7, 2008
Messages
9,094
throttle plates should be closed in neutral, does not mean they are.
you have to check if they are closed like they should be or open for some odd reason.
linkage came off, or stuck linkage throttle plates maybe.
Not sure what controls the timing on that motor, but a timing light will tell what it is doing

dumping extra fuel without the extra air would mean the motor would flood out.
advanced timing is the only thing that I can think of that would cause RPM to go up without opening the throttle
 

WasabiBobby

Cadet
Joined
Feb 15, 2024
Messages
10
throttle plates should be closed in neutral, does not mean they are.
you have to check if they are closed like they should be or open for some odd reason.
linkage came off, or stuck linkage throttle plates maybe.
Not sure what controls the timing on that motor, but a timing light will tell what it is doing

dumping extra fuel without the extra air would mean the motor would flood out.
advanced timing is the only thing that I can think of that would cause RPM to go up without opening the throttle
I believe I owe you several beers. I need to find some better information on timing with my motor but I believe you were on the money.
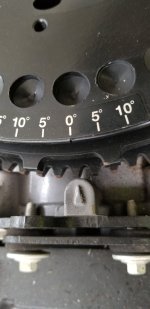
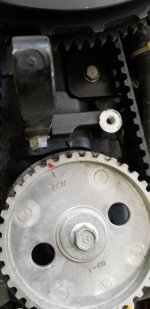
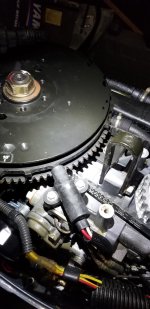
20240216_173421.jpg20240216_173435.jpg
Considering the mark at 0 degrees is the only mark I can discern on the rotor assembly, I am assuming it is the timing mark. The angle makes it look like they're not quite aligned but they are dead on. It's off by two teeth on the cam pulley. I also noticed the timing belt has quite a lot of slack in it.

I'm unable to find confirmation that's the timing mark on the rotor. The reference and videos I've found are with recoil starters. Assuming this is the case, am I needing to do anything further than replacing the timing belt with the rotor/pulley in the correct positions? Is there further damage that's likely?

I really appreciate all of the help.
 

99yam40

Fleet Admiral
Joined
Sep 7, 2008
Messages
9,094
I was talking about the timing when the spark plus fire.
a timing light shows how many degrees before or after top dead center the plugs get spark.

you are looking at the timing of the cam shaft and crank shaft.
but you need to read your service manual to find the proper way to verify that timing.
some motors do not have enough clearance between the pistons and valves to clear each other when that timing jumps.
so you need to make sure about what you are doing and if your motor could have that kind of problem.
 

WasabiBobby

Cadet
Joined
Feb 15, 2024
Messages
10
I was talking about the timing when the spark plus fire.
a timing light shows how many degrees before or after top dead center the plugs get spark.

you are looking at the timing of the cam shaft and crank shaft.
but you need to read your service manual to find the proper way to verify that timing.
some motors do not have enough clearance between the pistons and valves to clear each other when that timing jumps.
so you need to make sure about what you are doing and if your motor could have that kind of problem.
Thanks for the input. I've got the service manual and you're exactly right. The flywheel markings are for viewing through a window in the a plastic cover to check ignition timing. There's a driven sprocket below the flywheel with its own marking. For my own peace of mind I used a borescope and pulled the spark plug. TDC is right where the markings align on the driven pulley.
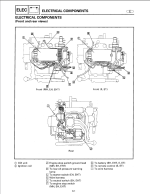
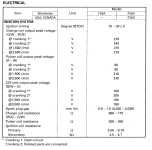
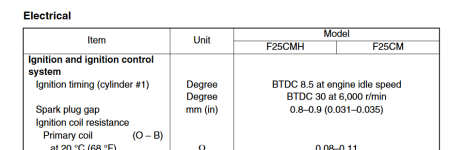
I'm borrowing a timing light tomorrow. I've watched a couple of videos on using one and saw two distinct ways. One with the spark plugs pulled and measuring it when the starter is turning things. The other when the motor is running. I'm assuming I want to do the former to prevent potential damage from revving with no load? Here is what my manual says regarding the timing specs:
1708204864792.png
I noticed this is a broad window and lacks RPM specs like I noticed in other manuals. Assuming it is advanced timing, how would I adjust this? It is a magneto flywheel/pulser coil and I have come up empty on finding any guidance for adjusting that. Other than that pictured spec my manual doesn't even mention ignition timing. In a manual for different F25s I get guidance on checking the timing but again no mention of adjustment. Would it just be pulling the flywheel and realigning it? Or is this something electronically controlled where I need to get my multimeter to test those components?
 

99yam40

Fleet Admiral
Joined
Sep 7, 2008
Messages
9,094
My C40TLRX (2 stroke) has a linkage from the throttle linkage to a wiper on the CDI.
this tells the CDI what position the throttle is in

the CDI also has inputs telling the motor when the motor has warmed up or overheated.
the CDI somehow changes the timing electronically using the inputs.

I will say I had to replace my CDI when the idle timing was too far retarded and I could not get everything to work properly until I put a new CDI on.

Older motors had a link that moved a plate that the components under the flywheel ride on that advanced the timing as the throttle was moved.

Sorry, I have no clue how your motor works the timing

I would think you would need to ground the spark plugs with them not in the head so the spark can happen .
timing light has to monitor for the spark

You need to read deeper into the ignition system in your manual not just the spec page.
should be idle and WOT timing specs in there somewhere.

Could be idle timing is 10 and WOT is 30
my guess anyway
 
Last edited:

WasabiBobby

Cadet
Joined
Feb 15, 2024
Messages
10
Thanks for the reminder about grounding. I think your guess is pretty good. In the manual for a different F25 it reads like this:
1708213724645.png
The manual PDF is small enough I can attach it here. I've gone through it several times praying I can find more information than I've already provided. If it's in there and I somehow missed it I'd be ecstatic just to have the knowledge. I don't see anything connecting the throttle/linkage to the CDI. I'm also not seeing any plates like you describe under the flywheel.
1708213867227.png1708213985756.png1708214277306.jpeg
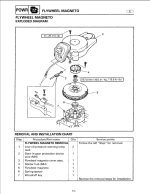
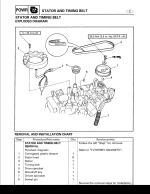
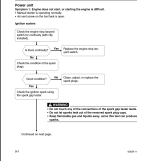
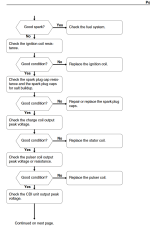
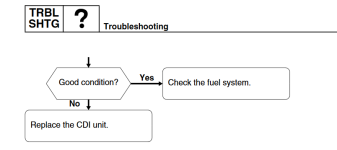
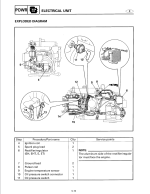
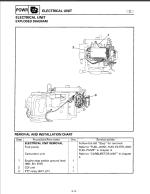
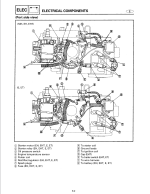
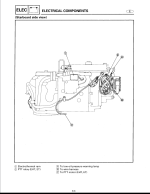
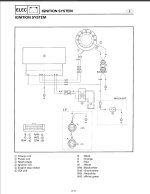
My best guess is the CDI is doing its computer thing when it reads that gap in the "teeth" on the middle portion of the flywheel. I'm guessing unless the woodruff key on the flywheel gave up the ghost my theory of adjusting its position is out. That F25C manual has what seems like a logical flowchart for working through the ignition system. Here's those pages along with wiring/diagrams from the correct manual:
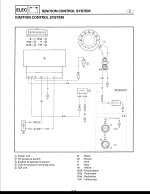
1708214544532.png1708214559901.png1708214588170.png1708214032104.png1708214072334.png1708214101795.png1708214118873.png1708214138308.png1708214167968.png1708214220109.png
If I get to the "Check the Fuel System" step I would probably start with the "Electrothermal Ram" that handles warmup and the "Enrichment Control System" from my understanding. Although at a cool ~$320 for OEM I'm right back to that $70 non-OEM carb assembly that includes one.
 

Attachments

  • 339000-Yamaha_F25ESRB_Outboard_2003.pdf
    6.5 MB · Views: 1

99yam40

Fleet Admiral
Joined
Sep 7, 2008
Messages
9,094
I am of no help, I do not see anything either in that manual on the timing.
But I did notice at the end it is for a 1999 F25X
Whatever that means.
did you ever check to see if the throttle plates in carbs close all the way when you back off the throttle?
 
Last edited:

WasabiBobby

Cadet
Joined
Feb 15, 2024
Messages
10
I am of no help, I do not see anything either in that manual on the timing.
But I did notice at the end it is for a 1999 F25X
Whatever that means.
did you ever check to see if the throttle plates in carbs close all the way when you back off the throttle?
You've been infinitely helpful. I found potentially-conflicting guidance that the manual should be F25X-B but have not found any definitive guidance that this one is incorrect. Based on the included reference numbers I'm fairly certain it is correct. I have not seen any depictions that make me think it isn't.
1708222990136.png Viewing the throttle plates at all required removing the whole carb assembly and therefore disconnecting the linkage.* Externally the linkage all looked in good order. If timing comes back normal tomorrow I'll plan on removing the plastic breather tube and reinstalling the carb so I can view them with the linkage connected.
*N.B. for other readers: if you're dealing with that ***** of a third bolt to remove, take the shaft from a cheap 6-in-1 screwdriver. 10mm nut driver in the 1/4 inch end, use a 5/16 wrench to drive the fat end. If you have a magnetic 10mm driver it is simple to place it on the bolt first and assemble the rest snaking through the stuff in the way.
 

WasabiBobby

Cadet
Joined
Feb 15, 2024
Messages
10
Timing light update: With the advance set to 10 degrees, I'm getting dead-on the 0 degree mark when I start cranking. It stays on 0 for a few seconds, then shifts over to between the 0 and 5 degree mark, on to the 5, and finally shifts and holds steady between the 5 and 10. On the black sticker pictured in post #6 it is shifting to the left.

When I set the advance to 27 degrees I get the exact reverse happening. Between 5 and 10 to the right initially, to 5, between 5 and 0, and finally back to dead-on the 0 degree mark.

When it settles it holds consistently. So I am assuming the next step is to check it when actually running. It's been raining all day and I don't want to flood my garage, good news is the weather should be better tomorrow.
 

99yam40

Fleet Admiral
Joined
Sep 7, 2008
Messages
9,094
I am confused about you setting the advance to 10 and 27.
is this something on the timing light or the motor?

My Snap-On timing light from back in the 70s does not have anything to set, just hook up and read what is shows on the motor.
 

WasabiBobby

Cadet
Joined
Feb 15, 2024
Messages
10
I am confused about you setting the advance to 10 and 27.
is this something on the timing light or the motor?

My Snap-On timing light from back in the 70s does not have anything to set, just hook up and read what is shows on the motor.
It's a setting on the timing light. It adjusts the flashes so that instead of reading different markings on the flywheel it should be the 0 degree mark with the correct setting. I got lucky guessing 10 degrees to begin with. Since the light's setting has granularity where I can measure single degrees vs. 5 degrees on the flywheel I figured going with the more exact one would be better.

My optimistic side is hoping the 10-27 degrees means I'm right on the money according to the specs. My pessimistic side is thinking it levelled off at the 27 degrees because the starter was holding it at consistent RPM. If it starts and accelerates compared to cranking speed, that timing could continue to advance, and lead to the issue I experienced. I'll be sure to update when I find out tomorrow.
 

WasabiBobby

Cadet
Joined
Feb 15, 2024
Messages
10
Well not exactly informative checking the timing with it running, but I am not going to complain. Started right up and the throttle didn't runaway this time. Somewhat of a fast idle at 1400rpm but it's supposed to idle high cold. Backed off to 1200rpm on its own. Reads 27 degrees BTDC. I pushed the throttle linkage a couple times to see if I could nudge it in to repeating the issue. It ever so slightly advanced but went right back down.

The only explanation I can think for it resolving itself is that I did move the throttle cables for access to repaint the bilge/transom, or alternatively removing/replacing the carb freed something stuck. I've got a replacement for that torn boot on the way and should be able to find time to get it on the water to open it up under load this weekend.
 

99yam40

Fleet Admiral
Joined
Sep 7, 2008
Messages
9,094
I would not think it should be a 27 while idling, only at WOT.
but I know very little about those 4 stroke motors since I never owned one or worked on one.
It just does not make sense to why it would be that advanced at idle
 

WasabiBobby

Cadet
Joined
Feb 15, 2024
Messages
10
I would not think it should be a 27 while idling, only at WOT.
but I know very little about those 4 stroke motors since I never owned one or worked on one.
It just does not make sense to why it would be that advanced at idle
I saw this right as I was heading out to run it again. I don't have the kind of luck where things just fix themselves. Still no runaway but another symptom: after idling for 3-5 minutes the warning buzzer goes off. The tach has markings like there should be indicators for high temp or low oil pressure, but neither indications were triggered, just the buzzer. With earmuffs and with the hose directly on the cleanout. Oil level is at the middle of the markings on the dipstick.

Considering the commonality being the electrical system controlling the timing and the buzzer, I'm leaning towards that being the root of the problem.
 
Top