1978 18ft Mariner: Getting Ready for June 2021 Splash..!!!

BigMega

Cadet
Joined
Dec 22, 2020
Messages
27
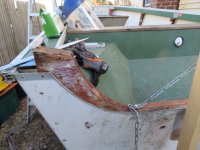
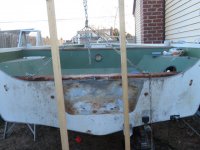
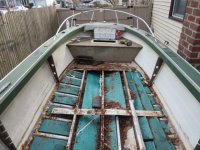
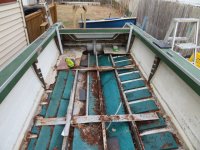
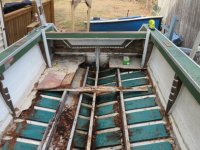
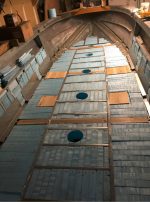
I'd like to invite everyone to participate in helping to rehab this old 18' Mariner: Whether a purist restorer or an old time "Rube Goldberg" your experience and thoughts are welcomed: The goal will be to splash around mid-June 2021 and it feels do-able: The boat was bought on Ebay from a Charity that specializes in boat auctions: (see my first posting..."Pig in a Poke"). At this point I have the floor mostly removed with some pieces under the splashwell that still remain: The Transom came out with relative ease and the gentle persuasion of a rubber mallet: I also did something different in regard to removing the inner and outer gunwale trim when removing the transom: I didn't remove any of it... Details and pictures to follow:
MY BIOPIC: I'm three years past my 70th year: Like each of you, I love being near, in or on the water. My earliest recollections are of the early 1950's and fishing trips with my dad out of Canarsie, Brooklyn on the big boats: My teenage years were spent growing up in Huntington Long Island and a stones throw away from the Harbor and a gazzillion memories. During college years at Stony Brook, I worked the Great South Bay as a bayman to pay for school. After graduation I continued to work as a clammer full time for the next 7 years until the bay was so depleted that it was hard to earn a living: Fast forward to December 2020; my phone is ringing...it's a friend...even before I answer it, I know exactly what the conversation will be: " What are you up to?" nothing much, what about you? Did you see such and such on Netflix, etc: I was ready to hang myself, so instead I bought the Starcraft: Goodbye Netflix hello Starcraft..! and I couldn't be happier: I'm able to devote as much time as needed to get the boat ready for some fishing adventures with my 6 year old grandson.
MY VISION: Is to have a SAFE platform for inshore fishing up to the inlet but never into the ocean: I will be using the boat exclusively on the Great South Bay of Long Island: I would like it to look good but not necessary to be awarded "Splash of the Year": I want the hull to be as light as possible and balanced: My thoughts are to move the fuel supply to the bow and the battery midships. Plus a bunch of other ideas:
REMOVING THE TRANSOM:
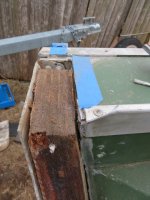
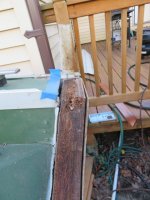
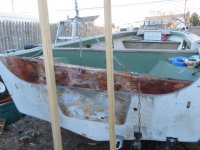
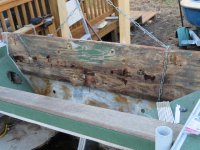
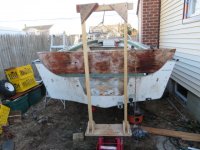
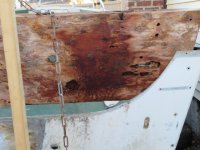
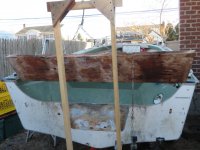
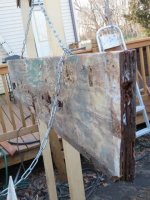
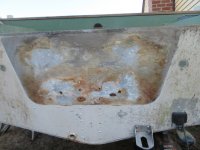
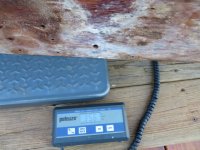
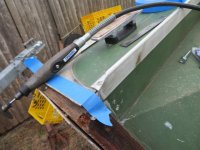
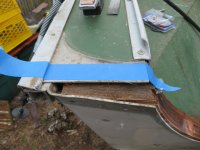
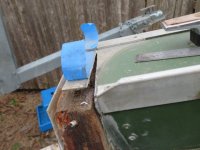
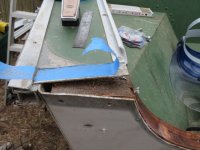
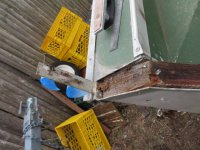
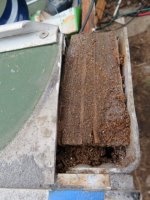
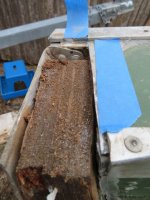
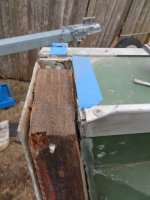
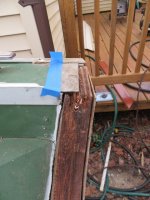
Here are some pictures of the transom being removed: I believe it may be the original transom..3 pieces and no indication of having previously been replaced: In doing my research here on the SC forum there was an abundance of help and detailed steps for replacing the Transom: Instead of drilling out the inner gunnel trim rivets and removing the outer gunnel trim: I took out my dremel with a metal cutting blade and in minutes the tab of aluminum that ends 3/4" over the transom was out and I was ready to pull the wood: All the cuts are invisible and covered by the end cap: Also, any water running along the top of the gunnel getting under the cap will spill directly into the side of the transom, so removing it makes sense, I think:

Tomorrow...I will be pulling the lower unit on the 1981 70hp Johnson and replacing the water pump: This engine has been in hibernation for 15 years: Details and pictures to follow: Have Fun..
 

Attachments

  • IMG_1109.JPG
    IMG_1109.JPG
    65.8 KB · Views: 16
  • IMG_1113.JPG
    IMG_1113.JPG
    67.3 KB · Views: 15
  • IMG_1115.JPG
    IMG_1115.JPG
    137.9 KB · Views: 14
  • IMG_1116.JPG
    IMG_1116.JPG
    134.6 KB · Views: 14
  • IMG_1117.JPG
    IMG_1117.JPG
    140.4 KB · Views: 15
  • IMG_1118.JPG
    IMG_1118.JPG
    158.2 KB · Views: 15
  • IMG_1119.JPG
    IMG_1119.JPG
    155.4 KB · Views: 15
  • IMG_1120.JPG
    IMG_1120.JPG
    137.1 KB · Views: 14
  • IMG_1121.JPG
    IMG_1121.JPG
    141.1 KB · Views: 14
  • IMG_1122.JPG
    IMG_1122.JPG
    82.1 KB · Views: 14
  • IMG_1123.JPG
    IMG_1123.JPG
    125.1 KB · Views: 16
  • IMG_1127.JPG
    IMG_1127.JPG
    140.9 KB · Views: 20
  • IMG_1093.JPG
    IMG_1093.JPG
    171.2 KB · Views: 22
  • IMG_1094.JPG
    IMG_1094.JPG
    172.8 KB · Views: 21
  • IMG_1096.JPG
    IMG_1096.JPG
    162.5 KB · Views: 18
  • IMG_1102.JPG
    IMG_1102.JPG
    136 KB · Views: 17
  • IMG_1103.JPG
    IMG_1103.JPG
    129.1 KB · Views: 14
  • IMG_1104.JPG
    IMG_1104.JPG
    123.7 KB · Views: 14
  • IMG_1105.JPG
    IMG_1105.JPG
    132.6 KB · Views: 14
  • IMG_1106.JPG
    IMG_1106.JPG
    152.7 KB · Views: 14
  • IMG_1107.JPG
    IMG_1107.JPG
    86.8 KB · Views: 13
  • IMG_1108.JPG
    IMG_1108.JPG
    66.2 KB · Views: 12
  • IMG_1109.JPG
    IMG_1109.JPG
    65.8 KB · Views: 12
  • IMG_1110.JPG
    IMG_1110.JPG
    67.8 KB · Views: 14
Moserkr

Chief Officer + Starmada Splash Of The Year 2021
Joined
Nov 23, 2020
Messages
869
🍻 Here’s to you getting her splashed by june, and fishing with your grandson!! No better motivation than that. My best fishing trips were with my Grandpa as a kid. You are 73 years young! Just got done hunting pheasants with my now 94 year old grandpa, so imagine your work paying off for the next 20 years....

Looks like a guillotine for a transom haha. My corners were already cut too, made for an easy removal.
 

SHSU

Lieutenant Junior+Starmada Splash Of The Year 2019
Joined
Mar 8, 2017
Messages
1,725
Look forward to following the thread!!!

Similar motivation to make memories with my wife and daughter. Since our splash, we have had a blast fishing and tubing. Nothing like cruising around on a boat you rebuilt.

SHSU
 

MNhunter1

Lieutenant Junior Grade
Joined
May 12, 2014
Messages
1,053
Looking forward to the progress! I have an 18' MR180 waiting in the wings as well.
 

Watermann

Starmada Splash of the Year 2014
Joined
Jan 12, 2013
Messages
13,787
I see someone has already been into your Mariner with the addition of the green foam under deck. Are you certain this is a 78 model year? Reason I ask is that it should have the rib end braces by 78.

Some advice, I know that you want to be done by June which is a very ambitious time table but you would be better served to remove the splashwell. Removed you can clean the inner transom skin and make any needed repairs to either the knee brace or unwarted holes. All the white and brown on the transom skin is corrosion that needs to be cleaned off which is tough to get done with the SW in the way.
 

BigMega

Cadet
Joined
Dec 22, 2020
Messages
27
🍻 Here’s to you getting her splashed by june, and fishing with your grandson!! No better motivation than that. My best fishing trips were with my Grandpa as a kid. You are 73 years young! Just got done hunting pheasants with my now 94 year old grandpa, so imagine your work paying off for the next 20 years....

Looks like a guillotine for a transom haha. My corners were already cut too, made for an easy removal.
Thank you for the kind words....The guillotine (LOL) was bolted to a motorcycle jack: I needed a solution for removing the engine: No tree limbs were in sight..I didn't have a cherry picker...and I thought I was 25 year old again removing a 40hp from my clam boat. It sort of worked; the plan was to lift the engine off the transom and guide it down into a cushioned cart: The lifting part of the plan executed perfectly and lifted the engine right off the transom. However, once it cleared the transom I began to lose control by the second: I knew in a flash that I was losing it and it was going down: I gave it a loving bear hug and the two of us went down together in a slow fall: And both of us came out of it without injury..!!
What didn't work as an engine lift performed admirably in removing the transom:
"ALL'S WELL THAT ENDS WELL"
 

Attachments

  • IMG_1088.JPG
    6.1 MB · Views: 17
  • IMG_1089.JPG
    4.4 MB · Views: 11
  • IMG_1090.JPG
    4.3 MB · Views: 10
  • IMG_1091.JPG
    5.9 MB · Views: 12
  • IMG_1092.JPG
    5.4 MB · Views: 12

BigMega

Cadet
Joined
Dec 22, 2020
Messages
27
I see someone has already been into your Mariner with the addition of the green foam under deck. Are you certain this is a 78 model year? Reason I ask is that it should have the rib end braces by 78.

Some advice, I know that you want to be done by June which is a very ambitious time table but you would be better served to remove the splashwell. Removed you can clean the inner transom skin and make any needed repairs to either the knee brace or unwarted holes. All the white and brown on the transom skin is corrosion that needs to be cleaned off which is tough to get done with the SW in the way.
Thank you for sharing: Yes, Indeed you are correct the boat was built for the 1977 model year and the paperwork that I have supports that: It was sold in 1978 and registered that year. Thank you for highlighting the difference commencing with the 1978 Mariner: Should I be concerned about making any upgrades to 1978 or later Specs?
Before the weather dropped 14" of snow I did take a look at what might be involved with removing the splashwell. Looked to be a relatively straight forward and easy removal: From memory I believe (6 )or so small blind rivets and (3) large solid rivets into the gunnel on each side: The Splashwell and crossmember come off as a single component:

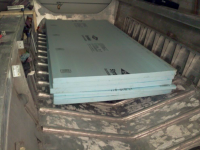
The deck was replaced 17 years ago and boat was stored for 15 of those years: The green foam appears to be an open cell foam: I noticed weight differences in similar dimension-ed pieces that were exposed or not to water: It was also poorly installed with at least 40% of floatation space un-used: The bow had sections that were totally devoid of anything. I'm thinking about using poured foam in the bow ( after gluvit and repairs) are done and configuring pink foam sheets or styrene (styrofoam) sheets between floor and ribs: HOW MANY SHEETS OF FOAM BOARD ARE NEEDED TO FILL ALL THE VOIDS BETWEEN FLOOR AND RIBS ON AN 18 FOOTER?


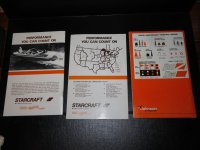
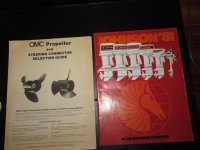
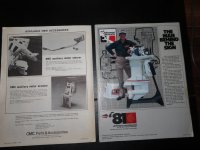
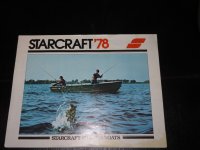
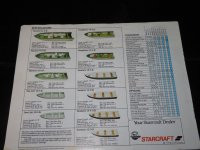
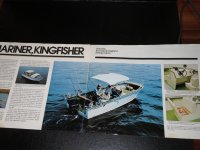
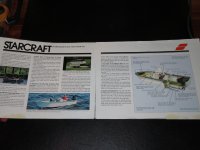
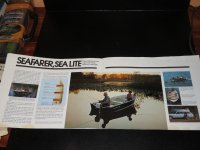
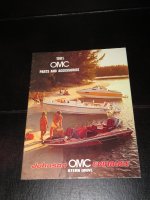
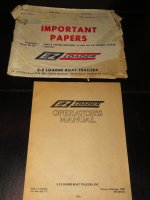
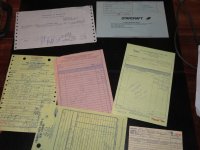
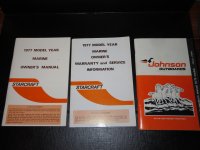
I attached some pics of the paperwork that the second owner handed over to me: When the PO handed me the documents and original catalogs and owners manuals, I knew I had a boat that was cared for through the decades:
 

Attachments

  • IMG_1309.JPG
    IMG_1309.JPG
    1.1 MB · Views: 5
  • IMG_1310.JPG
    IMG_1310.JPG
    1.2 MB · Views: 4
  • IMG_1311.JPG
    IMG_1311.JPG
    1.2 MB · Views: 4
  • IMG_1312.JPG
    IMG_1312.JPG
    1.2 MB · Views: 4
  • IMG_1313.JPG
    IMG_1313.JPG
    1.1 MB · Views: 4
  • IMG_1314.JPG
    IMG_1314.JPG
    1.3 MB · Views: 4
  • IMG_1315.JPG
    IMG_1315.JPG
    1.3 MB · Views: 4
  • IMG_1316.JPG
    IMG_1316.JPG
    1.2 MB · Views: 4
  • IMG_1317.JPG
    IMG_1317.JPG
    1.2 MB · Views: 4
  • IMG_1318.JPG
    IMG_1318.JPG
    514.4 KB · Views: 4
  • IMG_1319.JPG
    IMG_1319.JPG
    342 KB · Views: 5
  • IMG_1320.JPG
    IMG_1320.JPG
    1.4 MB · Views: 5

BigMega

Cadet
Joined
Dec 22, 2020
Messages
27
Looking forward to the progress! I have an 18' MR180 waiting in the wings as well.
Thank you...These boats are a pleasure to work on...I'll share lots of pics as I race towards a June 2021 Splash: I like the console on the MR180:
 

BigMega

Cadet
Joined
Dec 22, 2020
Messages
27
Look forward to following the thread!!!

Similar motivation to make memories with my wife and daughter. Since our splash, we have had a blast fishing and tubing. Nothing like cruising around on a boat you rebuilt.

SHSU
Thank you so much...In doing my pre-purchase due diligence I read thoroughly many of your postings and knowledgeable responses to questions: In many ways you and so many other dedicated SC owners on this forum have empowered me with the confidence that "I can do this"
 

SHSU

Lieutenant Junior+Starmada Splash Of The Year 2019
Joined
Mar 8, 2017
Messages
1,725
Man, sounds like you got lucky with not getting hurt. I purchased a Harbor Freight Engine lift to use and then gave it away when I finished the project. Even then it was a bear to use because I didn't account for the front bracing on the motor lift and it running into my engine stand... Live and learn.

Pour Foam.... There are a couple who have done it, but you will find a lot of people saying to just use the preformed from HD. As for the number of sheets, don't know if anyone has that listed in their thread. Probably could take a couple rough estimates and purchase more then you think and return it if not needed.

SHSU
 

classiccat

"Captain" + Starmada Splash Of The Year 2020
Joined
Dec 20, 2010
Messages
3,412
That green stuff looks like pool-noodle material...big sponges.

I used nearly every bit of (4) 4x8 2" and (2) 4x8 1" XPS sheets to do my '75 18'SS.

1612608088890.png

1612608290455.png
 

BigMega

Cadet
Joined
Dec 22, 2020
Messages
27
Man, sounds like you got lucky with not getting hurt. I purchased a Harbor Freight Engine lift to use and then gave it away when I finished the project. Even then it was a bear to use because I didn't account for the front bracing on the motor lift and it running into my engine stand... Live and learn.

Pour Foam.... There are a couple who have done it, but you will find a lot of people saying to just use the preformed from HD. As for the number of sheets, don't know if anyone has that listed in their thread. Probably could take a couple rough estimates and purchase more then you think and return it if not needed.

SHSU
"Live and Learn": Still living and still learning: It never ends..!!!
I think I'll ditch the idea of poured foam: Classiccat did exactly what I have in mind to do: For the 18ft'ers aprox 6 sheets of hardboard foam: Tnx
 

BigMega

Cadet
Joined
Dec 22, 2020
Messages
27
Hello...Wow, I bet that took a week of cutting: How has water movement in the bilge being handled: Nice job I will be doing similar: Tnx
I'd like to invite everyone to participate in helping to rehab this old 18' Mariner: Whether a purist restorer or an old time "Rube Goldberg" your experience and thoughts are welcomed: The goal will be to splash around mid-June 2021 and it feels do-able: The boat was bought on Ebay from a Charity that specializes in boat auctions: (see my first posting..."Pig in a Poke"). At this point I have the floor mostly removed with some pieces under the splashwell that still remain: The Transom came out with relative ease and the gentle persuasion of a rubber mallet: I also did something different in regard to removing the inner and outer gunwale trim when removing the transom: I didn't remove any of it... Details and pictures to follow:
MY BIOPIC: I'm three years past my 70th year: Like each of you, I love being near, in or on the water. My earliest recollections are of the early 1950's and fishing trips with my dad out of Canarsie, Brooklyn on the big boats: My teenage years were spent growing up in Huntington Long Island and a stones throw away from the Harbor and a gazzillion memories. During college years at Stony Brook, I worked the Great South Bay as a bayman to pay for school. After graduation I continued to work as a clammer full time for the next 7 years until the bay was so depleted that it was hard to earn a living: Fast forward to December 2020; my phone is ringing...it's a friend...even before I answer it, I know exactly what the conversation will be: " What are you up to?" nothing much, what about you? Did you see such and such on Netflix, etc: I was ready to hang myself, so instead I bought the Starcraft: Goodbye Netflix hello Starcraft..! and I couldn't be happier: I'm able to devote as much time as needed to get the boat ready for some fishing adventures with my 6 year old grandson.
MY VISION: Is to have a SAFE platform for inshore fishing up to the inlet but never into the ocean: I will be using the boat exclusively on the Great South Bay of Long Island: I would like it to look good but not necessary to be awarded "Splash of the Year": I want the hull to be as light as possible and balanced: My thoughts are to move the fuel supply to the bow and the battery midships. Plus a bunch of other ideas:
REMOVING THE TRANSOM:
Here are some pictures of the transom being removed: I believe it may be the original transom..3 pieces and no indication of having previously been replaced: In doing my research here on the SC forum there was an abundance of help and detailed steps for replacing the Transom: Instead of drilling out the inner gunnel trim rivets and removing the outer gunnel trim: I took out my dremel with a metal cutting blade and in minutes the tab of aluminum that ends 3/4" over the transom was out and I was ready to pull the wood: All the cuts are invisible and covered by the end cap: Also, any water running along the top of the gunnel getting under the cap will spill directly into the side of the transom, so removing it makes sense, I think:

Tomorrow...I will be pulling the lower unit on the 1981 70hp Johnson and replacing the water pump: This engine has been in hibernation for 15 years: Details and pictures to follow: Have Fun..
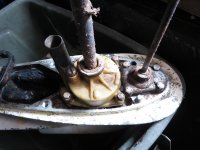
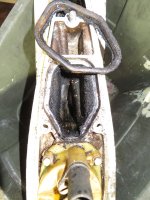
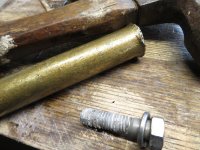
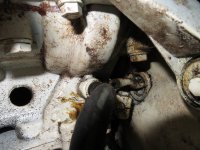
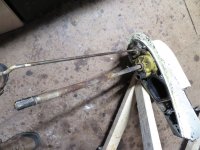
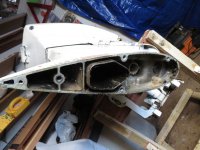
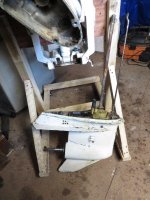
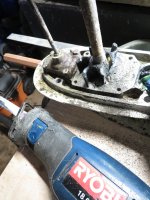
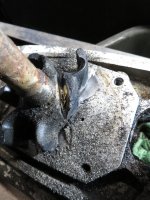
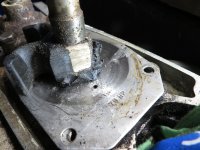
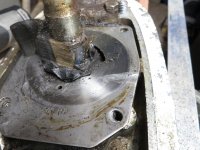
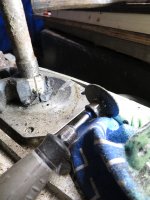
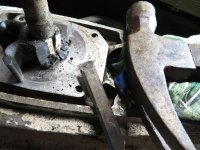
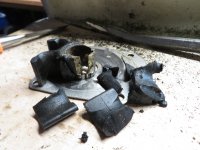
PULLING THE LOWER UNIT: Although the engine was only used in fresh water and the bolts looked clean, they were a bear to get out: Each bolt initially felt like they could break and it was slow going a click at a time and rocking the bolt in and out Using a 1/2" drive and socket: Took nearly an hour. This may help: Unscrew each bolt in turn the same number of threads:After each loosening of the bolts, lightly tap down with a block of wood on the lower unit, as it separates spray penetrating lube into the opening between the lower unit and midsection: Take your time with this and you will get it out: Removing the housing on the water pump, I was delighted to see that the impeller was intact and in functioning condition as were all of the rubber seals: Amazing after sitting for 15 years..! However, removing the impeller required a "sawzall" a "Dremel" a hammer, a chisel, and 15 minutes or so: Next up...Rebuild the Fuel Pump:
 

Attachments

  • IMG_1339.JPG
    IMG_1339.JPG
    1.2 MB · Views: 8
  • IMG_1340.JPG
    IMG_1340.JPG
    594.9 KB · Views: 7
  • IMG_1321.JPG
    IMG_1321.JPG
    1.5 MB · Views: 6
  • IMG_1322.JPG
    IMG_1322.JPG
    1.2 MB · Views: 6
  • IMG_1323.JPG
    IMG_1323.JPG
    356.9 KB · Views: 6
  • IMG_1324.JPG
    IMG_1324.JPG
    1.6 MB · Views: 7
  • IMG_1325.JPG
    IMG_1325.JPG
    1.5 MB · Views: 7
  • IMG_1326.JPG
    IMG_1326.JPG
    1.3 MB · Views: 8
  • IMG_1327.JPG
    IMG_1327.JPG
    489 KB · Views: 8
  • IMG_1328.JPG
    IMG_1328.JPG
    501.7 KB · Views: 9

classiccat

"Captain" + Starmada Splash Of The Year 2020
Joined
Dec 20, 2010
Messages
3,412
Hello...Wow, I bet that took a week of cutting: How has water movement in the bilge being handled: Nice job I will be doing similar: Tnx
I rigged up a hot wire cutter (26awg Stainless Steel + a 12v battery charger); it made the cutting somewhat therapeutic...so the time just flew by!

All paths to the bilge are unobstructed. Outside of the main stringers, I laid a piece of foam board horizontally which gets propped up by the rib rivet tabs. Between the main stringers the vertical foam is resting on top of the ribs. Those cut-outs / access ports give me access to every single limber hole for cleaning; prevent water from damming-up.
 

BigMega

Cadet
Joined
Dec 22, 2020
Messages
27
That leg looks rough...
This is the first one I've opened up....the PO used it on a large pond in Connecticut, so I wasn't surprised to find some sand inside: The gear case was full and no water was present: No leaks on the lower gear case: Hopefully functions better than it poses for pictures...Tnx
 

Attachments

  • IMG_1345.JPG
    IMG_1345.JPG
    545.8 KB · Views: 8
  • IMG_1346.JPG
    IMG_1346.JPG
    548.1 KB · Views: 73
  • IMG_1347.JPG
    IMG_1347.JPG
    1.4 MB · Views: 8
  • IMG_1348.JPG
    IMG_1348.JPG
    1.5 MB · Views: 8
  • IMG_1349.JPG
    IMG_1349.JPG
    512.2 KB · Views: 8
  • IMG_1350.JPG
    IMG_1350.JPG
    1.6 MB · Views: 8
  • IMG_1351.JPG
    IMG_1351.JPG
    1.2 MB · Views: 9

Watermann

Starmada Splash of the Year 2014
Joined
Jan 12, 2013
Messages
13,787
On the hull braces, personally I would add them to any boat of the era that doesn't have them from the factory, especially a Mariner that doesn't have side panels. You don't have to get them under the rib ends since the factory didn't do the bends it's tough to make the angle right and have the ribs lay flat if you do. I added the braces between the ribs on my Chief, I know the sides won't split out.

y4mQmoREx4phr4yKnOVyCP1v78cMbOR6UNfVkD7ku_d3rEPKUVLN-bMAscK8HNtGO-oYHpPXBcqICAoW0lm9GP9DoHKzyRMHVe0vqI8Up-Ku8h-qxfR5YXB9CNiIJguJZ_wPjZHZ8LAEXg8VxeUKM4lv1uAa3D6G6_b4pp-8gznfI_j27Wb-4N-VMch-OLjvSJY


On the motor.
img_1346-jpg.333503


You're that far in, I would make sure to replace the driveshaft and shift shaft seals. Never have seen a stainless driveshaft rust, is that rusted or crud? Either way be sure to clean it up, especially below where the seals ride.
 

SHSU

Lieutenant Junior+Starmada Splash Of The Year 2019
Joined
Mar 8, 2017
Messages
1,725
+1 with @Watermann

Replace the seals even thought it still looks good. It sat that long, I wouldn't trust the seals to last much longer once put to work. I would do the shift lever seal, driveshaft seals, prop shaft seals, new oil bolts washers, and new impeller.

SHSU
 

BigMega

Cadet
Joined
Dec 22, 2020
Messages
27
On the hull braces, personally I would add them to any boat of the era that doesn't have them from the factory, especially a Mariner that doesn't have side panels. You don't have to get them under the rib ends since the factory didn't do the bends it's tough to make the angle right and have the ribs lay flat if you do. I added the braces between the ribs on my Chief, I know the sides won't split out.

y4mQmoREx4phr4yKnOVyCP1v78cMbOR6UNfVkD7ku_d3rEPKUVLN-bMAscK8HNtGO-oYHpPXBcqICAoW0lm9GP9DoHKzyRMHVe0vqI8Up-Ku8h-qxfR5YXB9CNiIJguJZ_wPjZHZ8LAEXg8VxeUKM4lv1uAa3D6G6_b4pp-8gznfI_j27Wb-4N-VMch-OLjvSJY


On the motor.
img_1346-jpg.333503


You're that far in, I would make sure to replace the driveshaft and shift shaft seals. Never have seen a stainless driveshaft rust, is that rusted or crud? Either way be sure to clean it up, especially below where the seals ride.
Thank you "Watermann" & "Shsu"......I'm wondering if as an alternative, it would be possible to add structural support of the sides by using Epoxy Resin and mat using the same layout as your boat: While it will not be as strong as aluminum and rivets, it still should add some degree of support, I would think: The PO poly fiberglassed the floor to the sides and it was attached fairly well to the aluminum, although I was able to pull it off by hand. While my intention is to have a Nautolex or similar vinyl floor....I'm wondering if it wouldn't make sense to fiberglass the floor perimeter to the sides with epoxy resin and mat...? At the moment I'm leaning towards the latter solution to adding structural strength to the sides:
On the recommendation to replace the rubber seal for both the driveshaft and the shift rod....would you be referring to the rubber seals just beneath the driveshaft and shift link covers on the LU?
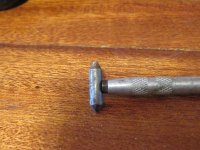
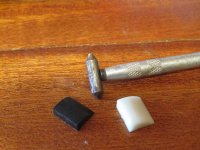
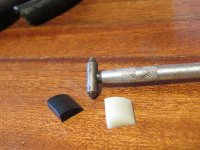
In removing the impeller i expected to see a plastic key, however there was no plastic key. Instead there was a pin with chamfered ends that fit nicely into the keyway slot on the shaft: The OMC kit that I will be installing has two plastic keys, one white the other black: The white key is slightly larger: Would you know how I should determine which key is the correct fit?

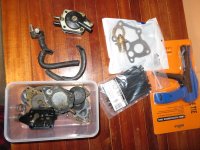
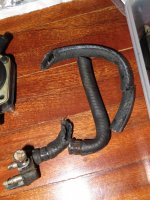
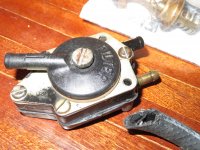
I rebuilt the Fuel Pump using a donor that I found on ebay...the original pump was damaged trying to get it apart: I am not exaggerating when I say that the fuel lines were "mumified" : The fuel lines will all be installed with marine grade cable clamps:

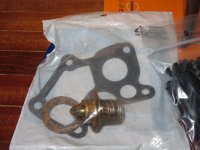
I've been using Sierra Parts for the Fuel Pump rebuild and soon to be installed thermostat. The parts appear to be high quality and the fit was excellent:
Thanks again for helping this project move forward..!!!
 

Attachments

  • IMG_1364.JPG
    IMG_1364.JPG
    1.7 MB · Views: 2
  • IMG_1365.JPG
    IMG_1365.JPG
    938 KB · Views: 2
  • IMG_1366.JPG
    IMG_1366.JPG
    1.8 MB · Views: 2
  • IMG_1367.JPG
    IMG_1367.JPG
    1.2 MB · Views: 3
  • IMG_1371.JPG
    IMG_1371.JPG
    1.5 MB · Views: 4
  • IMG_1372.JPG
    IMG_1372.JPG
    1.5 MB · Views: 4
  • IMG_1373.JPG
    IMG_1373.JPG
    1.5 MB · Views: 3
Top