New Anchor and Bow Roller

tpenfield

Moderator
Staff member
Joined
Jul 18, 2011
Messages
18,039
A fairly big weekend on the boat project front . . . I have been meaning to put a new anchor and a windlass on my boat. This year, the budget got stretched a bit on some other issues, so I decided just to do the new anchor and roller this year, and then the windlass next year.

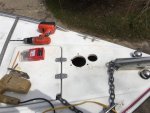
I decided to go with a claw anchor, as that is what Formula has used for the most part. The bow roller required that I replaced the single navigation light with dual lights (green/red). Also, the piano hinge on the anchor locker hatch had come apart. So, I replaced the hinge with surface mount hinges.
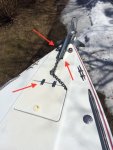
IMG_5943.jpg

Here are a few more pictures of the project in the making . . .

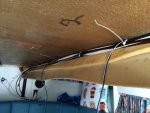
Split out the wiring for the dual bow lights.
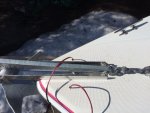
IMG_5932.jpg

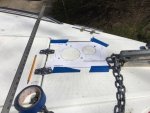
I used some cardboard to ensure appropriate spacing of the locker hatch . . .
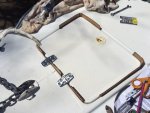
IMG_5937.jpg


The new anchor and roller, along with the lights.
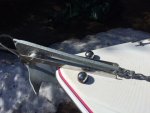
IMG_5934.jpg

I also roughed in the wiring for a windlass, since I am refurbishing the headliner and have the cabin wiring exposed

* * * continued on the next post * * *
 
Last edited:

tpenfield

Moderator
Staff member
Joined
Jul 18, 2011
Messages
18,039
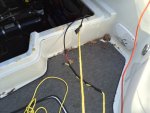
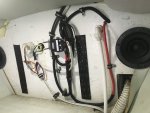
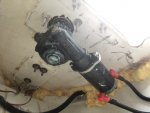
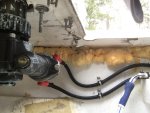
Here are some pics of the wiring . . .
IMG_5947.jpg

I ran some 4 GA wire from the engine room, up the port side and then through the ceiling of the cabin to tie into the existing wiring harness.

I also ran a 12 GA Trilpex wire to the helm for the windlass switch.

Feeding the 4 GA wire down the port side was 'interesting' . . . I tied a string to the cable, so feeding the second cable was not too bad.

IMG_5950.jpg

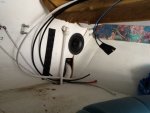
Here is the wiring at the bow . . .
IMG_5948.jpg

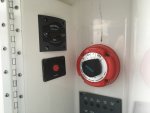
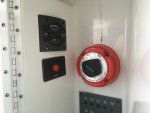
My plan is to have the windlass circuit breaker (35 amp) near the battery switch, which is just forward of the engine room, and then have the solenoid up in the v-berth, just behind the anchor locker.

I'm glad to have the wiring roughed in . . . no fun doing that, I had to disassemble lots of stuff to gain access to run the wires.
 
Last edited:
dozerII

Admiral
Joined
Oct 25, 2009
Messages
6,527
Nice job on the install, pre-planning and rough in wiring the windlass was great idea.
 

JASinIL2006

Vice Admiral
Joined
Feb 10, 2012
Messages
5,673
Ted, you always do such nice work. And I like how you document it so well to help the rest of us learn! Thanks!
 

tpenfield

Moderator
Staff member
Joined
Jul 18, 2011
Messages
18,039
Thanks, guys. I was originally thinking that I could knock this off in a day . . . it ended up taking the whole weekend. I also combined the electrical cabling work with the headliner repair that I am doing. Since I would not want to take the headliner out again next year.

I sure wish that the boat manufacturers used conduit for their electrical wiring and control cables . . . it sure would make add-on work like this much easier.
 

tpenfield

Moderator
Staff member
Joined
Jul 18, 2011
Messages
18,039
UPDATE:

My plan was to do the anchor roller last year and then install a windlass this year (2016). So, I shopped around for a suitable windlass and had narrowed it down to the Lewmar V700, Lewmar V1 or the Maxwell RC8. I decided to go with the Maxwell.

I did the mechanical installation today and will proceed with the electrical connections tomorrow and probably into next weekend.

Here are a few pictures from the day . . .

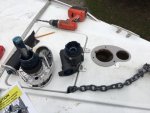
Measuring . . . I removed a chain lock pin so that I could install the windlass in the same area. IMG_7400.jpg


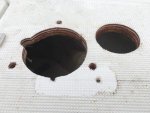
Then it was a matter of drilling and cutting . . . IMG_7403.jpg


I sealed the exposed areas with some poly resin that I had on-hand . . . IMG_7409.jpg


Here is the Maxwell RC8 temporarily assembled . . . IMG_7405.jpg


The instructions say to grease the daylights out of everything, so I used any grease that I had, since it is better that no grease :D. Actually it is marine grease . . IMG_7411.jpg


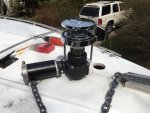
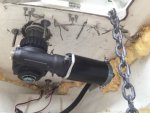
Here is a picture from within the anchor locker of the windlass installed IMG_7412.jpg


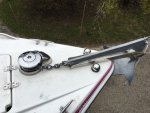
Here is a look topsides of the windlass . . . IMG_7416.jpg


I think I have to get a new chain, even though it is the correct diameter, I and not sure the link spacing is proper for the gypsy. I probably need to get a new anchor roller too . . . the auto-luanching type.

Next steps are to do the electrical, which as per earlier in this thread, I roughed in the heavy wiring last year. the windlass came with a switch, which I will use up at the anchor loack, but I plan on buying a toggle switch for the helm that matches the existing helm switches.

That's all for now . . . :)
 
Last edited:
Grandad

Lieutenant Commander
Joined
Jun 7, 2011
Messages
1,504
I probably need to get a new anchor roller too . . . the auto-luanching type.

I was wondering about self-launching when I saw your earlier pictures. I planned on using a claw anchor too, but changed to a Delta instead for the self launch ability using a simple roller similar to what you have. So you could change to a Delta instead of changing the roller. Worked well for me. However, what you may also find, as I did, your nav lights that are similar to mine will not be visible with the higher profile of the Delta. I had to move my lights. - Grandad
 

Grub54891

Admiral
Joined
Jun 17, 2012
Messages
6,071
Just curious, Is that a cored deck? Usually when installing a windlass we oversize the holes and fill with a epoxy/cabosil mix, and drill to proper size. It prevents crushing the core material and leaks. We also use backer pates on the underside for more support.
 

tpenfield

Moderator
Staff member
Joined
Jul 18, 2011
Messages
18,039
Thanks for the replies, guys (hey that rhymes) . .:)

I do like the claw anchor, so I may swap out the roller. Besides I banged up and bent the roller pretty good last year, so I may get a new one.

The deck is a plywood core. Looking at the photo of the underside, I was thinking that it may want a backing plate. I put a backing plate on the anchor roller when I installed it last year. The installation instructions for the windlass did not mention/recommend a backing plate . . . probably because they do not recommend holding the boat at anchor via the windlass anyway. I may go get a piece of starboard along with some 5200 and use that for a backing plate.

I started in on the electrical wiring and connections yesterday . I have a circuit breaker, a solenoid, a helm switch and a bow switch to install . . . what a chore that is going to be. :rolleyes: Even though I roughed in the heavy cable and switch cabling last year, getting to things like the battery switch is proving to be challenging. The common mounting stud on the Perko battery selector is already maxed out, so I have to get creative. the primary cables to the switch look to be 00 or 000 AWG. After about on hour of struggling with it, I happened to slice my finger on a sharp edge . . . so I was done for the day :facepalm:

. . . . went in the house and watch Jordan Speith quad-bogey the 12th . . . :facepalm: I guess his day wasn't going any better :facepalm: :)
 

tpenfield

Moderator
Staff member
Joined
Jul 18, 2011
Messages
18,039
Another Update . . .

I have been working on all of the wiring for the windlass, which has taken a lot longer than I had figured. . . . lots of detail and not easy to reach. I am glad that I ran the heavy cable last year. :thumb:

I started at the stern/engine bay area with the main circuit breaker
IMG_7441.jpg

Then it was a matter of installing the solenoid and bow switch and doing all of the wiring. I also have a helm switch on order but it is a few days away. Here is all of the wiring up at the bow bulkhead, which is just behind the anchor locker.
IMG_7437.jpg

I also made a backing plate for the windlass and re-installed it. I secured the backing plate with 5200 . . . kind of made a mess as it oozed out while I tightened the bolts. Also you can see the wiring to the motor
IMG_7433.jpg

I will probably have to make a divider to keep the washdown hose away from the rode.
IMG_7435.jpg

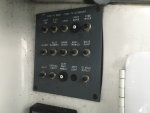
The switches and solenoid run off a separate circuit breaker, which I installed at the helm CB box . . . I got one unused CB location left :eek:
IMG_7439.jpg

I still need to install the helm switch, but I was able to test out the windlass. After fixing a couple of wiring snaffoos . . . all is well.

I am looking for a new chain & rode, as the current tackle is not correct for this windlass . . . I thought the chain would be OK, but it is not. I need 1/4" 'short link' and what I have and have found locally is the standard link chain. I may have to order something. :noidea:
 

Attachments

  • IMG_7441.jpg
    IMG_7441.jpg
    123.8 KB · Views: 4

tpenfield

Moderator
Staff member
Joined
Jul 18, 2011
Messages
18,039
Another Update . . .

I'm getting close to completion. I shopped around locally for the chain, rode and an anchor roller, making the local merchants rich :facepalm:

I found a local hardware/marine store that had G4 short link chain . . . $6.00/foot, but it is good stuff and the right link size for the windlass. I got 15 feet of it.

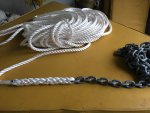
I bought 120 feet of 3-strand and then did the chain/rode splice. I had 200 feet of double braid line, and I managed to splice 100 feet of it to the end of the 3-strand, just in case I need to anchor in deep water. So the entire rode is 235 feet +/-.
IMG_7456.jpg

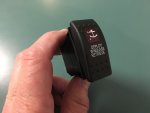
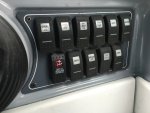
The Carling Technologies 'Contura II' switch (which is what Formula used/uses) arrived
IMG_7449.jpg

So, I installed the switch, wired it up and tested it out.
IMG_7457.jpg

I also bought a self-launching bow roller, but had not installed it yet. I hole pattern and the overall dimensions are a bit different than the current bow roller, so I got to think about how I will make the swap.

For now, at least the windlass works, but I'll need the new roller for self launching.
 

GA_Boater

Honorary Moderator Emeritus
Joined
May 24, 2011
Messages
49,038
Nice work. Ted. Very Pro looking!

Much better than your time estimation. :D Or mine. :blue:
 

tpenfield

Moderator
Staff member
Joined
Jul 18, 2011
Messages
18,039
. . . and I am still at it. I installed the new 'self-launching' bow roller and connected the rode and anchor. Here is a video of the first test of the windlass and anchor launch/retrieval.


I still need to do a few tweaks to it as the chain tends to hit the top of the gypsy. I have ordered a few more things to see if I can get it to work a little smoother.

The new roller holds the anchor tightly in the 'up' position, which is a good thing. Last year, with the old setup, I would have to bungy the anchor down to keep it from bouncing around.
 
Last edited:
Mischief Managed

Lieutenant Commander
Joined
Dec 6, 2005
Messages
1,928
Nice work. You will love having that windlass.I suspect that with that rope/chain rode, you will discover that you need a swivel between the chain and anchor. I know I did. Don't do what I did and get one of those sleek machined stainless swivels that's held together with an Allen bolt. Get something like this: http://www.iboats.com/Quick-SW10-Anc...iew_id.1374054 instead.
 
Last edited:
tpenfield

Moderator
Staff member
Joined
Jul 18, 2011
Messages
18,039
Actually, I have a swivel at the anchor/chain linkage. The tabs on the bolts cause a bit of interference going over the bow roller, so I have purchased the SeaDog brand that is more streamlined. I'm going to try to install it before boat launch tomorrow. :thumb:
354-1826081_0.jpg
 

Mischief Managed

Lieutenant Commander
Joined
Dec 6, 2005
Messages
1,928
That's the one I have and don't care for. It does not have enough slop and can jam at a 90 degree angle on the anchor. It's a pain to fix and always seems to happen at the worst time...
 

Grandad

Lieutenant Commander
Joined
Jun 7, 2011
Messages
1,504
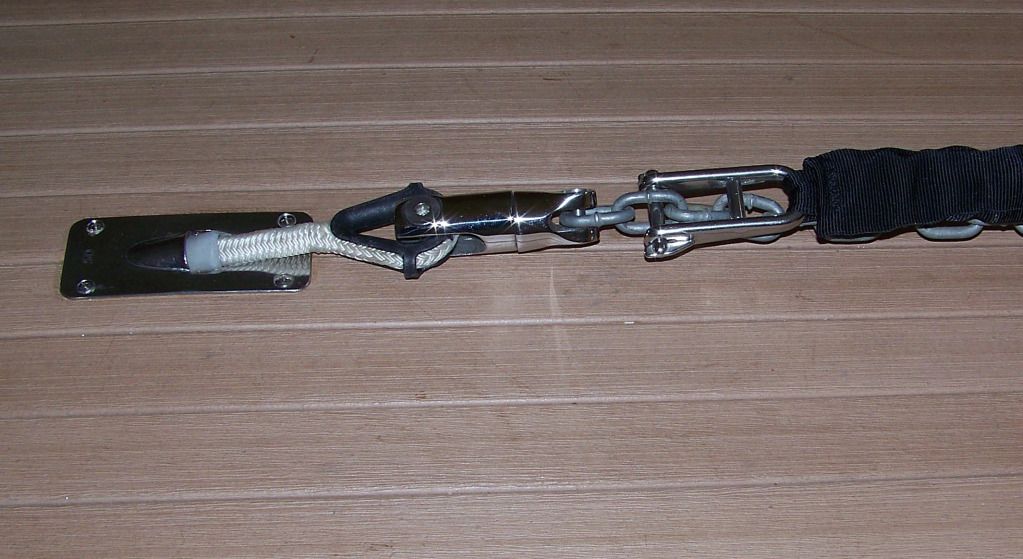
I use a similar swivel that hasn't given me any trouble. In the picture below, I have a black fabric covered "Shockle" attached that I thought I would need to keep a spring tension on my Delta, but have since dispensed with it as unnecessary. - Grandad
 

Mischief Managed

Lieutenant Commander
Joined
Dec 6, 2005
Messages
1,928
I use a similar swivel that hasn't given me any trouble. In the picture below, I have a black fabric covered "Shockle" attached that I thought I would need to keep a spring tension on my Delta, but have since dispensed with it as unnecessary. - Grandad

Yours is not attached to the shank of your anchor and can't have the issue mine has. That said, the setup you have would never make it through my windlass gypsy unscathed, my rope to chain connection has to be a standard splice like Ted has.
 
Top