studlymandingo
Commander
- Joined
- Mar 22, 2006
- Messages
- 2,716
A couple of months ago I posted the question of how to lace a t-top. My latest boat had a canvas top that was installed with a bunch of zip ties. timmatthews sent me a drawing of how to do the lacing. I finally got around to lacing the top today and I took some photos; so maybe it will be of some help for others putting on a new top or lacing.
If you are in a hurry, don't start this project; it's gonna take a little while. If you have sensitive hands, put on some gloves; you're going to be pulling HARD on the rope.
First thing I did was knot the end of the rope and feed it through the first eyelet from the top. The end of the rope then goes around the frame, under the canvas, then back through the same eyelet. Then the rope goes across the TOP, down through the next eyelet, around the frame, under the canvas, and back through the same eyelet from the bottom. AS FOLLOWS:
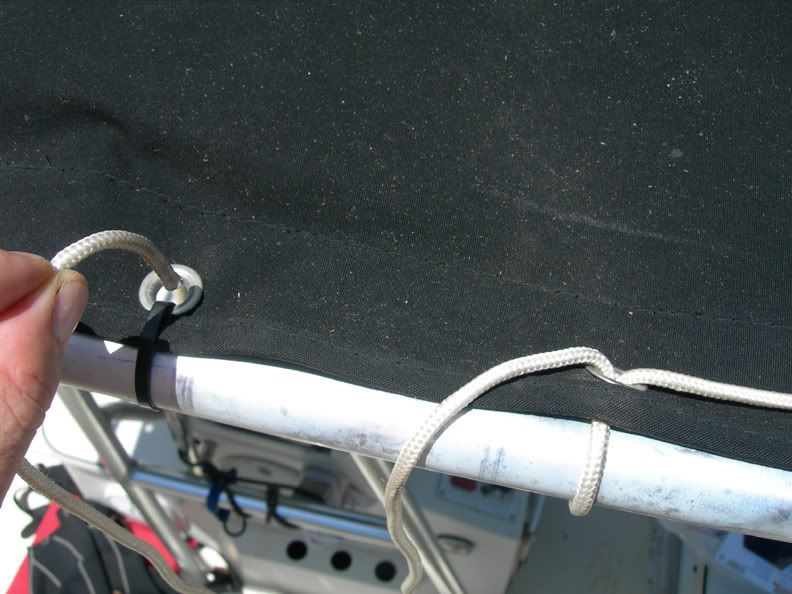
Coming from the top of the last eyelet across the TOP
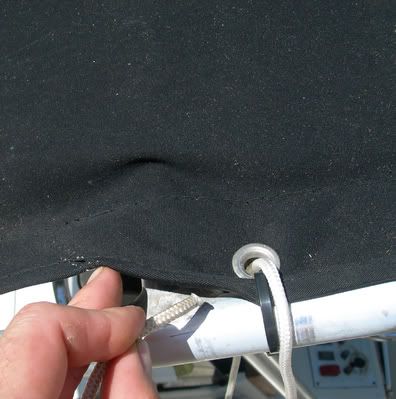
Down through the eyelet and around the frame, then UNDER the canvas
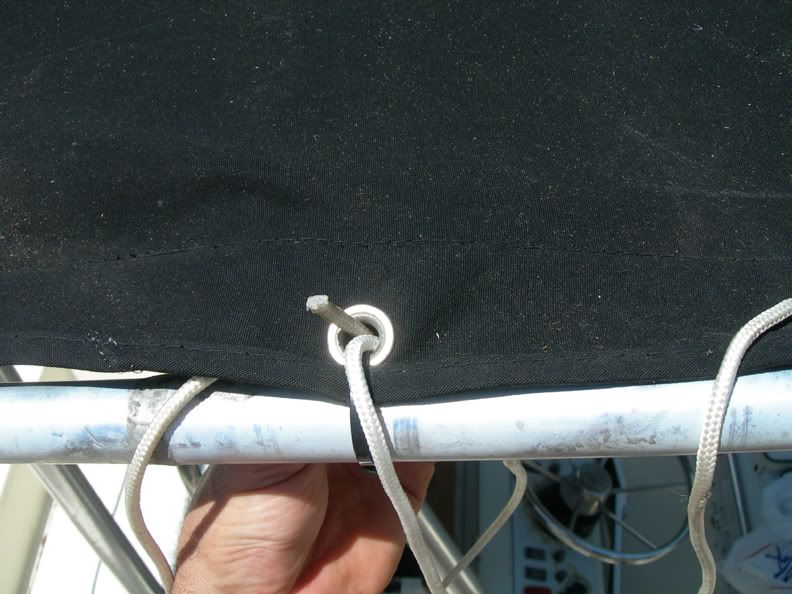
Then back through the same eyelet from the bottom
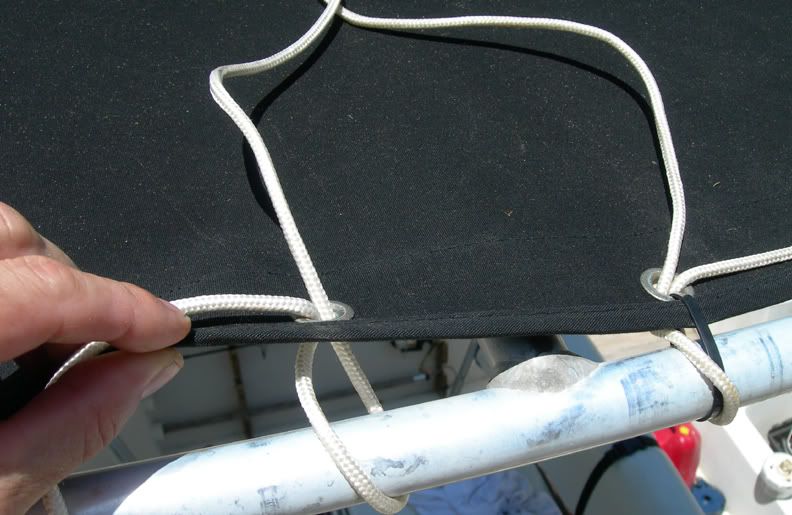
Pull it through and tighten. Once this has been repeated all the way around the frame, you can then untie the original knot, wrap it once around the frame, pull both ends tight, and knot together.
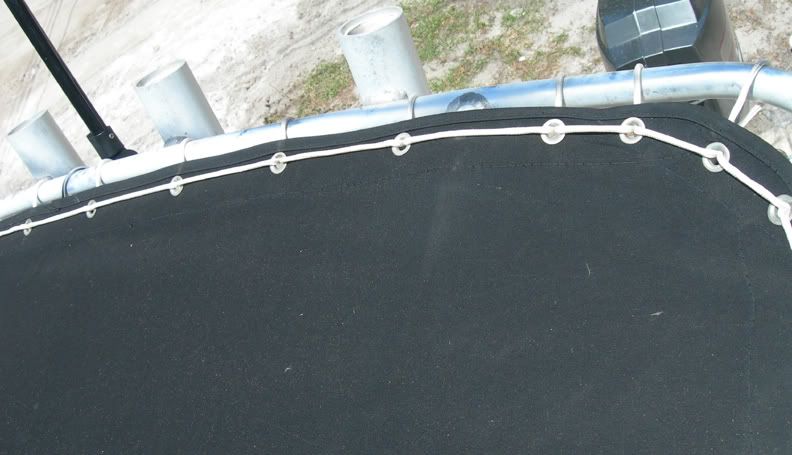
This is what it looks like from the top.
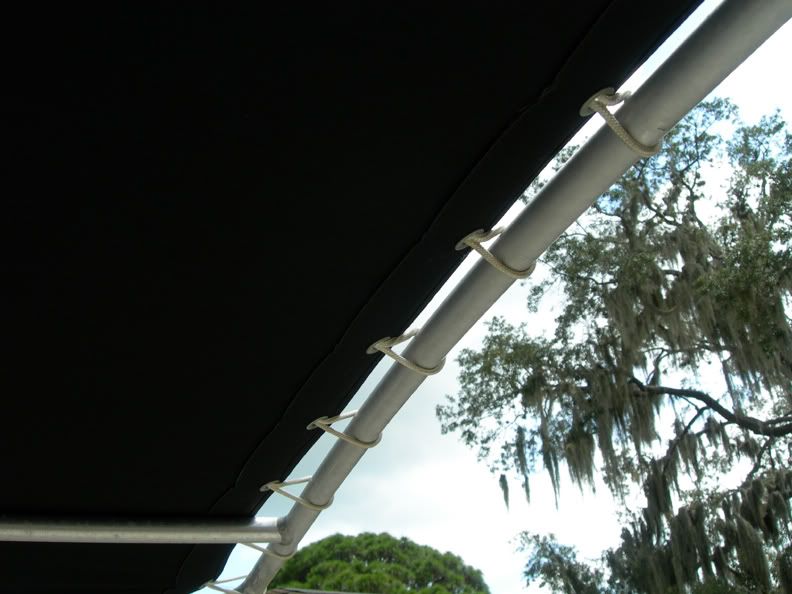
And from underneath.
This uses more rope than you might expect. My boat is a 19' Center console with an average sized t-top. I used a 50' piece of rope and had very little to spare. I wet the rope before I did the lacing, the theory there is the rope would stretch more while I was pulling on it. I don't know if this was necessary, but in my head it seemed like a good idea. Many people just go from eyelet, around the frame, to the next eyelet. This method of lacing provides more stability for the canvas, and it is the way a factory top is laced.
The canvas is now tight as a drum...literally you can slap it with your hand and it sounds like a bass drum. It looks great, many thanks to timmatthews for the drawing. I hope this proves useful to someone else
If you are in a hurry, don't start this project; it's gonna take a little while. If you have sensitive hands, put on some gloves; you're going to be pulling HARD on the rope.
First thing I did was knot the end of the rope and feed it through the first eyelet from the top. The end of the rope then goes around the frame, under the canvas, then back through the same eyelet. Then the rope goes across the TOP, down through the next eyelet, around the frame, under the canvas, and back through the same eyelet from the bottom. AS FOLLOWS:

Coming from the top of the last eyelet across the TOP

Down through the eyelet and around the frame, then UNDER the canvas

Then back through the same eyelet from the bottom

Pull it through and tighten. Once this has been repeated all the way around the frame, you can then untie the original knot, wrap it once around the frame, pull both ends tight, and knot together.

This is what it looks like from the top.

And from underneath.
This uses more rope than you might expect. My boat is a 19' Center console with an average sized t-top. I used a 50' piece of rope and had very little to spare. I wet the rope before I did the lacing, the theory there is the rope would stretch more while I was pulling on it. I don't know if this was necessary, but in my head it seemed like a good idea. Many people just go from eyelet, around the frame, to the next eyelet. This method of lacing provides more stability for the canvas, and it is the way a factory top is laced.
The canvas is now tight as a drum...literally you can slap it with your hand and it sounds like a bass drum. It looks great, many thanks to timmatthews for the drawing. I hope this proves useful to someone else


