Replacing Bellows on a SX drive (pic heavy)

Status
Not open for further replies.

bajaunderground

Lieutenant
Joined
Apr 18, 2008
Messages
1,401
Hey fellow boaters...we had a gorgeous day here in Colorado (perfect for Fall boating) I thought I'd replace the bellows in my signature boat. Having never done this before it most likely took me a little longer than the experts...but I saved a grip of money in the process! So Here's the play-by-play of what I did. Standard Disclosure: I replaced the drive and exhaust bellows in my Volvo Penta SX out drive following various posts' advice, OMC manual and common sense. I take zero responsibility if you follow my steps and screw it up. The only special tool I needed were snap-ring pliers and a 1/2 hex socket for a 1/2 drive (readily available at Autozone). The snap-ring pliers I got a Ace Hardward, but were too small to reach...so I improvised and used needle nose pliers.

Enjoy!

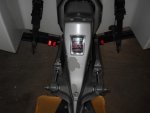
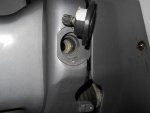
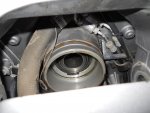
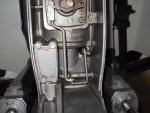
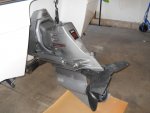
First couple of pics is of the drive and removal of shift linkage covers.
DSCN1754.jpg
DSCN1755.jpg
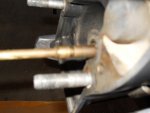
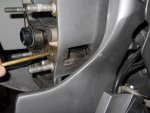
Detach shifting cable from shifting arm; then unthread it from shifting cable.
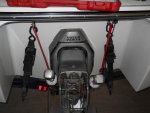
DSCN1757.jpg
remove and support hydraulic rams, 5/8" wrench and socket (I think support is not really necessary, as they can hang relatively easily and safely. Use you best judgement when removing rams?)
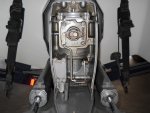
DSCN1756.jpg
Loosen the 6 nyloc 7/16 x 20 bolts holding the drive to pivot housing. (most recommend replacement...use your best judgement?) I do not envy you salt water boating peeps...these is strictly a fresh water out drive u-joints. Extremely clean!
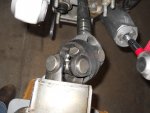
DSCN1758.jpg

Next post....
 
Last edited:

bajaunderground

Lieutenant
Joined
Apr 18, 2008
Messages
1,401
Re: Replacing Bellows on a SX drive (pic heavy)

Next, loosen shift linkage bolt (7/16" wrench).
DSCN1759.jpg
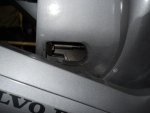
The recess in the brass housing is where the housing attaches to the pivot housing. It doesn't need to be completely removed, just loosened enough to remove.
DSCN1760.jpg
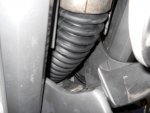
Old exhaust bellows.
DSCN1761.jpg
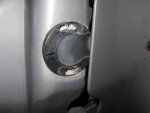
Trim sender switch. Mark position and remove (5/16" bolt)
DSCN1762.jpg

to be continued...
 

bajaunderground

Lieutenant
Joined
Apr 18, 2008
Messages
1,401
Re: Replacing Bellows on a SX drive (pic heavy)

Pull out trim sender and push up or down out of your way.
DSCN1763.jpg
Inside the trim switch is the 1/2" hex bolt. (Starboard and Port both need removed and seem to have a thread locker/anti-seize on them?)
DSCN1763.jpg
DSCN1764.jpg
Next is the stainless steel ground strap (to pivot housing). Use a 7/16" wrench or socket. I forgot to re-attach when I re-installed pivot housing, there's enough room between gimbal housing and pivot housing should you do the same?
DSCN1765.jpg

To be continued...
DSCN1765.jpg
 

bajaunderground

Lieutenant
Joined
Apr 18, 2008
Messages
1,401
Re: Replacing Bellows on a SX drive (pic heavy)

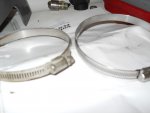
I ordered Volvo Penta OEM parts...so they had the correct style of hose clamp. The old clamp is a standard SS hose clamp with the threads stamped into the band. The OEM has the threads pressed into (not through).
DSCN1767.jpg
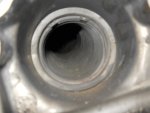
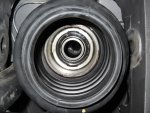
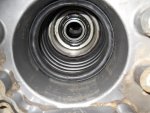
Here's the housing for the drive bellows. I think they're pretty clean for a 17 year old outdrive? Clean 'em up so the gasket has a nice sealing surface. Not adhesive needed.
DSCN1768.jpg
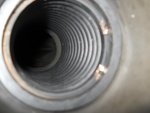
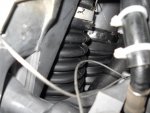
Here's the drive bellows attached. Position the hose clamp with the nut at a 2 o'clock position. Torque (40-66in. lb. or 4.5-7.5 Nm).
DSCN1769.jpg
The exhaust hose clamp must be positioned at 3 o'clock (sorry forgot pic) I torqued to about the same as the drive bellows. The key to successful bellows seating is to be patient and make sure the ends are seated evenly and all the way. There's grooves for both that they must fit in for a proper fit and when you put them on, it's pretty obvious?!
Once the pivot housing is re-installed (I forgot to mention the fresh water inlet housing mounted to the pivot housing. Use a large adjustable wrench to remove the nut (it's 1 3/8" dia.). be cautious, it is plastic! The hex bolts need to be re-installed with both the metal washer and plastic washer. Torque the pivot housing bolts to 105-120 lb. ft.
DSCN1769.jpg
Re-attach the shift cable housing, being careful to find the notch for the retaining bracket (again, it's a 7/16" bolt)
DSCN1772.jpg

To be continued...
 

bajaunderground

Lieutenant
Joined
Apr 18, 2008
Messages
1,401
Re: Replacing Bellows on a SX drive (pic heavy)

Pull the drive bellows over the lip on the drive side of the pivot housing. Again, take your time and make sure it's seated properly?!
DSCN1773.jpg
re-install the e-clip (again I used needle nose pliers, use caution as the thing will fly if it slips off!!!
DSCN1774.jpg
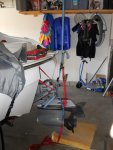
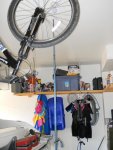
I'm not sure of the weight of the outdrive (I'm guessing 100-125lbs?). I attached an eye-bolt to a floor joist over head and used ratchit straps and tie-downs for support. I use it just as a stabilizer and never fully support the weight of the out drive, but I suspect I could. Use your best judgement for lifting outdrive?!
DSCN1775.jpg
DSCN1776.jpg

To be continued...
 
Last edited:
bajaunderground

Lieutenant
Joined
Apr 18, 2008
Messages
1,401
Re: Replacing Bellows on a SX drive (pic heavy)

Check u-joints for any signs of wear, tightness. Lube the shaft with marine grease, lube o-rings with light weight oil. I use assembly lube for the front of the housing (the part that seals against the drive bellows). It's oily enough for slipping, but tacky enough to stay put? While the drive is off, grease the u-joints thru the zerks. As mentioned and advised in other posts, when you pull the drive, check for alignment?! I just did this a few weeks back when I pulled and replaced the motor.

Once aligned, tighten bolts to specified torque (I cannot remember? Nor did I look it up in manual, I just tighten until it feels tight?) Re-attach shift linkage. I thread the little nut back on with the shifter and outdrive in neutral. Line up the shaft with the hole, slip thru and place cotter pin, which you replaced, right ((which I reused, only because I replaced it last month when I rebuilt the motor and had to pull the drive to remove)
DSCN1777.jpg
Exhaust bellow in the up position, fully installed.
DSCN1778.jpg
The intake and drive bellows from below. Note the 2 hydraulic line with zip-ties and clear hosing over them. They rub against the pivot housing and show sign of abrasion. I added these to stave off wear for a few more season...hydraulic lines are pricey!
DSCN1779.jpg

Hope this helps some!?
~Brett
 
Last edited:

bruceb58

Supreme Mariner
Joined
Mar 5, 2006
Messages
30,548
Re: Replacing Bellows on a SX drive (pic heavy)

Pretty good write up.

I am with you on using only OEM bellows.

I think you are missing a washer where your shift cable's cotter pin goes through. That washer will help reduce some slop in your shifting.
 
Last edited:
dutch993

Seaman Apprentice
Joined
Sep 15, 2013
Messages
48
Re: Replacing Bellows on a SX drive (pic heavy)

Note the 2 hydraulic line with zip-ties and clear hosing over them. They rub against the pivot housing and show sign of abrasion. I added these to stave off wear for a few more season...hydraulic lines are pricey!
View attachment 216563

This is a great suggestion and I will do the same. :thumb:
 

Lynall

Seaman Apprentice
Joined
Apr 24, 2012
Messages
46
Re: Replacing Bellows on a SX drive (pic heavy)

Could have done with this write up a few months ago, so i went in blind and its turned out okay, very little/info /pics on the web, regarding late SX drive repairs.
I did mine in the marina and just walked the drive off and on, wasnt to hard/heavy but is very top heavy
 
Last edited:
Brian 26

Chief Petty Officer
Joined
Aug 14, 2013
Messages
574
Re: Replacing Bellows on a SX drive (pic heavy)

Thanks for posting.
 

bajaunderground

Lieutenant
Joined
Apr 18, 2008
Messages
1,401
Re: Replacing Bellows on a SX drive (pic heavy)

Pretty good write up.

I am with you on using only OEM bellows.

I think you are missing a washer where your shift cable's cotter pin goes through. That washer will help reduce some slop in your shifting.

I will pull it off and place a washer. It's possible there was one there on the initial drive pulling when I pulled the motor? There wasn't one there this time around...or the PO had a service done and it wasn't placed...eitherway, I'll place one one. Good Eye you have there!

~Brett
 

bruceb58

Supreme Mariner
Joined
Mar 5, 2006
Messages
30,548
Re: Replacing Bellows on a SX drive (pic heavy)

I will pull it off and place a washer. It's possible there was one there on the initial drive pulling when I pulled the motor? There wasn't one there this time around...or the PO had a service done and it wasn't placed...eitherway, I'll place one one. Good Eye you have there!

~Brett
It will help reduce some of the sloppiness of the shifting. Make sure you use a stainless steel cotter pin and stainless steel washer.
 

dypcdiver

Lieutenant Junior Grade
Joined
Nov 1, 2005
Messages
1,039
Re: Replacing Bellows on a SX drive (pic heavy)

Whilst you are in there, a lock nut should be positioned on the end of the shift cable butted up against the brass cube.
 

Attachments

  • Capture.JPG
    Capture.JPG
    11.9 KB · Views: 22

bajaunderground

Lieutenant
Joined
Apr 18, 2008
Messages
1,401
Re: Replacing Bellows on a SX drive (pic heavy)

Whilst you are in there, a lock nut should be positioned on the end of the shift cable butted up against the brass cube.

I understand the logic behind this, but given how the shift cable attaches to the shifting arm, I'd have to lose the cotter key in order for the brass "cube" to unthread. At that point the lock nut does nothing except keep the brass cube in place? It wouldn't facilitate a safer/more secure attachment as the cotter key is the weakest link...and if it slips-out/breaks, I couldn't shift into/out of gear, so I'd know right there there's an issue! Others may be different? I just don't see any benefit in this case? If it makes you feel better then go for it!?

~Brett
 

bruceb58

Supreme Mariner
Joined
Mar 5, 2006
Messages
30,548
Re: Replacing Bellows on a SX drive (pic heavy)

The locknut is on the inside of the brass cube. Its purpose is to hold the brass cube solid at a 90? angle to the shift arm. You need to have that to keep the brass cube from rotating while you shift.
 

dypcdiver

Lieutenant Junior Grade
Joined
Nov 1, 2005
Messages
1,039
Re: Replacing Bellows on a SX drive (pic heavy)

Mine arrived new with the nut on the aft side of the cube(easier to get at)and it serves exactly the same purpose. Whilst I know the pure engineering side says the lock nut goes on the underside but I don't think it matters in this situation, just so long as it is present somewhere.
The inner of the cable will rotate, as happened on my throttle cable and caused the engine to tick over at 1200rpm it took a while to find that when I disconnected the cable from the arm it sprung round by more than 90deg creating friction at the throttle arm.
 
Last edited:
slag

Chief Petty Officer
Joined
Jul 17, 2009
Messages
471
So there is no draining of the fluid needed and, no gaskets to replace?
 

dypcdiver

Lieutenant Junior Grade
Joined
Nov 1, 2005
Messages
1,039
Old thread, but to answer your question, you are correct, a good smear of waterproof grease on the mating surfaces and the studs will make it easier to remove next time.
 
Status
Not open for further replies.
Top