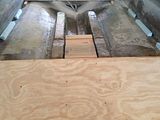
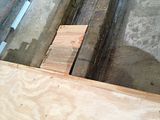
Mid 1960's OMC Evinrude gull-wing, a work in progress.

veebus52

Cadet
Joined
May 20, 2015
Messages
9
Quantumn, you are really doing some nice work. I'm picking up a lot of pointers from watching and reading all the comments from others as well. Makes me think I can restore my 1963 17ft. Red Fish glasser. It needs transom and deck work like yours. I was particularly interested how you cut off the cap to get to the transom as I was wondering how to go about that. I am watching with great interest. Thanks for taking the time to document your work so well!
 

Quantumn

Petty Officer 2nd Class
Joined
Jul 17, 2012
Messages
142
Thank you Veebus52, under no circumstances do I claim to know what I am doing, but muscling my way through it. Every step is 2 hours of reading these forums and 1 hour of work. I was reluctant and never considered removing the back splashwell and thought this project would be more than I bargained for. WOG gave me solid advice with cutting the back part off to facilitate easier working conditions, that hint was a godsend for sure. Also Sphelps clued me into make absolutely sure I have the hull braced from the outside to prevent separation. Glad I did that.
In order for me to remove the splash well, I needed to cut the 2 halves apart as they were resined together, thanks omc, lol. Started with a cutting wheel, not able to keep a straight line, then moved to a sawzall, no go, extremely on the over powered side (though it might have worked with a finer blade, oh well), last thing I tried worked like a champ. The ole' skillsaw. Nice and slow and was done in about an hour. Just suggestions sir, every project has its own tools and procedures. What works for me is not even the boat bible for everyone. Post some pictures of your situation and we will be more than willing to offer suggestions. Rock on Veebus52.
 

Quantumn

Petty Officer 2nd Class
Joined
Jul 17, 2012
Messages
142
Not much to report from yesterdays work session. I have been working very early hours and this old body needs naps, so yeah, got a little done but not worthy of pictures. I managed to clean up the rear deck board along the edges and seal them up. Let them cure overnight. Today is a stellar day and progress is being made so I will be sure to add some new pictures of the progress. Have a nice and productive day everyone!!!
 

Woodonglass

Supreme Mariner
Joined
Dec 29, 2009
Messages
25,924
Looking forward to the pics!!! You're moving along nicely and your quality of work is looking good. It's nice to see a new member take the advice given and put it to use in a productive way. It's not always the case!!!!
 

Quantumn

Petty Officer 2nd Class
Joined
Jul 17, 2012
Messages
142
Looking forward to the pics!!! You're moving along nicely and your quality of work is looking good. It's nice to see a new member take the advice given and put it to use in a productive way. It's not always the case!!!!

Thanks Woody, this whole project would be a debacle without the help from everyone of you. I actually feel as if I might know what I am doing now, lol.:humble:
 

Woodonglass

Supreme Mariner
Joined
Dec 29, 2009
Messages
25,924
That's why we call this...

You come here as a student, and leave as a Professor!!!!
 

Quantumn

Petty Officer 2nd Class
Joined
Jul 17, 2012
Messages
142
So while I wait for the second deck panel to cure I thought I would do some updating of today's progress. Really excited here, possibly get the deck laid down in the hull if everything works out well. The weather is just perfect and with a day off, I might be able to move forward a bit. :whoo:

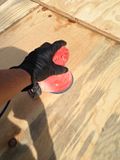
Started off the day with locating all the in-work items outside on the garage landing, sure feels nice to not be cramped in the garage. Placed the second deck board on sawhorses with 2/4's underneath to give a even platform to prevent the panels from warping in the sun.Then proceeded to grind just a little before laying down the CSM. First step, quickly sand down with 80 grit to level off any little buggars that might be lurking:


Next was a thorough cleaning with acetone, highly important as I found out a couple days ago. (That extra 3/4 board down the center sort of looks like a diving board, don't cha think, lol):


Wiped down and time to mix up some poly:


Just a quick shot of absolute tools of the trade:


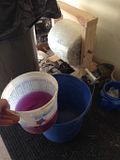
Per WOG's advice earlier, pre-warming the 435 resin is helpful in getting it to spread out evenly and soak into the wood prior to glassing in the CSM, though the Admiral would put me on double secret probation if I used her cake pan, so I resorted to the bucket method, same results:


gm280

Supreme Mariner
Joined
Jun 26, 2011
Messages
14,593
Honestly, I can't relate to warming up polyester to make it thinner to soak in better. We are having a heat wave here in middle Georgia with present temp in the mid 90's. And before the day is over, it probably will reach 100 degrees again today. I need to put the poly in some ice water to keep it from vaporizing...:facepalm:
 

Quantumn

Petty Officer 2nd Class
Joined
Jul 17, 2012
Messages
142
Honestly, I can't relate to warming up polyester to make it thinner to soak in better. We are having a heat wave here in middle Georgia with present temp in the mid 90's. And before the day is over, it probably will reach 100 degrees again today. I need to put the poly in some ice water to keep it from vaporizing...:facepalm:
That is too funny GM280, middle of the road conditions would be ideal for us both :tea:. Meanwhile, I had a major thunderstorm roll in very fast and had to scramble to get everything inside before mother nature releases her torment on global warming. Guess its back to being confined indoors, oh well, just need a quick sealing on the edges then install the t-nuts for the seats. Moving along :bolt:
 

Quantumn

Petty Officer 2nd Class
Joined
Jul 17, 2012
Messages
142
So I have a silly and possibly dangerous set of events in place. I am experimenting with the foam risers and need to attach them to the hull bottom before I install the decking. Many products will adhere them but with a minimal 24hr curing time. Being under the timer that I am for the 4th, I need to be faster. So here is my thought. It is common knowledge that foamular will literally melt with acetone and polyester resin. This I proved with a small piece on my garage landing, melted to a blue blob in a matter of seconds, and to this day, I can not remove it, it is stuck until I drag out the grinder and grind it away.
So what is it to say, just a light brushing of the foam on the side I need attached with a little acetone and applying that? Should be good and secured in a matter of a half hour. Now also, the foam is only there for the initial installation of the decking to raise it a bit before tabbing in the sides. Once I 2 part foam the hull, they will be a part of the floatation. Ideas?
 

Quantumn

Petty Officer 2nd Class
Joined
Jul 17, 2012
Messages
142
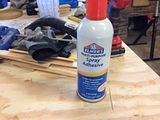
Ok, so that experiment did not work out as planned, was worth the try though. And no harm was the result which is good. So resorted to another attack, contact cement from elmers:


Seems to be working fine, and only needs 1 hour to achieve adhesion. Guess that is the plan for now. Will update.
 

MTboatguy

Fleet Admiral
Joined
Jul 8, 2010
Messages
8,988
Spray on adhesive works fine as long as the drying agent isn't acetone, I have used it in all kinds of boat repair applications.
 

Quantumn

Petty Officer 2nd Class
Joined
Jul 17, 2012
Messages
142
Spray on adhesive works fine as long as the drying agent isn't acetone, I have used it in all kinds of boat repair applications.
Would there be any issues if it does contain acetone MTboatguy? This elmer's adhesive contains acetone but not sure about if its designed as the drying agent.
 

MTboatguy

Fleet Admiral
Joined
Jul 8, 2010
Messages
8,988
A lot of spray on adhesives, use acetone because it evaporates so quickly, if in doubt, double check spray a small piece of the foam and let it sit for a few minutes, if it starts eating into the foam, then it will probably destroy it enough that you won't maintain the structure you are after. Don't ask me how I know!

:facepalm:
 

Quantumn

Petty Officer 2nd Class
Joined
Jul 17, 2012
Messages
142
Good call MTboatguy, I did just that and had no melting involved. Worked like a champ. Though I was in a hurry to move forward, my body said it was time to call it a day. So we will let those strips cure overnight and tomorrow before work, I will install the seat t-nuts and place the 2 deck panels in place. Also will insure that the gunwall cap will still be able to fit without too much effort.
Thanks for the heads up MTboatguy.
 

Quantumn

Petty Officer 2nd Class
Joined
Jul 17, 2012
Messages
142
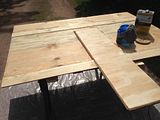
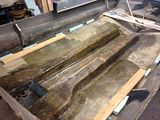
So waking up this morning, and before work, I checked the foam strips and they are attached solid to the hull. Yay, things are moving on. The 2 x 4's are only for temporary support as the deck is installed to help protect the foam strips, they will be removed before deck is secured down with 3m 5200 and ss screws:


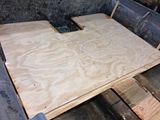
Layed the first deck board down for a test fit, and everything seems to be lined up perfectly. To ensure that it is square on the stringers and 1/4" gapped from the rear and sides, I used thick paint sticks tucked in the side to ensure nothing shifts:


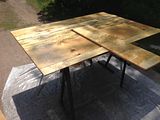
Not sure it is noticeable from this rear shot, but you can see the center additional 3/4" acx for future additions (pedestal seats or other ideas). I knotched them as well to ensure the under deck seat brackets sit nice and snug. Also on the very end is a 4" x 68" x 1/4" support board which will allow the next deckboard to snug up and give me something to mount to. Hopefully this will be enough to keep everything nice and level once its time to glass the top side:


Here is another shot, from a better angle:


Looking like it should work. Tonight after work, I am hoping to pb the deck boards into place and possible start tabbing them into the sides. I am like a kid in a candy store atm, fun stuff and all the hard work has paid off. Feel free to offer any suggestions or comments, knowledge is key. Thanks everyone.
 

Quantumn

Petty Officer 2nd Class
Joined
Jul 17, 2012
Messages
142
Looks like I will need to modify things just a tad, while the foam strips on the sides are doing what I wanted, they seem to be a little too tall. So will have to shave them down a 1/4" or so. Currently working on the t-nuts for the seat brackets, and I am once again attempting something that could be detrimental but in my mind I think it will work, stay tuned Iboaters. :ranger:
 

MTboatguy

Fleet Admiral
Joined
Jul 8, 2010
Messages
8,988
Quant, question, how are you going to secure the T-Nuts? I have installed quite a few of those over the years, if these are the type with the 4 prongs that pull into the wood, are you installing on the underside or the topside of the deck, I have done it both ways. If you install on the underside, then I recommend glassing over top of them and then after cured take a razor knife and cross cut the cured cloth through the bolt hole. That way when you run the bolt down through them you won't push it out. The ones with the 4 prongs are actually designed to install on the underside. I hope I am telling you something you already know, if so, then just tell me to bug off!

:D
 
Top