"It Happened!" Transom has to be replaced! (NOW W/PICS)

LX Kid

Ensign
Joined
Sep 5, 2008
Messages
993
Finally found four strong bodies with weak minds to move my gazebo/carport onto the driveway. So now I can work inside the boat without banging my head on the rafters.

"I smell paint fumes!" LoL

20171028_110005_resized_2.jpg 20171113_135134_resized_1.jpg
 
Last edited:

LX Kid

Ensign
Joined
Sep 5, 2008
Messages
993
Little by little getting there. Put two layers of fiberglass over the CSM I layed yesterday. Sealed the transom scupper holes and electronic line holes with resin.

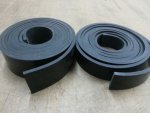
Pretty sure the doom of my old transom was caused by three areas. First was improperly sealed scuppers, 76 holes in the transom cap and a bad gasket around the transom light. They all were leaking for the past 35 years. I bought a 1/8"x 1" wide roll of rubber seal to fit up under the cap and will fill all the holes on the outside.

20171114_092020_resized.jpg 20171114_091958_resized.jpg
 
Last edited:

Bayou Dave

Lieutenant Commander
Joined
Dec 13, 2012
Messages
1,780
Little by little getting there. Put two layers of fiberglass over the CSM I layed yesterday. Sealed the transom scupper holes and electronic line holes with resin.

Pretty sure the doom of my old transom was caused by three areas. First was improperly sealed scuppers, 76 holes in the transom cap and a bad gasket around the transom light. They all were leaking for the past 35 years. I bought a 1/8"x 1" wide roll of rubber seal to fit up under the cap and will fill all the holes on the outside.


Any idea why there are so many holes in the transom cap?
 

LX Kid

Ensign
Joined
Sep 5, 2008
Messages
993
Any idea why there are so many holes in the transom cap?

I've taken the whole rub rail off at least once in the ten years I've owned the boat and who knows what former owners had done in the past. The starboard side bow had been in some sort of bad accident and was repaired so it come off at that time and maybe the rub rail isn't even the original.

Anyone know where I can buy a new rub rail "CHEAP?" I'd like to put a whole new one on and they are pretty costly!
 

LX Kid

Ensign
Joined
Sep 5, 2008
Messages
993
Now that I'm woking by myself, sorting out all the issues in the engine compartment is going to be a big "issue" for me with bad knees. I guess taking a double dose of Tylenol and getting after it will be the way to git-r-done!

20171114_100533_resized.jpg
 

kcon

Petty Officer 1st Class
Joined
Dec 10, 2016
Messages
303
Anyone know where I can buy a new rub rail "CHEAP?" I'd like to put a whole new one on and they are pretty costly!

If you can't salvage and restore one off craigslist or something, I got a taco marine semi-sigid vinyl type rub rail for like $260, seems like the best deal I could find for new.
 

LX Kid

Ensign
Joined
Sep 5, 2008
Messages
993
If you can't salvage and restore one off craigslist or something, I got a taco marine semi-sigid vinyl type rub rail for like $260, seems like the best deal I could find for new.

Should I decide to replace it, cypress wood with rope rub is sounding really good about now!
 

LX Kid

Ensign
Joined
Sep 5, 2008
Messages
993
Guess I'm down to the next critical step of painting the transom. Gotta check the temperature specs for best results. Cold front has moved in and is a little cool outside. Roll and tip is the painting method I will be using. I guess in the mean time I could crawl down into that dark hole, called an engine compartment, and start sorting things out.

Dark hole.jpg
 

LX Kid

Ensign
Joined
Sep 5, 2008
Messages
993
I decided to primer the transom and glad I did. It's amazing after wet sanding the primer you able to see all the little small flaws. I used glazing putty a few minutes ago and will wet sand in about 30 minutes and re-primer.

20171116_135903_resized.jpg
 

LX Kid

Ensign
Joined
Sep 5, 2008
Messages
993
Wet sanded the glazing putty and re-primered those areas. I also chiseled out the area for the stern light as well as sealed it with resin. I'm going to try and paint the transom tomorrow afternoon.
20171116_175545_resized.jpg
 

Jcris

Chief Petty Officer
Joined
Apr 23, 2016
Messages
466
The transom is looking very smooth!
What are you going to do about all those holes in the cap?
 

LX Kid

Ensign
Joined
Sep 5, 2008
Messages
993
The transom is looking very smooth!
What are you going to do about all those holes in the cap?

Yesterday I ran the length of the cap with resin. I also bought 1/8"x1" rubber seal that I will put up under the cap and when the rub rail is screwed back on it will seal everything.

Rubber seal.jpg
 

LX Kid

Ensign
Joined
Sep 5, 2008
Messages
993
I really didn't want to get into this at the moment, but I noticed they "beat the hell" out of the hull. After I complete this part of the project and get her back in the water I'll address that issue. Now way around not painting the hull. I just can't believe all the dock rash and pounding they did to her! When I start that I'll open a new posting and will be asking for help and advice.
 

LX Kid

Ensign
Joined
Sep 5, 2008
Messages
993
Just got thru painting the 1st coat and I gotta say that my roll and tip skills need a lot of work. There are brush strokes in the painted area no matter how lightly I brushed. Pretty sure the paint is too thick and needs thinking. I used a 4" foam roller and a new 4" wide brush. What should I used to thin the paint. Read, on the web, that mineral spirits is not really what I should use. Oh, and the transom is "very white" and I guess original hull color is something else. Maybe oyster white.

Tomorrow I may find it necessary to wet sand it and start with better thinning of the paint. My brush may be too stiff also.
 

zool

Captain
Joined
Aug 19, 2012
Messages
3,432
What brand paint did u end up using? Most marine specific paints have a separate brushing and spraying thinner...if its an alkyd enamel like Rustoleum, they have specific thinners too for their products, or you can use the spirits like you have...thin around 20-25%. As a side note, Rustoleums thinners are either acetone or mineral spirits with a slow evaporation rate, which helps for leveling out brush strokes. Some use a blend of both acetone and spirits.

Try brushing from the field into the wet line as you move across the transom, that way you always start the brush strokes in a fresh area and not in a finished area, meaning brush towards where you came from, and not away from it.
 

LX Kid

Ensign
Joined
Sep 5, 2008
Messages
993
Fiberglass Coatings paint. Polyurethane Enamel. I wonder if by tomorrow it will be hard enough to wet sand? Wonder also if I could take it to Home Depot and put a little tint in it to make it less so ":bright white?"

20171010_095634_resized.jpg
 
Last edited:

LX Kid

Ensign
Joined
Sep 5, 2008
Messages
993
No Title

Don't know if you can tell by the pics to see the brush marks in the paint. Either way it's looking a million times better than it did a month ago!
 

Attachments

  • photo281054.jpg
    photo281054.jpg
    90.2 KB · Views: 0
  • photo281055.jpg
    photo281055.jpg
    87.1 KB · Views: 0

zool

Captain
Joined
Aug 19, 2012
Messages
3,432
Thats an alkyd enamel, similar to Rusto or other implement paints....you should be able to thin it with acetone or spirits.......try wet sanding it in a small area after 24 hrs, if it doesnt gum up the paper, wet sand it and recoat a few times, you can also try running the foam roller over then next coat just before it starts drying, to smooth it out.

Home depot may try to tint it for you, tell them to use a tint for oil based enamel and if you can bring anything flat and small off the boat, they can color scan and match what you have now.....not sure if you have anything with the gel color on it left over. Or you can try sherman williams, they sell insulex i believe, and may be able to tint it for u using their color cards to get a close match.
 
Top