94 Crownline 266br

Tolyn

Seaman
Joined
Jun 28, 2010
Messages
57
Greetings!

Soooo I had this soft spot in the floor of our (new to us last year) boat. Yeah... You seasoned boaters can probably see where this is going already. We didn't know any better at the time and got a great summer of fun out of it as it was. In any event, what is done is done. On with the saga.

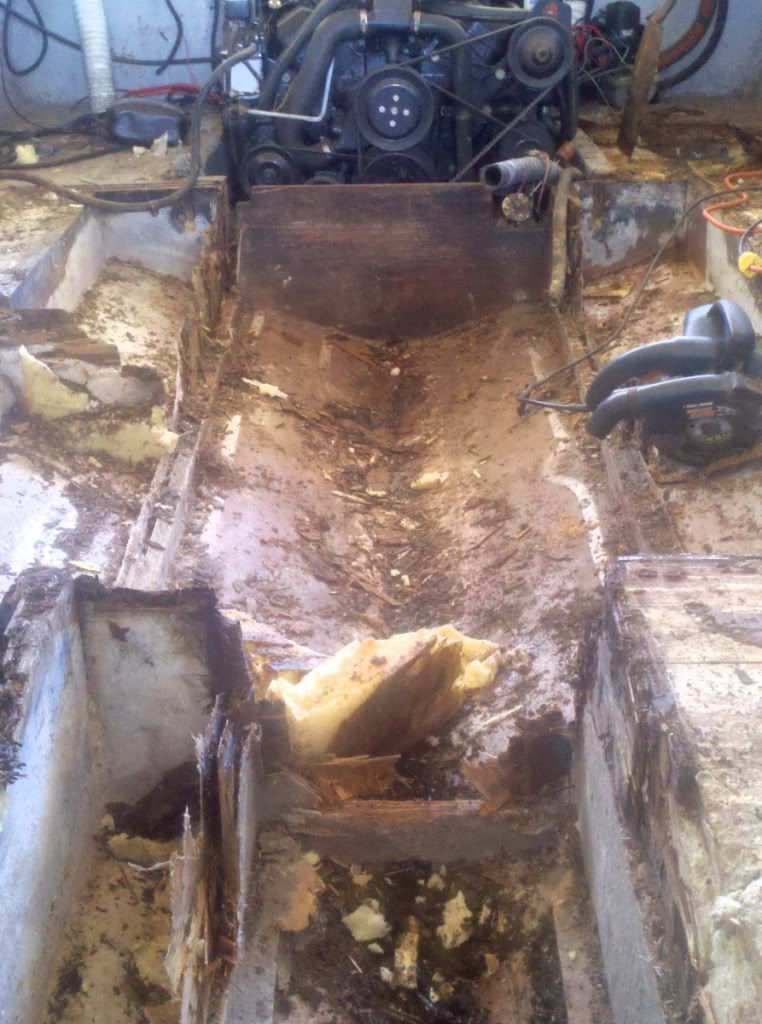
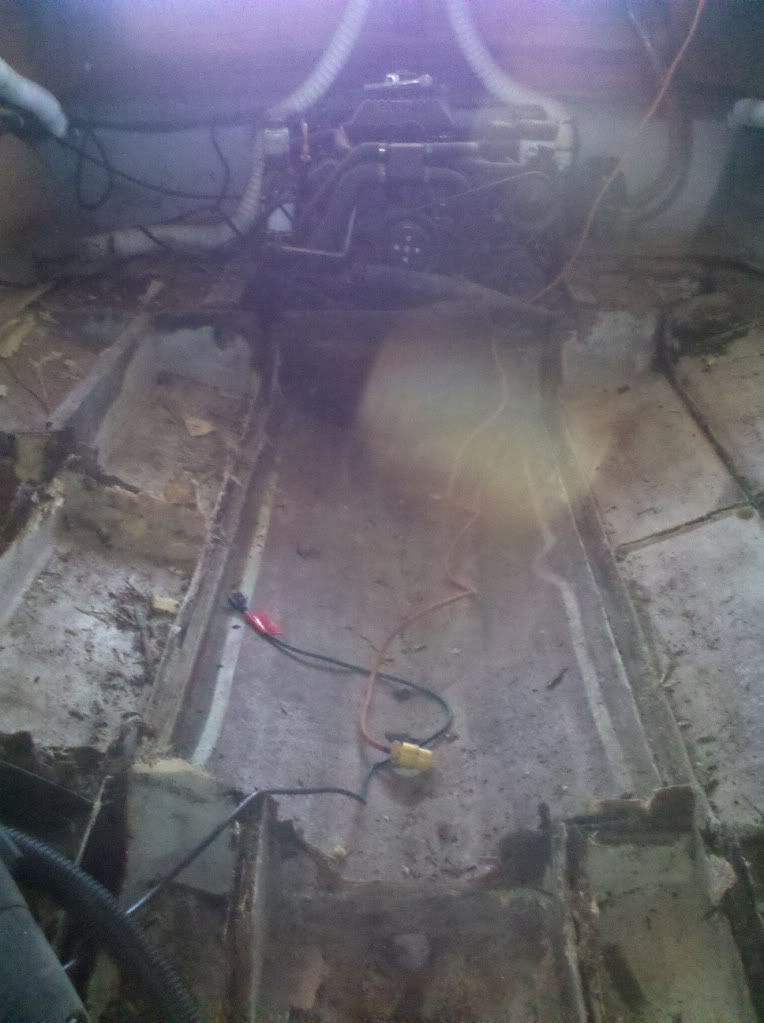
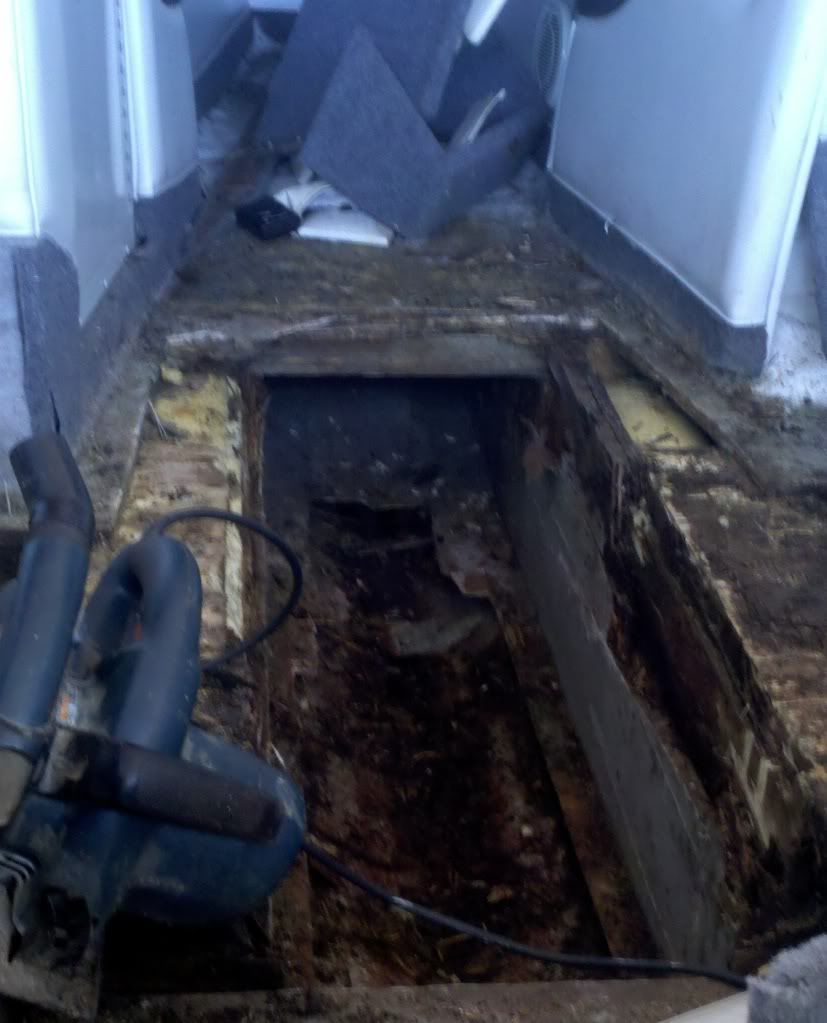
The interior was kind of tore up in the rear section so we decided to get some new seating for it because that seemed a really easy thing to do which would make going out more pleasant. Which led to some new carpet because the old stuff was coming up, was pretty nasty and really thin (I know! I know! no carpet). Soooo we have some new seating and carpet sitting in the garage now. Well while I'm at it I might as well deal with that soft spot in the water-ski locker thingy (wakeboard wont fit in there). Up comes the top sheets of plywood and ooh boy. She's pretty rotten underneath. Ugh..

5.jpg


More iboats reading and I have some questions.

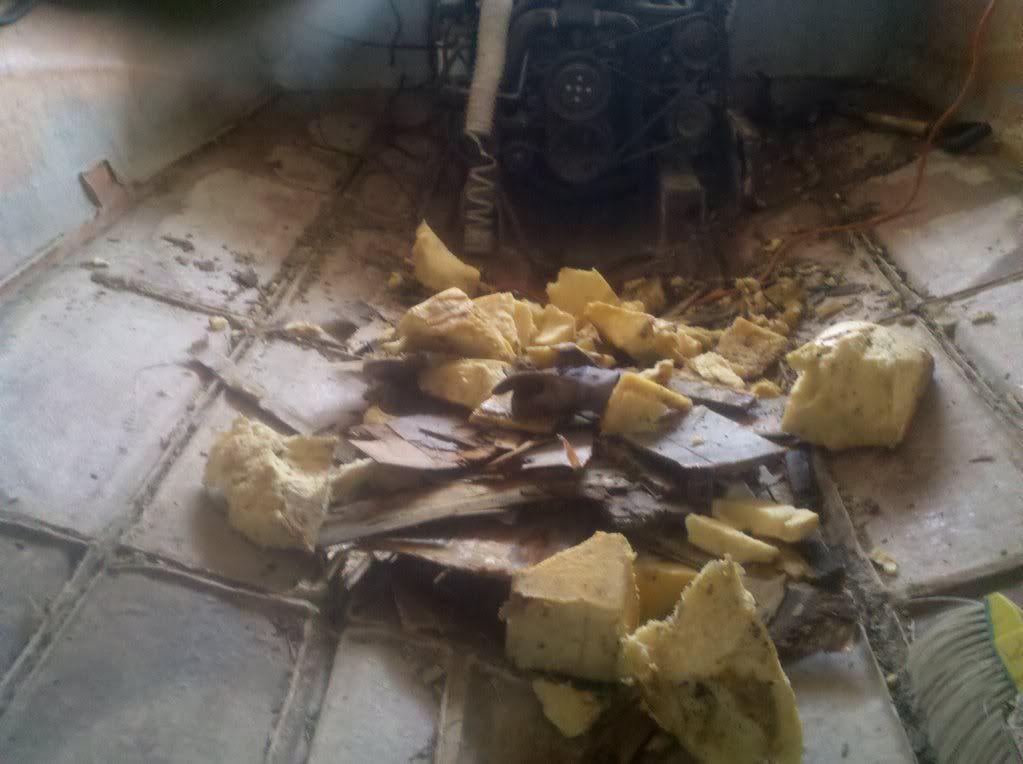
1) I'll spare the foam or no-foam debate that appears to have been pretty well discussed in several other posts. The foam thats in there doesn't seem remotely close to enough to float the boat and doesn't look particularly structural so I'm guessing it was for insulation. Anyway, foam aside: my "stringers" appear instead of being glass boards running lengthwise are more of a cross hatch pattern of glassed plywood making up a series of boxes?!?

2.jpg


a) Presumably I need to replicate this pretty closely with marine grade plywood or maybe PT plywood and then glass those? (read a bunch of posts on plywood prep).

b) Maybe its just me but, there doesn't seem anyway for water to escape one of those little boxed compartments...which strikes me as somewhat of a questionable design choice? Obviously somebody at Crownline thought it was a good idea?

c) I hate the thought of pulling the front seats and such out but at this point with what I've seen I think that needs to happen. Port side of the boat has a little mini storage cabin that looks like all fiberglass. I think that might just unscrew and come right out of there (hah! just cursed myself I'm sure). The other side has the helm controls. Disconnecting all that stuff kind of worries me. How easy is that stuff normally? Any other good options that might involve leaving it there somehow?

2) I still need to drill the motor mounts and transom and check for rot there (and then fill with 4200/5200 (whatever number tube of stuff I got from iboats). Honestly I was so disheartened with what I found today I just didn't have it in me to check. Judging by the angle of one of the motor mount bolts I am not holding much hope. Maybe I'll be lucky and it was just about the only angle it would go in at! I keep telling myself that. It's not working so far..

7.jpg


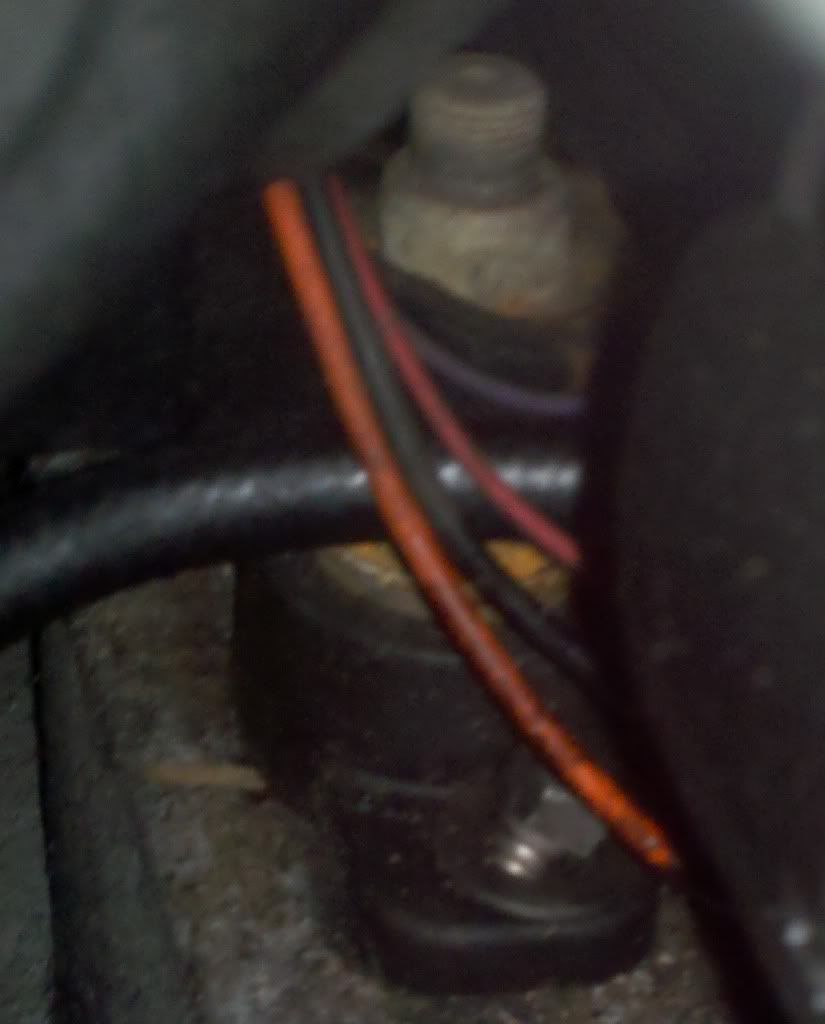
3) Scary how close the fuel line runs to one of the pulleys on the engine! Probably should route that a little differently or at least secure it on both sides so it doesn't get bounced against it somehow? I don't really need the kind of excitement that might create if it got rubbed through.

4.jpg


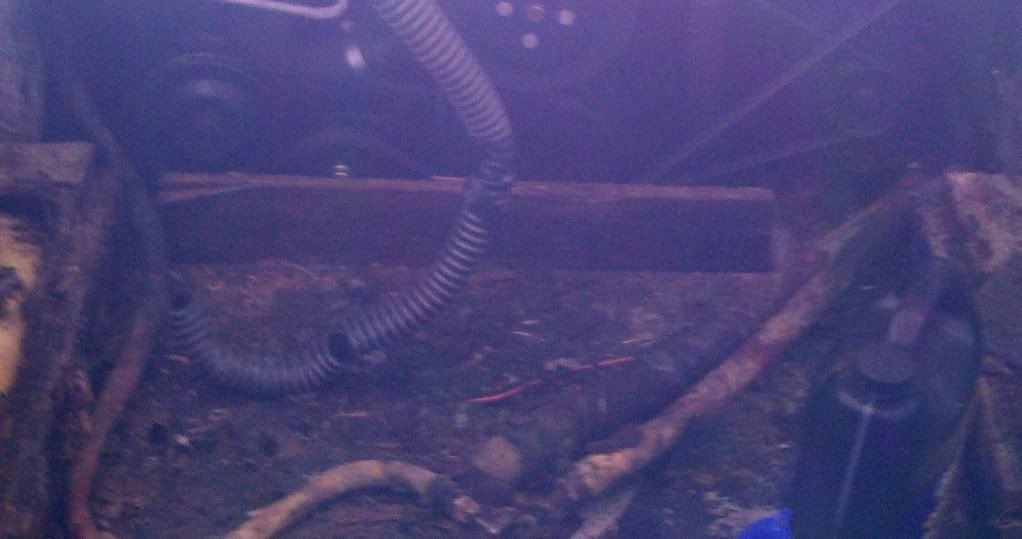
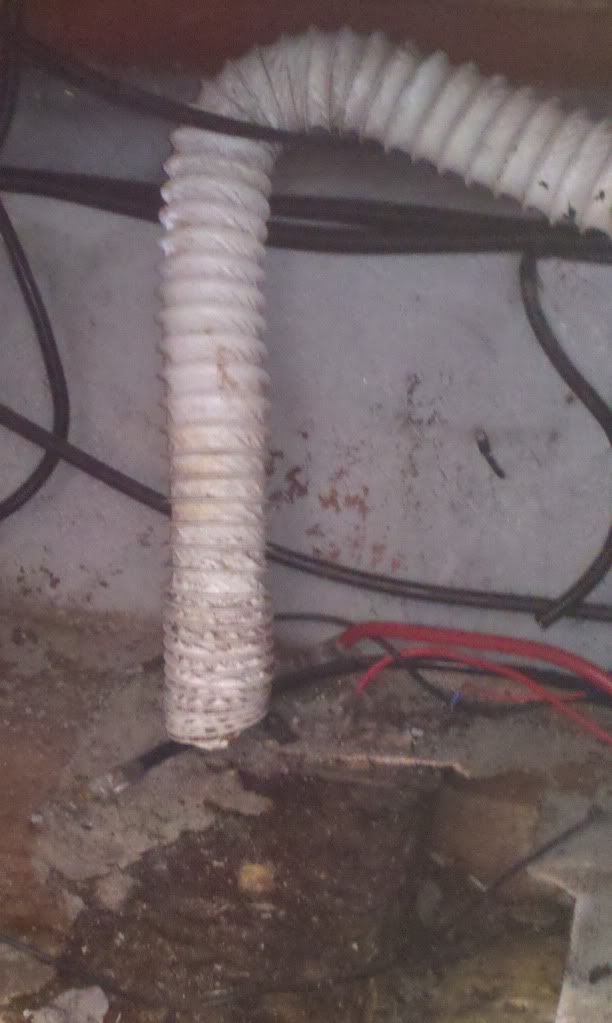
4) What's with the blower vent with no blower? There's an intake "blower" hose come in from high on both sides. The port side blower hose extends all the way down just shy of the bottom in the bilge area and has an inline blower about halfway up and exits the aft center vent. The starboard side hose just hangs down near where the batteries are/were and exits the same vent as the port side. Is that actually an intake of sorts or should I stick a blower on it?? Lengthen the hose so it drops into the bilge area also?

6.jpg


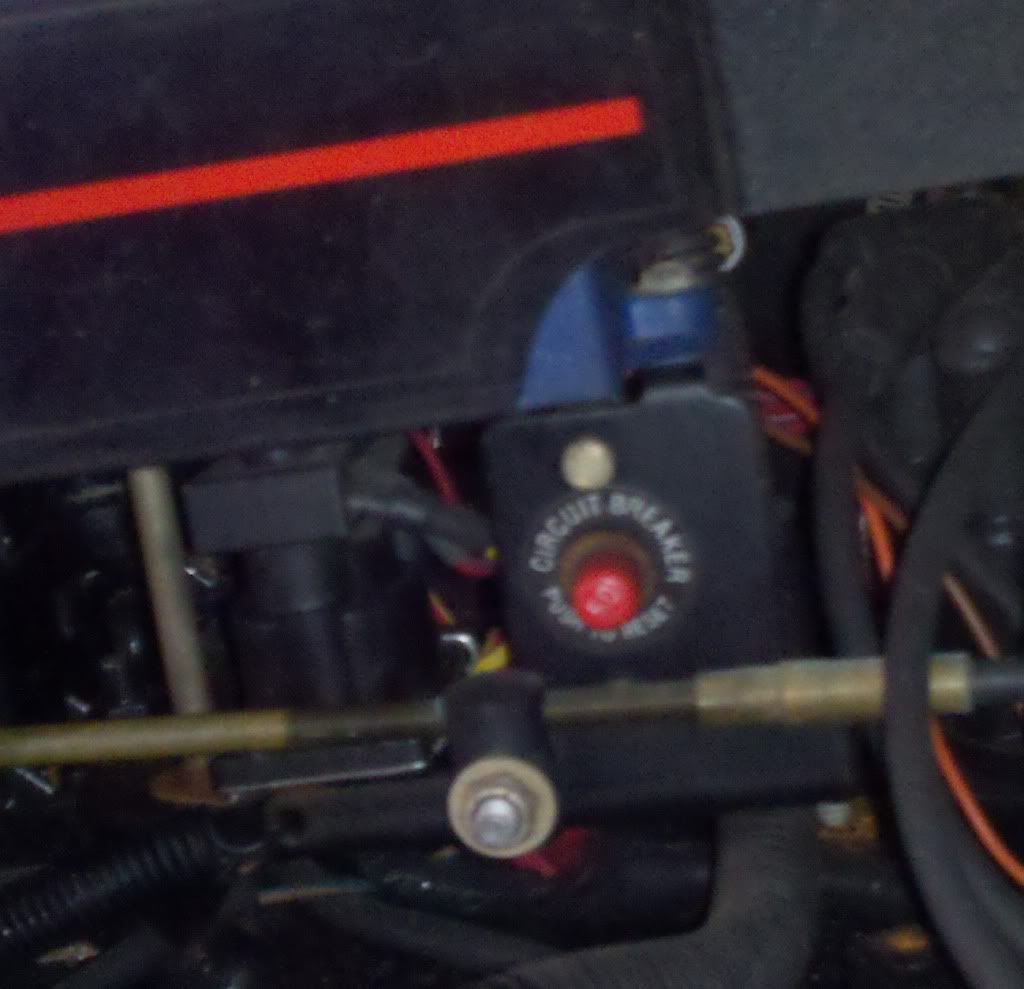
5) My motor (7.4l Mercruiser) has a red button! Some kind of circuit breaker obviously, but for what?? Electric fuel pump? As much as I like to push red buttons, I figured I should find out what this one is first (that and the motor is winterized so I wouldn't be able to tell anyway). It looks to me like it needs pushing though.

3.jpg


Any advice, sarcasm and general harassment is welcomed!

Respectfully,
-T
 

kmarine

Chief Petty Officer
Joined
Nov 5, 2010
Messages
581
Re: 94 Crownline 266br

Looks like you opened up a can of worms! First you only need one blower, the vent hose is designed to blow air into the bilge from the gill shaped vents while giong underway. as for the stringers, you it will take you a few weekends to replace the stringers. This is evidence of how a boat is cared for is more important than the age of the boat.

The red button protects the wiring harness from a large dead short. If a short occurred this could prevent an electrical fire. It is kind of like your main circuit breaker in your house electrical box.

I recomending doing a bit more research about your stringer repair before deciding how far you need to go to repair your hull. Fill any tholes with epoxy not urethane. good luck
 

ezmobee

Supreme Mariner
Joined
Mar 26, 2007
Messages
23,767
Re: 94 Crownline 266br

Check out this thread http://forums.iboats.com/showthread.php?t=300463 (he's got all his photos linked right in the beginning). His boat has similar construction to yours and he did an awesome job on it. His foamage is also masterful :) Good luck with your project and welcome to iboats!
 

Yacht Dr.

Vice Admiral
Joined
Feb 26, 2005
Messages
5,581
Re: 94 Crownline 266br

I think EZ is right .. Its a full blown resto from bottom to deck.

Taking the cap off and just start measurements and pics..then cutting away.

YD.
 

Tolyn

Seaman
Joined
Jun 28, 2010
Messages
57
Re: 94 Crownline 266br

Thanks kindly for the replies. The link offered some pictures that look a lot like what I am dealing with and certainly some quality workmanship in repairing the damage.

Took some core samples of the motor mounts on both sides and the transom. Bad to worse unfortunately. Motor mount cores came out black and crumpled to dust. Transom core was reddish but wet and felt like it just popped right through.

ughh.....
 

followme21

Seaman
Joined
May 19, 2008
Messages
65
Re: 94 Crownline 266br

I'm in the process of doing my 92 Crownline, I was also wondering if I should drill a 1/2 hole, with a piece of pvc or something in the bottom side of each stringer (the main front to back ones anyway) so any water that did get down there could make its way to the bilge. thoughts?
 

Tolyn

Seaman
Joined
Jun 28, 2010
Messages
57
Re: 94 Crownline 266br

Another Crownline person in the same boat (hah! haha haa..ehh. ok That probably gets used at least 3 times a day on this forum).

Yes! I thought the same thing. Especially after checking out the excellent work linked by EZ there. The person clearly makes allowances for water passage which makes sense but only in some places which I find rather strange. It would seem like they *all* should have a way to get down to the center?

I don't understand why you would go to that length to repair something and then create more wood pockets to hold water in. I would guess the drain holes (they probably have some really cool boat-ish name for them) should probably be bigger than a half an inch however. I'd be tempted to put at least a 3/4" hole maybe even 1" so if something drops in there somehow it doesn't clog it and make matters 10x worse.

I think a lot of my boat's problems started with the engine hatch cover that wet kids like to climb over, lay on, etc. That would seem the most regular source of water intrusion and looks to be about where the worst of the decay was. I'll have to look and think about that problem a little bit more to see if I can direct the water instead of just letting it go wherever and hope it eventually makes its way down and out.

The transom honestly worries me the most since it means the engine has to come out..and I've never taken an engine out of anything.. well maybe a hotwheel using a hammer and my Dad's shiny new Craftsman screwdriver. Probably won't use that method here (he lives a good distance off and won't let me near his screwdrivers). Plus the transom looks to be some kind of odd three part design where the center section is definately thicker than the sides. Maybe I'm a good candidate for that pour in stuff? The glass on both sides seems in good shape.

Respectfully,
-T
 

proshadetree

Lieutenant Commander
Joined
Jul 19, 2008
Messages
1,887
Re: 94 Crownline 266br

I used 1/2 inch limber holes for jets on mine. I compartmentalized the lower sections under the floor to at least slow some water down in the event of a breach or hole in the hull. Installed two bilge pumps to make sure she didn't sink. I figure that even if something get in there anything has to be better than wet foam.
 

Tolyn

Seaman
Joined
Jun 28, 2010
Messages
57
Re: 94 Crownline 266br

Ahh Frisco! It actually makes me feel a little better seeing somebody else going through such a similar situation (and progressing through it nicely!).

I'm about out of the initial despair and frustration stage I think after reading a lot here. Sad that somebody obviously knew it was a problem since there was 1/2" plywood over the top of rotted out fiberglass in most places as well some pieces of sheet metal sandwiched in the worst spots (where the chairs attached). It really can't get much worse at this stage (well I'm sure it can and probably will but shh.. let me have my Zen moment).

Sooo for those who have done this before or just generally know more than me (woohoo! everybody chime in!):

Did you, or is it wise, to put Limber holes in all the stringers in these types of "box" design scenarios?

I just can't see the wisdom in creating a closed in box with no method for water to escape downward. While one would argue that if I did my job right that no water would ever get in there but eventually...
 

ezmobee

Supreme Mariner
Joined
Mar 26, 2007
Messages
23,767
Re: 94 Crownline 266br

Drainage is key. Add the holes.
 

Bondo

Moderator
Staff member
Joined
Apr 17, 2002
Messages
70,531
Re: 94 Crownline 266br

Did you, or is it wise, to put Limber holes in all the stringers in these types of "box" design scenarios?

I just can't see the wisdom in creating a closed in box with no method for water to escape downward. While one would argue that if I did my job right that no water would ever get in there but eventually...

Ayuh,... Like ezmobee says,... Drainage is the key to hull life longevity...

Every bitty nook, 'n crany needs to be well Drained to the bilge where the water can be pumped, or drain out through the garboard plug...

Drill, carve out the holes, then seal the scars...

As yer learnin',...
There's No such thing as a Water-proof compartment in a boat bilge...
 

Yacht Dr.

Vice Admiral
Joined
Feb 26, 2005
Messages
5,581
Re: 94 Crownline 266br

I just can't see the wisdom in creating a closed in box with no method for water to escape downward. While one would argue that if I did my job right that no water would ever get in there but eventually...

Floatation would be the only wisdom in closed boxes.

Your right about if its done correctly.. No water should ever get in there.

OH..and one thing about open sealed boxes ( not foamed ).. the Coast Guard from what I hear doesnt like that ;) .

YD.
 

Tolyn

Seaman
Joined
Jun 28, 2010
Messages
57
Re: 94 Crownline 266br

Quick update (no pics sorry).

Weather here has been prevented working on it too much. I got out yesterday and started clearing the boat of all the gear stuffed into the various compartments. A lot like moving. You never realize how much stuff you have crammed into places until you have to take it all out of there.

It looks like the bow section is largely a fiberglass tub one piece sort of affair. Unfortunately the wood beneath it is toast which I seem to have no way to get to without taking the cap off the boat. Wife is not particularly enthused with me splitting the boat in half to say the least.

I tore some of the foam out and found the bottom third or so was more or less a wet sponge which validates what a lot here have said. Closed compartments with no drainage and spongy foam eventually will take its toll.

I'm going to kind of tackle the boat in thirds : middle section, transom/engine mounts, bow. I think this would go a lot faster with the gas tank out which would let me just cut this mess close to the hull and be done with it so I'm going to focus on that. Any suggestions on tank maintenance once it comes out that should be done? I've thought of replacing the sending unit since the gas gauge is pretty iffy at best. If I can just replace the existing with a reed unit and get more consistent readings then I may go ahead and spring for one.

Respectfully,
-T
 

Tolyn

Seaman
Joined
Jun 28, 2010
Messages
57
Re: 94 Crownline 266br

Well some progress finally. It all seems so daunting at times but as has been said, just keep chipping away and eventually you start seeing results. When the path seems unclear I come back here and read some more and the fog lifts a little bit each time.

tankout.jpg


The fuel tank is out. A nice aluminum one that looks in good shape. I'll replace the floaty sender unit with one of those reed ones since my gas status has always been rather suspect.

Considering purchasing a Saw-zall to help make the bigger cuts I have been doing with the Skilsaw (I keep thinking I am going to saw through the hull). The little saw blade grinder wheels work pretty well for cleanup after the bigger cuts.

Ugh the foam is terrible. Water-logged all the way through in some cases. Decided I am not putting foam back in. The boat is probably going to drop a few hundred pounds just in water weight alone. :rolleyes:

I think I will go look at plywood this weekend. Any guesses how many sheets a 26.5' boat would need (deck, stringer/structure, transom)? I ballparked at 10 but think that might be low since the stringer/structure parts are doubled up in most places.

Still kind of nervous about splitting the cap so I'm saving that for near the end to deal with the bow section. Wife is still not too keen on that but I don't see any way around it.

Sincerely,
-T
 

Tolyn

Seaman
Joined
Jun 28, 2010
Messages
57
Re: 94 Crownline 266br

More progress today. Got the interior sides out after taking several pictures of the throttle wiring and the shift linkages. This let me finally get all the way to the sides of the deck where they meet the hull. Plywood was pretty much dust underneath. Very wet and came apart if you looked at it funny.

Started cutting the stringer remnants away and got a good chunk of the middle section cut pretty short. Do I need to grind the fiberglass channels flat to the hull or can I clean them out good and drop a properly epoxy'd piece of plywood in the channel and just tab that? Presumably that is the grinding portion that folks seem to love so much so I'm guessing the proper answer is .. grind 'em flat?

Using the the grinder/cutter blade to score the fiberglass and then putting a flat square shovel in between seems to give a good amount of leverage and lets me move along at a faster rate (rather than just plain trying to cut through everything). It helps I'm sure that my plywood is really rotten.

sidesoff.jpg
 

jonesg

Admiral
Joined
Feb 22, 2008
Messages
7,174
Re: 94 Crownline 266br

I find it useful to not tell my wife what I am afraid of doing.
Just do it first, let her ask then tell her how simple it was.
 

jonesg

Admiral
Joined
Feb 22, 2008
Messages
7,174
Re: 94 Crownline 266br

Do I need to grind the fiberglass channels flat to the hull or can I clean them out good and drop a properly epoxy'd piece of plywood in the channel and just tab that?

Thats what I did, I left the channels for locating the new wood, grind either side for the tabbing.
I ran an elec chainsaw down the channels to clear them out and scour up the glass. It made a dirty hard chore very quick and simple.

I pre-glassed the stringers, sealed all end grains with multiple coats of resin , dropped a thick bead of PL premium adhesive in the channel to bed the stringers and just tabbed them in after the PL cured in a couple hrs , it made it simpler.

Poly resin would save you several hundred $ and make the project go together a lot faster.
 

Tolyn

Seaman
Joined
Jun 28, 2010
Messages
57
Re: 94 Crownline 266br

Thanks for the reply jonesg. I was hoping that would work. In several places the stringers are two layers thick it looks like I might have to grind out the middle so I don't get a gap in between the two at the bottom. Today my little 4" grinder died a hot smoking death. Poor thing. Good excuse to go order plywood I guess.

I got to have a clear look inside the motor mount / stringer sections today. My motormount screw/lags were sitting diagonal for the reason that I feared. The wood inside the mounts is soaked and rotting badly. Not much to grab onto any more. I would imagine it was just a short matter of time before something really bad happened.

I am curious how touchy the engine is to the height of the motor mounts. I'll get them as close as I can but at what point do you measure your work and go "nope... not going to work" and start a redo there? The fiberglass obviously adds a little bit so kind of aim a bit low/short and build up to it? Considering the potential consequences of being wrong I'd *really* like to get this part right.

597041274_photobucket_21357_.jpg
 
Top