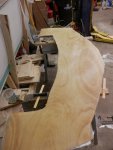
1992 Stratos 2250 here we go again

zool

Captain
Joined
Aug 19, 2012
Messages
3,432
I'm confused... why would you epoxy the transom and let it dry before it goes in the boat? Or am I not following correctly?

One reason is you want to soak the wood in the resin, to add longevity, you also want cured resin on the wood, so it doesn't wick up and dry out the lams when you glue and tab it in...some pre glass it, then install..

You can just put raw wood in, and wet it then, but any voids between the outer skin, and the wood, can get compromised when drilling out holes for accessories, or other transom items..if its pre-coated, any water that does find its way between the skin and core, wont start soaking the transom right away.
 

Arawak

Chief Petty Officer
Joined
Aug 27, 2010
Messages
486
I understand entombing the wood in resin, but it sounds like Almincha plans to wet the outer skin side and the edges, let it set, and THEN put it in the boat. It would be much better it put it in wet, so you get a better bond to the hull. Wet on wet is much better.

If you paint the wood with epoxy first, before you coat it with the PB you use for bonding, or before you put glass on it, it will not wick out and starve the lamination. I've done it this way for years, and whenever I've cut through the work the bond is always good.

As for drilling through for accessories, IMO you should overdrill and plug with PB, then drill the correct size again to prevent water getting at the wood.
 
Last edited:

zool

Captain
Joined
Aug 19, 2012
Messages
3,432
I understand entombing the wood in resin, but it sounds like Almincha plans to wet the outer skin side and the edges, let it set, and THEN put it in the boat. It would be much better it put it in wet, so you get a better bond to the hull. Wet on wet is much better.

.

Epoxy sticks to epoxy as well as it sticks to wood, absence of any blush....the bond will be the same, but dealing with a wet, sticky transom of that size would be a pain, so why?

Whether you precoat it in the boat right before install, or in the shop before nets the same result, just more cumbersome in the boat...
 

ahmincha

Lieutenant Commander
Joined
Jul 21, 2012
Messages
1,512
My plan was to wet out the hull side and edges let it dry then install, then wet out the other side after the transom is set and pb has dried. But after zool mentioned some people glass the one side then install. I kinda think this may be the way to go. gives me a chance to get familiar with the epoxy.
Now if this is a acceptable way should I do 2 coats of 17 oz or just one before install
 

zool

Captain
Joined
Aug 19, 2012
Messages
3,432
Glassing the inside of the transom before install, is easier, flat on a bench.......laying the cloth, vertically, after its in is a bit more difficult....the hull side doesn't need cloth, it becomes a smore of resin and wood.
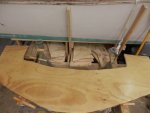
You can do one before, and one after tabbing, or do both before, then the 2 layers of tabbing.

I did mine without any cloth, but for other reasons, so I have to lay vertical cloth....but ill just pin it up and wet it out.
 

kcassells

Fleet Admiral
Joined
Oct 16, 2012
Messages
8,601
Just for the hey of it I glassed both sides of my transom and edges before install. A few days later came back with the pb and put that pig in. I did do trial runs, had another fella there to work with me. Worked the dripping pb and made filets. After that I glassed the transom again and did the tabbing.
 

ahmincha

Lieutenant Commander
Joined
Jul 21, 2012
Messages
1,512
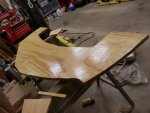
2 coats on face and edges so far. I rolled it on with small paint roller. As I rolled it got a little milky looking. Is that normal? P4040001_zpsqmwhik3k.jpg
 
Last edited:

kcassells

Fleet Admiral
Joined
Oct 16, 2012
Messages
8,601
Yea, that happens sometimes. Kinda means it's setting up and time to stop rolling. It'll dry clearish.
 

ahmincha

Lieutenant Commander
Joined
Jul 21, 2012
Messages
1,512
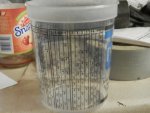
This is what im using to measure out my epoxy. I just go to 3:1 and pour part a in first to 3 then part b to the next 3 Actually you can use any matching # just do part a first. P4040002_zpsyj7xwf3r.jpg
 
Last edited:

ahmincha

Lieutenant Commander
Joined
Jul 21, 2012
Messages
1,512
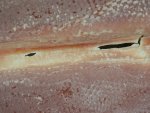
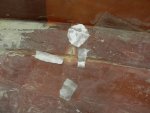
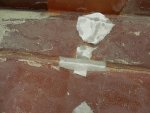
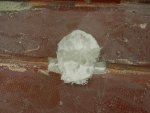
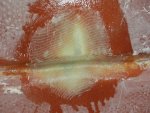
P4040002_zps6qlborqn.jpg P4040003_zpsvrpzbade.jpg P4040004_zpsfwlrlsoi.jpg P4040005_zpsbol3sx6n.jpg Going to fix my holes in the hull while I am waiting for transom to set
 
Last edited:

ahmincha

Lieutenant Commander
Joined
Jul 21, 2012
Messages
1,512
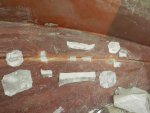
I plan on using 4 pc of 17oz to patch the holes. Then I will see if I need a big pc over the whole thing P4040001_zpstuvt4aea.jpg P4040002_zpswntovmff.jpg P4040003_zpsfi3u5oco.jpg P4040004_zpsnjng91ku.jpg Thats how im basically doing all the holes
 
Last edited:

ahmincha

Lieutenant Commander
Joined
Jul 21, 2012
Messages
1,512
P4050001_zpsazxabkhj.jpg
P4050002_zpsjokqvtta.jpg
P4050004_zpsf4sntvr2.jpg
P4050003_zpsyzgaqprk.jpg
I guess now i wait and ck on them every so often
 
Last edited:

kcassells

Fleet Admiral
Joined
Oct 16, 2012
Messages
8,601
Hopefully you placed something on the underside like wax paper, painters tape, saran wrap to keep the epoxy from falling thru or drooling down on your outside hull.
For each patch you show you should have at least 2 more pcs. that extend 2" further than the next and each one should be done wet on wet.
That measuring cup you have is a comfort level for you but it looks like a outofthisworld tool for me. lol, :happy:
All edges where the patch is going should be somewhat chamfered/angled from the inside of the hull.

I simply take my resin in a measure cup to say as an example for what I think I need to 12, then I know I need to add 4 more catalyst to make the mix in the same cup. Stir and simmer until the ingredients make for a good supper.
Also take that cup when your done, place it upside down somewhere and let the EEEpoxy run out. Then you can use it again.
As usual.... Looks great!
 

ahmincha

Lieutenant Commander
Joined
Jul 21, 2012
Messages
1,512
Thanks kc yes I put tape on the underside. And I did all 4 wet on wet.
It is a slower process then poly but once I start the stringers I'll be able to jump around
 

kcassells

Fleet Admiral
Joined
Oct 16, 2012
Messages
8,601
Back at you! Tx! man I love those days old marshmallow chickies. :laugh:
 

ahmincha

Lieutenant Commander
Joined
Jul 21, 2012
Messages
1,512
P4050001_zpsazxabkhj.jpg P4050002_zpsyy2eeczf.jpg P4050003_zpsyzgaqprk.jpg P4050004_zpsgufmpkvs.jpg Well these 4 patches have dried. Now what I noticed is where I ground therte is still a depression. Can I just add some more 17 oz starting small and going bigger again over what I already did to make it thicker?
 
Last edited:

Arawak

Chief Petty Officer
Joined
Aug 27, 2010
Messages
486
It is a slower process then poly

Keep in mind that you can -- in fact you should -- add another layer before it has fully set up. This saves you having to wipe down with a damp cloth and sand between layers and gives you a better bond.

The only time you need to wait for a cure is if you want to sand it.
 

ahmincha

Lieutenant Commander
Joined
Jul 21, 2012
Messages
1,512
Thanks Arawak that is how I did it 4 layers at once. But it still has a depression and I was wondering if I can do another layup small to large over what I already did.
 
Top