Woodonglass
Supreme Mariner
- Joined
- Dec 29, 2009
- Messages
- 25,924
I see no problem with your proposed rebuild solution. I also agree that all your wood should be totally encapsulated in resin and glass.
Last edited:


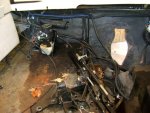
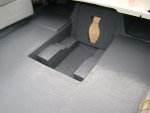
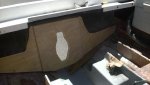
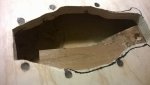
I had about 4 hours to spend with her on Saturday and feel like I made some good progress. You know once you just get out the big tools, sawsall, circular saw, etc. it goes a lot faster. Don't get me wrong its still a lot of work, and I still haven't gotten all the wood off the transom yet, but I'm a lot farther along after 4 hours then I thought I would be. Look what I found in the engine mounting box, standing water. I could not believe it. Boat hasn't been in the water since last August. I guess there is no where for it to go. So none of the wood in the mounting structure was encased in glass, why? I plan on encasing everything in glass when I rebuild the structure, is there any reason I should not do that?
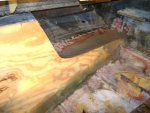
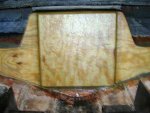
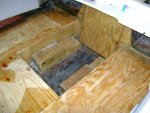
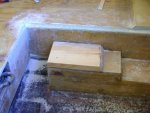
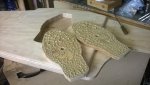
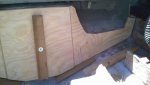
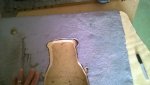
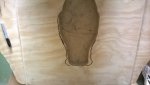
Also the underside of the floor decking is not wrapped in glass. Even though I am only going to the bulkhead with the decking most of the water coming in and out of the boat is happening in that stern area. Is there any reason I should not wrap the decking on both sides? Also, as you can see from earlier pictures my transom was pretty square on top and went across the stern of the boat. I think I am only going to build the new transom to the shape of the stern of the boat so I can (tab or fillet? I'm not sure which terminology to use here) in both the top and bottom of the new transom.
Is there any reason I should not do it that way? I have seen it done that way in several examples. Am I giving up lateral stability by doing that?
Thanks for the help!
I bet additional glass is still lighter then wet wood.....But yeah the thickness on the decks might make mating up the surfaces challenging.
I want some feedback on something I have been thinking about. Since I'm pretty sure my problem started with the lower transom bolt I was thinking I would like to go ahead and drill the bolt holes now and drill them oversized. I would then fill the holes with the resin, chop strand peanut butter before I glass the wood and glue it in. Then when I drill the holes to install the transom there will be no wood exposed. Any thoughts on that?
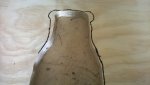
I originally cut the transom to integrate with some side structure on the ends but after reviewing some of the pics from the Atlantafiberglass site I decided to just stick with the form of the boat. I really didn't see any benefit to tying in the those upper cross sections and it just looked like it was going to be more of a PIA then it was worth. I think the adhesion process is going to be difficult enough without having to worry about an additional stress since that process has to be done before the resin starts to set up. Next weekend I start fiberglassing. It has been raining here a little, which is really unusual for our high desert dry climate but this week it is supposed to clear up and get in the 80's so I will be able to work for a few hours after my day job. Hoping this starts to go a little faster. I also found out this week my local boat shop maintains all the fiberglass supplies I need. The shipping and haz mat fees cost me $100 just to get the stuff from US Composites.