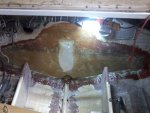
1989 Chaparral Transom Repair

jbcurt00

Moderator
Staff member
Joined
Oct 25, 2011
Messages
24,871
The old time oil is for use on seat and bolster plywood ONLY on a fiberglass boat. Tin boats arent the same, and.on those it can be used for the transom.

To be accurate, polyester resin alone is not being used as a waterproofer before application of more poly resin and glass. Its to pre-wet the wood ONLY, so that the dry plywood doesnt absorb too much of the resin intended for the glass. Poly resin alone is not a waterproofer, its only viable w the addition of glass. Else its prone to crack and have been of no use.

When using polyester or vinyl ester resin to 'glue' the transom laminations together, also requires the use of glass. Having a piece of CSM between the ply layers may add some strength, but not much. Just another means to laminate them together.
 

rad1026

Chief Petty Officer
Joined
May 1, 2006
Messages
443
great replies, thank you so much. I will keep going with transom removal and post more this weekend, unless I come up with more questions. I am still really wondering how I am going to rebuild the engine mounts, but one thing at a time. Oh, wait, I do have another question. In post #55 picture 3. You can see where the bottom of the transom stopped and there was a big lip of fiberglass rounding down to the drain hole. I'm guessing I am going to have to grind that entire lip down flush and leave an area at the bottom of my new transom to accommodate the drain.
 

drewm3i

Petty Officer 1st Class
Joined
Dec 31, 1969
Messages
280
Ok based on your new pics of the transom demolition it appears that the stern was constructed by a full sheet of 3/4" plywood running the full width of the stern and then they built up the central portion of the transom at the keyhole to accommodate the requirements for the mounting of the outdrive. Is this correct? If so the sections to the right and left of the center portion are there to support the stern and for structural purposes (Tow Eyes, Boarding Ladders etc...) but again the Main Structure IS the center section..

Yep, that's how Chaparral builds them. They also don't extend the wood down to around the drain plug on some boats like mine. Not sure about the OP's plug.
 

rad1026

Chief Petty Officer
Joined
May 1, 2006
Messages
443
this shows as post 70 on my computer, either way it was the three pics I posted on 2/29.
 

alldodge

Moderator
Staff member
Joined
Mar 8, 2009
Messages
40,762
Most boat manufactures do it this way. Just make a rounded place with the wood and give room for layers of glass when installing. Also keep the transom from sitting flush against the bottom of the hull, I used about a 3/8 to 1/4 gap and wrapped glass around to the bottom.

Photo573.jpg
 

rad1026

Chief Petty Officer
Joined
May 1, 2006
Messages
443
So you want an actual gap between the transom wood and the hull or you just don't want the wood setting on the fiberglass? Would you fill the gap with PB before laying in the glass? Good job by the way.
 

alldodge

Moderator
Staff member
Joined
Mar 8, 2009
Messages
40,762
So you want an actual gap between the transom wood and the hull or you just don't want the wood setting on the fiberglass? Would you fill the gap with PB before laying in the glass? Good job by the way.

Either way (air, PB or Mat) works. You don't want a hard spot where the load of the wood is solid against the hull. Vibrations and jarring can cause a crack.

As for the job, the pic above has several white spots from not wetting correctly. This happened form a misunderstanding or being misinformed, either way I fixed it. I mixed resin with some caposil to thicken the resin, this was a mistake. Don't mix anything with resin when your wetting the glass. I ground off everything you see in the pic and reglassed. The next time around it came out real nice, and every layer afterwards.

The pic above was to show how I cut the wood prior to install.
 

ondarvr

Supreme Mariner
Joined
Apr 6, 2005
Messages
11,527
You don't want to thin the resin with anything, this goes for all types of resin, leave it as is. As for knowing what type or resin it was made with, 99.9999999% of all boats are made polyester and/or VE, and if there's any VE it's only in the skin coat on the hull, not the entire boat. If this was a custom one off boat there would be a very slight chance of it being epoxy.

You can glass the plywood together or glue it, it's not going to make much of a difference.

It doesn't make much of a difference on the transom if the plywood touches the hull or sides, these are very ridged section of the hull with little flex, so you aren't creating a hard spot. Leaving a gap just makes cutting the plywood to fit easier.

Glassing the wood prior to putting in place kind of became something people on this site did, I'm not sure why, it takes longer and makes little difference because it still needs to be glassed once it's placed in the boat. If it's really difficult to get to the transom to do the glass work I could see it helping, but if the cap if off its wide open in there. Glassing stringers prior to putting them in place seems like a lot of extra work that doesn't accomplish anything.
 

rad1026

Chief Petty Officer
Joined
May 1, 2006
Messages
443
okay, you guys are blowing me away now. I love all the information and experience, thank you all so much for your generous sharing. Yeah, I see what you are saying about glassing the wood prior to installation. If you use PB to adhere the transom that is serious water proofing on the back side of the wood. When you glass in the front you are water proofing there. Same thing goes for the stringers. I get it. I guess I want to do things better then the factory did. I'm all water-shy now because I NEVER want this to happen again and this could have been going on for years in my boat without any symptoms. So how do you keep this from happening? It seems the biggest culprit is the keyhole or the mounting holes for the transom assembly. If any intrusion happens in these areas how do you keep it from penetrating the wood? And how do you keep it from spreading to the stringers, motor mounts, etc? I could see glassing over the key hole once its cut but what about the mounting holes? I'm sure my intrusion was from my sacrificial anode bolt washer leaking. How do I keep this from happening?

Thanks again for all the replies
 

tpenfield

Moderator
Staff member
Joined
Jul 18, 2011
Messages
17,712
Many folks wonder about some of the boat manufacturing practices as they go through a repair or restoration as you are doing. The issues that you see lie in the fact that during the hull fabrication process some manufacturers do a nice job in encapsulating the wood structure, but then they proceed to cut holes and drill holes in all sorts of places in order to install all of the components :eek: So, unless they are diligent and seal the exposed edges of the cut-outs and holes, the structure is open to the elements. Kind of defeats their initial purpose. :facepalm:

Other manufacturers don't do a good job of encapsulating the structure in the first place and all the cutting and drilling just makes matters worse.

You could (and should) seal up the edges of the cut-outs and seal the exposed wood of the transom bolts holes, as that will prevent moisture from having an easy entry into the structure. Resin is probably a good thing to use to seal the exposed edges as it will absorb into the wood and not create any clearance issues when you go to install things.

As far as your question about moisture propagating throughout the wood structure, again, it is a matter of how the manufacturer chooses to build the structure and secure it into the hull. Some manufacturers do a better job of isolating parts of the wood structure from other parts, other manufacturers do not.

An example of this was on my Formula 242, which had bulkhead and stringer cancer. The rot stopped at the transom, because the transom wood was glassed in before the stringers and bulkheads were installed. So, there was fiberglass separating the transom & stringers and the moisture stopped there. On the down side, the wood components of the stringers and bulkheads were all joined together with staples, etc. as a single assembly, then glassed into the hull. So, moisture was free to travel throughout those parts of the structure. If they had glassed the bulkhead before attaching the stringers, the 'cancer' would probably have been isolated to just the bulkhead, where it originated.

These are the details that most folks do not think about nor can see when they consider buying a boat, be it new or used. They all look shiny on the outside :)
 

rad1026

Chief Petty Officer
Joined
May 1, 2006
Messages
443
Excellent! Thanks for taking the time to reply in such detail. Yes, I will seal the edges and holes and end of the stringers where they attach to the transom. Can't wait to get this demo done so I can start putting things back together.
 

jbcurt00

Moderator
Staff member
Joined
Oct 25, 2011
Messages
24,871
IMO, pre-wrapping the plywood before installation accomplishes a few things:

Opportunity to 'practice' glassing and get resin mixing and consumption estimates for how each person works, as most have never done it. Working w plenty of room around and on a flat surface at waist level on a work bench/table

Isolates the components, stringers from the transom, bulkheads and etc and vice versa. So its possible to keep water compromised parts from damaging adjacent components.

Hopefully the edges of the plywood are as well sealed and protected from water intrusion as possible.

It provides 1 more layer of protection w 1 additional barrier in an imperfect process and practices by those that haven't done it before.

You can see all the results of your work. Dry spots, delamination of the glass from the plywood or other problems.

Once encapsulated, the parts and pieces are glassed and that should help prevent having dry placed plywood from wicking resin away from the joint, starving it of sufficient resin to bind tbe glass and plywood.

But, no, as far as I know, no manufacturer builds (or built) their boats that way.

Are the costs of time, money, effort and supplies worth it? Everyone must judge that for themselves.
 

Woodonglass

Supreme Mariner
Joined
Dec 29, 2009
Messages
25,924
Very Very Very Important. Always pre Coat/Soak any wood components with resin prior to laying the first layer of CSM or 1708. Also always fill any voids in the flat areas or the edges of the wood so that air pockets won't form. This is critical to a good layup and to ensure the wood is properly encapsulated. And then as previously stated. Proper maintenance and care in the future is imperative. You must always pre drill and pre coat any screws or bolts that are used to attach any and all hardware to the transom or any other wood parts of the boats.
 

JASinIL2006

Vice Admiral
Joined
Feb 10, 2012
Messages
5,549
IMO, pre-wrapping the plywood before installation accomplishes a few things:

Opportunity to 'practice' glassing and get resin mixing and consumption estimates for how each person works, as most have never done it. Working w plenty of room around and on a flat surface at waist level on a work bench/table

I think this is a a very good observation. If you haven't glassed before, it takes while to get the hang of it. Practicing in the manner you describe (with your work piece easily accessible) greatly helps when you have to start working in the boat, where space is sometimes cramped and you have to work in sometimes-uncomfortable postures.
 

tpenfield

Moderator
Staff member
Joined
Jul 18, 2011
Messages
17,712
Fiberglassing is a learned skill and folks have various techniques that they have acquired with experience to make it go easier and come out better. I've done major structural repairs on my 2 Formula boats. I didn't get reasonably good at fiberglassing until doing the second boat.

Key things that I learned:

Plan out your work, because as soon as you add the catalyst (hardener) to the resin the "clock is ticking". With ploy resin you have about 15 minutes, with VE you have about 30 minutes.

Start with small batches of resin until you get the feel for how much you really need and how big an area you can do before 'time is up' and the resin is hardening before your eyes :eek:

Resin first, then the cloth . . . you will see lots of folks apply the cloth to an area and then try to dab the resin onto the cloth and get it to soak in. That technique is wicked hard to do and takes a long time, so the clock runs out on you, and it often doesn't yield good results. Like WoG says, it is so much easier (and often necessary) to pre-wet and area and then lay the cloth over it and smooth it out. The resin coming up through the cloth chases away the air pockets and you get a perfect wetting of the cloth much faster.

I actually like to work with stitched cloth, like the 1708, because I can wet the back side of the cloth in a prep area, let it soak in a minute or two and then apply it wet side down to the work area and roll it smooth. With CSM it is better to slobber the wood with resin and lay the cloth over the wetted area.
 

ondarvr

Supreme Mariner
Joined
Apr 6, 2005
Messages
11,527
IMO, pre-wrapping the plywood before installation accomplishes a few things:

Opportunity to 'practice' glassing and get resin mixing and consumption estimates for how each person works, as most have never done it. Working w plenty of room around and on a flat surface at waist level on a work bench/table

Isolates the components, stringers from the transom, bulkheads and etc and vice versa. So its possible to keep water compromised parts from damaging adjacent components.

Hopefully the edges of the plywood are as well sealed and protected from water intrusion as possible.

It provides 1 more layer of protection w 1 additional barrier in an imperfect process and practices by those that haven't done it before.

You can see all the results of your work. Dry spots, delamination of the glass from the plywood or other problems.

Once encapsulated, the parts and pieces are glassed and that should help prevent having dry placed plywood from wicking resin away from the joint, starving it of sufficient resin to bind tbe glass and plywood.

But, no, as far as I know, no manufacturer builds (or built) their boats that way.

Are the costs of time, money, effort and supplies worth it? Everyone must judge that for themselves.

I call myself lazy, but a better description is efficient, I hate extra steps that don't accomplish anything, I can't stand doing something twice when it can be done once and the the results are the same or better. Some people like tinkering, and if something makes them feel good, they do it whether it helps or not. But that ain't me.

1. It may be easier to get a little glass experience prior to jumping in the boat, but there are many opportunities to get this practice in other parts of the project.

2. The individual pieces of wood can be isolated just as easily when it's done in place.

3. You will be resin coating the wood in the exact same way, so everything will be sealed.

4. You won't be adding one more layer of glass, the same amount will be used either way.

5. You can see just as much when it's done at one time in the hull, if there are mistakes you will be fixing them either way. One of the biggest problems is people trying to apply one layer of glass at a time, it's actually much easier to do multiple layers at a time.

6. The wood will have been resin coated, so there won't be dry spots from resin being sucked into the plywood.


They don't do it in production because there are no real benefits in doing it that way, you just add a tremendous amount of time laying out the boards, glassing them, trimming and turning them over, glassing the other side and trimming it a again. Whatever time is spent doing all of this is wasted because you need to do all again inside the boat, just with one layer less of glass.

All the layers can be done at one time when in the boat, it's actually easier to do several layers of glass at one time than just one at a time, the results are typically much better too.

After saying that, if it makes someone feel better glassing the wood prior to installing it it's totally up to them, they can do it any way they please, but the reason isn't that it turns out better.
 
Last edited:

rad1026

Chief Petty Officer
Joined
May 1, 2006
Messages
443
No Title

I had about 4 hours to spend with her on Saturday and feel like I made some good progress. You know once you just get out the big tools, sawsall, circular saw, etc. it goes a lot faster. Don't get me wrong its still a lot of work, and I still haven't gotten all the wood off the transom yet, but I'm a lot farther along after 4 hours then I thought I would be. Look what I found in the engine mounting box, standing water. I could not believe it. Boat hasn't been in the water since last August. I guess there is no where for it to go. So none of the wood in the mounting structure was encased in glass, why? I plan on encasing everything in glass when I rebuild the structure, is there any reason I should not do that? Also the underside of the floor decking is not wrapped in glass. Even though I am only going to the bulkhead with the decking most of the water coming in and out of the boat is happening in that stern area. Is there any reason I should not wrap the decking on both sides? Also, as you can see from earlier pictures my transom was pretty square on top and went across the stern of the boat. I think I am only going to build the new transom to the shape of the stern of the boat so I can (tab or fillet? I'm not sure which terminology to use here) in both the top and bottom of the new transom. Is there any reason I should not do it that way? I have seen it done that way in several examples. Am I giving up lateral stability by doing that?

Thanks for the help!
 

Attachments

  • photo239180.jpg
    photo239180.jpg
    224.1 KB · Views: 8
  • photo239181.jpg
    photo239181.jpg
    279.4 KB · Views: 8
  • photo239182.jpg
    photo239182.jpg
    227.1 KB · Views: 9
Top