1976 Tom Boy Boat, 1976 40 HP Johnson Outboard and who knows what Trailer

igotit

Petty Officer 2nd Class
Joined
Oct 30, 2015
Messages
134
I looked thru this entire thread......i really like this boat.
Great progress sofar.
 

nurseman

Lieutenant Junior Grade
Joined
Jun 2, 2013
Messages
1,045
Give that poly a good wipe down with acetone before you start sanding, and it will help with the sticky.
 

gm280

Supreme Mariner
Joined
Jun 26, 2011
Messages
14,593
Give that poly a good wipe down with acetone before you start sanding, and it will help with the sticky.

Good idea nurseman. Otherwise that sticky cured poly is a mess to deal with trying to sand it out smooth. It gums up the paper quickly and while I have hundreds of disks, I hate to use so many for such a otherwise simple sanding.

I have a lot of things to get done today. So I really hope to get the hull ready for a primer coat if everything goes as planned.
 

gm280

Supreme Mariner
Joined
Jun 26, 2011
Messages
14,593
Well I had to post here today. WHY? Because this is my 10000 post. Yea, I do realize 9999 are totally worthless, but I don't know how I racked up that many. I need to watch how many post I make. :eek:

I did sand out that last poly putty area. And it really sanded out pretty well. Then a use a rattle can primer (Rustoleum automotive sandable primer) to see how it would look with some color on it. Looks nice and now I need to go over the hull one more time looking for areas that need some work, and then reprime the entire hull with the good stuff. Hope that happens soon too.
 

gm280

Supreme Mariner
Joined
Jun 26, 2011
Messages
14,593
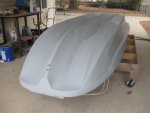
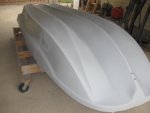
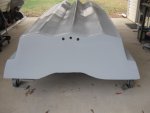
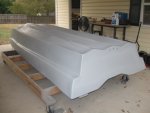
With every thing going on today, I don't know how I managed to work in priming the hull, but I did. And there are a lot of things that look a ton better. But also some more pin holes that I can now see as well. So some more sanding and filing. Not like before but a few yet. The temps were near 80 degrees and no wind. So I got out everything mixed up the two part primer and shot it before the sun went down.
001.JPG
You can see some different shades of gray because I just did finish spraying and it all hasn't cured yet. I wanted to get some pictures before it got too dark.
002.JPG
Can see a more shiny effect on this side because it hasn't flashed off yet. I have to say flat colors look so much better the gloss for hiding imperfections.
003.JPG
The transom looks good. But there are a few holes to cover there as well around the edges.
004.JPG
And a final shot from the transom looking down the side.

In the next couple days I will sand with probably 320 grit and fill the remaining pin holes. And if it looks good after that, It may be time for some color(s). :noidea:
The trick now is to not sand through the edges but sand it all smooth ready for paint. Sand paper changes grit when you sand corners and edges. You have to tread very lightly with them. I did shoot the edges and such with a few coats and slowed down while spraying to get more primer on them. We'll see how everything comes out.
 

gm280

Supreme Mariner
Joined
Jun 26, 2011
Messages
14,593
Thanks guys for the nice words. I appreciate it.

Again, I don't know how I managed to work in some boat work today, but I did. I sanded down one panel from transom to bow. It took a while because I am using 320 grit paper and trying extremely hard not to cut through the primer., especially on the edges. But the finish looks pretty nice. Yes, I am still exposing a few more pits and pin holes, and a few cut throughs, but not many and small in size. Once I fill the pits and pin holes, I think I can spot prime, sand and be ready for some color....I think. :der::loco:
 

gm280

Supreme Mariner
Joined
Jun 26, 2011
Messages
14,593
Looking nice GM! I know that feeling on "hope I am ready for color" lol!

Arch, after thinking about it, I may switch now to 400 wet and continue sanding this latest primer coat. Because it looks like this sanding could set up for paint. There are a few spots that will need filled and fixed, but those can easily be spot repaired and spot primed as well. So wet 400 could be the route I go with now with the little rubber flat pad sanding.
 

gm280

Supreme Mariner
Joined
Jun 26, 2011
Messages
14,593
I didn't touch the boat today, at least not to work on it I was rebuilding a trolling motor circuit for another iboater and that took most of the time. So maybe tomorrow I can wet sand with 400 grit to get ready for color. We'll see.
 

gm280

Supreme Mariner
Joined
Jun 26, 2011
Messages
14,593
I started doing a wet sand today. But after a short while I stopped for a few reasons. I couldn't find any 400 grit wet/dry sandpaper in my shop, but lots of 600, 800 and 1200 and 2000 grit. So I tried 600 wet paper with water. That works okay on the previous 320 dry paper sanding I did previously, but didn't go very well with straight primer sanding with the 600 wet paper. I worked more trying to get it cut down smooth then I would like. So I can either go over the hull with 320 dry paper and then 600 wet, or wait until I get some 400 wet paper. I was going to go over the hull with the 320 dry, but the hull was now wet. So everything came to a stop. Some time plans don't come together. :facepalm:

One thing I will say though, when the hull was wet the area that I did sand looked amazing. That hull never was meant to look that nice.
 
Top