1958 Evinrude Fastwin 18hp Restoration Project - Need Your Help

racerone

Supreme Mariner
Joined
Dec 28, 2013
Messages
36,316
????--This motor has an adjustable high speed jet and it is NOT inside the float bowl.--If packing washers are not in good shape you will have a leak there !
 

Yanibm1

Seaman Apprentice
Joined
Jun 1, 2015
Messages
38
It was my impression that the bottom adjustment knob on the carb is the "high speed jet" or maybe I'm referring to it wrong and should just call it the high speed adjustment. It's leaking a bit now because like an idiot I screwed in the needle without the silencer on, which seems to have a stop built in to it that hangs and prevents the needle from going in further than a certain point, and I think it went in a little too far. So if I back it off at all a few drops of fuel begin to leak around needle shaft.

Attached is a video of the motor running. Does this idle seem about right? Any slower and it coughs and dies.


Yanibm1

Seaman Apprentice
Joined
Jun 1, 2015
Messages
38
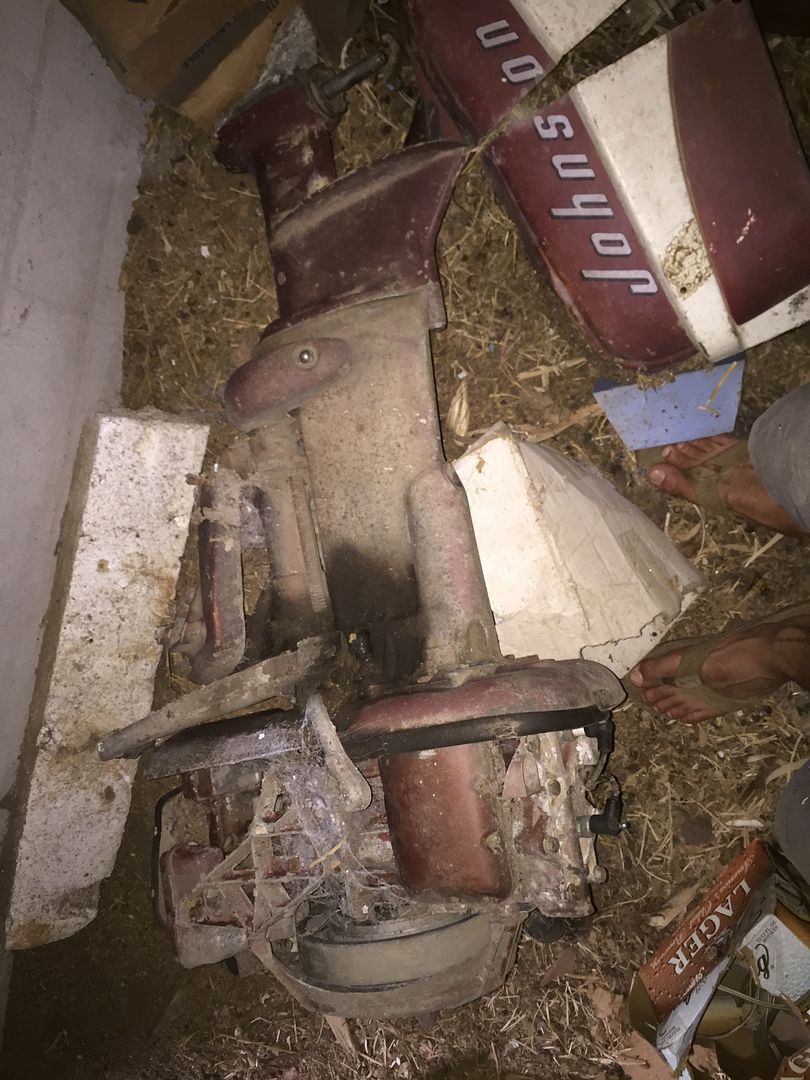
Also... I found another motor in the barn:


it seems to be a 30hp Johnson. After this project though I think my willpower and funds for fixing up motors may be depleted for a while. Although, while the motor looks very dirty, it has been sitting under cover and not out in the woods like the Fastwin and may entail less to get running.
 

Yanibm1

Seaman Apprentice
Joined
Jun 1, 2015
Messages
38
Another question: how is the idle screw supposed to be adjusted on the side of motor where the tiller handle control the gear mechanism? Is it to the point the motor doesn't die when throttle is turned down or what?
 

AlTn

Commander
Joined
Mar 9, 2010
Messages
2,813
yes, that idle is too high...yes, that screw on the side is the idle stop/adjustment...couple of ?s..what are your compression numbers now?.. with the carb linkage to the timing cam detached or loosened completely...can you detect any binding in the throttle shaft as you move it from a closed to horizontal position?...any lateral play in the throttle shaft?
 

Yanibm1

Seaman Apprentice
Joined
Jun 1, 2015
Messages
38
AITn I do not think I have any lateral play or binding on the throttle shaft when I was working on the carb. I checked for smooth operation then but I will need to recheck those things you mentioned.

I ended up taking the motor out for a spin and initially it ran very rough until I screwed in the lower carb adjustment in tight. It seems there is a leak from the packing on both adjusters as they are screwed in all the way. With this setting the motor ran awesome and I ended up putting about 6 gallons through it yesterday.

Apart from this, there is another issue. It seems there is fuel leaking from the camshaft plate (I'm not sure what to call it) or the half of the powerhead that I swapped from the old powerhead since the new one's mount was broken in shipping - the section past the reed valves that requires taking the two hex bolts out from the intake pictures in post 24 that is the darker shade of blue. There is some fuel leaking around both sides albiet not an alarming quantity but enough to form a small trickle down the motor pillar after running for the afternoon. I did not form a gasket during assembly since there did not seem to be one there from the factory. Do you guys think that since I plugged the outlet for the pressure hose it's building pressure in that chamber or should I take it apart and form a gasket to seal. I'm pretty sure I cleaned the metal off very well

I left the motor at my girlfriend's farm since I won't be able to work on it this week.
 
Last edited:

Yanibm1

Seaman Apprentice
Joined
Jun 1, 2015
Messages
38
Just a quick update: repacking the idle and fast speed needle adjustments on the carburetor solved 98% of my issues with idling. It still coughs once in a while but I think I just need to adjust a bit better. I'm still leaking fuel, a little bit, from the mating area between the powerhead and the crankshaft housing that I replaced from the old powerhead. There was no gasket there on either powerhead so I'm assuming I did not clean the surface well enough but if anyone knows anything about this or has any suggestions please let me know.

What a joy using this motor, especially after putting so much work into it. Been out the past 2 weekends having a good time. Thanks for all the help everyone!
 

racerone

Supreme Mariner
Joined
Dec 28, 2013
Messages
36,316
Well, you may or may not understand.-----The block is machined as an assembly.---Therefor you can not just bolt on a part from another motor and expect a perfect fit.-----That is a metal to metal joint and these parts are precision stuff.------No gasket is to be used , just a thin bead of the correct sealer.
 

Yanibm1

Seaman Apprentice
Joined
Jun 1, 2015
Messages
38
I assumed the parts were machined separately and were fairly interchangeable. Will have to pull it and simply apply some sealant then. I'll probably do that in the off season then since I don't think it's really pressing issue.

Racerone, you mentioned earlier a lot of the parts are interchangeable from the newer 60's powerheads. I noticed from the diagrams that this powerhead uses 3 rings but they are cross listed with pistons that use the two rings. Do you have any knowledge of their interchangeability. Is there an advantage/disadvantage of using 3 instead of 2. Why would they change it?
 

HighTrim

Supreme Mariner
Joined
Jun 21, 2007
Messages
10,486
That seal MUST have a special sealer on it. You can use 3M 847, which is the BRP brand, and the easiest to use. clean surfaces well with acetone, mate surfaces, then use the dowels to bring them together. Then torque all bolts to spec. You will get an air leak, which is what you now have, and will run lean, and leak fuel/oil mix out.

BTW, the fact that you were getting continuity from either coil ground to one of the spark plug leads is totally normal.
 

Yanibm1

Seaman Apprentice
Joined
Jun 1, 2015
Messages
38
Thanks for chiming in Chris. I discovered this was normal after reading about and observing the way the ignition system works. This is my fast and furious dive into the marine world with a nice project to jump it all off so many questions come up and thankfully most have been getting answered. I'll have to seal it up but I sure don't feel like taking all apart again at the moment so I think I'll probably run it this way for another few weeks (I start school in about 4 weeks) and will probably put it on the work table as something I can work on to take my mind off all the studying. I'm trying to get in all the time I can on the water right now.
 

Yanibm1

Seaman Apprentice
Joined
Jun 1, 2015
Messages
38
So basically my question boils down to this: although other future year 18hp Fastwin powerheads and their corresponding components have different part #'s if I was to rebuild this motor in the future, can I use the pistons and rings, etc from the newer powerheads? My understanding would inform me yes from what I have been able to gather since the cylinders seem to have the same specs but certainly someone will have a better understanding than me.
 

Yanibm1

Seaman Apprentice
Joined
Jun 1, 2015
Messages
38
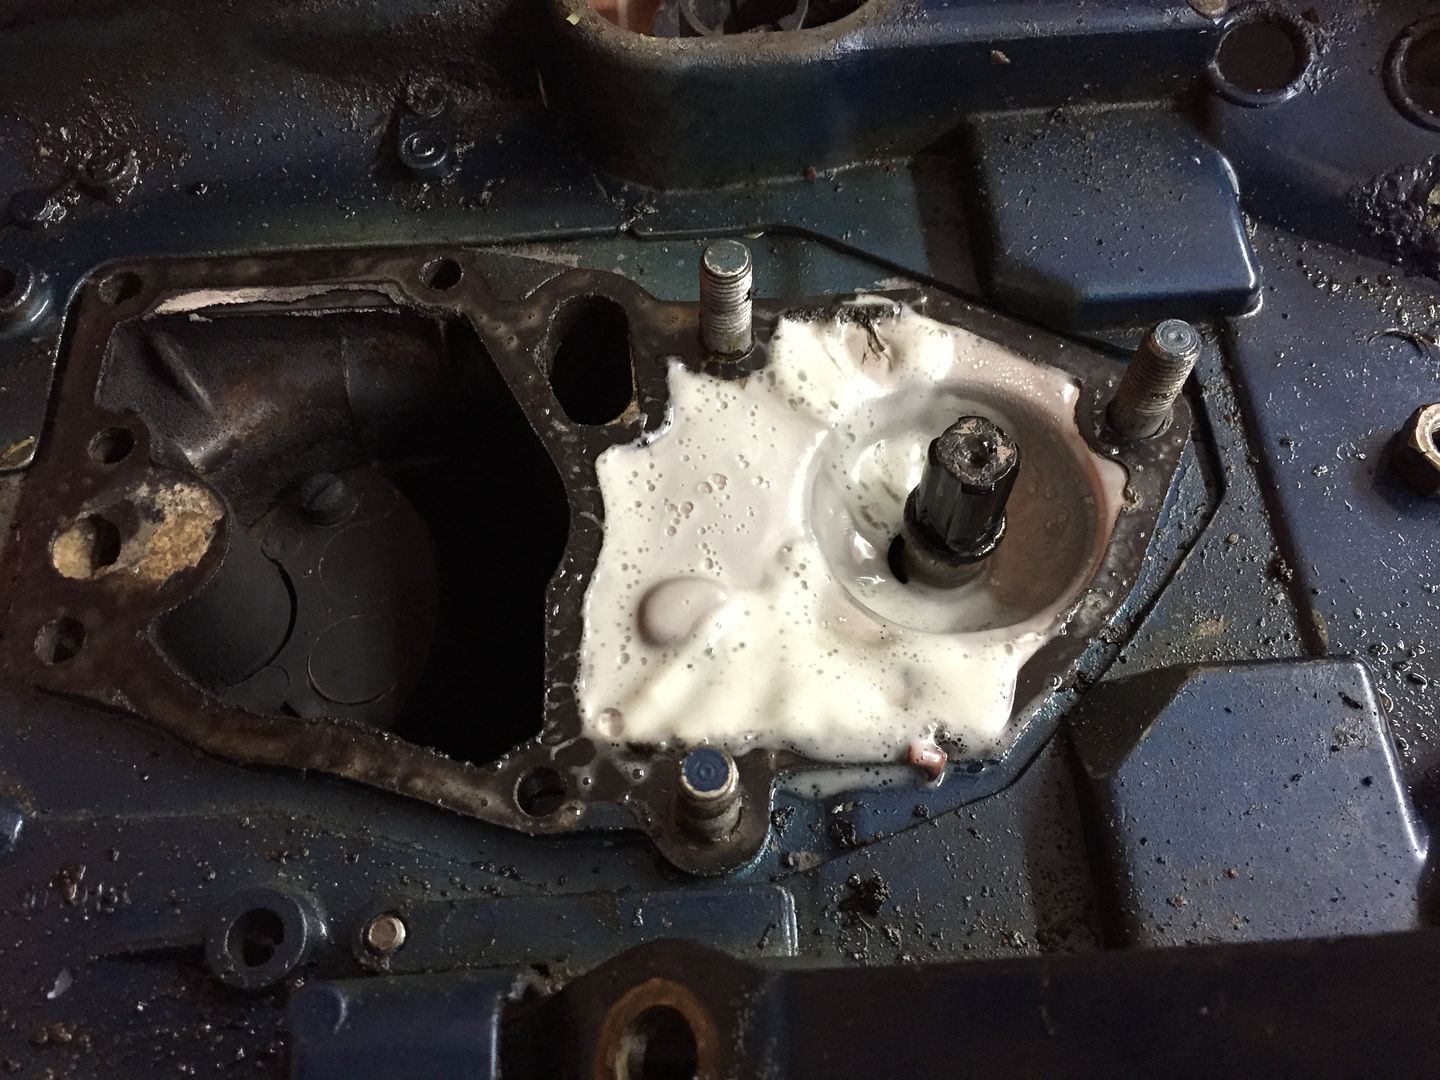
Starter rope has broken twice now with the new replacement j bought on eBay so I ordered an OEM rope and while waiting on it decided to dissassemble the powerhead to form a gasket on the crankcase in order to fix the leak. In the process I found this foamy mess which i believe may be normal...please tell me it's normal:


Hopefully some normal mixing of exhaust, water, and oil?
 
Last edited:

Yanibm1

Seaman Apprentice
Joined
Jun 1, 2015
Messages
38
Just to update, I sealed the crankcase and it made a huge difference in idling. I can now run very low idle and the motor seems to be running very well.
 

Calcasieu

Seaman
Joined
Aug 27, 2015
Messages
54
Really enjoyed following this post! One of the cylinders looks to be in pretty bad shape. What did you do to clean the bore and cylinder itself?
 
Top