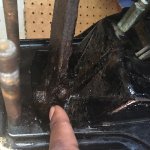
I was able to get my gimble housing assembly off but I found that the steering pin is super rusted.....any ideas on how to get that thing loose?
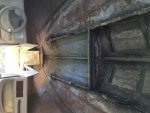
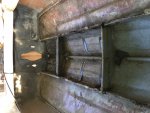
I take it this is the transom assembly after you took it off the boat. The swivel pin (steering pin) is in a very bad shape. Soak this sucker with PB Blaster (forget WD40 for now, it will not work) Let it soak over night. Take an open box wrench and try to break it loose. Be patient and don't play Hercules with it.
If this doesn't work, wash off the PB (it is flammable) with water and use a high temp torch to heat the nut until red; it will never actually get red because the swivel pin will take a lot of heat out of it but you get the idea, heat it up.
let it cool just a little and try to break it loose again. It will give in sooner or later. it will just test your patience limits first. make sure you are not stressing the lower lips that carry the lower steering pin. If you break these, you need a new transom assembly.
By the way, breaking this nut loose is not the main problem, this nut is not even tight on the swivel pin nor it meant to keep it tight or be torqued. It is just a height adjuster, that is all. If the swivel pin refuses to budge, it is not the nut, the corrosion just simply welded it in place. Here is how you force it out
If you look under the pin, you will find a threaded hole (either 3/8 or 7/16 coarse threads). Find out what threads you have (try different bolts) retap the threads to clean them up.
Get a piece is 2*4 and drill a hole in the middle of the 2 side. Insert a bolt with a flange from the bottom of the drilled hole and thread it in the bottom of the swivel pin. That was what I used in hurry, I am sure you can come up with better design if you have the time to do so.
With every few turns of the nut, hammer gently on both ends of the 2* to pull the swivel down the amount you freed by loosening the nut and so on. Be careful and don't lose control of the hammer so you don't break the lower pin lips.
Good luck