My Rotten Lady

kramerpage

Chief Petty Officer
Joined
Jul 26, 2010
Messages
447
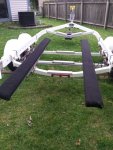
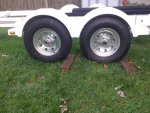
Look what I found when I did the bunk board replacement... Now trailers should not be used as a Saw Horse. This was on the transom end. Im very surprised it didn't break off...

rps20160627_115709.jpg


rps20160627_115758.jpg
 

kramerpage

Chief Petty Officer
Joined
Jul 26, 2010
Messages
447
Unfortunately I found severe crazing on the bottom hull where the boat sat on the bunk boards. Bunks are 6 wide by 8 ft long. I'm guessing this boat filled up with water and then froze. The crazing is directly below each stringer. I don't begin to know how to address this issue that was hidden by the bottom paint.

The surfaces are smooth and even as far as elevations go. I was preparing the bottom for Teflon wax and found it last night. I was so disappointed I didn't even take pictures but I will tonight. Any advice on how to begin to deal with this? Thanks
 

kramerpage

Chief Petty Officer
Joined
Jul 26, 2010
Messages
447
Here are some pics. They are not very good quality. I called my marina and they said to dewax / sand / clean / 2 coats interlux epoxy barrier / two coats interlux VC performance epoxy since its a trailered boat. So I ask "don't I need to dremmel out every crack?" He stated no. I guess I cant see paint actually as a proper repair. Any experience?
I found four star type crazes. They look like a blister but the surface is smooth not raised, When you run your fingernail you feel the crack but no elevation change. Then the same with the 4 foot long crazing under the bunk boards.

rps20160701_090133.jpg

rps20160701_090214.jpg

rps20160701_090344.jpgrps20160701_090438.jpg
 

kramerpage

Chief Petty Officer
Joined
Jul 26, 2010
Messages
447
R u able to see anything from the inside of the boat?

I have not specifically looked yet. I never saw anything while I was in there grinding for days. I read to place a bright light under boat then search in boat which I will so this weekend. I wouldn't think I would see anything since they are so thin. But I'm usually wrong but every once in a while I'm right. Lol.

Going to lowes to get more paint pans and plastic mixing cups. Unbelievable the among of sundries items I have used.
 

Woodonglass

Supreme Mariner
Joined
Dec 29, 2009
Messages
25,924
With this amount of webbing I'd recommend grinding them out and then filling with Gelcoat paste. This video shows the process.
Since you're painting you wouldn't need to do the polishing. Just fill the area with paste,let cure, and then sand em smooth starting with 120 and go up to 400 grit. Then shoot the primer and paing. That's what this Dumb Old Okie would do.
 
Last edited:

kramerpage

Chief Petty Officer
Joined
Jul 26, 2010
Messages
447
Thanks for the advice WOG. I was thinking the same thing. I would think it will be very difficult doing this repair upside down. And very physical on the body. I need to get the right tool head for my Dremel and give it a try. I have fresh gelcoat from us composites but not paste. Can I make it paste or do I buy premade paste ?
 

Woodonglass

Supreme Mariner
Joined
Dec 29, 2009
Messages
25,924
Gelcoat is a polyester resin based product soooo, you can thicken it just like resin. Just add some cabosil to the thickness of mayonaise.
 

kramerpage

Chief Petty Officer
Joined
Jul 26, 2010
Messages
447
Well as an update I did finish 100 percent the boat trailer. I am now placing the boat back onto the trailer. Its been very hot and I'm unable to get much done but I'm plugging away at the to-do list. LOL For now I have ignored the issues with the bottom of the boat and placing that last on the list. I do however have a plan to correct the issues as suggested by the members here.

rps20160708_134729.jpg

rps20160708_134657.jpg


rps20160727_104354.jpg
 

kramerpage

Chief Petty Officer
Joined
Jul 26, 2010
Messages
447
The trailer looking sharp M8. Good work!!

What is the update of those spider cracks?

Thanks for the compliment. It was more work than expected. Imagine that. Lol

The crazing on the bottom will have to be removed and filled with thickened gel coat as WOG suggested. My goal now is to take it to canvas shop to prepare for winter snow since my canopy cannot withstand snow load. Then it's time to go fishing for 3 months with a new used boat I purchased. Back to work in spring of 17. Who would have thunk it would take me this long. I'm all in on the resto...
 

DeepBlue2010

Lieutenant
Joined
Aug 19, 2010
Messages
1,304
You are making good progress; boats and fast maintenance/repairs can't be mentioned in the same sentence. These things are not designed with maintenance in mind. The other day my bathroom sink faucet was leaking and I did not want to buy the original one that came with the boat as its quality - in my mind - doesn't match the asking price.

So I went ahead and ordered a nice one but it came with a square base. The factory cut a nice size rectangle opening in the sink to match the old one, so I had to go and find the right shade of plastic and fabricate a custom base out of a starboard material. Then I have to find some magical way to squeeze myself into a very tight space for installation, working blind and by touch most of the time since I can't get my head in there to see what the heck I am doing. A two hours job max in an accommodating work area took me two days to get right; but with boats, it is the norm.

What is your planes for the bottom after you grind and fill? Are you going for bottom paint still?
 
Last edited:

kramerpage

Chief Petty Officer
Joined
Jul 26, 2010
Messages
447
I hear you. Its a mountain at times. Here is my plan.

Grind out blisters and crazing.
sand
Fill with thickened gel coat or epoxy fairing compound
sand
clean with denatured alcohol
apply 2 thin coats epoxy primer roller
apply two coats thin coats of polyurethane paint roller
 

Woodonglass

Supreme Mariner
Joined
Dec 29, 2009
Messages
25,924
If you want to make your own filler, use this recipe 250 ml of resin w/2.5ml of hardener, 200 ml Glass bubbles, 50 ml cabosil, 30ml of surfacing wax.
This will yield a cup and a half of strong but easily sanded filler. You'll have about 25 minutes before it kicks. That's why I only mix a small amount and then make more if needed. If the spot isn't to big then filler works fine. If not, then go with PB and then come back with the filler to fill any low spots in the PB. Sand and fair with 120 grit and then finish with 180. You want some fine etching to give the primer something to bite into.
I'd also recommend 3 coats of the final Color.
 

DeepBlue2010

Lieutenant
Joined
Aug 19, 2010
Messages
1,304
My understanding is that these stress cracks are on the bottom of the boat. I did not read anything about blisters before your last post but I could have missed it.

If my understanding correct, I wouldn't worry about filling with gelcoat if I am covering with epoxy paint. I would go with epoxy based (two part) good quality marine filler for below water line use and fill & sand. If you are going for barrier epoxy coat, I would consider finishing up with good quality bottom paint and be done with it for few seasons before I have to reapply. It is what I would do at least
 

kramerpage

Chief Petty Officer
Joined
Jul 26, 2010
Messages
447
The issue of poly paint is that it's a trailered boat and never will sit in water longer than one or two days.
 

Woodonglass

Supreme Mariner
Joined
Dec 29, 2009
Messages
25,924
If that's the case then the Tractor Paint method works very well for minimum costs.
 

kramerpage

Chief Petty Officer
Joined
Jul 26, 2010
Messages
447
Say What???? It would be nice if I could just use thickened gel coat sand and wax bottom. Done
 

kramerpage

Chief Petty Officer
Joined
Jul 26, 2010
Messages
447
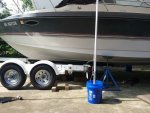
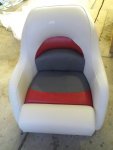
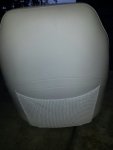
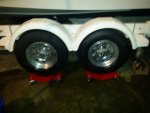
I received two new bucket seats today that I ordered in May. I'm happy with them. Half the price the upholstery shop wanted to redo my original. Also I got the trailer under the boat and placed roller skates under it so I can easily adjust bunk boards and move entire boat around. Me like them a lot!!!!

rps20160729_123615.jpg

rps20160729_123647.jpg


rps20160729_123540.jpg
 
Top