Mid 1960's OMC Evinrude gull-wing, a work in progress.

Quantumn

Petty Officer 2nd Class
Joined
Jul 17, 2012
Messages
142
Very good question MTboatguy, and timely I might add. I figured the most strength would be to mount them from the bottom side, I have been taking pictures along the way and will post them very soon. But your insight is spot on and I appreciate that. Thanks sir. :joyous:
 

Quantumn

Petty Officer 2nd Class
Joined
Jul 17, 2012
Messages
142
So before I proceed with tabbing in the deck, I need to install the seat bracket nut plates from underneath the deck. Having taken measurements before the removal of the old deck, I was able to make a template from a 2 x 4, (why I don't have a kreg tool is beyond me) to help in drilling the holes in the right spots and straight:


Template in place, I began to drill the holes, using screwdrivers to hold it in place helped to keep my locations accurate:


Initially inserting the hardware, I was able to "crank" down the screws from the other side which pulled the nuts secure, though I realized that the screws were about 1/2 " to long, going to get shorter screws tomorrow:


No time to waste so its time to glass down the nuts to prevent water from saturating below the deck:


Previous csm grinded down and wiped with acetone ready for a couple layers of glass cloth, mixed up a small batch of poly and its time to coat the surface:


All glassed in and should be good to go. I inserted the screws during this process to the end of the nutplate to prevent the drilled holes and nutplate threads from filling with resin, hopefully that works, lol:


Plenty of more updates and questions coming soon, til then, thanks for the look everyone.
 

Quantumn

Petty Officer 2nd Class
Joined
Jul 17, 2012
Messages
142
I know I know, he is making some new type mouse traps... Okay what do I win? :bounce:
Very nice try sir, but no, hehe. Actually its very simple. As I was using these "shims" to help align the deck boards, I kept knocking them over and they would fall under the deck. So its just a simple way for me to keep them available and within reach for removal before the filets go in. 2 days off from work this weekend and I should make some good progress. Actually going to start laying in the deck boards tonite. Should be fun.
Btw everyone, I switched my pictures to thumbnails recently and was wondering if it would be better to revert back to full size pictures. Thoughts?
 
Last edited:

Quantumn

Petty Officer 2nd Class
Joined
Jul 17, 2012
Messages
142
So I am at a pivotal point of the construction and would value the communities opinion on a few things before I proceed. Help me Obi Wan, your my only hope :laser:.
First order of business that I need help to decide on, though I feel it is always a great idea to follow the original layout of the structure as the oem intended, it seems this Evinrude was a little different in how other company's designed their transom and deck. Just about everything I have seen in these forums or on youtube for other boat designs has the transom extending all the way to the bottom of the hull and secured to that point. Then the decking is fit next to the transom and attached. When I dismantled the "Rude Awakening", it was just the opposite. The decking was secured down all the way to the keel and thus the transom was mounted on top of the decking, tabbed in of course. My intentions from the very start was to follow this plan and rebuild as it was by the factory.
I guess my question is that I intend on following that setup, would there be adverse issues doing it this way?

Second order of business that needs to be addressed is concerning remounting the removed splash-well top. As you can see in this picture, she lines up perfectly and thus no hull spreadage, which is a godsend:


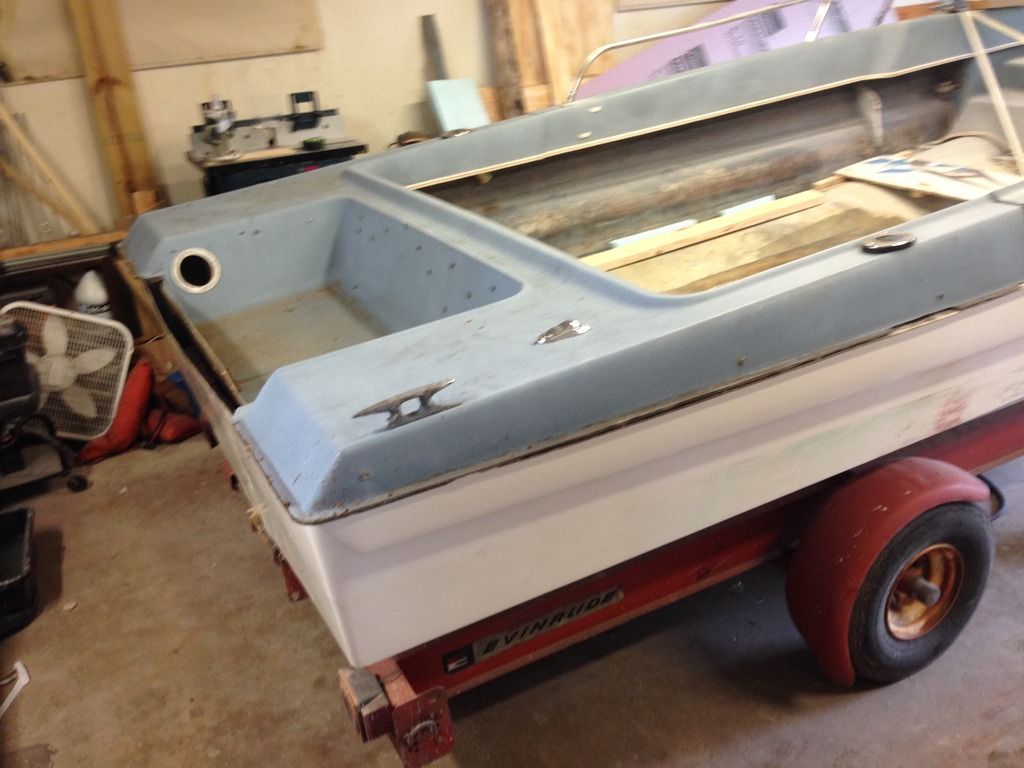
I was pleasantly surprised and happy to see this, but with the width of my current design of the transom, 1 1/2" plus matting, I am thicker than what will fit:


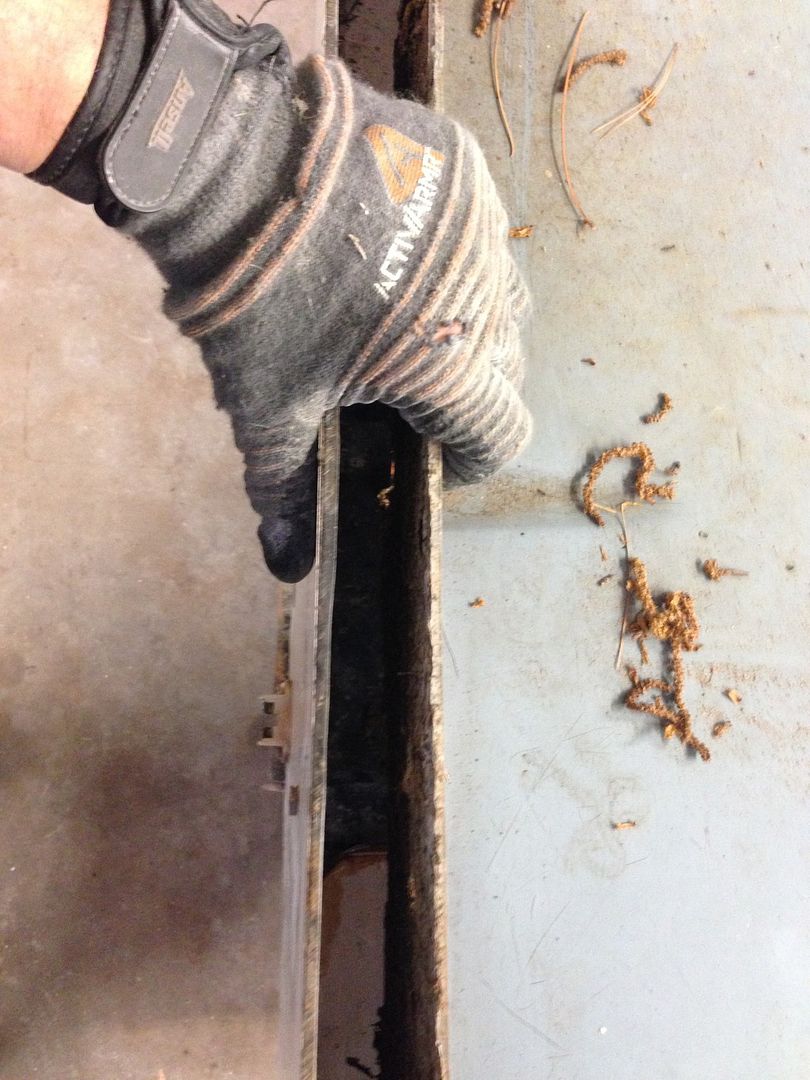
What would be the best way to remedy this? I would like to keep my original plan of double 3/4" marine ply plus the 2 x 6 cross-member. (2 x 6 is not an issue atm but I do have a question about that as well when the time comes). Since I am about 3/8" shy of needed room, my thoughts were to remove that 3/8" from the front of the splash-well before reattachment and just extend the lip on the keel edge to make up:

 
Last edited:

gm280

Supreme Mariner
Joined
Jun 26, 2011
Messages
14,593
Some great questions there Quantumn... Bare in mind these are my opinions and by no means anything else or actual suggestions! As for the transom all the way to the bottom of the hull and the floor butting up against it. I can see that setup where the transom goes to the bottom being a better idea because that allows the hull bottom to offer structural support for it as well. And then tab in the flooring section to that full length transom would give it even more structural support. HOWEVER, being how the manufactory didn't do that, it would seem either way would suffice. My gut feeling is a full length transom is the more stout setup though. As for the transom thickness. If you can, I again would not cut the transom to gain the needed space, but cut the splash well. That way the transom maintains its total strength and the little splash well cutting will never be noticed after it all is tabbed in and blended. Understand these are my ideas and not criticism of however you decide to go. I mean after all the newly installed parts are tabbed together, it will be like a rock either way you decide. :smile:
 

kcassells

Fleet Admiral
Joined
Oct 16, 2012
Messages
8,600
So maybe I'm missing the big pic here. But if I understand it correctly you are simply going to remove @3/8" in the area you show as cut out. Then put your a little bit larger transom in. Then reinstall the shorter mold/splashwell back which compensates for the 3/8" larger transom.
Genius Idea!
Works for me.
 

Quantumn

Petty Officer 2nd Class
Joined
Jul 17, 2012
Messages
142
Thanks GM and Kcassells for your insight, exactly what I need at this juncture. I am at the point of no return and really need to make the right decision on the transom/deck before it move forward. Now granted, below the deck at the keel, there is only 3/4" clearance so possibly I can just pb a support there and rest the deck on that, possibly.
Today I am ready to work on the resto, boat is out, weather is beautiful, and I sit idle staring at what should and will be:


Second board is ready to go in, once I get a direction and help, lol:


Quantumn

Petty Officer 2nd Class
Joined
Jul 17, 2012
Messages
142
I have been noticing over the past month or so that there is a week spot in the hull that is extremely flexable with no flooring in, so I decided late last night to 1708 a few cross layers for addition support:


In my feeble mind, you can never be too cautious. Thanks everyone....
 

gm280

Supreme Mariner
Joined
Jun 26, 2011
Messages
14,593
Ha, good idea to add such support. Never a better time then when you can get to it instead of cutting your new floor to do that. 1708 is certainly going to help with that issue as well. Now I see what you made the "mouse traps" for. Again a good idea. Seems I am at the exact same point as you presently are. I hope within the next day or so to be posting some pictures of my project again. I still have some head pressure and minor morning sore throat, but it is getting better daily so watch for updates soon...I hope. Keep posting your progress and pictures. I like it :smile: :thumb:
 

Quantumn

Petty Officer 2nd Class
Joined
Jul 17, 2012
Messages
142
So as an update on the resto progress I was all ready to start installing the decking with ss screws and 3m 5200 before proceeding with filets and tabbing in the sides when I met a local boat technician who has worked in the business for quite some time. Upon discussing the foam installation, which will be 2-part foam, I have decided to first tackle that project before installing the decking. Just to ensure that all the voids beneath the deck are filled. On this note, I will be needing to order the materials first, then installation. So until I get the materials, I have other things that will be needing attention during the restoration. So not a setback, but a better way to put "johnny 5" back together.
Will post updates here soon on progress and hope everyone has a wonderful day. Peace :peace: (possibly even working on removing old paint/primer and polishing the hull gelcoat)
 

gm280

Supreme Mariner
Joined
Jun 26, 2011
Messages
14,593
Quantumn, I too was initially thinking about the mix and pour foam before I install the actual deck, but I decided to not go that route. And here is my thoughts on that. Yes pouring the foam and then seeing if there were any voids sounds like a great idea, but you have to lay some type plastic on the underside of the deck to keep the foam from sticking to it, or you won't be able to lift the deck off to actually see if there are any voids. And that also means you have to hold the deck down when pouring because the expansion of the foam will lift it. So I think I will forgo that effort and just poly down the deck and cut openings in the sections and pour. If that covers the majority of the area, then I will feel okay and good about it. Because the areas not filled with foam will still allow floatation if a tragedy should happens. The sealed sections will provide floatation to water intrusion for a long time if called on to do that. So I'm not going to worry about possible little voided sections... But that is just my warped thinking... However, I will watch your efforts and could change my mind as well... :thumb:
 

MTboatguy

Fleet Admiral
Joined
Jul 8, 2010
Messages
8,988
I used a 2" hole saw and cut plugs in the new floor when I did my foam on the last one I restored and then put the plugs back in and glass them. I would not pour foam with the deck out, or you could end up having to cut a bunch of foam to get your deck back in. I know others that have done it without deck in and they said they would not do it that way again, but that is just my opinion, you might be able to get it worked out for you.
 

Quantumn

Petty Officer 2nd Class
Joined
Jul 17, 2012
Messages
142
Thanks GM280, I fully understand your thought process and I was under the same direction as well. My concern is about the layout of the under-deck area. Most structures comprise of multiple stringers (2+) and several bulkheads while mine consists of a pair of fiberglass stringers and nothing else. The rear keel area has only 1 1/2 inch of depth for floatation which tapers to 9"+ towards the bow. My main concern was that once I 5200 the deck down, my options were limited to just pouring the foam into 3" holes that I drilled out. Being that I csm'd the deck boards underside and it is completely sealed, I would like to keep that area sealed without having to make repairs just because of the floatation being added afterwards. To note, I am not exactly sure of how I will be doing this, but at this point in time, I am thinking of the best way to pour the foam and ensure full coverage, is to pour it with the deck not even there. Chopping/sanding/cutting the excess foam above where the deck will rest should be rather easy as long as I mix the proper quantities and move on from there. Thoughts/ideas?
 

gm280

Supreme Mariner
Joined
Jun 26, 2011
Messages
14,593
Thanks GM280, I fully understand your thought process and I was under the same direction as well. My concern is about the layout of the under-deck area. Most structures comprise of multiple stringers (2+) and several bulkheads while mine consists of a pair of fiberglass stringers and nothing else. The rear keel area has only 1 1/2 inch of depth for floatation which tapers to 9"+ towards the bow. My main concern was that once I 5200 the deck down, my options were limited to just pouring the foam into 3" holes that I drilled out. Being that I csm'd the deck boards underside and it is completely sealed, I would like to keep that area sealed without having to make repairs just because of the floatation being added afterwards. To note, I am not exactly sure of how I will be doing this, but at this point in time, I am thinking of the best way to pour the foam and ensure full coverage, is to pour it with the deck not even there. Chopping/sanding/cutting the excess foam above where the deck will rest should be rather easy as long as I mix the proper quantities and move on from there. Thoughts/ideas?

Okay I understand the process. I have one question though. And I honestly have no idea about this. But does polyester resin dissolve the poured and cured foam? I know poly will do a job on some other type foams, but I honestly don't know about the mix and pour foam. And the reason I ask that question is because if you pour the foam without the deck on, and then trim the foam that it beyond the height of the stringers to get it level again, when you PB the deck in, will the fresh poly resin dissolve the cured foam or not... I seriously don't know...:noidea:
 

Quantumn

Petty Officer 2nd Class
Joined
Jul 17, 2012
Messages
142
Great question and though I can not speak from experience, my research on polyurethane 2 part foam is that once fully cured this foam can be laminated over with any type of polyester, epoxy or vinyl ester resin without melting. That is per UScomposites website. So I can accept that. I am sure others know alot more than I have to offer for an answer, but I am going with it, unless of course others pipe in and advise not to.
So with a little progress today, many hours of work though, I was able to cut out a template for the last deck board. This board is not a simple rectangle board to cut. I have to compensate for the actual original thickness of the old deck, 1/4", to the new thickness, 3/4". While also contouring for the hull gull-wing. Do I need a geometry degree for this? Using a sheet of foam insulation board, I started hacking away:


With the piece cut out to replicate the remaining deck board, slid it into place to check the fit, seems as though it will work:


Now to just cut the 3/4" acx board to these measurements and grind out the bottom side, it should be a decent fit once I pb it into place. Though I need to attach bottom supports and another 3/4" center panel for future pedestal seat installation. Lots of work but moving forward. Thanks for the look everyone and feel free to pipe in with suggestions or comments, always look forward to your expertise and thoughts. Peace
 

gm280

Supreme Mariner
Joined
Jun 26, 2011
Messages
14,593
Quantumn, I see you are working with the segments of the front of your boat like I had too. I had to cut my floor basically the same way to get it to fit properly. I can sympathize with your efforts... One thing I did that made cutting floor panels a little easier, I marked a center line in the boat and then took measurements from each side to the center in 6" increments move forward and transfered those measurement onto the actual plywood. I drew a center line on the plywood and when I measured one section. I transferred that measurement onto the plywood from its center line and even though I then had to cut from both sides of the plywood, the panel fit perfectly in one cut. Because as you know boats have no straight lines in them. Everything is curves and angles. Ha, I like your work and am watching the progress... :thumb:
 

Quantumn

Petty Officer 2nd Class
Joined
Jul 17, 2012
Messages
142
Thanks GM280 for the pointers. I myself have found out the irregular curves and not quite so square measurements. I was able to cut the piece of foam to fit like a glove, then transferred that over to my sheet of 3/4" ply. I did not even pay attention to how it actually laid out on the wood, I just started cutting with my saber saw:


Though the foam was cutt into regular triangles, I decided to round them off when cutting the wood. Feeling this will give a more custom fit. And low and behold, I noticed that the two outside edges did not match in width, hmmm. There goes what GM280 pointed out. So hopefully that is not a miss cut on my part and once I test fit it into the hull, it will work out:


Luckily I cut the board from the top side so with some good luck, it will fit. If so, I will then need to grind down the lower edge to contour to the hull. Shall find out in about an hour if it works or if I need to cut another sheet. Fingers crossed.
 
Top