Wellcraft 170 Classic -89 full restoration

Jussi-T.

Petty Officer 2nd Class
Joined
Jan 5, 2013
Messages
151
Re: Wellcraft 170 Classic -89 full restoration

Yup, I noticed too, that Peltipesu isn't that expensive so I might use that..

By the way, does a standard size Torx socket fit to the Alpha hinge pins? I found that there is a special tool/socket for the hinge pins, but if it's a standard size torx, I don't want to spend my money on that tool.
 

johan75

Seaman Apprentice
Joined
Jul 31, 2011
Messages
34
Re: Wellcraft 170 Classic -89 full restoration

If you like or trust a ready made product better than mixing yourself then go for it. You should be ok in any case and it won't affect the budget much in a project like this.

About the rest of the painting job; I personally wouldn't change any of the recommended products. IOW use the recommended primer and thinner for the 2k paint you choose to use. For cleaning the spray gun you can use anything that removes the paint I guess.

About hinge pins; I don't think a torx will fit, so probably no. You might be able to use a 1/2" Allen wrench though, at least I believe so. Don't use a metric or anything that almost fit because if you strip the pins you're in trouble. The real 12-point tool is IMO the best way to go by far. Those pins are known to be a little hard to get out so more contact is better. You might want to heat up the housing a little before starting. Can you borrow the tool from some local Merc service shop? If not, I think it's about 10..15x, where x is dollars or euro.
 

Woodonglass

Supreme Mariner
Joined
Dec 29, 2009
Messages
25,924
Re: Wellcraft 170 Classic -89 full restoration

I agree ^^^ I always use the MFG recommended Thinners for the Paint. Prep on the aluminum is pretty basic, it just needs to be Oil Free and etched. The acid in the Vinegar will do the etching andthe Acetone will take care of any oil. Not familiar with the Petipesu but if that's what experienced users are recommending over there and the price is right then heck yeah, I'd use it. It sounds to me like johan75 has been down this road many times and is leading you very well.
 

Jussi-T.

Petty Officer 2nd Class
Joined
Jan 5, 2013
Messages
151
Re: Wellcraft 170 Classic -89 full restoration

I just ordered the hinge pin tool from ebay (USA). It is going to cost about 17€. Better to have proper tools when it is time to start the demolishing. :)

Johan, can I ask what was the costs for the new boat cover and where did you got it done? I think I have to replace mine too since it has some tears on it. People have told that MP Venekuomu here in Varsinais-Suomi is a good place, but it is pricey.
 
Last edited:

Woodonglass

Supreme Mariner
Joined
Dec 29, 2009
Messages
25,924
Re: Wellcraft 170 Classic -89 full restoration

You mean you're NOT going to buy a sewing machine, teach yourself to sew, and make your own?? And all this time I thought you were a TRUE DIY'er...I'm sorely disappointed in you!!!! :D

Ik?v??!!!
 

johan75

Seaman Apprentice
Joined
Jul 31, 2011
Messages
34
Re: Wellcraft 170 Classic -89 full restoration

I just ordered the hinge pin tool from ebay (USA). It is going to cost about 17?. Better to have proper tools when it is time to start the demolishing. :)

Good! I think I got it of eBay too. I've purchased quite a bit of tools from eBay shops, it's so easy. Sometimes the price is the same as in local import shops though, when adding shipping. There are some local service shops importing marine parts from the US. Also iBoats is a good place to look. You're gonna need a few special tools before splashing the boat.


Johan, can I ask what was the costs for the new boat cover and where did you got it done? I think I have to replace mine too since it has some tears on it. People have told that MP Venekuomu here in Varsinais-Suomi is a good place, but it is pricey.

Short answer; I imported the canvas and thread from the US and purchased all the snaps and tools from Sailrite. Clear vinyl and zippers I got from a large local boat-cover maker.

The covers you've seen pictures of aren't actually completely ready yet and only for the bow-area I had an old cover to use as template. The other ones, windshield and cockpit, I planned and measured myself. I asked a tailor in the building next to mine to sew the pieces together. For the three pieces you've seen pictures of I'd estimate the tailor's work was a little more than 100 eur, perhaps 125 or so. That's only a small part of the whole thing though. If you have the space, you could do it yourself as Woody suggests.

Before giving any advice, what are you planning to make? What kind of covers, do you have old ones to use as templates for everything, and if yes do you want to make any changes to the design? Have you thought about canvas, type, thickness etc? There are many qualities to choose from, not just Sunbrella, which is expensive.


Cheers,

Johan
 

Woodonglass

Supreme Mariner
Joined
Dec 29, 2009
Messages
25,924
Re: Wellcraft 170 Classic -89 full restoration

If in fact you want to attempt to make your own, and by the way, it's not as hard as you might think, I can give you some Ebay vendors that sell at extremely reasonable rates that might ship to you and still be reasonable. If you can find an old industrial style sewing machine you can learn to use it pretty quickly and with your skills you'd be cranking out a cover in no time. I found it to very rewarding work and enjoyed it a lot. I think a guy like you will as well.
 

Jussi-T.

Petty Officer 2nd Class
Joined
Jan 5, 2013
Messages
151
Re: Wellcraft 170 Classic -89 full restoration

Guys, you got me persuaded. It seems that used industrial style sewing machines aren't that expensive at all! (200-300€/250-400$). If I buy that machine I will upholster the seats my self too. I have asked about the seat upholstering prices from local tailors and they are EXPENSIVE. I think I'll go next summer with the old seats and cover and next winter I will learn how to sew. :)

Woody, I am a DIYer, I just was a little lost :D So thanks for kicking me back on the right tracks! ;)

About the seats: I am going to replace the back-to-back seats to a "captains chair" style seats, and the two rear seats and engine box are going to be replaced with a full wide bench and sun deck :) I have plans for the future engine and this is why I have to make the engine compartment much bigger, and this requires the modifications to the rear seating.
 

Woodonglass

Supreme Mariner
Joined
Dec 29, 2009
Messages
25,924
Re: Wellcraft 170 Classic -89 full restoration

I did exactly that to my boat so you might want to check out my thread for some helpful info on the sewing stuff. I learned a lot and can help you with many aspects of the learning process. I made a Rear Bench Seat from Scratch and it turned out really well IMHO so I'm sure you can/will do the same. making patterns etc... is not that hard. You just gotta jump in and do it.;)
 

johan75

Seaman Apprentice
Joined
Jul 31, 2011
Messages
34
Re: Wellcraft 170 Classic -89 full restoration

Excellent!

You'll probably get a tailor (IOW not a boat cover maker) to do just the sewing for less than the prize of the sewing machine, but if you're gonna do the seats as well and aren't in a hurry, just do all the stuff yourself. As Woody says you'll learn something new and will never have to outsource again when you start your next restoration project, or in a couple of decades when you need new seats and covers for this boat.

IMO there are many things you shouldn't save on when doing a project like this, but when it comes to covers and upholstery you can save a lot, I mean a lot, by doing all or as much as possible yourself, including getting the materials and tools from webshops or eBay. Make a plan.

A tip; Go to the Helsinki International Boat Show in February to check out captains chairs. I threw out the back-to-backs last spring to give room to a couple of new Ergo 7UPs in custom colours. I couldn't resist :)
 

Jussi-T.

Petty Officer 2nd Class
Joined
Jan 5, 2013
Messages
151
Re: Wellcraft 170 Classic -89 full restoration

I watched your youtube videos and pictures, I have to read the whole thread with better time, but it was very interesting, like always ;) The tool you are using to cut the foam, what is it called?

Let's just say, that now, after I watched your videos and pics I am 100% sure I want to do this myself! I know you can help me to get this done. I also have few relatives who know how to sew, they just don't have industrial style sewing machines for vinyl and leather. But I'm sure they can guide me too.

Me and my girlfriend just bought a new mattress to our bed, now I know what to do for the old one! :D
 

johan75

Seaman Apprentice
Joined
Jul 31, 2011
Messages
34
Re: Wellcraft 170 Classic -89 full restoration

Also a great choice. You know what :) I had also planned for those or the 5UPs, can't remember.... but then I tested the 7UPs. As I said, I couldn't resist, even though I had to break the piggy-bank. I didn't buy them at the fair though. I wanted a wine red stripe in the middle of the back made from five pieces to mach the old design, the rest just plain white, so later I called the factory and went to Tampere to discuss and check my possibilities. The CEO himself came to meet me and I made the final decision and deal there on premise. Customizing like that naturally made the prize higher, but not much. Perhaps some 10-15% more than on the web-shop, so you tell me if it was a good deal or not.

I'm going to the show. I need to get motivation to do all things planned for this year.
 

Woodonglass

Supreme Mariner
Joined
Dec 29, 2009
Messages
25,924
Re: Wellcraft 170 Classic -89 full restoration

You never know what you can find lurking in the back of somebodys old lot. One man's Junk is another mans Treasure. The tool to cut the Foam is an Electric Carving Knife. Just like you cut a Turkey with. Less than $20 here in the States.
Knife.jpg
 

Jussi-T.

Petty Officer 2nd Class
Joined
Jan 5, 2013
Messages
151
Re: Wellcraft 170 Classic -89 full restoration

Hey guys!

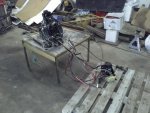
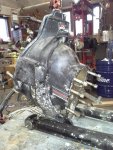
Today I started working with the boat again. I disassembled the transom assembly. I think the trim limit switch and trim sender units have never been replaced, due to screws that were TIGHT. I managed to open only one, the rest snapped... Heating didn't help... Tomorrow have to try to drill them out...

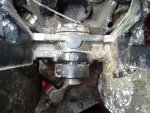
The upper swivel shaft and gimbal ring fitting had a little play and I was worried that the gimbal ring square is worn, but the bolts seemed to be quite loose so I checked from the manual what is the correct tightening torque. It was 55 lb ft and I tightened the bolts to this and all the play is gone. I guess it'll be fine now.

Johan, do you remember did you have loose fitting on this steering shaft? It seems that this is quite common issue, luckily tightening the bolts helped in this case.
 

Fishatron

Cadet
Joined
Jun 30, 2009
Messages
28
Re: Wellcraft 170 Classic -89 full restoration

Hi Jussi-T, just caught up on your thread. Looking good! Thought of a potential name for your boat 'Well Finnished'....anyways keep up the great work!
 

Jussi-T.

Petty Officer 2nd Class
Joined
Jan 5, 2013
Messages
151
Re: Wellcraft 170 Classic -89 full restoration

Thanks Fishatron! "Well Finnished" hey that would be a great choice too! I have to think again about the name issue :D
 

johan75

Seaman Apprentice
Joined
Jul 31, 2011
Messages
34
Re: Wellcraft 170 Classic -89 full restoration

Johan, do you remember did you have loose fitting on this steering shaft? It seems that this is quite common issue, luckily tightening the bolts helped in this case.

I don't remember now. Perhaps it was a little loose. It was rather dry though, either the previous owners didn't grease it or then the grease didn't get there or both. I think both because mine had not been properly taken care of.


A lot of things can be really tight on those... be careful when you drill out the screws so you don't harm the ring. You should put new trim and tilt switches on when you assemble it again IMO, just so the cables are fresh. As we've discussed before. You don't want to disassemble these parts again anytime soon, or ever.

//
Johan
 

Jussi-T.

Petty Officer 2nd Class
Joined
Jan 5, 2013
Messages
151
Re: Wellcraft 170 Classic -89 full restoration

Yup, I have noticed that almost everything is really tight :D And yes I purchased a Quicksilver tilt and trim sender kit, the old ones looked that they haven't been functioning in long long time. I guess that's why the PO had pull a +12v wiring to the trim switch...

About the hole drilling, I tried to drill one cracked bolt, but the stainless steel is just too hard ( or I'm just too lousy driller :D). I center punched a mark to it, but it didn't center enough. So i thought, what the heck, I'll drill a new holes next to the old ones. IMO it does the job just fine. I'll post pics later.

By the way, did you put new bushings and seals when you did your's?

Ps: Did you got my private message I sent you on tuesday? It's about the paints :)
 
Top