stumped

screennamie

Seaman
Joined
Nov 28, 2011
Messages
59
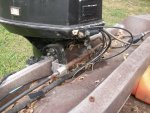
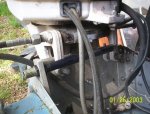
How would you remount this? These are the parts I got when I purchased the steering. Been awake too long and calling it a day.

I'm thinking some fabricating, cutting, bending or drilling is going to be in order. No problem to do I have the tools but if anyone can modify the pictures or tell where some thing goes I'd appreciate it.

aa.jpg

aaa.jpg
 

Bob_VT

Moderator & Unofficial iBoats Historian
Staff member
Joined
May 19, 2001
Messages
26,030
Re: stumped

Center drill that L bracket and mound it in the steering hole in the front of motor....... and bolt it all together. I can appreciate the lack of sleep and things will be clearer when you get a nap!
 

screennamie

Seaman
Joined
Nov 28, 2011
Messages
59
Re: stumped

Well, I've remeasured and with no fabrication right now I'm still 4 inches short of the motor. I got the wrong size push/pull rod with my steering kit. I was thinking of taking some 1/4" steel and making an adapter. Heat and twist it to 90 degrees on one side so it will mount to the plate and the steering. unless anyone has a rod laying around and wants to trade or sell? Heres a picture of mine with the number on it. No idea what they mean.

aaaaaa.jpg
 

screennamie

Seaman
Joined
Nov 28, 2011
Messages
59
Re: stumped

Or I'm looking for a rod shaped like this one here I found on iboats here

rod i might need.jpg

or a bracket.. anyone know where I could purchase this? I'm thinking may be cheaper to make.

or steering bracket.jpg
 
Last edited:

Bob_VT

Moderator & Unofficial iBoats Historian
Staff member
Joined
May 19, 2001
Messages
26,030
Re: stumped

You are on the right track......... you need a place where the linkage rod connects to the motor and sometimes on the older motors it is easier to make one.
 

screennamie

Seaman
Joined
Nov 28, 2011
Messages
59
Re: stumped

about to head to the hardware store... how thick of steel should I be looking for 1/4 or 1/8th. I think as long as its thick enough it shouldn't fail.
 

screennamie

Seaman
Joined
Nov 28, 2011
Messages
59
Re: stumped

This is what I came up with. used 1/4" thick steel and bolted her down. Better than paying for a whole new mounting bracket or longer push pull rod.

000.jpg

I was thinking of installing a cotter/pin in this second photo where the rod connects. Just incase it does fail but I don't expect that this steel is going to bend or break anytime soon.

00.jpg


I just don't know which hole on the make shift tiller I've installed the steering will perform the best with. Did some playing at the helm and the motor doesn't turn very far. I think its going to handle like my truck in 4 wheel drive :rolleyes:
 
Last edited:

Frank Acampora

Supreme Mariner
Joined
Jan 19, 2007
Messages
12,004
Re: stumped

Did you try tilting the engine up? It is almost a certainty that the L bent steel will interfere. The steering tube needs to be as close to the transom clamps as possible.
 

screennamie

Seaman
Joined
Nov 28, 2011
Messages
59
Re: stumped

I was actually smart enough to trim it to where it gets on plane fine. I put the peg in the second hole which is where I had it when I was on the lake before I spun the prop.

That's another reason I was thinking of using a cotter/pin there. That way I can disconect the cable turn the motor and trim her all the way out. Would make it easier to get up or down the ramp and in and out of my drive way at an incline.

Unfortunately the splash pan has those supports connecting to the transom. Kind of prevents me from installing the tilt tube. I'm looking for a clamp block though. This should hold me till I find one suitable for the price :D Unless this looks really unsafe.

I'm not too sure I'm going to be a big fan of the steering though. I would say the motor only travels 40 degrees from the center in either direction. We'll see how she handles :rolleyes:
 

Frank Acampora

Supreme Mariner
Joined
Jan 19, 2007
Messages
12,004
Re: stumped

103_6240.jpg

Admittedly this is not a good photo but it is all I had. You can see my flat steering mount bar (no longer used) attached to the splashwell on the starboard side (left side of the photo).

Simply attach a strong flat piece of aluminum (preferable) or stainless to the starboard splashwell support. Drill a 7/8 hole near the top (reason aluminum is better unless you can drill stainless that big). Locate the hole so it is close to directly below the steering arm (blue "U" shaped part) on the engine. Pass the steering tube through the hole and locate it with two collars, one on either side of the flat bar. Now attach your stainless link to the steering cable and the engine. This will allow the engine to tilt fully. If you need more steering travel, attach a bracket from the engine steering arm towards the engine itself. This will allow more turning for the same steering cable travel. If you have the room, you can attach the link through a drilled hiole in the bottom engine cowl for maximum steering.

Simple, cheap, and effective. The reason I no longer use it is because the current engine has through the clamps steering mounting.
 

screennamie

Seaman
Joined
Nov 28, 2011
Messages
59
Re: stumped

I kind of understand but I'm not certain. My engine doesn't have a through tube where it mounts to the transom. And I don't know what you mean by collars. I don't see how that would hold the steering cable in place. Is it a type of plumbing/fitting that goes through the 7/8" hole and the cable screws onto, like a big inside out threaded nut?

basically the motor will turn sharper the closer I have the stainless steering link hooked up to the powerhead. I may just break down and get a clamp block. :facepalm:

Another issue I thought of is should the motor be centered, or turned all the way to one side, and then the cable matched up?

Because I centered it and gave the wheel enough turns to match the steering cable and link to center. Then I mounted all the hardware.
 

Frank Acampora

Supreme Mariner
Joined
Jan 19, 2007
Messages
12,004
Re: stumped

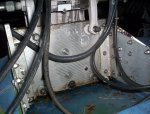
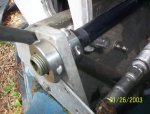
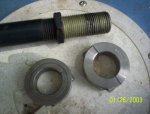
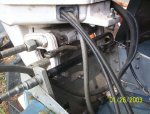
104_6847.jpg104_6846.jpg104_6845.jpg104_6844.jpg

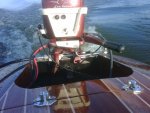
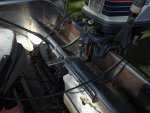
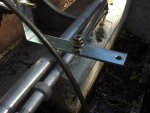
See if these photos help. This is how the engine was steered before I mounted the current engine with thru the clamps tilt tube steering. This is still attached because I was not going to disconnect it just to demonstrate the old system.

The shaft collars shown are stainless split collars and are very expensive. I use them because I got them for nothing. You can use regular aluminum collars with a set screw, or even steel if you keep them well painted, greased, etc. to prevent rusting.

In the photos, you can see that my steering tube (as most are) has threads so I would not need collars. Your tube is not threaded except for where the cable threads on so you would need to use collars to locate it.

Now: Set the engine to center, set the steering wheel to center and then connect the arm to the engine. Now, slide the collars to either side of the steering tube against the mounting bar. These collars keep the tube in position.

As I said before, attach the mounting bar to the starboard splashwell brace. Use a spacer to fill in the brace.

Note that in the third photo, I used an old damaged steering tube and cable. It is locked into almost full left turn (port) position.
 

screennamie

Seaman
Joined
Nov 28, 2011
Messages
59
Re: stumped

That does make more sense. Thanks for the help! And I had looked into those clamp blocks but for 80 bucks, I find that to be hard to stomach for such a simple device. I'll see if I can mock something better up next week. I'd still like to test this out and see how it does.

Will mounting to the splash well like that allow the engine to turn further in both directions or is that pretty much dependant upon the steering cable that I have purchased?
 
Top