Stringer Jig

Woodonglass

Supreme Mariner
Joined
Dec 29, 2009
Messages
25,924
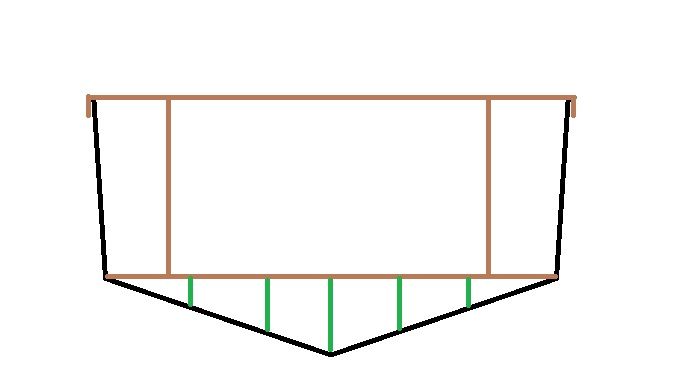
In another thread and many others as well, the question of how to obtain the proper stringer height came up. There are many ways of doing this. Being a 40+ year woodworker, I love to use Jigs whenever possible to make my work easier and repetitive and to increase accuracy. I like to keep things "Level and Plumb" as well. This can be challenging when working on boats when they are on a trailer or even on cradles trying to keep them level and plumb is difficult at best. After the input of several iBoats members on various methodologies and thinking quite a bit on the subject I came up with this jig. I've not put it to use yet, but I believe it should work quite well. Made from 2x2 material it would be hung from the sides of the hull at the time the stringers were being placed. Measurements would have been taken previously of the original stringer height and the jig made according to these calculations. Placing one jig at the stern and another towards the bow would allow you to create accurate cardboard or foam templates for your stringers and then during installation be assured they were all positioned, Port to Starboard at the correct height. Here's a drawing of the jig...
StringerJig.jpg


Hopefully it makes sense. If you moved one of the jigs from Back to front and measured from the bottom of the jig to 1/4" off the bottom of the hull approx. every 6 - 12" you could transfer these measurements to the Plywood Blank and should be able to get very close to the dimensions of the stringer. The jig should work whether the cap is Off or On. Once the deck is removed you would lay a 2x4 across the beam of the boat and measure down to the tops of the stringers to get the height required and record it. Build the jig to this measurement.

Again, I have never used this and am putting this out only as an idea that I think might be helpful. I will be trying this in the future when the need arises. If anyone in iBoats land cares to build one and try it, please post pics and your results. I would be very interested in your findings.

Just an
OldDumbOkie.jpg
trying to be helpful!!!
 
Last edited:

sphelps

Supreme Mariner
Joined
Nov 16, 2011
Messages
11,436
Re: Stringer Jig

Got the Glassmaster coming up soon and have been thinking jigs . A little different hull design but the same concept .
 

Woodonglass

Supreme Mariner
Joined
Dec 29, 2009
Messages
25,924
Re: Stringer Jig

If you build and use it let us know your opinions please!!!
 

GWPSR

Senior Chief Petty Officer
Joined
Jul 25, 2012
Messages
758
Re: Stringer Jig

Wood, there was an iBoater who did very similarly to this, and in addition, added a plywood "comb" to the bottom, with slots cut for the stringers. When reassembling, he used those slots to maintain position during bedding. I can't remember who it was, but perhaps someone else does, or the culprit will be along and fess up. :)

Maybe it was GT1M?
 

Georgesalmon

Lieutenant Commander
Joined
Apr 14, 2012
Messages
1,793
Re: Stringer Jig

FYI, I worked for a boat builder that used an aluminum jig exactly like that except it hung from the top of the mold when the hull was still in there. It made it possible to make sure the stringers and bulkheads were all at the correct height for installation of liners and modules that were installed later on in the assembly line. The stringers were tabbed in, let cure and then the jigs were removed to facilitate completely glassing in the stringers.
 

mercurymang

Master Chief Petty Officer
Joined
Jul 14, 2012
Messages
850
Re: Stringer Jig

Neat idea. I do have a question. How does it work with the cap on or off?
 

TJS

Petty Officer 3rd Class
Joined
Aug 5, 2010
Messages
94
Re: Stringer Jig

Wood. When you state hang. What does this mean. What is the vertical material.
 

Woodonglass

Supreme Mariner
Joined
Dec 29, 2009
Messages
25,924
Re: Stringer Jig

As you can see in the diagram the brown lines would be 2x2 material. the top piece would lay across the beam of the boat and the vertical 2x2 pieces cut to length would Hang down from that piece with the other horizontal 2x2 piece attached at the appropriate height of the deck on the bottom. It would not matter if the cap was on or off as long as you took the original measurements with the cap in the same configuration. The height would remain the same. As GWPSR points out, You could easily attach "Ears" to the bottom of the jig to hold the Stringers in place while they were curing once their locations were established. I do believe in fact that GT1M had something like this but much more substantive. I forgot about that. I guess I "Stole" this from him without knowing it. Sorry GT1M. I think a couple of these small devices would do the trick but again, not tried or tested except by GT1M. Check out his thread for further assistance.

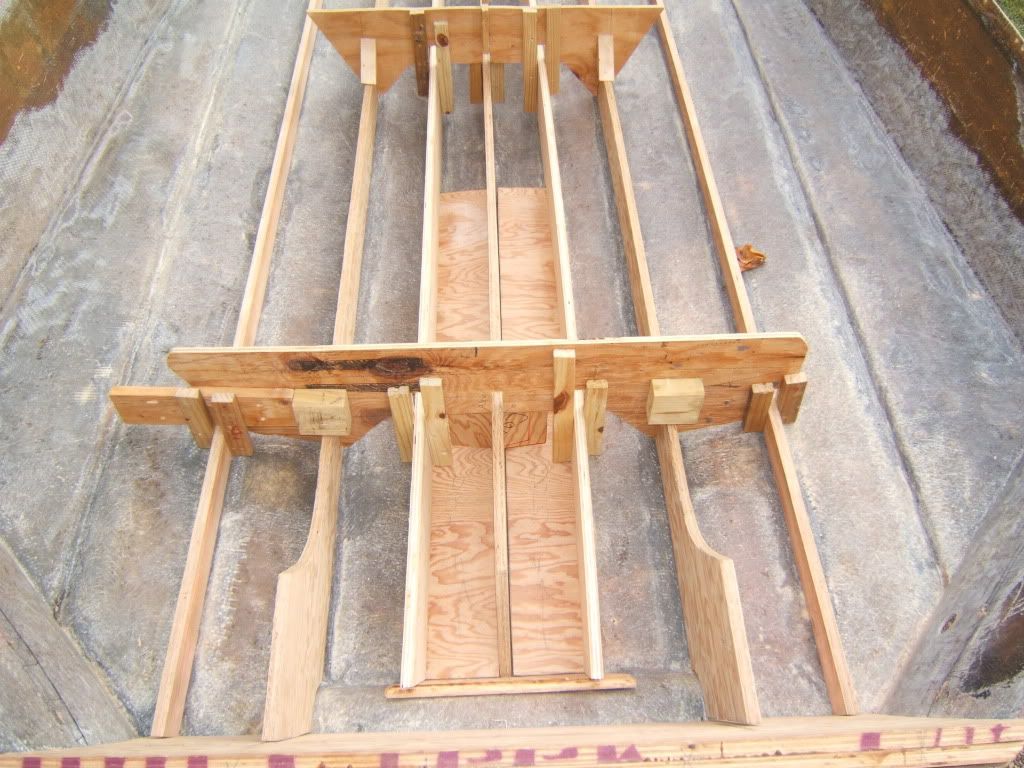
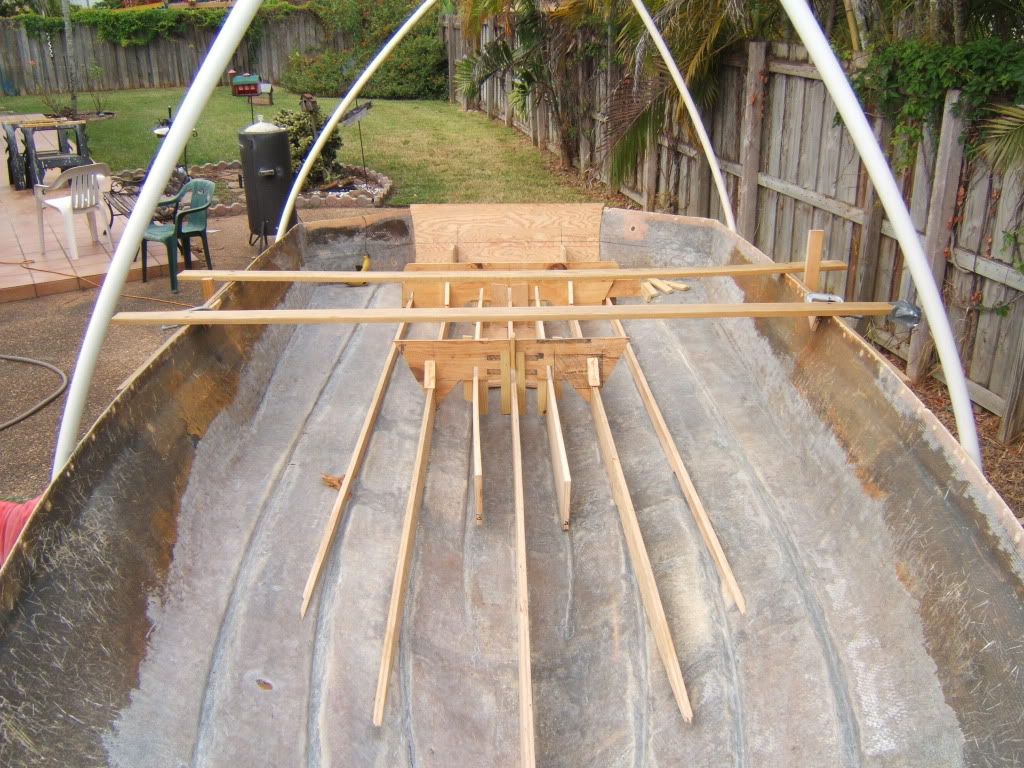
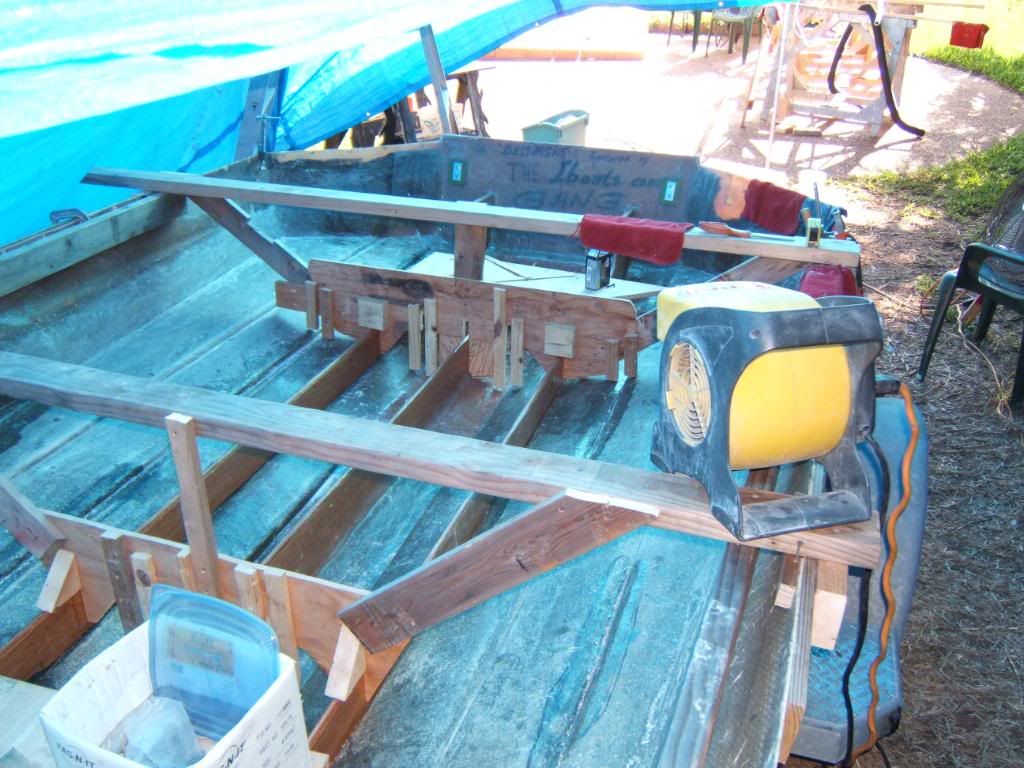
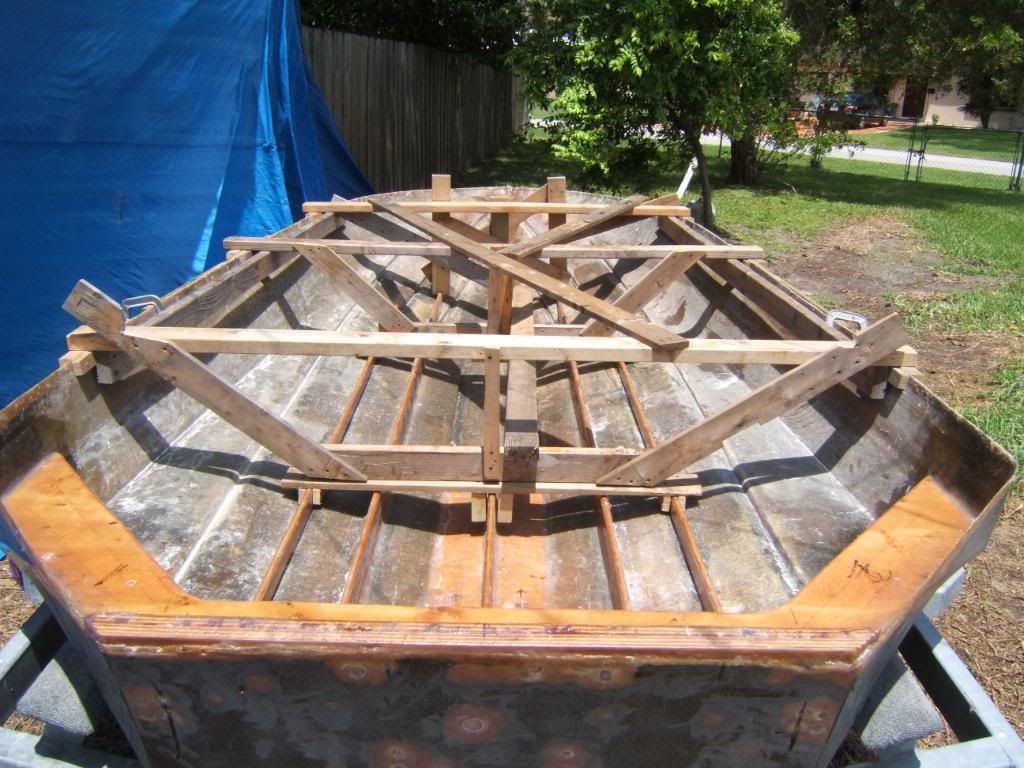
Here's a Pic of what GT1M did on his boat. Very similar idea to mine. His was to hold the hull shape as well as to position and hold the stringers in place. Put the 2 together and you have a good stringer system for establishing height and position. I think it could be a "WINNER" with or without "Tiger Blood"
 
Last edited:

GT1000000

Rear Admiral
Joined
Jul 13, 2011
Messages
4,916
Re: Stringer Jig

Wood, you and everyone else on this fine site are welcome to any and all of my ideas, whether good, bad or ugly and may use, modify or extrapolate them as any of you see fit...

I am honored just to be a teeny tiny part of this awesome forum...

I noticed you were going to show a picture of my contraption...but it didn't come up, so I have taken the liberty of posting a couple...

Here are the "spacers"...I used hot glue and C-clamps to get the pieces in place and later used some drywall screws to hold it together...


Here it is being used to help "clamp and align" the stringers for bedding...I added the 2x4's and 1x4's to act as downward pushing clamps...the 2x4's along the sides are attached to the hull through some of the old rub rail holes with screws...
While setting it all up, a bunch of C-clamps lent a helping hand...


Here it is modified and strengthened in preparation for the big flip...


I don't have any pics of the set up being used for the actual measuring, but the basic design as drawn by "woody" is basically what I used...
The basic concept worked so well that I just kept adjusting and modifying it to suit the needs of the moment...
 

Woodonglass

Supreme Mariner
Joined
Dec 29, 2009
Messages
25,924
Re: Stringer Jig

Yep that's it. This should give everyone a much better idea of what my drawing is trying to convey. Thanks Gus!!!!
 

Yacht Dr.

Vice Admiral
Joined
Feb 26, 2005
Messages
5,581
Re: Stringer Jig

I think that I understand the concept of the Jig your speaking of.

If your talking about a Jig that works for more then 2 stringers it might become a bit complicated ( as seen in the above posts ).

Jigs are a great tool for almost anything !

As long as you have a jig for the outermost stringers then your golden. The inner stringers/bulks fall in place after those are set. As Woody stated there is NO Level or Plum on a boat. You have to work with Lines and Flatness.

I think the Best case for a jig on a rebuild is Knowing Exactly where the Motor Mount Tabs were.

Make a jig with Feet/location of Exactly the location of the Mounts are before you start.

Remember you can rebuild the deck anywhere you want .. a few inches up ( or down If you have room ) if you prefer. But the Location of the Power Plant should be right back were it was ( Yes this is for an I/O or IB ).

Good thread here :)

YD.
 
Top