Mr.Stickney
Petty Officer 3rd Class
- Joined
- Oct 1, 2014
- Messages
- 94
Hello All,
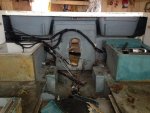
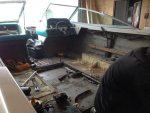
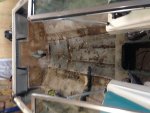
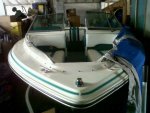
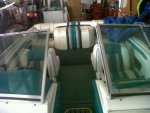
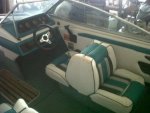
Long time lurker and have been soaking up the information and I think I'm finally ready to tackle this. Its a 1990 Sea Ray BR180 with a beautiful matching EZ loader. Scope of the project is as follows.
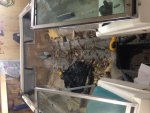
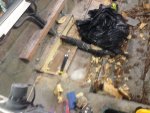
Transom R&R
Stringer R&R
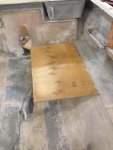
Deck replacement
Volvo Penta repower - 305 SBC
Why the Volvo you ask? I have a full repower in the garage from a boat I scrapped earlier and this one came with a seized Mercruiser 305 and no drive. And secondly there is some stress cracking in the outer skin that the increased diameter of the Volvo housing will take care of for the most part. Thirdly, just to say I did.
First question for this build thread: There is a gentleman local here selling what looks to be 1708 by the roll for one hell of a deal. Unfortunately the seller has not said that it is 1708 nor does he know the weight of the material. I plan on going to have a look on the weekend but I am just wondering if there is an easy way to identify what exactly I am looking at?
Thanks and stay tuned for updates!
Long time lurker and have been soaking up the information and I think I'm finally ready to tackle this. Its a 1990 Sea Ray BR180 with a beautiful matching EZ loader. Scope of the project is as follows.
Transom R&R
Stringer R&R
Deck replacement
Volvo Penta repower - 305 SBC
Why the Volvo you ask? I have a full repower in the garage from a boat I scrapped earlier and this one came with a seized Mercruiser 305 and no drive. And secondly there is some stress cracking in the outer skin that the increased diameter of the Volvo housing will take care of for the most part. Thirdly, just to say I did.
First question for this build thread: There is a gentleman local here selling what looks to be 1708 by the roll for one hell of a deal. Unfortunately the seller has not said that it is 1708 nor does he know the weight of the material. I plan on going to have a look on the weekend but I am just wondering if there is an easy way to identify what exactly I am looking at?
Thanks and stay tuned for updates!
 I'll be tagging along for your adventure if you don't mind.