Nismoron's 1988 Mariner 210 Restoration

classiccat

"Captain" + Starmada Splash Of The Year 2020
Joined
Dec 20, 2010
Messages
3,405
use an impact driver (not to be confused with an impact wrench) to get as many of the screws out as possible.

for the dudes that don't want to give-up their lunch money, you can try drilling / coring them out ...then blast their heads-off with a wood chisel :madgrin: Drill & tap new holes when you reinstall it.
 

GA_Boater

Honorary Moderator Emeritus
Joined
May 24, 2011
Messages
49,038
If the shaft protrudes inside the hull enough, use vise grips to start backing the screw out until you can grab the head with the vise grips. SC usually used 4 1/2" long or longer screws for stuff like this. They bought all the stock at the Army Surplus store and used them everywhere.
 

Nismoron

Petty Officer 2nd Class
Joined
Jan 29, 2012
Messages
115
If the shaft protrudes inside the hull enough, use vise grips to start backing the screw out until you can grab the head with the vise grips. SC usually used 4 1/2" long or longer screws for stuff like this. They bought all the stock at the Army Surplus store and used them everywhere.

Mine are only about 1" or 1.25" long. They are all already stripped, so drilling them out or grinding off the heads is only option. Only about 1/8" inch sticks through hull into the into the inside of the boat. Not enough to grab.

Fortunately, I work for a fastener company that specializes in stainless. I;m sure I can get some more to replace them. haha
 

classiccat

"Captain" + Starmada Splash Of The Year 2020
Joined
Dec 20, 2010
Messages
3,405
Mine are only about 1" or 1.25" long. They are all already stripped, so drilling them out or grinding off the heads is only option. Only about 1/8" inch sticks through hull into the into the inside of the boat. Not enough to grab.

Fortunately, I work for a fastener company that specializes in stainless. I;m sure I can get some more to replace them. haha

Their choice of fastener for the rubrail channel is a little odd to me...as opposed to solid rivets; a box of solid rivets is a heck of a lot cheaper than a pile of #10 SS & locknuts.

Tapped holes for machine screws make it a 1-man installation? :noidea:
 

Watermann

Starmada Splash of the Year 2014
Joined
Jan 12, 2013
Messages
13,753
If the shaft protrudes inside the hull enough, use vise grips to start backing the screw out until you can grab the head with the vise grips. SC usually used 4 1/2" long or longer screws for stuff like this. They bought all the stock at the Army Surplus store and used them everywhere.


That's exactly what my Chief had a whole lot of screw for the job at least 2" too long and when it came time for the bow curve, they bent shafts over so they wouldn't hit. Almost all of the them were loose but wouldn't spin freely. Now this sort of pain with the Mariner, I guess they weren't considering us resto guys coming along decades later repairing their boats. Another thought for replacement hardware, get some large flange blind rivets and grind down 2 sides so they fit in the channel... pop and then on to the next one.
 

GA_Boater

Honorary Moderator Emeritus
Joined
May 24, 2011
Messages
49,038
Their choice of fastener for the rubrail channel is a little odd to me...as opposed to solid rivets; a box of solid rivets is a heck of a lot cheaper than a pile of #10 SS & locknuts.

Tapped holes for machine screws make it a 1-man installation? :noidea:

They probably used self-drilling machine screws. Labor saving, but a lot more $$ than rivets.
 

Nismoron

Petty Officer 2nd Class
Joined
Jan 29, 2012
Messages
115
Anyone have any idea how many sheets of Pink 2" foam it will take to tightly pack the hull on my 21' Mariner? I'm just trying to figure about what it is going to cost.
Gotta start figuring the logistics of transporting it home and storing it till use as well. haha

Also, is there a glue/adhesive that will hold it? I might like to glue sheet pieces into blocks in some areas to keep them from getting out of place. Especially the smaller strips that will be at the edges where the bottom meets the gunwales.
 
Last edited:

GA_Boater

Honorary Moderator Emeritus
Joined
May 24, 2011
Messages
49,038
I used hot glue to hold the sheets to one another. Can't help on how many sheets, I guessed and had a little left over.
 

64osby

Admiral
Joined
Jul 28, 2009
Messages
6,799
Figure out the volume of the space you are filling and buy 10% more than that.

My personal belief is you get a little more foam when it is placed vertically. You also may require some 1", 1/2" or even fan fold to fill some small voids.
 

Nismoron

Petty Officer 2nd Class
Joined
Jan 29, 2012
Messages
115
Well between all of the excellent football, and grilling yesterday, and fishing today... I absolutely NOTHING done on the boat this weekend.
But ALL of my teams won and ALL of my hated teams lost. I grilled bacon wrapped dove breasts with cream cheese, and zucchini spears with olive oil and pepper over a mesquite fire. Ad a few beers and a GOOD night's sleep. Then my boss called today and wanted to go fishing. I caught 12-14 spotted bass on a very unforgiving lake. So it was a GREAT weekend.
 

64osby

Admiral
Joined
Jul 28, 2009
Messages
6,799
Football, food and fishing; the 3 F's are always a good reason not to be working on a boat.

Now you had your break, get back to work.:D:eek:
 

Nismoron

Petty Officer 2nd Class
Joined
Jan 29, 2012
Messages
115
Yep! I know. For the first time, I am behind schedule.

I may have another schedule buster coming up too. I have a local river that I fish often that is pretty fast, has LOTS of rocks and even has a few class III and class IV rapids. NOT somewhere you want a large boat or a fiberglass one...

Anyway, a guy at work recently bought nice old 16ft flatbottom jon with a 35 johnson. He took it to his marine mechanic and had $600 worth of work done on motor and new controls and cables. Runs great. This weekend he tried to fix the jerry rigged electrical on boat and got frustrated. So he went to bass pro and bought a new 17ft Tracker with a 50 Merc 4stroke. Told me that he would sell me the boat for the $600 that he has in motor... I previously worked on car and boat electrical systems for 14yrs. I think I might be able to wire the lights on this one. ;-) haha So I might have to spend $600 of my boat budget on this. I was going to buy a 14-16ft jon when I got done with my Mariner so that I can fish my favorite river. No way I could get a 21 footer in there.

 
Last edited:

Nismoron

Petty Officer 2nd Class
Joined
Jan 29, 2012
Messages
115
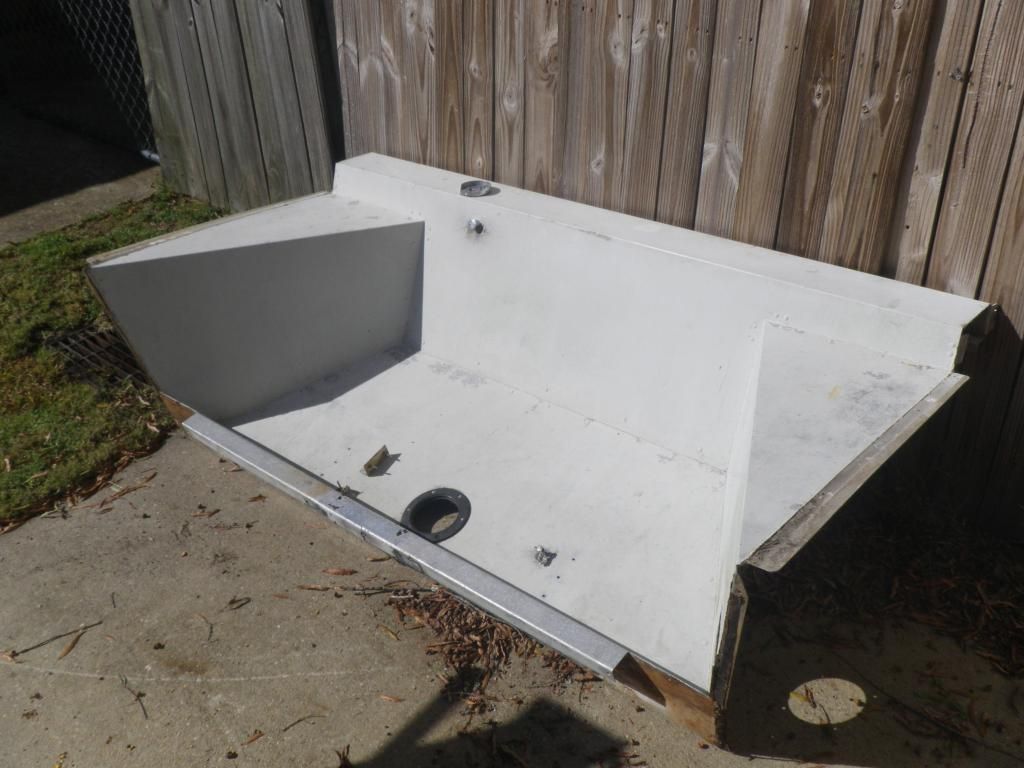
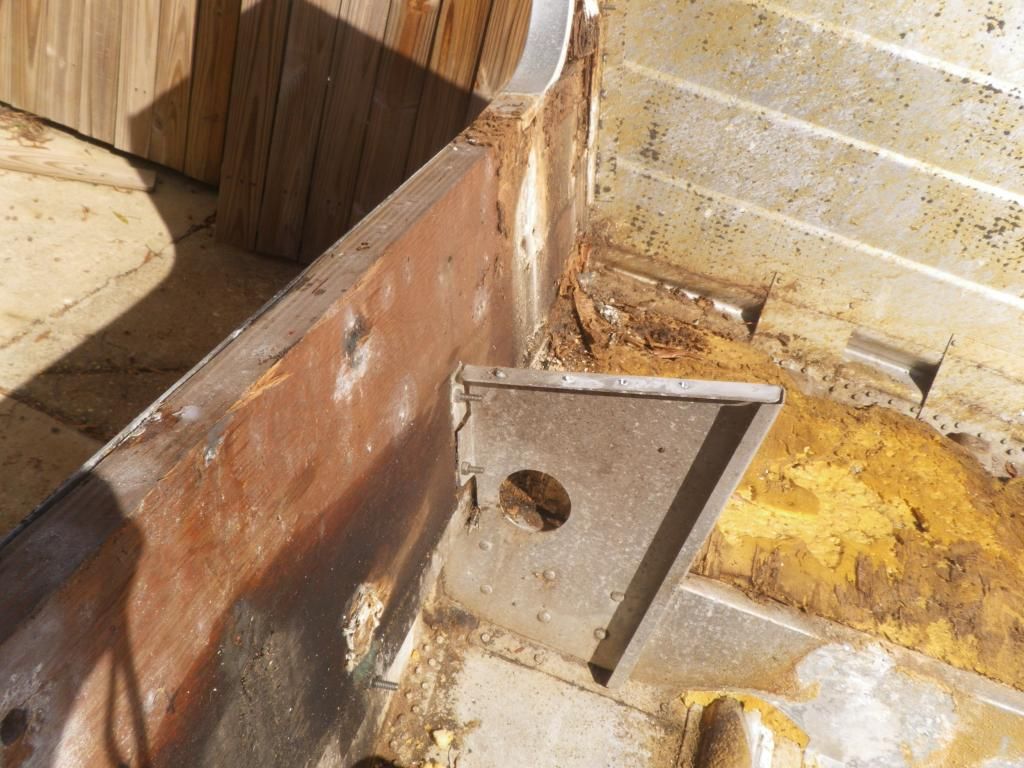
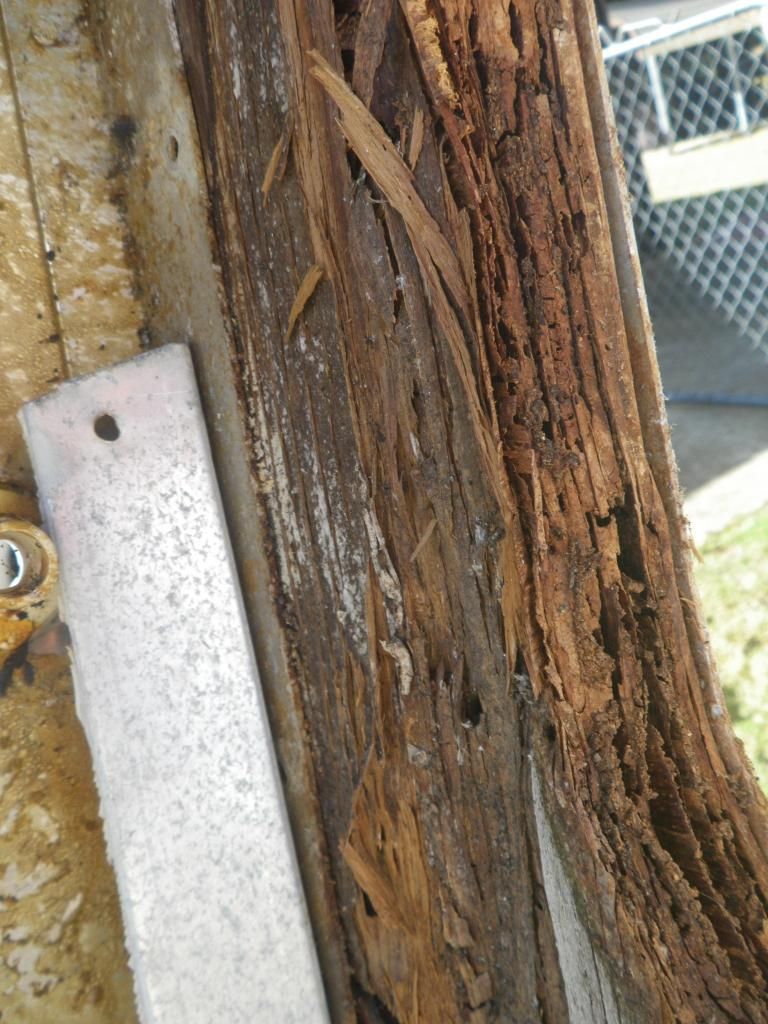
I got alot done today. I got the stripped stainless screws drilled out of the rubrails. I also for the splashwell out as well as all of the wood removed from the transom. All intact! It is completely rotted and dried out. It is like 1.5 inch thick tissue paper. haha I also got all of the foam dug out from under where the splashwell was. I was pleasantly surprised at the small amount of corrosion on the transom, but I did find some significant cancer in the seam where the bottom meets the transom. But none of it is through the hull. That I can tell. There is still a good bit of white fuzz. I have soaked in down with vinegar and will get a wire brush to it tomorrow.
Both of the knees are cracked and broken where they bolt to the transom. I am trying to decide whether to weld them back or trim the broken flanges off and replace the flange part with something much more significant. Maybe a new 3/16 or 1/4 inch aluminum plate riveted to the original.


Nismoron

Petty Officer 2nd Class
Joined
Jan 29, 2012
Messages
115
Uh Oh.... I went out there this morning and did a little clean up. I chipped at the white fuzzy and took the shop vac to it. It is much worse than I thought. There are several spots wher it has eaten most of the way through and one place where there is some perforation....

Now what to do? The areas are too large to fill weld. MAN!!! I dont want o rivet in a whole new transom.. But I dont want patch panels on the outside either...
Any suggestions? The bad spot is only about the size of a nickel or quarter. Not the whole hole. There are just a couple of pin holes, but the eaten spot is about quarter sized. Then there are several more that are not as bad, but are palm sized at the largest.

Crap! I just got out there and did some more cleaning... Found a few more perforations. All are a collection of pinholes in areas the size of a quarter or less. :-O
Up to 5 or 6 areas now...
 
Last edited:

Watermann

Starmada Splash of the Year 2014
Joined
Jan 12, 2013
Messages
13,753
Hey don't panic Nismo, it's very common and remember it's just a skin to keep water out, the main support is the transom wood. My Chief had very similar problems being salty and so did C Cat on his SS. Be sure you drill out the rivets and take off the bottom Z channel so you can clean it out behind there too.

I just can't believe how people run these boats with compromised structure, that's what cracked those knee braces, running it with a rotten transom.
 

laurentide

Lieutenant Commander
Joined
Jul 24, 2011
Messages
1,869
You might take a look for cracks in the splashwell, too. Mine had also been run with a heavy 6 cylinder OB on a rotten transom, and the well was cracked at the two lateral stress points where the 45* piece joins the vertical piece. It's an easy fix, too.
 

Nismoron

Petty Officer 2nd Class
Joined
Jan 29, 2012
Messages
115
I'm not panicking. Just very dissapointed. Just not sure how to go about fixing it...

I dont think the cracking happened by running it. I think it happened on my way home. It was a 6hr drive. When I bought it there were no cracks in the splash well. When I got home, it was cracked right where the bottom of the well turns vertical to go up the transom. It was also now separating in the rear top corners where it meets the transom and the gunwales. Definitely not there when I bought it.
 

laurentide

Lieutenant Commander
Joined
Jul 24, 2011
Messages
1,869
Sorry if this is super obvious to you, but you can just drill out the ends of the cracks, fill with JB original, then use more epoxy to bond aluminum flat bar under the cracks...better than new. And you haven't painted yet, so it'll be invisible once faired and painted.
 

Weep'n Willy

Master Chief Petty Officer
Joined
Jun 12, 2012
Messages
831
The good news is you are in the right place to get advice. Restoring these older tins that have been poorly cared for is certainly a challenge but those problems can be overcome. A lot of good advice available here that will help keep your project moving.
 
Top