New Journey

airshot

Rear Admiral
Joined
Jul 22, 2008
Messages
4,493
Nice looking job...I had a 1979 model with a 70 Johnny on it. Great boat and she did 34 mph with two on board. Caught lots of walleye off that boat !!
 

Gibbles

Lieutenant Commander
Joined
Nov 14, 2009
Messages
1,991
I run costco batteries.
Best deal out there.

Been running them for years now. (y)
 

MNhunter1

Lieutenant Junior Grade
Joined
May 12, 2014
Messages
1,000
Not much fun watching spar dry and running electrical, but getting things checked off... coat, dry, flip, repeat...I guess the 4hr dry times are better than the 24hr.
IMG_5483.jpgIMG_5485.jpg
 

MNhunter1

Lieutenant Junior Grade
Joined
May 12, 2014
Messages
1,000
Well, I can't say it's been fast, but definitely moving forward. Spring here in MN has been a bit of a wet and windy mess scattered with a few nice days here and there. Spring turkey season was a bit unusual with the weather patterns, but managed to lay one down on day 3 when the sun finally broke for a morning. Still trying to find an opportunity to get my 12, err 13 year old out (just had a birthday on Sunday), but between the lacrosse, baseball, and flag football games, combined with the weather, its been a challenge. Its been busy, but I know I'll look back someday and miss the chaos of it all.

Pretty much down to electrical and getting the TOP running and rigged, along with some trailer work. Probably tackle a full trailer rehab over the next winter, but still need to paint some fenders, wire some lights, and take care of all the littles to make sure its safe and fully functional. Finishing up the front casting deck, storage, and trolling motor needs, then I'll turn back to the console and complete the rest of the wiring there. So close, yet so far :)
IMG_5584.jpgIMG_5585.jpgIMG_5586.jpgIMG_5587.jpgJasonSpring24.jpg
 

ShoestringMariner

Lieutenant Commander
Joined
Apr 18, 2015
Messages
1,574
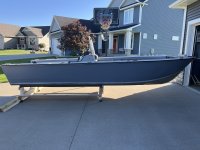
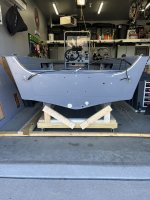
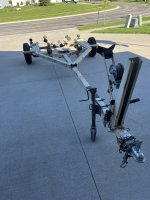
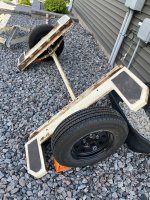
Was going to wait until I actually had this one in hand, but I figured the journey is a big part of what we look forward to sharing here. Made an agreement with my wife that if I sold the 16SS after having taken up space in our garage and two different homes for a number of years, I could find the hull I wanted and build another one as a keeper. I hope the saying holds true that the third times a charm...

After prematurely looking for good bones for a new rebuild (I think my wife was thinking "next year"...lol), I have a verbal agreement in place on a '84 MR180 about 3 hours from here. Watched it for about a month and had several conversations with the seller. Plan to hit the road pre-dawn on Saturday morning to arrive around sunrise, look her over, and tow her home.

Keep your fingers crossed for a safe journey with no surprises/disappointments...

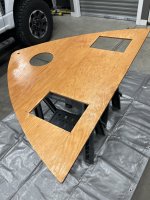
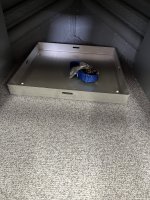
View attachment 322032View attachment 322034View attachment 322036View attachment 322038
My brother has one of these, looking forward to seeing your build
 

Moserkr

Chief Officer + Starmada Splash Of The Year 2021
Joined
Nov 23, 2020
Messages
843
Nice big tom!! Great looking boat too. Very clean build. Cant wait to see her on the water again.
 

classiccat

"Captain" + Starmada Splash Of The Year 2020
Joined
Dec 20, 2010
Messages
3,409
Update time: Was trucking along and then lost a little steam after the weather turned again. Got a few deliveries in, with another one arriving tomorrow containing the remaining terminal blocks and bus bars I need for the wiring. I know you all like pictures, and nothing too exciting to share, but I'll attach a few teasers:
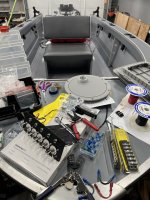
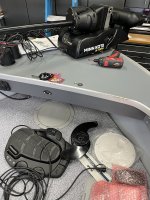
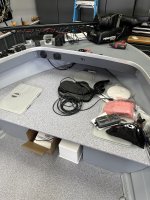
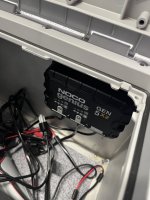
View attachment 396425View attachment 396426View attachment 396427View attachment 396428View attachment 396429
View attachment 396430
Questions:
1) Any issue with the Interstate batteries from the local Costco? I'll be running a group 24 for the starting/house (would need to do some modifications to fit anything bigger), and then a pair of group 27's dedicated to the 80lb Ulterra. Sounds like many recommend going to group 29's, but not sure what/where to find them for a dependable/reasonable price.
2) 6 AWG tinned recommended for joining the two 12v together and running to the trolling motor plug? Easy enough to make my own, or just buy some custom? My ratcheting crimper only goes to 10 AWG, but have a friend I could likely borrow a larger crimper from.
3) Plan on picking up a Noco 2 bank onboard charger (5amp per bank) for the trolling motor batteries. Any benefit in adding a single bank for the starter/house battery as well, or will the motor keep it pretty well charged? I'm also planning on carrying a Noco GB40 Boost for IF I ever find myself needing a jump for the main. Not much on the house aside from lights, bilge, livewell pump, and a Garmin 93SV.
3) Any issue with securing bus bar and/or terminal block directly to the inside of the transom under the splashwell? It would be easiest to screw it right into the wood, and will be completely covered/enclosed, so don't really see much opportunity for it to get wet there aside from a fully swamped hull.
4) Trailer fenders - the originals had the carpet backers, are they necessary, or any concern with leaving them off/fenders opened on the back?

Thanks Mob! Hope everyone is well!

another super clean build man!
For what it's worth, I'm winding down of 2 weeks of striper fishing on the mighty Hudson with a pair of Walmart Everstart Maxx Marine 29DC's for my 80# Terrova. I've been using the TM for a full day of controlled drifts & spot-lock anchoring in an area of river that has full outgoing flow (regardless of tide) and at the end of the heaviest use day, I had only used 25% of their capacity. IIRC, they were about 110 bucks a piece.
 

MNhunter1

Lieutenant Junior Grade
Joined
May 12, 2014
Messages
1,000
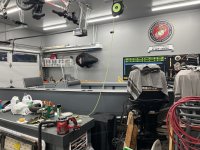
After a little contemplation, and recognizing what little time there'd be to actually use the boat this season between all the kids sporting activities, I decided to move forward with the trailer rehab while the motor was still off the hull. I had originally planned to tackle it over the winter and get the boat in the water this season, but I know it'll bug the crap out of me to not only see the disparity between boat and trailer every time I look at it, but also knowing I still have the project to complete ahead of me. I don't want it partially complete, I want it fully complete.

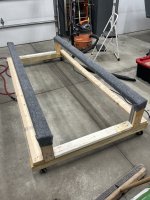
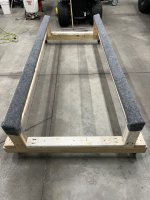
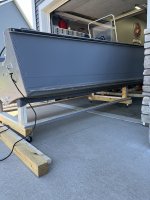
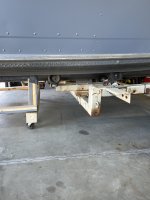
So, I took some scrap 2xs and 4xs I had laying around from other projects and Macgyvered up a boat cradle. Now, how I'm going to transfer the boat from trailer to cradle is still under some contemplation, but figure with a 800lb hoist on the ceiling, a couple of the neighbor buddies, and a few wobbly pops, we should be able to figure something out. I constructed it so the bunk height of the cradle sits about 1/2" or so below the height of the trailer rollers, so hoping it should slide on pretty easy as long as I can brace the casters. Goal is to get it transferred over sometime this weekend, then start on the trailer disassembly after jotting down a few important measurements. Wish me luck! 😄

IMG_5815.jpgIMG_5816.jpgIMG_5817.jpg
 

MNhunter1

Lieutenant Junior Grade
Joined
May 12, 2014
Messages
1,000
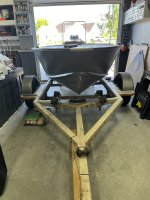
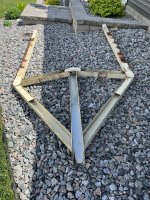
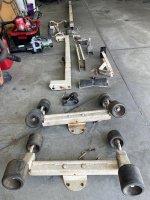
Had a busy weekend so a little delayed in posting. Successfully made the leap from trailer to cradle...as a one man job! I had the neighbor lined up to give me a hand on Saturday morning, but got a little eager when I was getting everything all prepared and had it down before he made his way over. I did brace up the bow for a little added security once it was positioned back in the garage, and the trailer has now been completely deconstructed...more pics to come.

IMG_5837.jpgIMG_5839.jpgIMG_5840.jpgIMG_5841.jpgIMG_5843.jpgIMG_5844.jpg
 

MNhunter1

Lieutenant Junior Grade
Joined
May 12, 2014
Messages
1,000
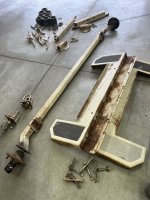
I remember as a kid, taking things apart out of curiosity, but often never got around to putting them back together. I hope things have changed...😁

IMG_5859.jpgIMG_5860.jpgIMG_5861.jpgIMG_5869.jpg
 

MNhunter1

Lieutenant Junior Grade
Joined
May 12, 2014
Messages
1,000
My dilemma...

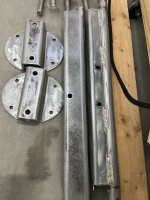
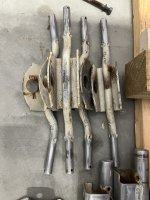
I've been working on the parts with a flapper disc/angle grinder, 80 grit on an orbital sander, and some wire wheels. I had planned to hit everything with Rustoleum Rusty Metal Primer before laying down some Rusto Pro as a topcoat, but I'm reading some conflicting information on using the primer on clean metal, rather than just over rusty metal. As you can see, I have a bit of both w/ several piece yet to prep. Anyone have experience with the Rusty Metal Primer over clean metal? Can I mix the primer coat and spot spray the respective areas with both the Rusty Metal and the Clean Metal primer? Any other recommendations?

Do I let the clean metal sit a bit and build some surface rust? Seems a little backwards...

IMG_5883.jpgIMG_5884.jpgIMG_5885.jpg
 

Sharpie223

Petty Officer 2nd Class
Joined
May 24, 2021
Messages
159
My understanding is that rusty metal primer just has some extra oils in it, designed creep into rust (more than surface rust), that will be present on the sirface layer if no rust exists. I've tried it before and had adhesion issues between paint and primer. I'd recommend sticking to clean metal primer. If you see rust anywhere, hit it with some phosphoric first and rinse/dry. I've heard good things about corroseal as well, which is a phosphoric based converter that also is supposed to leave an acrylic primer layer. Personally, I like to spray all steel with phosphoric, clean or not. Aside from etching, it helps show where there may be some other contamination, such as weld slag or surface oils. And it does so before you've put in the effort to paint.
 

MNhunter1

Lieutenant Junior Grade
Joined
May 12, 2014
Messages
1,000
My understanding is that rusty metal primer just has some extra oils in it, designed creep into rust (more than surface rust), that will be present on the sirface layer if no rust exists. I've tried it before and had adhesion issues between paint and primer. I'd recommend sticking to clean metal primer. If you see rust anywhere, hit it with some phosphoric first and rinse/dry. I've heard good things about corroseal as well, which is a phosphoric based converter that also is supposed to leave an acrylic primer layer. Personally, I like to spray all steel with phosphoric, clean or not. Aside from etching, it helps show where there may be some other contamination, such as weld slag or surface oils. And it does so before you've put in the effort to paint.
Thanks! So no issue/adhesion concerns hitting it with the clean metal primer after treating with the Correseal or phosphoric? Treat(all, not just rusty spots), prime, paint.
 

Sharpie223

Petty Officer 2nd Class
Joined
May 24, 2021
Messages
159
If you use straight phosphoric, keep it wetted while applied (maybe tightly wrap in plastic), then rinse after. I'd imagine dried phosphoric could cause issues. If done right, all that should be left is an adherent layer of iron phosphate, which has good tooth for primer. Same idea as self etch primer, but a little stronger results.

I don't have any experience with corroseal, but I haven't heard anything wrong with it. Maybe do a trial piece and cross hatch test before a full paint job. My reading about it has been where people have used it for rusty truck frames, they seem to like it.
 
Top