Man of Steel Goes Aluminum

PikeHunter431

Petty Officer 2nd Class
Joined
Sep 8, 2015
Messages
171
No Title

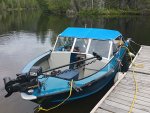
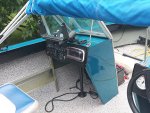
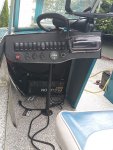
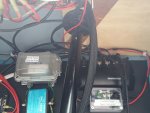
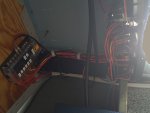
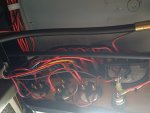
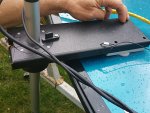
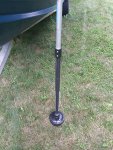
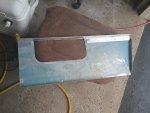
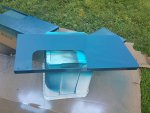
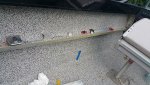
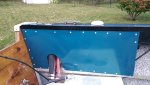
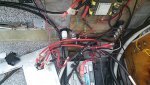
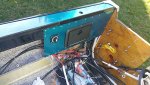
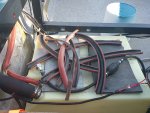
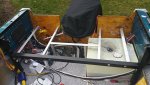
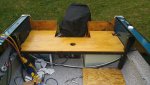
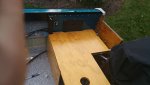
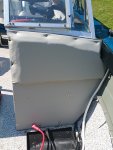
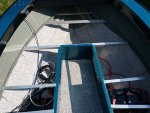
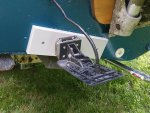
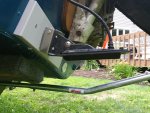
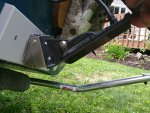
At camp, I installed a transducer mounting plate (with 5200) and the transducer setup on the port side of the stern. I used a transducer shield/saver and a spring-back bracket also made by Transducer shield and saver. We have to raise the outboard to get a good side side image on the starboard side, but otherwise the the transducer performed well with the dual and down imaging. Almost forgot, my son rewired the trailer lights as well. I am so glad I had that extra portable light kit as a backup.
 

Attachments

  • photo270608.jpg
    photo270608.jpg
    113.3 KB · Views: 3
  • photo270609.jpg
    photo270609.jpg
    106.1 KB · Views: 3
  • photo270610.jpg
    photo270610.jpg
    126.3 KB · Views: 2
  • photo270611.jpg
    photo270611.jpg
    72.3 KB · Views: 3
Last edited:

PikeHunter431

Petty Officer 2nd Class
Joined
Sep 8, 2015
Messages
171
No Title

We also got the rain top put on, which was good, as it rained 8 of the 9 days. We got some nice smallies, my best was a little over 21inches.
 

Attachments

  • photo270612.jpg
    photo270612.jpg
    106.4 KB · Views: 4
  • photo270613.jpg
    photo270613.jpg
    158.9 KB · Views: 2
  • photo270614.jpg
    photo270614.jpg
    131.3 KB · Views: 2

Watermann

Starmada Splash of the Year 2014
Joined
Jan 12, 2013
Messages
13,753
Whoa man that's a transducer and I thought mine was over sized, that one of yours is the size of griddle! :lol:

Jeez I hate fishing in the rain, I like the fish to be wet not me... that is unless you're catching some hogs that one or course.
 

PikeHunter431

Petty Officer 2nd Class
Joined
Sep 8, 2015
Messages
171
No Title

I took some pics of things we did before the first trip in May. We used the larger RAM mounts for the ONYX head unit. You can see the Iron pipe with flanges I used for extra support. Underneath the console, I put a piece of plywood in to distribute the force on the console and to the pipe.
 

Attachments

  • photo270632.jpg
    photo270632.jpg
    112.1 KB · Views: 3
  • photo270633.jpg
    photo270633.jpg
    101.6 KB · Views: 3
  • photo270634.jpg
    photo270634.jpg
    82.5 KB · Views: 3

PikeHunter431

Petty Officer 2nd Class
Joined
Sep 8, 2015
Messages
171
No Title

Here are the pics of the wiring under the driver console I forgot to take and post before.
 

Attachments

  • photo270636.jpg
    photo270636.jpg
    110.4 KB · Views: 4
  • photo270637.jpg
    photo270637.jpg
    129.5 KB · Views: 4

PikeHunter431

Petty Officer 2nd Class
Joined
Sep 8, 2015
Messages
171
No Title

Here are a couple pics of the 360 imaging system. It is on the port side of the bow. I am using a breakaway mount. Not shown are the 4 plastic screws that give if I hit something. We put an extension tube on to get it low enough to clear the hull. However, the unit really did not perform well. We had all the wiring isolated, even disconnected the trolling motor batteries and used one to direct power it, and turned everything else off. Still, it did not image well. Spent some time with Hummingbird support and eventually sent them image files we took. Haven't heard back from them, but I suspect we will need to do a warranty swap on the unit.
 

Attachments

  • photo270640.jpg
    photo270640.jpg
    176.3 KB · Views: 1
  • photo270641.jpg
    photo270641.jpg
    131.5 KB · Views: 1
Last edited:

PikeHunter431

Petty Officer 2nd Class
Joined
Sep 8, 2015
Messages
171
So now it is time for Phase three. On the list is:

Bow casting deck and seating area
Rear casting deck, splash pan, rear side panels, fuel exhaust
New throttle cables and reroute under side panel
Port sideboard with storage compartments
Livewell setups and plumbing
Rear seating
Windshield cleanup
Clean/polish rails under sideboards.
Sun Top (on rails) installation
Marine radio
Sound system
Led Strip lighting ? front and back
Replace rear nav light with removable one
Mounts for fiberglass ribs for cover
Cupholders!

Beyond Phase three
Trailer painting
Replace front seats and posts.
 

Watermann

Starmada Splash of the Year 2014
Joined
Jan 12, 2013
Messages
13,753
All of that sounds fun to me right up until I got down to ... Trailer WORK :nightmare:
 

PikeHunter431

Petty Officer 2nd Class
Joined
Sep 8, 2015
Messages
171
Notice that is it past phase three, the "sometime in the future" part. It is just cosmetics, so once phase three is done, it could be a long while. Of course, the admiral may just go out sometime when the boat is off the trailer and take a couple spray cans of Rustoleum and call it a day/project complete.
 

Pusher

Lieutenant
Joined
Sep 2, 2014
Messages
1,273
We also got the rain top put on, which was good, as it rained 8 of the 9 days. We got some nice smallies, my best was a little over 21inches.

Geez man, I'm not sure I've ever even seen a bass that big online! I bet you had to consider a mount for it!
 

PikeHunter431

Petty Officer 2nd Class
Joined
Sep 8, 2015
Messages
171
Geez man, I'm not sure I've ever even seen a bass that big online! I bet you had to consider a mount for it!

The only thing I was considering was how good the streaks on the grill would be. If I land a northern over 25 lbs, then I will consider a mounting.
 

PikeHunter431

Petty Officer 2nd Class
Joined
Sep 8, 2015
Messages
171
I am long overdue for an update. Before I put her in storage I did get a couple phase 3 items done. I cut the bow deck support in the front and narrowed it to pick up a bit more under deck storage on each side.
 

Attachments

  • photo290129.jpg
    photo290129.jpg
    196.2 KB · Views: 3
  • photo290130.jpg
    photo290130.jpg
    198.7 KB · Views: 3

PikeHunter431

Petty Officer 2nd Class
Joined
Sep 8, 2015
Messages
171
I cut and added some angle aluminum to give the sides more support and painted them to match the hull.
 

Attachments

  • photo290131.jpg
    photo290131.jpg
    212.7 KB · Views: 4
  • photo290132.jpg
    photo290132.jpg
    213 KB · Views: 4
  • photo290133.jpg
    photo290133.jpg
    255.9 KB · Views: 4

PikeHunter431

Petty Officer 2nd Class
Joined
Sep 8, 2015
Messages
171
I put vinyl in both gunnels and below the gunnel on the port side. I also fashioned a side piece for the rear port side to cover the gas tank lines.
 

Attachments

  • photo290135.jpg
    photo290135.jpg
    198.1 KB · Views: 3
  • photo290136.jpg
    photo290136.jpg
    196.6 KB · Views: 3

PikeHunter431

Petty Officer 2nd Class
Joined
Sep 8, 2015
Messages
171
On the rear starboard side, I made another side plate with a hatch for the rear fuse box and to hold the main battery switch.
 

Attachments

  • photo290137.jpg
    photo290137.jpg
    167.2 KB · Views: 4
  • photo290138.jpg
    photo290138.jpg
    190.5 KB · Views: 4
Last edited:

PikeHunter431

Petty Officer 2nd Class
Joined
Sep 8, 2015
Messages
171
For the new gas tank, I put a couple rubber pieces underneath it, cut some rubber hose I had and used those pieces on the bottom edges and buttress it all the away around with angle aluminum screwed to the floor. I took out the temporary deck frame and built the permanent one.
 

Attachments

  • photo290139.jpg
    photo290139.jpg
    245 KB · Views: 4
  • photo290140.jpg
    photo290140.jpg
    197.5 KB · Views: 4

PikeHunter431

Petty Officer 2nd Class
Joined
Sep 8, 2015
Messages
171
I am planning on having the rear deck hinge near the transom so I can swing it up for access into the bilge and battery sections. I had to angle the board on the starboard side for the fuse box hatch to open. I cut two plywood face pieces for both sides of the deck. The middle will be open to accommodate the plumbing for the center live boxes.
 

PikeHunter431

Petty Officer 2nd Class
Joined
Sep 8, 2015
Messages
171
[No message]
 

Attachments

  • photo290146.jpg
    photo290146.jpg
    195.6 KB · Views: 3
  • photo290147.jpg
    photo290147.jpg
    150.9 KB · Views: 3

PikeHunter431

Petty Officer 2nd Class
Joined
Sep 8, 2015
Messages
171
I removed the temporary bow deck framing. The attempt to cover the console front with foam and then vinyl didn't really turn out so great. I took that off, removed the foam, and put a fresh piece of vinyl on it (no picture of the finished piece alone.) Then I started constructing the permanent bow deck frame.
 

Attachments

  • photo290149.jpg
    photo290149.jpg
    216.6 KB · Views: 4
  • photo290150.jpg
    photo290150.jpg
    256.3 KB · Views: 4

No-AH

Petty Officer 1st Class
Joined
Oct 20, 2016
Messages
234
Nicely done M8, and thanks for sharing your progress with pics. We are at the same stage in our re-do's. What's your plan with the rear casting deck, any seating?
 
Top