Bravo 3 Bellows Replacement - Times 2

tpenfield

Moderator
Staff member
Joined
Jul 18, 2011
Messages
17,712
So long as the flats are vertical your good. Never found anything to reference the larger over the smaller end to be up/down. Not to say there might be something out there, just never heard of anything

Yea, might be a FigNewton of my imagination or an obstacle illusion as I looked at it. The picture does not show the difference too well.

Also, I took a look in my Mercruiser manual and it seems to mention a marking for the 'Top' of the bellows, which apparently would put the flat spot vertical, but the manual did not mention the flat spots directly. so, I'll have to see if I can figure out the chaffing cause as I take things apart.
 

MarkSee

Lieutenant Junior Grade
Joined
Sep 10, 2010
Messages
1,172
When I took my B3 u-joint bellows off 2 weeks ago it had a 'top' marked and the "flat spots" are at 3 and 9 o'clock by what I remember.
I'll double-check when I get home in a few hours.

Mark
 
Last edited:

tpenfield

Moderator
Staff member
Joined
Jul 18, 2011
Messages
17,712
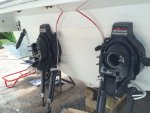
Well, I started into the bellows on both outdrives today

first the drives had to come off, and the trim limit and sender get taped up out f the way.

IMG_6220.jpg


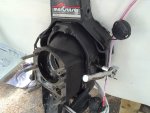
I was thinking the hings pins would be nearly impossible to remove, but with the help if a long handle wrench, I was able to break them loose and then take them out with a socket wrench.
IMG_6221.jpg

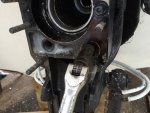
I forgot to order the special tool for the cable fastener, but I found that one of my deep sockets worked. It is a real pain to get a wrench on the back side, but I figured it out after a while.
IMG_6225.jpg


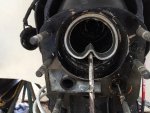
The I took the bellows sleeve out
IMG_6226.jpg

Then the bellows was pushed out of the bell housing
IMG_6227.jpg

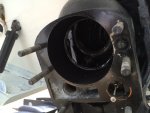
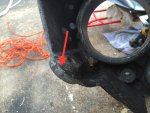
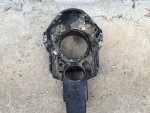
After I got everything freed up from the bell housing, I looks for and found what I believe was causing the chaffing on the bellows. There is a squared off area of the bell housing just behind the pivot point. That seemed to line up to the area where the chafing on the bellows was occurring. So, I figured that I should take the corner off a little bit with my grinder.
IMG_6232.jpg

Continued on next post. . .
 

tpenfield

Moderator
Staff member
Joined
Jul 18, 2011
Messages
17,712
I used my ankle grinder with wire brush attachment to clean up the bell housing a bit and take off the corner that was causing the chaffing. IMG_6233.jpg


I painted the bell housing in the areas where I ground off some corrosion . . . IMG_6235.jpg


The Starboard bell housing was much worse than the port housing in terms of marine growth . . . I guess the marine critters like the taste of the starboard drive better IMG_6238.jpg


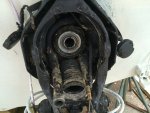
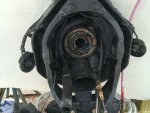
Here is the starboard gimbal assembly with most of the 'stuff' removed. IMG_6239.jpg


Here is the port outdrive IMG_6240.jpg

I noticed that the outer shift cables are different between the 2 outdrives. Probably due to maintenance over the years.

I have to clean up the mounting flange for the bellows . . . I am not sure how clean it needs to be or the best way to clean the old adhesive off of the flange. ????

Anyway, I got most of what I wanted to do done today and hopefully tomorrow will be a day of putting things back together.
 
Last edited:

tpenfield

Moderator
Staff member
Joined
Jul 18, 2011
Messages
17,712
UPDATE:

I RTM and saw that the prescribed flange cleaning method is with sand paper and Lacquer Thinner. . . . better make a Wally Mart run today. :)
 
Last edited:

tpenfield

Moderator
Staff member
Joined
Jul 18, 2011
Messages
17,712
When I took my B3 u-joint bellows off 2 weeks ago it had a 'top' marked and the "flat spots" are at 3 and 9 o'clock by what I remember.
I'll double-check when I get home in a few hours.

Mark

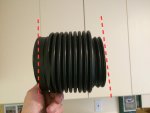
Thanks, having taken the bellows off, the top mark does put the flat spots at the sides. My old ones were just installed about 45 degrees off from being correct. It did not seem to have anything to do with the chaffing however.

Another thing I noticed is that with the proper orientation, the end that joins to the bell housing has a slightly upward angle to it as shown in the picture below . . . which would make sense, I guess. IMG_6241.jpg
 
Last edited:

alldodge

Moderator
Staff member
Joined
Mar 8, 2009
Messages
40,760
Making good progress. As you say it looks like the port side has had more recent work accomplished. Never paid attention to the angle of the boot angle, well look closer the next time I do it.

Question a bit off topic. Do you move your boat or have it moved?
 

tpenfield

Moderator
Staff member
Joined
Jul 18, 2011
Messages
17,712
Making good progress. As you say it looks like the port side has had more recent work accomplished. Never paid attention to the angle of the boot angle, well look closer the next time I do it.

Question a bit off topic. Do you move your boat or have it moved?

I have it moved/launched by a local boat hauler. $10/Foot each way. So, if I had to pull the boat for any maintenance, it would be $660 added onto what ever the maintenance would cost. that is why I decided to do the bellows, as they were looking questionable with the chaffing marks along the ribs.

It turned out that 3 of the accordion ribs were affected . . . probably rubbing during turns, etc.
 

alldodge

Moderator
Staff member
Joined
Mar 8, 2009
Messages
40,760
I have it moved/launched by a local boat hauler. $10/Foot each way. So, if I had to pull the boat for any maintenance, it would be $660 added onto what ever the maintenance would cost. that is why I decided to do the bellows, as they were looking questionable with the chaffing marks along the ribs.[?quote]

Do that enough and you could pick up your own trailer :D

It turned out that 3 of the accordion ribs were affected . . . probably rubbing during turns, etc.

Check for play in the upper and lower pins, the boot should stay clear of the ring.
 

tpenfield

Moderator
Staff member
Joined
Jul 18, 2011
Messages
17,712
Update . . .

Boy do I hate bell housing & bellows work . . .

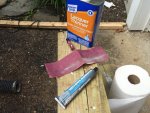
I started off the day with my supplies for cleaning the u-joint bellows flange and prepping for the bellows installation
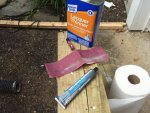
IMG_6242.jpg


I replaced the exhaust bellows on the starboard drive with a 'tube' since the port drive already had 'the tube'. My preference is for tubes as they are lower maintenance IMO. IMG_6246.jpg
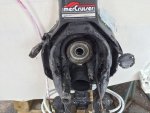


Then I finished prepping the bellows flanges and installed the bellows on both drives IMG_6249.jpg
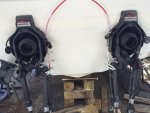

Getting the bell housings back on and all connected to everything is a real chore. . . I suppose with practice it would not be too bad, but as a one-off it was tough. Anyway, I got the housings loosely connected and then pulled the u-joint bellows through the bell housing where it is secured in place by the sleeve to make a water tight seal. At that point, I realized that the bellows tool that I ordered was not needed, only if I was going to do the exhaust bellows :facepalm:
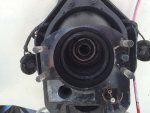
IMG_6250.jpg


I used my alignment tool along with the sleeve insertion tool to install the bellows sleeve. IMG_6251.jpg
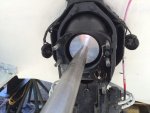


Here is the bellows and the water intake hose installed. I like how Mercruiser designed the water intake hose & fitting , , , very clever. IMG_6256.jpg
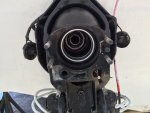


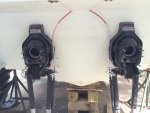
Here are the transom/bell housings all done. I did not have time to install the outdrives, so that will have to wait for next weekend. IMG_6257.jpg


In doing this repair, I found the toughest thing was to make sure not to break anything while taking things apart, considering it is used in salt water. Also, tough was figuring out how to dis-assemble and re-assemble the oil line and shift cable into the bell housing.
 

Attachments

  • IMG_6242.jpg
    IMG_6242.jpg
    188.1 KB · Views: 4
Last edited:

alldodge

Moderator
Staff member
Joined
Mar 8, 2009
Messages
40,760
Hard parts done, and for us old guys that's a good thing.
Exhaust tubes are defiantly better and if they rip, no big deal. Tubes are also better for performance with less restriction, but bad for more noise on plane
 

tpenfield

Moderator
Staff member
Joined
Jul 18, 2011
Messages
17,712
I have it moved/launched by a local boat hauler. $10/Foot each way. So, if I had to pull the boat for any maintenance, it would be $660 added onto what ever the maintenance would cost. that is why I decided to do the bellows, as they were looking questionable with the chaffing marks along the ribs.[?quote]

Do that enough and you could pick up your own trailer :D


Check for play in the upper and lower pins, the boot should stay clear of the ring.

I did not see your post until now . . . I will check for play in the pivots.

Yea, I have been contemplating a trailer. It would be about $6K and then I would need at least an F-250 to tow it . . . so maybe a used one for $10-15K. So, the payback of a trailer is not there, more of a convenience thing. I do enjoy painting the boat while it is on blocks and stands . . . very easy versus painting my trailer boats in the past.
 

tpenfield

Moderator
Staff member
Joined
Jul 18, 2011
Messages
17,712
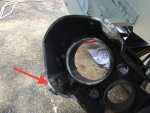
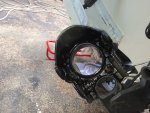
I just noticed something in the pictures that I posted . . . The gimbal rings are slightly different between the 2 outdrives. The starboard ring has larger 'indents' just below the hinge pin pivot points.

I had suspected that the gimbal rings were different, based on previous maintenance, but did not really see it until now.

Take a look at the pictures above in the earlier posts where both gimbal rings are showing (post #30) . . . Anyone have an idea of the difference? Later version? Wrong part?

Not sure it has any negative affect . . .
 
Last edited:

alldodge

Moderator
Staff member
Joined
Mar 8, 2009
Messages
40,760
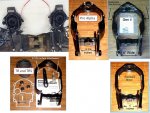
You right, Your starboard appears to be a Gen 2 gimbal and the port is a Bravo. Both have 4 inch spacing between the bottom flanges, but the spacing in the lower is wider for a Bravo then a Gen 2. Check spacing and see what it is
Ted drives.jpg
 
Last edited:

tpenfield

Moderator
Staff member
Joined
Jul 18, 2011
Messages
17,712
Well, I'll be . . . . I had a feeling. By "spacing in the lower" you mean the space in the section beneath the pivot point, where the 2 gimbal rings appear to be different.

An interesting thing is that as far as I know, this boat has been 'professionally' maintained throughout its life, which has included 3 ports along the shores of lake Winnipesaukee NH. (Lakeport, Paugus Bay, Meredith). I'm surprised a marina would put an Alpha Gen II gimbal on a Bravo outdrive. . .

Obviously, they fit for the most part . . . not sure of any adverse effects ???
 

alldodge

Moderator
Staff member
Joined
Mar 8, 2009
Messages
40,760
Well, I'll be . . . . I had a feeling. By "spacing in the lower" you mean the space in the section beneath the pivot point, where the 2 gimbal rings appear to be different.

An interesting thing is that as far as I know, this boat has been 'professionally' maintained throughout its life, which has included 3 ports along the shores of lake Winnipesaukee NH. (Lakeport, Paugus Bay, Meredith). I'm surprised a marina would put an Alpha Gen II gimbal on a Bravo outdrive. . .

Obviously, they fit for the most part . . . not sure of any adverse effects ???

Only thing I can see is the chaffing thing

PM/email if you want to change it
 

tpenfield

Moderator
Staff member
Joined
Jul 18, 2011
Messages
17,712
I think I will leave it alone for now, since both outdrives have been 'chaffing' the bellows and I have seen no other adverse effects. I have some maintenance records in the documentation set that I got with the boat. I'll have to take a look to see if any of it mentions the gimbal ring . . .
 

tpenfield

Moderator
Staff member
Joined
Jul 18, 2011
Messages
17,712
OK, having looked on the web at various Gimbal rings . . . I have come across a supposedly Bravo gimbal ring that looks like the Alpha Gen II, EXCEPT for the top pivot point clamp area on the top of the ring. The Bravo is pretty much straight across and an SS plate goes there with 2 bolts, whereas the Alpha has a noticeable "bump" between the 2 bolt location, so an SS plate could not go across there.

As you can see on my outdrives, they both have the SS plate across the top. So, I'm guessing that there is a later version of the Bravo that looks similar to the Alpha Ring?
 

tpenfield

Moderator
Staff member
Joined
Jul 18, 2011
Messages
17,712
Here are a couple of pictures that I found showing 2 different gimbal rings

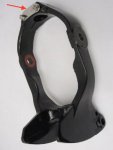
this is what is supposedly a Mercruiser 8M0062440 (Bravo)
bravogimbal.jpg

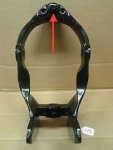
This is supposedly a Mercruiser 865328A01 (Alpha Gen II)
AlphaGIIGimbal.jpg

The lower part of the gimbal rings look the same, whereas the upper part, where the arrow points, are different. It seems like I have the 'Bravo' ring on the starboard drive, yet it is different than the port drive. so, maybe the port drive has the original gimbal ring, which is Part # 822374A4
 

alldodge

Moderator
Staff member
Joined
Mar 8, 2009
Messages
40,760
I think your right Ted, while I cannot find a spec sheet, I have been able to come across the different pics, and the one on your starboard side. Currently show 4 different types for the bravo now, standard (two serial number split), seacore and HP. Found reference to magnum and standard but no specs
 
Top