


laurentide
Lieutenant Commander
- Joined
- Jul 24, 2011
- Messages
- 1,869
You're making quick work of the demo. My top windshield has interlocking channels...I don't exactly remember how it came apart, but it was self-explanatory once I got into it.
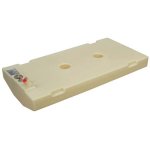
My $0.02 on the fuel tank is as far forward as you can get it. I have the OEM tank under the splashwell with two batteries on the other side. When I put the two deep cycles under the middle berth hatch it rode like a different boat. Much better! And she'll stay on plane at 12 mph now at 3500 RPM on the 70hp. That makes for low fuel costs. You really need some weight mid-forward to offset the outboard weight.
My $0.02 on the fuel tank is as far forward as you can get it. I have the OEM tank under the splashwell with two batteries on the other side. When I put the two deep cycles under the middle berth hatch it rode like a different boat. Much better! And she'll stay on plane at 12 mph now at 3500 RPM on the 70hp. That makes for low fuel costs. You really need some weight mid-forward to offset the outboard weight.
 . Wonder if the PO before your seller did the polishing job? Polishing the hull and the double floor just don't jive!
.jpg")


