87' Charger Mercruiser 200 restoration

dwolfenbarger

Seaman Apprentice
Joined
Jun 21, 2011
Messages
41
Re: 87' Charger Mercruiser 200 restoration

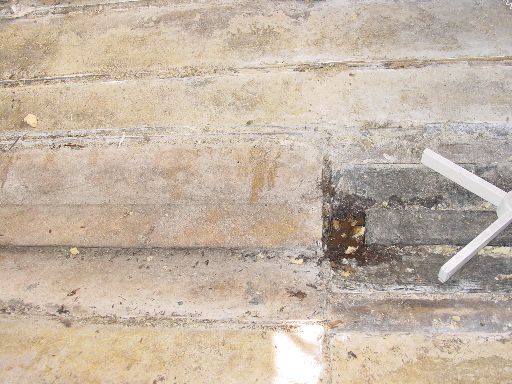
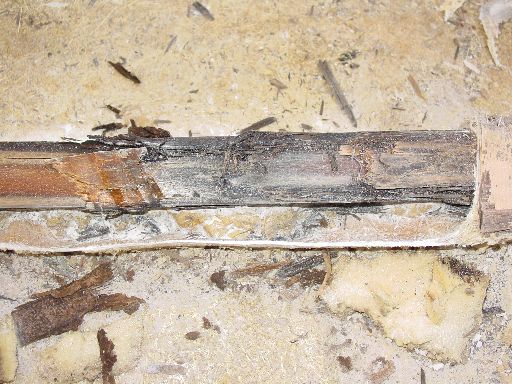
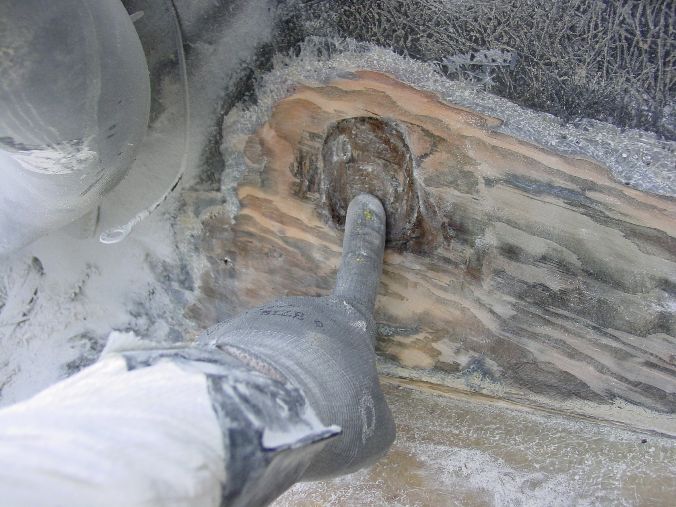
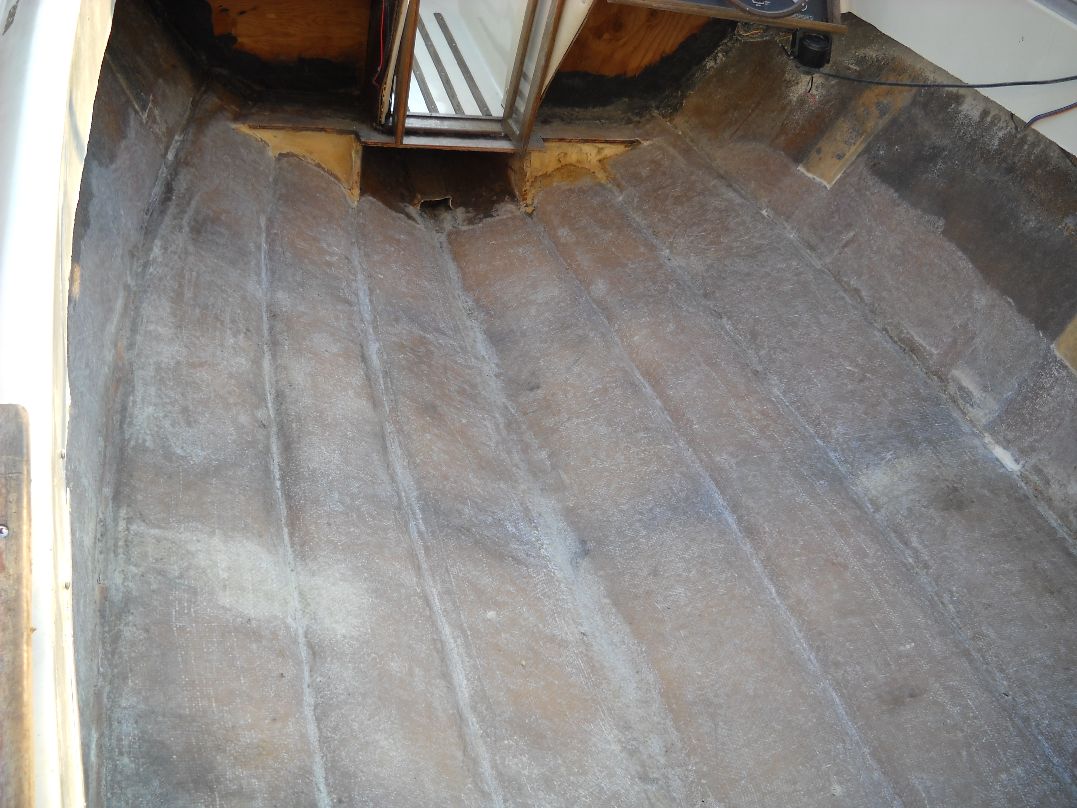
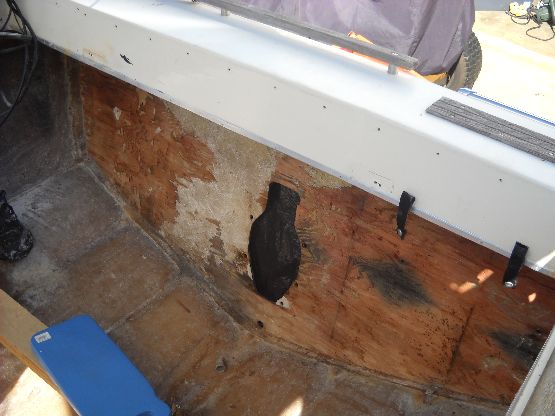
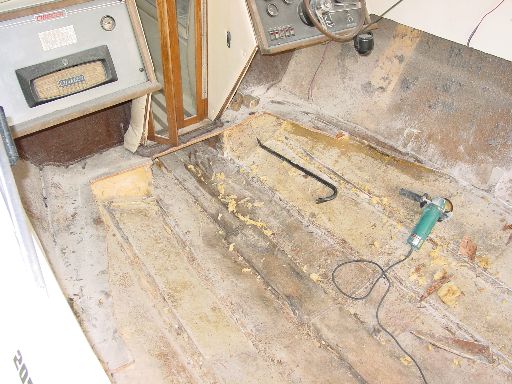
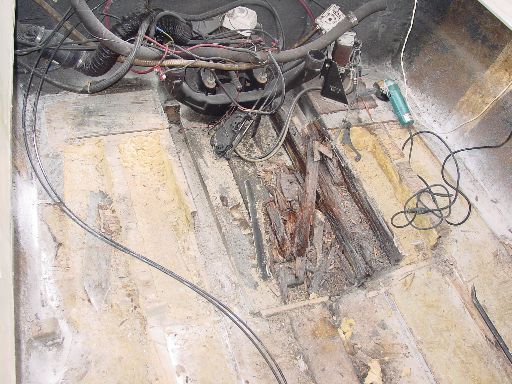
Thanks for the tip Wood. I hope I can find that type of wood in the 2 x6's. I think Lowe's has the Douglas fir in the 3\4" but not sure bout the 2 x 6's. Funny thing is the ones in the boat were a true 2" wide so I may resort to ply for those after all. Just depends on what I can find. Here are some updated pics. I got the rest of the motor mounts and the last of the wood from bow up to the kick panels out today.
87_fro10.jpg

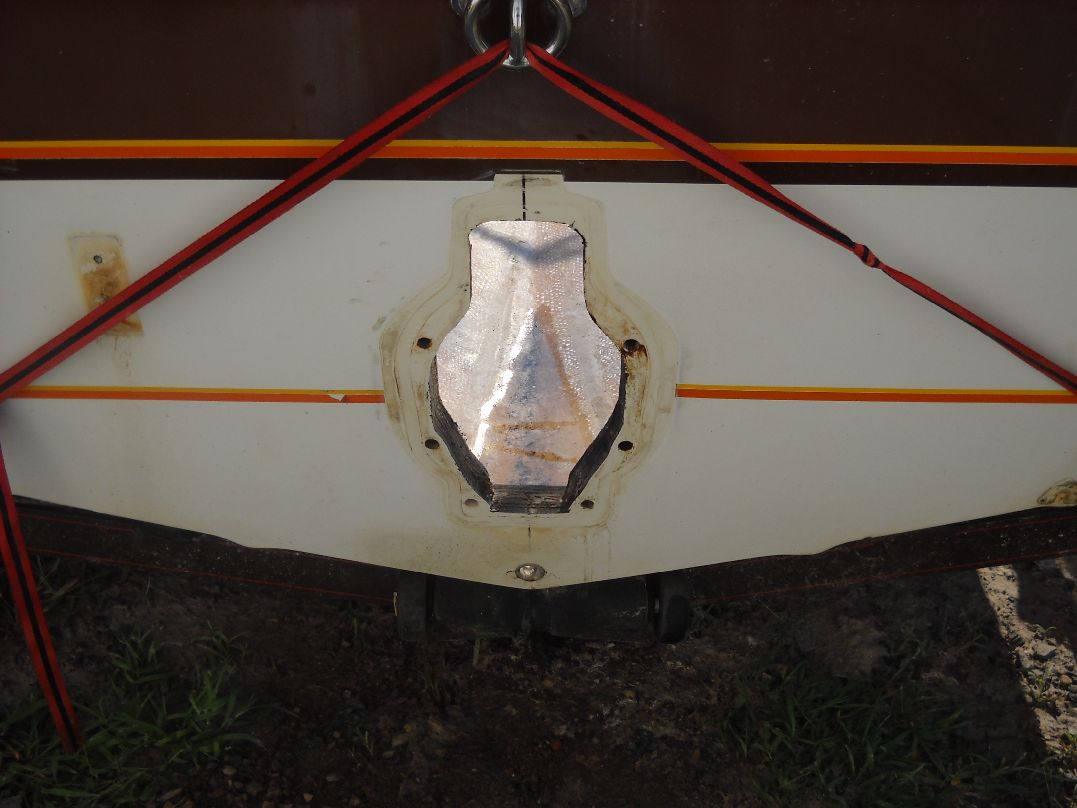
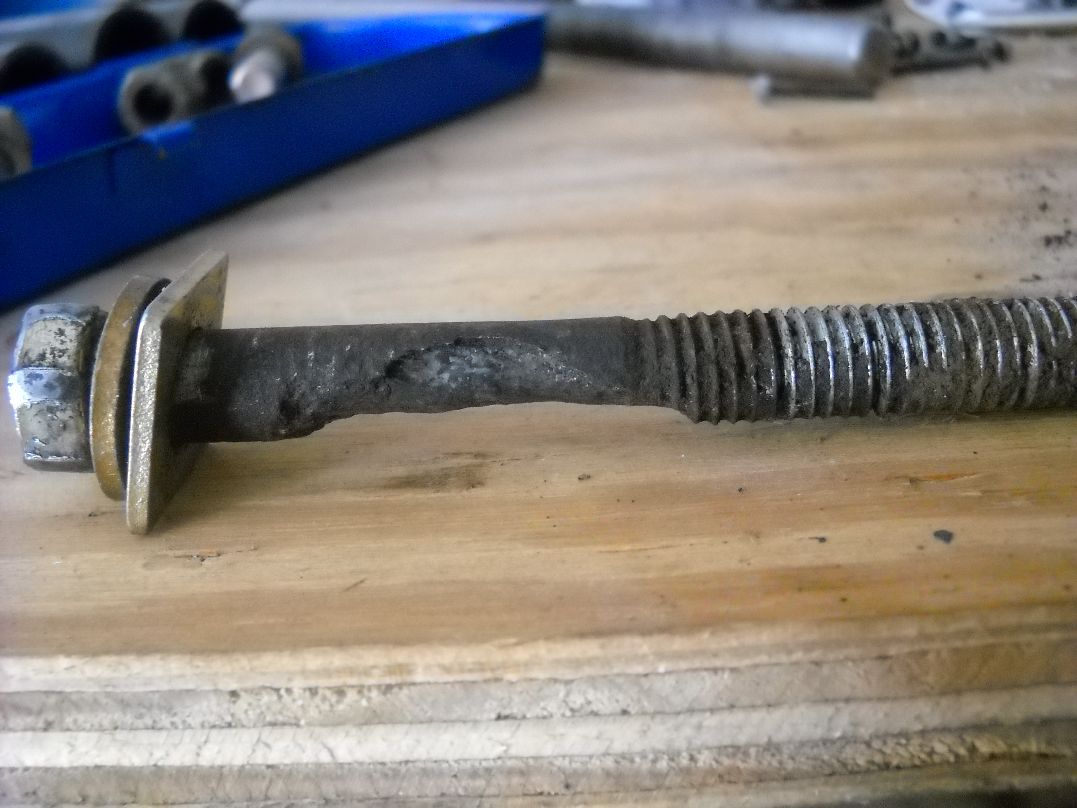
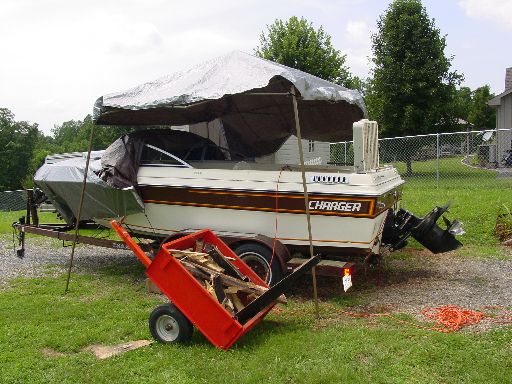
Lets bolt the new motor in this :eek:
87_mot10.jpg

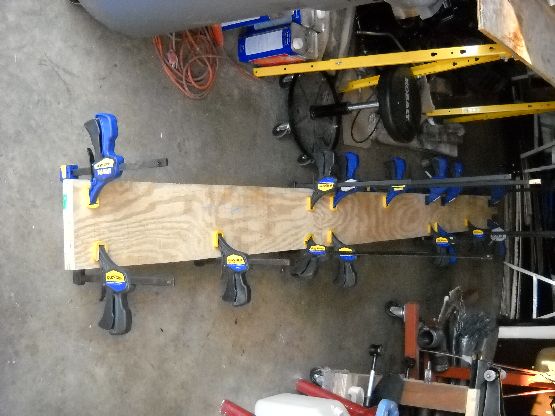
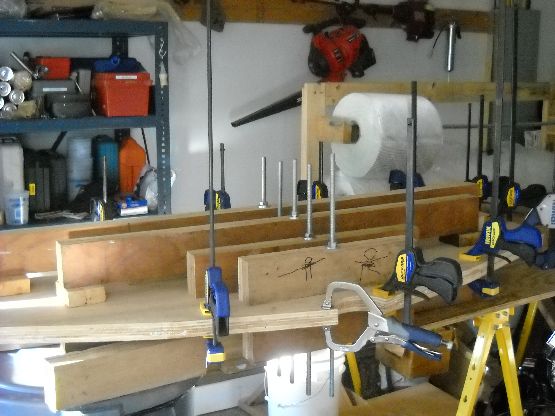
and here is a pic of my workplace setup (thank goodness for fans)
87_wor10.jpg
 

dwolfenbarger

Seaman Apprentice
Joined
Jun 21, 2011
Messages
41
Re: 87' Charger Mercruiser 200 restoration

Are those boards in the bottom structural? I don't like the way they are glassed in because water goes up under them. If they are not, then I was going to remove them and just put in braces for the gas tank and maybe put a false floor in the ski locker.
87_cen10.jpg


thought this glass work was GREAT foam inside the glass :D If they still make new boats like this I am glad bought an older boat and fixed it properly:)

87_foa10.jpg
 

dwolfenbarger

Seaman Apprentice
Joined
Jun 21, 2011
Messages
41
Re: 87' Charger Mercruiser 200 restoration

Anyone know if the boards in the center of the boat in the picture above are structural? I want to remove and\or change the design of them:confused:
 

rickryder

Commander
Joined
Jun 24, 2010
Messages
2,722
Re: 87' Charger Mercruiser 200 restoration

A little had to tell from the pic..... If it runs the center I would think it's the keel and YES it would be structural.
 

dwolfenbarger

Seaman Apprentice
Joined
Jun 21, 2011
Messages
41
Re: 87' Charger Mercruiser 200 restoration

Yea, they run straight down the center. The way they are tabbed in now water runs under them, any ideas of a way to fill the bottom so that water isn't sitting under them? I was thinking about filling it with PL glue or PB.
 

rickryder

Commander
Joined
Jun 24, 2010
Messages
2,722
Re: 87' Charger Mercruiser 200 restoration

My keel is 1 piece of wood covered in glass standing straight up in the center of the hull..... They may be some sort of stiffeners....water being able to flow under them can be a good thing.... It helps to get the water get to the bilge to be pumped out. I'm a big fan of limber holes.....I don't want any water laying in the bottom of the hull.... It promotes rot.
 

dwolfenbarger

Seaman Apprentice
Joined
Jun 21, 2011
Messages
41
Re: 87' Charger Mercruiser 200 restoration

Here is a better picture of the boards in the center of the hull
87_cen11.jpg

They are lying flat instead of standing up so that is why I get water under mine. And they can't be put standing up because then my gas tank won't fit and it will reduce my clearance in the ski locker. I'm thinking when I replace them that I will make it about 1 inch shorter so that water can run down both sides and the middle out one weep hole into the bilge. The previous setup had the middle blocked by the bulk head and 1 weep hole on each side of the keel.
 

dwolfenbarger

Seaman Apprentice
Joined
Jun 21, 2011
Messages
41
Re: 87' Charger Mercruiser 200 restoration

Found some bad news while grinding out the deck tabbing. There is about a 5 inch area of rot in the transom. This happened because there was a block glassed to the transom to support the floor. The poor glass work allowed the block to get wet and start rotting which of course continued into the transom because they were glassed together rather than glassing the block on top of the skin on the transom. The Transom is solid everywhere else. I have gone over it very closely and this is all the rot I've found. There will probably be a similar spot on the other side as well. The big question now is do I do a repair or replace the transom? :facepalm:
transo10.jpg
 
Last edited:

dwolfenbarger

Seaman Apprentice
Joined
Jun 21, 2011
Messages
41
Re: 87' Charger Mercruiser 200 restoration

Well I decided to go ahead and replace the transom. I haven't found any more rot but I don't like the way the glass is done. I figure it will probably get worse over time. I still have about half the hull to finish grinding. Hats off to you guys who have already ground your hulls because that is just one dirty nasty job that seems to never end lmao.
 

Friscoboater

Captain
Joined
Jul 3, 2009
Messages
3,095
Re: 87' Charger Mercruiser 200 restoration

You will not be sorry doing the transom. That way you will know it is done right. Looking good so far.


One thing to consider with resin is waste. There is always some left in the cup, and sometimes you will mix more than you need and waste a bunch. I used alot for Peanut Butter, but take off ten gallons for that and i am still at 30. That does not mean it is all in the boat.
 

dwolfenbarger

Seaman Apprentice
Joined
Jun 21, 2011
Messages
41
Re: 87' Charger Mercruiser 200 restoration

I'm sure as I tear into I will have some questions, although from what I saw that you did on your Glastron it looks pretty straight forward. Congrats on the splash of your Sea Ray , I really like the way your finished deck looked. I'm just hoping one of the local boat shops will have an alignment tool I can borrow. I figure I won't have enough resin or 1708 now that I'm doing the transom and the keel. I was hoping to splash it towards the end of summer but I'm not sure that is realistic now. I am in a unique position of being able to invest a lot of time in the boat thanks to my plant shutting down. Oh well, figure I can make the best of it.
 

dwolfenbarger

Seaman Apprentice
Joined
Jun 21, 2011
Messages
41
Re: 87' Charger Mercruiser 200 restoration

When your body is tired and tells you to stop, listen to it! Or you might do something stupid like this :(
 
Last edited:

dwolfenbarger

Seaman Apprentice
Joined
Jun 21, 2011
Messages
41
Re: 87' Charger Mercruiser 200 restoration

This is the goop I found under the keel. I really want to figure out a way to keep this from happening to the new pieces I put in. Bad thing is I didn't find any bad fiberglass over this part of the keel, so I'm not sure how that mess got in there to start with. Rick recomended to leave a tunnel under them to allow drainage. I'm guessing to do it that way I need to glass the boards first then tab them in with 1708? sound right of any other thoughts?
under_10.jpg
 

dwolfenbarger

Seaman Apprentice
Joined
Jun 21, 2011
Messages
41
Re: 87' Charger Mercruiser 200 restoration

I finally finished grinding :D:p I'm sure there will be more grinding from time to time but it won't be nothing like what I've done already. I don't think I would mind restoring boats other than grinding the fiberglass. I seriously doubt that I will do that again lol. For anyone who is about to do it, I recommend a 7" grinder because it has to be a lot faster than using a 4" grinder like I did.
87_gri11.jpg
 

dwolfenbarger

Seaman Apprentice
Joined
Jun 21, 2011
Messages
41
Re: 87' Charger Mercruiser 200 restoration

I got lucky and was able to save some money thanks to Bay Side Marina at Smith Mountain Lake Virginia. They are letting me borrow the 12 point adapter so I can take the out drive off and they also have the alignment tool for the motor which I borrow when I'm ready to install the motor :cool: They just landed a new customer for my marine needs. :D
 

dwolfenbarger

Seaman Apprentice
Joined
Jun 21, 2011
Messages
41
Re: 87' Charger Mercruiser 200 restoration

I got the out-drive removed and now its time to start removing the transom. I got really lucky in removing some severely corroded bolts. I'm surprised they didn't break because about half of the shank was eaten through with rust.

87_bel10.jpg


87_tra10.jpg


87_rus10.jpg
 

Friscoboater

Captain
Joined
Jul 3, 2009
Messages
3,095
Re: 87' Charger Mercruiser 200 restoration

Those bolts look just like mine when I took it apart. Go ahead and order new ones for sure. It looks like you are about ready to start putting things back in. As far as stopping that rot from hapening, I am not sure we every can. Just make sure there are not bubble sin your glass, and seal with gelcoat.
 

dwolfenbarger

Seaman Apprentice
Joined
Jun 21, 2011
Messages
41
Re: 87' Charger Mercruiser 200 restoration

As far as stopping that rot from hapening, I am not sure we every can. Just make sure there are not bubble sin your glass, and seal with gelcoat.

LOL I was afraid that was going to be the response. I was hoping to buy stainless steel bolts rather than the zinc coated like the original bolts. BTW gratz on the splash of your Sea-Ray, If my boat looks half as good as yours I will be happy. I have 5 gallons of gel coat already, how much did you use?
 

dwolfenbarger

Seaman Apprentice
Joined
Jun 21, 2011
Messages
41
Re: 87' Charger Mercruiser 200 restoration

It has been a while since I have updated my progress. I finally feel like I'm getting some where now.

Here is the new 12' stringer glued together out of ply
new_st10.jpg


Finally got all the old transom out. Don't have pic yet but this has all been ground down too.
transo12.jpg


The new transom glued together. 2 full sheets of 3/4" hardwood ply has few voids
new_tr10.jpg


I am hoping to finish the prep on the transom and have it glued in by Monday, but time will tell.
 

dwolfenbarger

Seaman Apprentice
Joined
Jun 21, 2011
Messages
41
Re: 87' Charger Mercruiser 200 restoration

Had a bit of a hang up putting the CSM on the transom. Was having a terrible time getting the glass to lay around the edges and had to grind it off. Plan is tomorrow to pick up a 1/2" in or 3/4" radius bit for my router. After adding the curve I'm going to do the edges in 1708 to make sure I get a good water tight fit. The design of the transom won't allow for me to glass the top edge to the hull so I want to make sure its waterproof in case the seam on the cap leaks again.

When I was first working on the boat I would get water inside even though I had the tarp on it. I found that the water was running of the tarp and going over the seam as it drained down the hull. I had to tighten the screws on the cap of the boat and seam to keep it from leaking inside. Anyone know if there is typically some kind of sealant added under the seam to ensure water doesn't leak around the cap? Tightening the screws fixed the problem for now so unless it leaks again I probably won't worry bout it...
 
Top