'76 MFG Fishin Caprice II Center Console Rebuild

Shakedownscott

Petty Officer 2nd Class
Joined
Jul 12, 2011
Messages
179
First of all I would like to thank everyone that contributes to this site. I never would have attempted this project without the information I have gained from this site. I have put quite a few hours into disassembly and now need some advice on how to go about finishing the job and getting her back together. OK and maybe a little encouragement. Every once and a while I look over at my sawzall and think I should chop this up and trash it. :frusty:

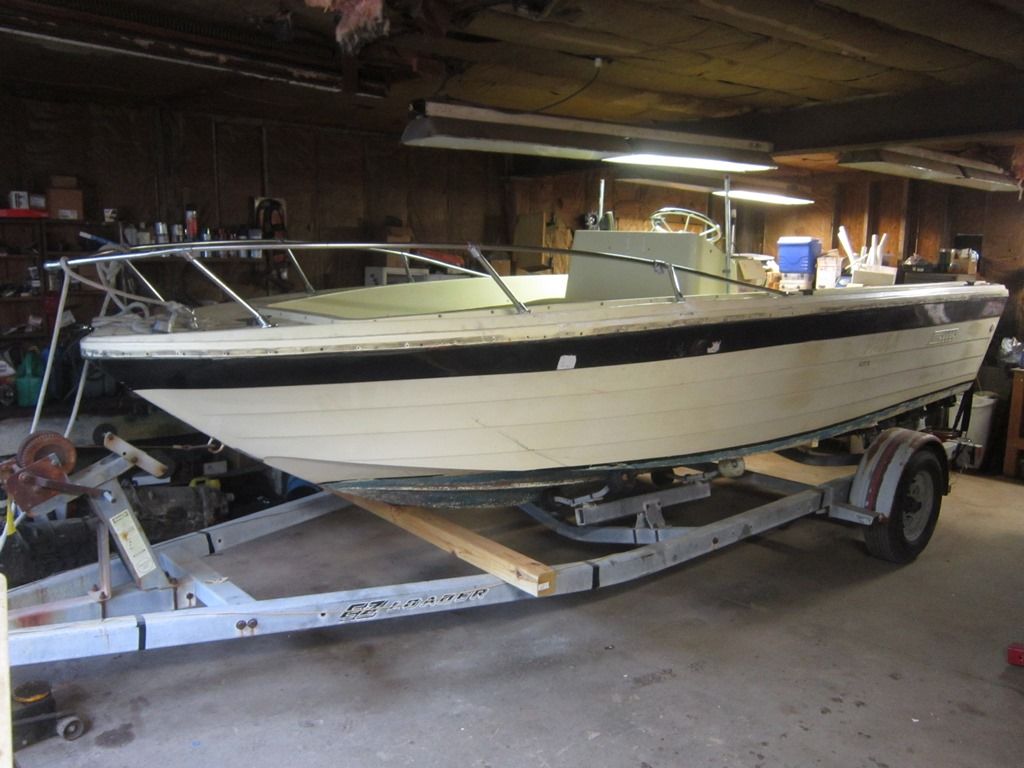
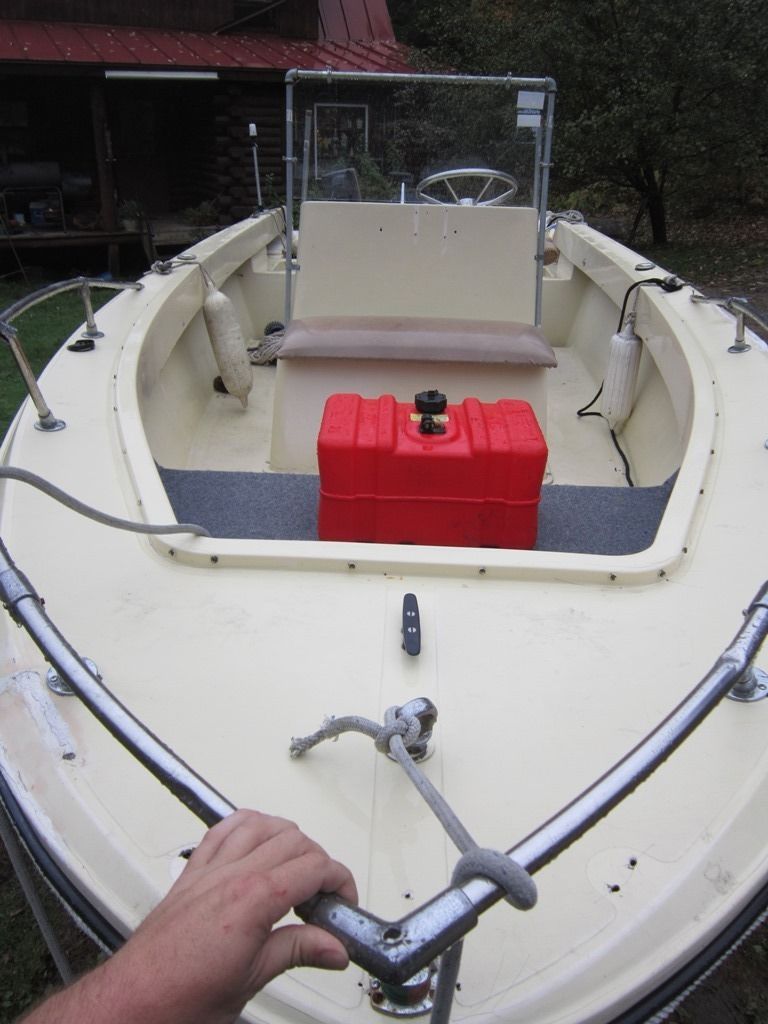
I purchased this boat a while back as a project. It is a 1976 MFG Fishin Caprice II, 19' with a center console. Looks like she has had a pretty rough life. She has been patched with varying types of putty, etc and also been re-painted. This is all ok with me, I am looking for a fishing boat.


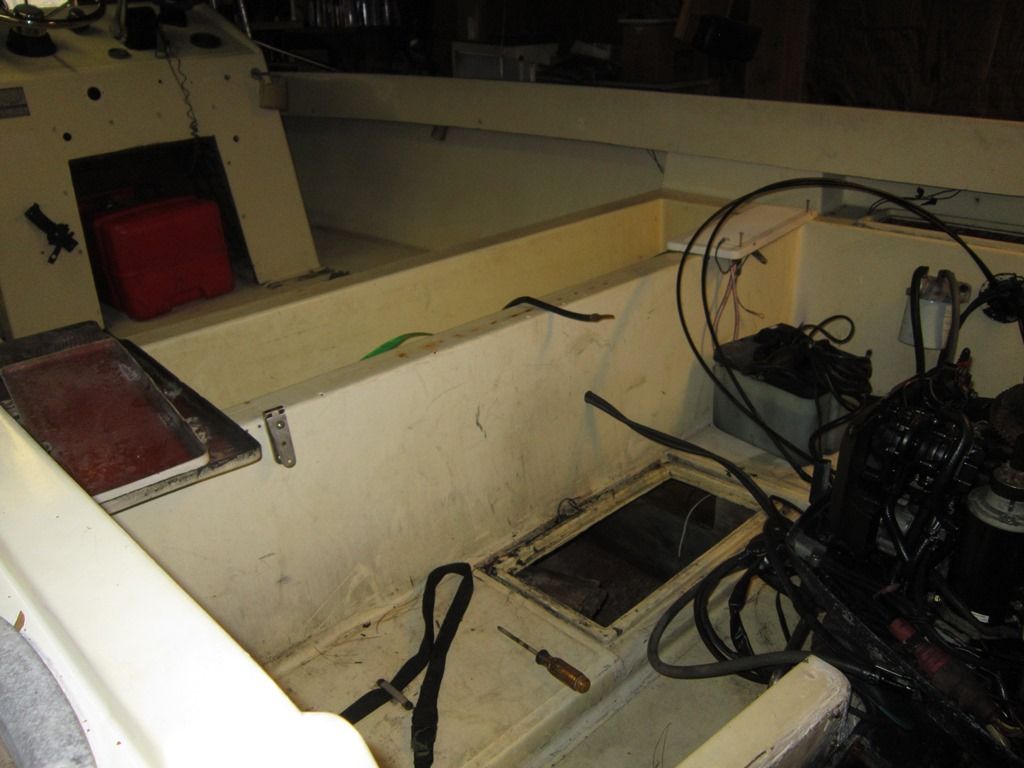
I knew that it needed a new transom and had some other damage from impacting stuff. As with so many other project boats I have seen on this sight, this was just the tip of the iceberg.

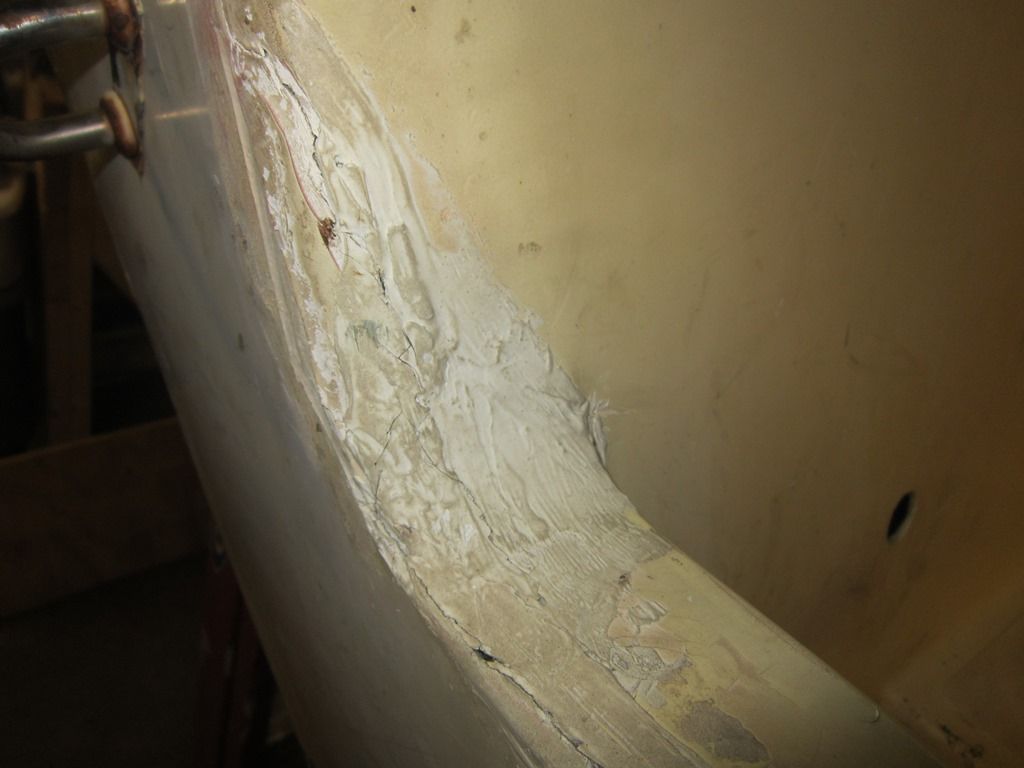
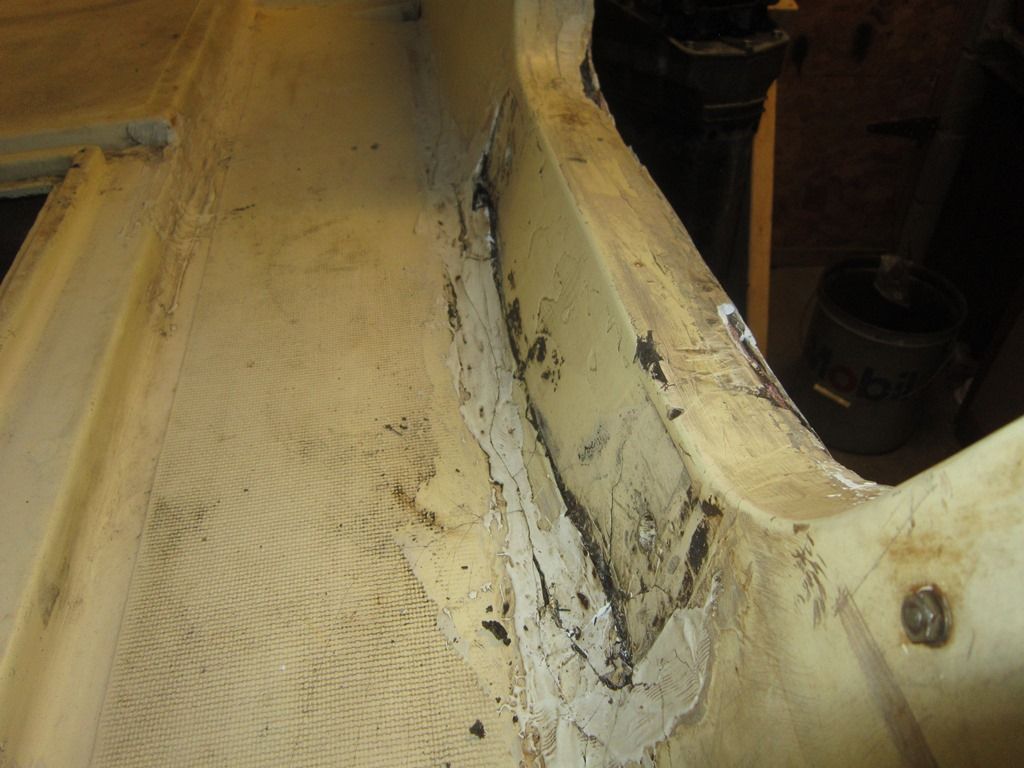
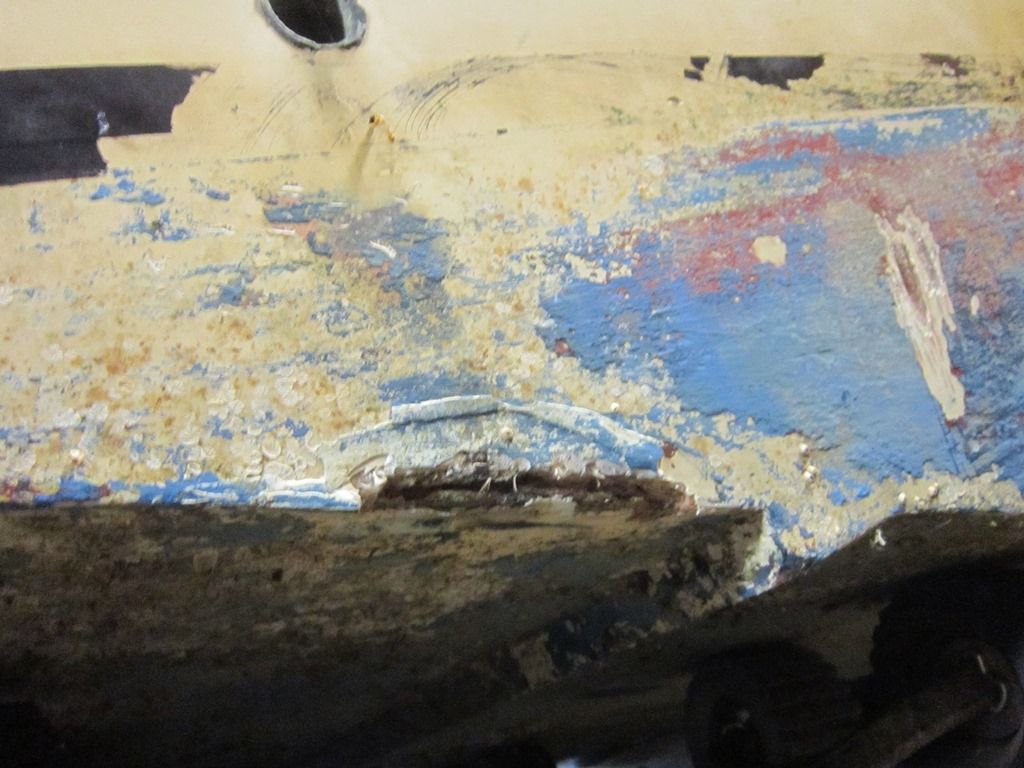
Transom was cracked all along the top.


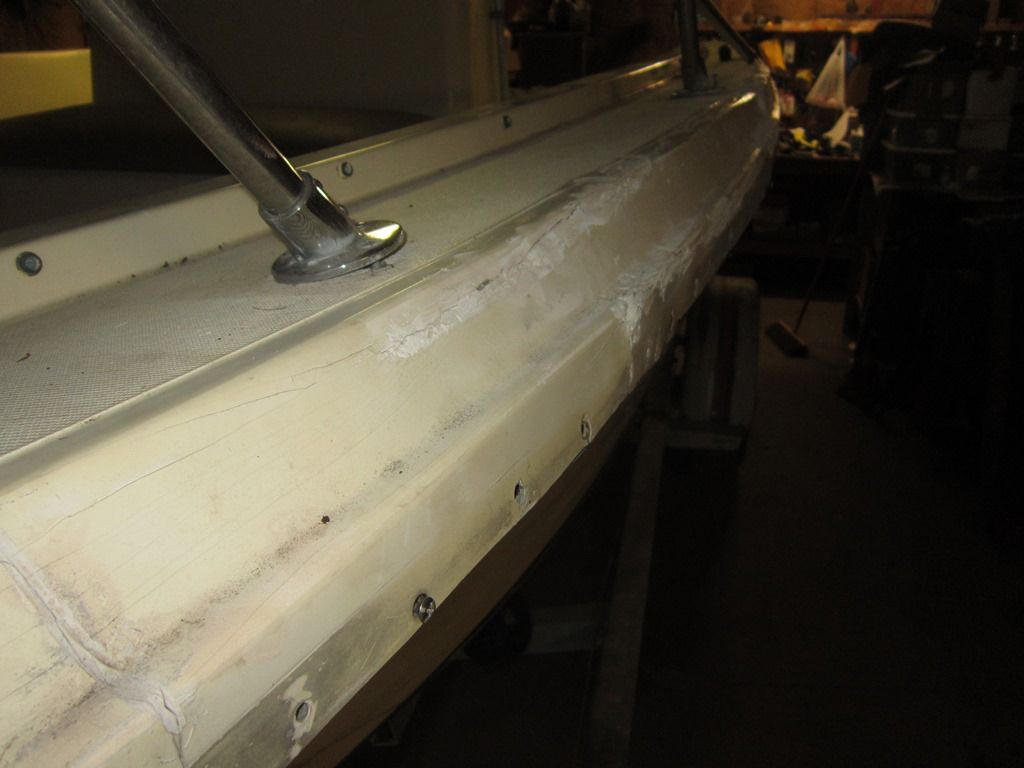
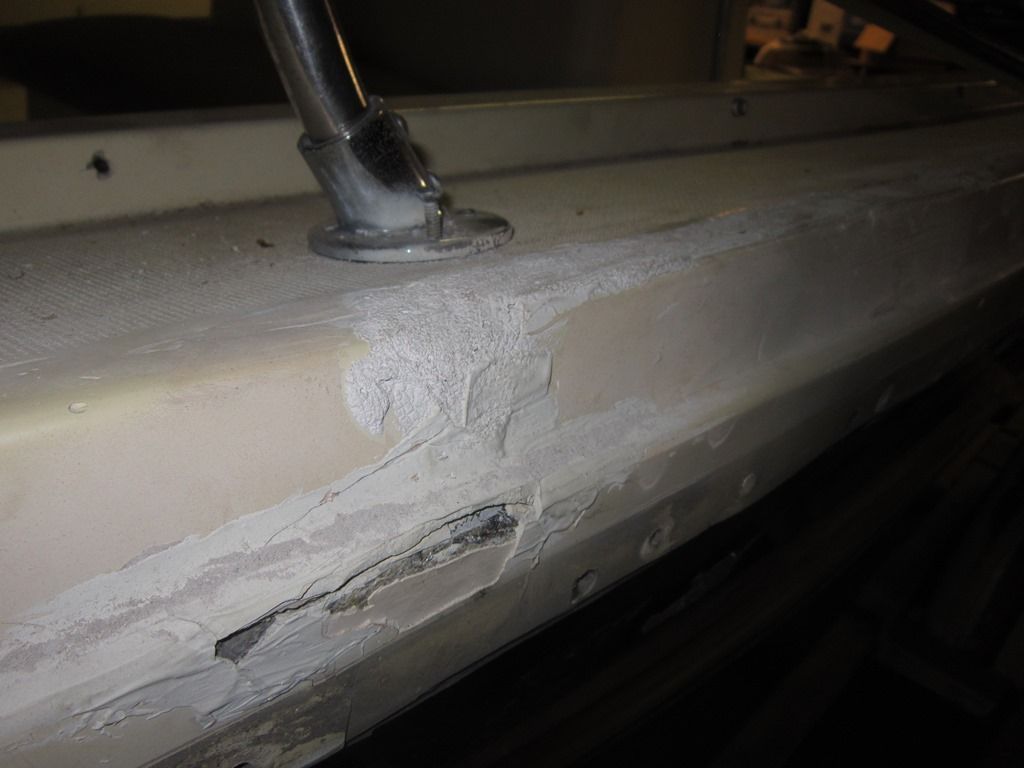
There was also damage to the rub rail from a collision with something.


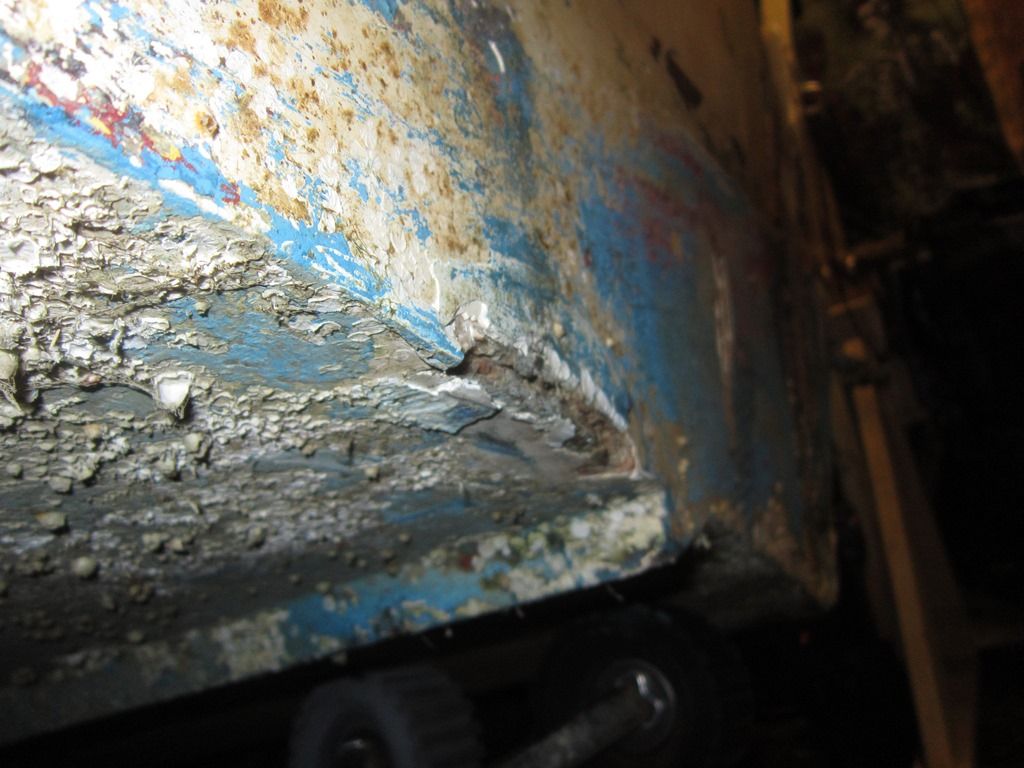
When I found the boat she was cranked way up on the trailer about a foot too much. The back of the boat was ridding on the steel bars of the trailer and it cracked two holes at the bottom of the transom.


This is where the journey started, next I will post about the disassembly that I have done so far.
 

gm280

Supreme Mariner
Joined
Jun 26, 2011
Messages
14,596
Scott, I can see a nice boat under all those blemishes. But only if you are willing to put a lot of serious effort in to her. The over all shot looks like a great boat. But the closer shots shows a lot of damage and need for rebuild. If you understand the entire effort that will be needed and have the time, money and willingness, you come to the best place to get help and assistance. Two things we require, first tons of pictures, and secondly your willingness to proceed. Just want to tell you this is going to be the messiest, smelly, dirty, itchy, thing you've probably ever tackled. But if you understand the work ahead of you, you will end up with a boat to last decades and more. If you can follow those ideas, let's go... :thumb:
 

Woodonglass

Supreme Mariner
Joined
Dec 29, 2009
Messages
25,924
Yup, She's got "Good Bones"!!!! Just need's a "Boat Doctor" with a good Dock Side Manner to get her back on the water. If you're willin' we are too!!!:D;)

 
Last edited:

Shakedownscott

Petty Officer 2nd Class
Joined
Jul 12, 2011
Messages
179
Thanks guys for the encouragement. I hope I can be a good boat Doctor and get her back on the water. I have some idea the cost and effort needed to do this but I am sure I have a lot to learn.
I started by removing the motor, controls, electronics etc. Then found a leaky fuel tank under the center console. The tank was foamed in place and was full of old fuel. The foam was saturated with old gas, what a mess.


Trying to pull the tank out was not easy but eventually came out. Looks like it was only leaking at the flange, so it may be repairable.


I took off the cap of the boat to see what I was getting myself into.


After removing the cap I realized that the floor was rotted under the front of the boat. When sitting on the trailer the boat is lower in the front, water must have sat for some time this way to cause rot up front. Too bad the previous owner didn?t take the time to jack up the front and let it drain.
Before going any further I added some supports to the trailer to try and keep the hull in shape.


This boat is built with three major pieces hull, cap and then the deck is a fiberglass insert installed in one piece. This hull liner made disassembly tough. There was no way to pull it out in one piece. I thought long and hard how to best take this apart. I decided to cut this into large pieces with the hope I can fiberglass it all together when I am done.


Under this section of the hull liner was the rotted floor. Unlike most of the threads on this site, I did not find a bunch of mush and mulch under the deck. There was a small area of rot in the floor and most everything else was in good shape.


I found that the stringers on the port side had delaminated and were no longer attached to the hull. Looks like all of the stringers were just tabbed together and some of this had loosened up.


This of course lead to more disassembly.
 

littlerayray

Lieutenant
Joined
Feb 17, 2013
Messages
1,456
Seems like your headed down the right path can't wait for more great pictures btw keep em comin
 

Shakedownscott

Petty Officer 2nd Class
Joined
Jul 12, 2011
Messages
179
The next thing I did was to remove the center console.


I removed the back section of the hull liner to look for more damage.


I found out that the inner stringer on the port side was broken about half way down the length of the boat. I cut out the center section of the boat to get to the stringer.


You can see in the last picture the broken stringer now on the deck. The inner stringers in this boat are huge over 12" deep.

This pretty much is where the boat stands now. Last night I was prying out all of the foam between and around the stringers on the port side.


Shakedownscott

Petty Officer 2nd Class
Joined
Jul 12, 2011
Messages
179
This is where I got to so far on my rebuild and have a bunch of questions on how to go forward. I have fixed a few things with fiberglass before but have never tackled a job this big before.

Now that I can see what is under the deck etc. Here is what I think I need to do:
1) Replace the main stringer and middle stringer on port side. Leaving the third outermost stringer “as is”.
2) Fix small area of rot in the front of the starboard main stringer.
3) Add new tabbing to the starboard main stringer for reinforcement
4) Replace front deck
5) Replace the transom.
6) Repair hole in the hull under the transom
7) Repair damage to rub rail area on the cap and hull from impact.

I am not sure exactly what order is the best to get this all back together.
Should I fix the cap first so I can have it properly installed when I glass in the new stringers and deck? The cap is really floppy where it was damaged and previously repaired. When I removed the screws holding cap to the hull, it all sprung out of shape.

When I replace the stringers should I leave them short towards the transom. Then splice in pieces between transom and new stringers? Or should I remove the transom now and put the stringers and transom in at the same time? The hull is pretty rigid now and don’t want it to lose its shape.

I would like to leave boat on trailer so I can move it out to grind it and then move it in when grinding is done. Figure I can put more support under hull before adding new stringers etc.

I would appreciate any advice on the best way forward.
 

Shakedownscott

Petty Officer 2nd Class
Joined
Jul 12, 2011
Messages
179
Cut out a section of the floor over the port stringers. Now I can get to both sides of the stringers for grinding. Next is going to be to remove part of the middle stringer. Still have some more foam to remove too. Starting to think about buying some resin and other materials . It will be nice to start building her back up.


sphelps

Supreme Mariner
Joined
Nov 16, 2011
Messages
11,435
I hope you have been taking measurements on all the steps and notches in the stringer/bulkhead system .. It sure seems pretty involved .. :lol:
I'm scratchen my head just looking at it ..I think I would do the transom first then tab the stringers into it ..
 

Shakedownscott

Petty Officer 2nd Class
Joined
Jul 12, 2011
Messages
179
I have been taking notes, measurements and a lot of pictures. Although sometimes I read my notes and have no idea what they mean. Luckily none of the wood is too rotted so I have good templates to use to make the stringers and bulkheads.
 

Shakedownscott

Petty Officer 2nd Class
Joined
Jul 12, 2011
Messages
179
I have been working on removing the rest of the main and middle stringers.

I left about 2 ft of the stringers attached to the transom. Currently planning to replace the stringers and bulkheads on the port side, then install the deck and gas tank cavity and casting platform. I think this will help keep the shape of the hull from flexing when I cut out the transom.


Here are the stringer and bulkhead pieces that I have removed so far. Going to by some plywood today at Home Depot. Saw that they had some BC exterior plywood, looks like that should work pretty well. I am estimating that two sheets of 1/2" and 3/4" should be just about enough for the stringers, deck and transom.


Can someone please give an estimate of what I am going to need for fiberglass supplies. Planning on going with poly resin, 1708 and 1.5 oz CSM.
 

Shakedownscott

Petty Officer 2nd Class
Joined
Jul 12, 2011
Messages
179
What would be the best fiberglass material for repairing the cracks on the rub rail? Thinking that 1708 may be too thick, will the CSM work for this?


Woodonglass

Supreme Mariner
Joined
Dec 29, 2009
Messages
25,924
A good estimate for supplies to start will be the following.

15 gallons of 635 Medium Poly Resin
20 yards of 50" 1.5oz CSM
15yds of 50" 1708 biax Fabric
4 Gallons of Cabosil
5 quarts of 3M Glass bubbles
Pint of surfacing wax


For the gunwale repairs you'll grind off all the old gunk and get down to fresh glass and then lay down 1-2 layers of CSM and finish off with some homemade fairing material using the glass bubbles, a bit of cabosil, a bit of surfacting wax and resin.
 

Shakedownscott

Petty Officer 2nd Class
Joined
Jul 12, 2011
Messages
179
Thanks WOG, that is very helpful. There is a lot of tabbing that I need to grind off before glassing in the new stringers. What is a good way to clean off all the grime before grinding? Thinking of using wax tar remover.
 

Shakedownscott

Petty Officer 2nd Class
Joined
Jul 12, 2011
Messages
179
Probably over thinking it. The tabbing etc that is stuck to the hull has some mold and dirt on it. I was thinking I should clean this off before grinding the glass. Didn't want to imbed the dirt into the scratches caused by grinding. Just want to make sure I get good adhesion.

I have done a fare amount of automotive body work and typically have cleaned the surface off with a bug/tar remover first before grinding off the paint. It is just a slow evaporating cleaning solvent.
 

Woodonglass

Supreme Mariner
Joined
Dec 29, 2009
Messages
25,924
You'll be grinding enuf glass that you won't need to worry about it but...You can if you want. TriSodiumPhosphate is my cleaner of choice.
 

Shakedownscott

Petty Officer 2nd Class
Joined
Jul 12, 2011
Messages
179
I placed an order for the fiberglass and resin. Hoping to get it for next weekend. Cut some new stringers and bulkheads. Feels good to be doing some building and cutting of new materials, so far its all been demolition.

I made the bulkheads a bit longer than the original one.


There were big gaps under the bulkheads with only small pieces of tabbing holding them to the hull. Going to try and do a better job when I put them back.


Glad to see the stringers placed in the boat, starting to look like there may be hope for this old boat after all.

 
Top