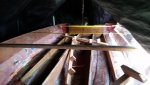
So while I have been tabbing in the transom, I keep getting little tiny bubbles that I can't get to work out. I kept adding resin and working with the chip brush and they wouldn't go away. I tried using my bubble buster roller, and it wasn't pushing them out either. What am I doing wrong? Is this bad enough of a problem that I need to grind the tabbing off and try again?
Here is a good picture of them.

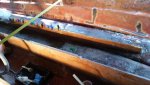
Here is a picture of a bigger bubble that I left because the glass was lifting in other places when I worked it out. I'll grind it out and fill later.

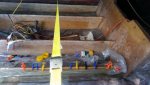
Here is a good picture of them.
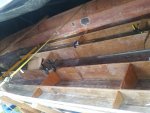
Here is a picture of a bigger bubble that I left because the glass was lifting in other places when I worked it out. I'll grind it out and fill later.
Last edited: