2001 Mercury 90hp Link & Sync Procedure

mav6759

Chief Petty Officer
Joined
Jun 25, 2007
Messages
489
I have a 2001 Mercury 90hp and was wondering if anyone knew the Link & Sync procedure. I have the shop manual, but it's not clear as to the proper procedure.

Thanks Mav
 

Texasmark

Supreme Mariner
Joined
Dec 20, 2005
Messages
14,569
I have a 2001 Mercury 90hp and was wondering if anyone knew the Link & Sync procedure. I have the shop manual, but it's not clear as to the proper procedure.

Thanks Mav

What's not clear?

I have my book handy and will await your reply. In short, the initial information is to get you access to the carburetor's butterfly valves for you to verify that when the throttle is all the way down, they are all shut and when it's WOT they are looking at you, all the same. The next thing is to ensure that the linkage is all intact whereby the 3 carbs, now controlled by one point are linked correctly to act in unison. That gets the interconnect linkage between the butterflies and the throttle position lever sync'd as far as fuel is concerned.

Then comes the setup of the throttle control to the spark advance such that you have your timing change occur over the rpm band from about TDC at idle to 20*+ at WOT. Finally the idle set knob for after you get in the water, boat in motion, adjusting the timing advance by the kurled knob on the throttle lever to get your specified idle rpm.
 

mav6759

Chief Petty Officer
Joined
Jun 25, 2007
Messages
489
So right now I disconnected the throttle cable, I made sure the throttle handle was all the way back to the stop..Then I made sure all 3 carbs are closed by losing the 3 screws on the carb linkage. So right now all 3 butterfly's are completely closed. Then I tightened the 3 screws on the carb linkage. Then I adjust the cam roller to the cam according to the book I have. But when I started the motor, it run very very high idle to the point that it scared the heck out me, and then the key switch wouldn't work for some odd reason which scared me even more.., so I pulled each plug wire until it stop running. (Dont try that at home boys and girls, that was a shocking experience..) lol... so right now, I think I have to work with cam and roller
 

Texasmark

Supreme Mariner
Joined
Dec 20, 2005
Messages
14,569
On stopping, shut off the fuel is probably the quickest access. Yes, when you pull the cap off the plug, Mercury prides themselves in a 40,000 volt pulse in just microseconds! No spark plug gap to stop it and you get the whole enchalada!

The key switch in the OFF position, grounds the black/yellow wire coming in on your remote wiring harness which kills the triggers and stops the engine.. Has nothing to do with L&S....just a freak timing of a different problem (see explanation below).

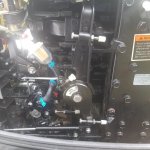
The cam roller has a white line as does the cam....your alignment marks....gotta rotate the roller to get it's line horizontal, and the idle stop screw presets the idle with the butterflies closed, a timing adjustment at around TDC degrees.

The next figure in the manual is to get the cam off the cam roller....don't want it touching, reason for the .005 gap. What this does is ensures that your throttle arm, when pushed all the way back as in the idle position, will stop as a function of the idle stop screw, and not the pressure of the butterflies in the carb pressing against the venturi case......did you remember to lock adjusting screw you loosened for that alignment.

The last step in the L&S is setting WOT stop screw which means the engine throttle/timing (20*+ BTDC....which is screaming fast) is at WOT and you have no linkage hooked back up at this time so the remote throttle is useless. Going to bet that's what happened.....you started in the WOT throttle position.

On the key wouldn't stop it problem, the engine (like happened to me once) probably went into pre-ignition overrun (ignites the fuel mixture with preignition sparks in the cylinder) which I had happen to me on one occasion doing the same thing....fiddling with timing. The Merc OEM 7k tack was on the peg....rpms out of sight, engine screaming, sacred the bageebies out of me....took a second or two to get my XXXX together. I had the same problem in that I couldn't shut down the engine. I squeezed the fuel line and got it to stop.

Once I got my wits together, I went back through things and got the engine started and it's still running like a top....it's usual self, with nothing else changed as a result of the instance. Was really surprised is survived that and didn't have problems later on.

So, before you go off and try to fix what probably isn't broken, put things back together, your linkage back on from your remote and go through your normal starting procedure. Hopefully other than setting your idle, it should do for you as expected.

After you get it on the water and running, then setup up your final 675 +/- 50 rpm in the water, F gear idle throttle position, boat moving using the idle stop knurled screw and locking nut.
 

mav6759

Chief Petty Officer
Joined
Jun 25, 2007
Messages
489
I tried to line everything up as best as I can...the book show nothing. I had to move the idle screw to get the throttle arm back to the stop. I have no clue as to what I am doing..And this book factory repair manual shows nothing. I ended having to move the 3 screws with the white stoppers, to move the throttle arm where it was back in the stop position. But it just doesn't seem right.
 

Attachments

  • photo331953.jpg
    photo331953.jpg
    958.9 KB · Views: 23

Texasmark

Supreme Mariner
Joined
Dec 20, 2005
Messages
14,569
Your picture looks good to me. I see that you have a decal indicating the idle screw which IS the one to use to set the "on the water" idle speed which varies the idle engine timing, not the carburetor butterfly setting.

What I think I see here is that the manual uses the wrong terminology in telling you what screw does what. The other screws without the Knurl....(the Knurl, a clue as to "this is the one you tweak for idle set...with your fingers, on the water") are the screwdriver adjustments for the shop setup of LInk and Sync.

So, what doesn't feel right.....don't forget to hook up your throttle cable.
 

mav6759

Chief Petty Officer
Joined
Jun 25, 2007
Messages
489
Here is where I am right now, I seen some motors online, all of them look similar to this photo. Not sure what each white knob does except for the idle. the other 3 I have no idea what do. I just tried to copy as best as I can.
 

Attachments

  • photo331970.jpg
    photo331970.jpg
    129.8 KB · Views: 17

Texasmark

Supreme Mariner
Joined
Dec 20, 2005
Messages
14,569
Your picture shows the throttle linkage against the stop for minimum throttle.....like you would have when in N with the throttle control on the remote all the way back. The lowest screw, adjusts this position and there is a paragraph and picture for IDLE STOP.

Moving up the next screw is MAX THROTTLE. There is a paragraph for that. This is an adjustment to be made when you hold the carb linkage in the WOT position, butterflies parallel to the venturi....looking at you. The setting is to back it off slightly and push on the throttle linkage arm till the arm quits moving toward max throttle because the mid carburetor lever hit a stop. Then with the lock nut loose, turn the screw so that it pushes back on the throttle arm a couple of turns. Lock the nut. The purpose of this is to ensure that that screw is what stops the WOT position linkage movement, not the tab on the middle carb.

Next is you on water IDLE RPM SET SCREW we talked about.

The top right one is the WOT SPARK ADVANCE LIMIT SCREW which is adjusted per the applicable paragraph in the manual for "TIMING". Basically, you get some help.....spin the engine with the timing light on "1, top plug wire, and, with the throttle cable to the remote disconnected (makes it easier to move the throttle lever), push the throttle lever to cause the throttle timing arm (the one in the back) to advance to the WOT position where the timing is the earliest....like 20-22*BTDC....

The black plastic cover has to be installed over the flywheel as the timing reference mark is on that piece of plastic.....the degrees BTDC are on the side of the flywheel. Use the screw and lock nut....the top right one in your picture as I said above... to set the desired timing limit at WOT per the manual spec.
 
Top