Re: 1985 Sea Sprite 185XL Rotten Deck Replacement
Hi M1B,
First things first, make sure the hull is properly supported, like JDA said...it might get enough support from the trailer, but it might not...when you start ripping everything out, things start to get pretty flexible... a little added support now will save many headaches later on...
Then, on to removing the cap...they are all different, but after you remove everything that can be unscrewed, unbolted, or otherwise taken off, then you can start to take off the cap...
First of all, take pictures...lots of pictures, from all angles, our memories cannot be relied upon.
")
Second, take measurements...I like to use a string line down the center of the boat from front to back...makes a pretty good reference point...you might need a second set of hands, so that when you take measurements from the string line, it doesn't move around and throw your ciphers off...make notes and OH yeah, did I mention, take pictures
I would note the length, width, height of the deck, anything that can be used later to verify that things are going back together correctly...
Then you can remove the rub rail insert, if it is rubber, and it is stiff, you can use a hairdryer or a heat gun on a low setting, to warm it up and maybe be able to pull it out, remember to look for any end caps, take them off, then remove any screws that might be holding it down, then you find the metal rub rail channel is held with rivets or screws, a ton of them, take them all out, and put the rails away carefully so they don't get bent or severely damaged, if they are scuffed or scratched, they can be revived with lots of elbow grease...
OK, if you have gotten this far, you are probably ready to pull the cap...use a combination of screwdrivers, prybars, and common sense and start carefully trying to separate the cap from the hull, go slow and be meticulous...all the way around...when you get to the transom, try to separate the cap from the transom as best you can, if it gets real difficult or doesn't want to budge, take pics, post them and we'll figure it out...
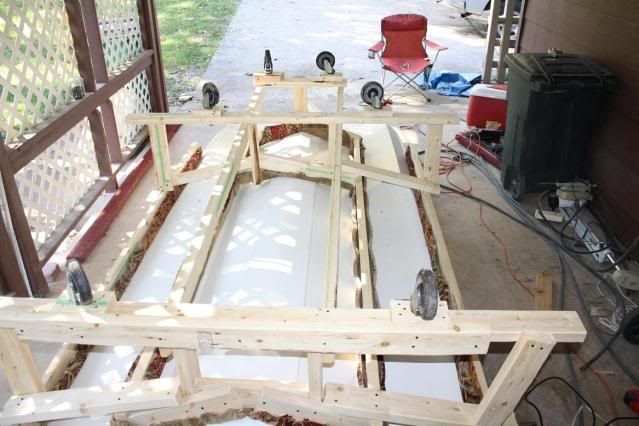
Look at the pics in my resto thread and get your self set up in somewhat a similar fashion, if you need more pics, let me know, but basically you will need a couple of trusses, and a couple of come alongs, ratchet straps, and/or rope...also you will need some scrap pieces of lumber to use as shims so you can lift the cap a little at a time as you go around...if you can get a board all the way across the cap, you can set up some temporary supports to the ground, to do the front part, raise your jack all the way up, or even higher, with shims, add the supports to the ground, then lower the jack. You can use the same method for the aft section, just lower the jack all the way, add your supports to the rear of the cap and then jack it up... you can also use your trailer to raise and lower the boat, fore and aft, kind of like a see-saw...
Find some good solid lifting points on the cap and attach your lifting rig to it, if you were able to get the boards all the way across, and your cap is not heavy like mine is,you can attach your lifting apparatus to the boards and go to town ...this will take little brain teasing and ingenuity, but I'm sure you can figure it out...
Once you start to lift the cap off of the hull, go slowly and make sure you are getting a clean separation, wires, cables, hidden screws, etc, can all keep it from lifting off.
Just take your time and ask questions of the Iboaters, we will help any way we can...
And YES, I did it completely by my lonesome, and my cap is the entire interior of the boat, probably weighed as much as the hull, maybe more...and it only tool about 3 hours, including throwing together the trusses...:redface:
The description of how to do it is probably more confusing and takes almost as long as the actual job...and there are probably as many ways to do this as there are Iboaters...
If any body has any further inputs, please add away, the more the merrier
And yes, this is my1stboat, too!:facepalm:
Best of Luck and remember, we are here to help, so don't hesitate to ask lots of questions...oh yeah and Pictures, lots of pictures...
GT1M