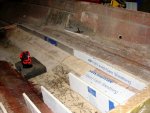
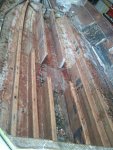
1979 Champion Bass Boat - Tear Down and Restoration -- with PICS

DHag

Petty Officer 2nd Class
Joined
May 29, 2007
Messages
166
Patch that big hole!

Patch that big hole!

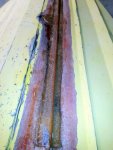
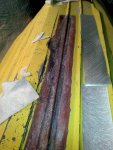
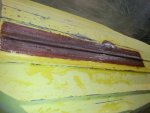
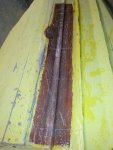
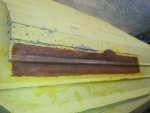
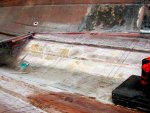
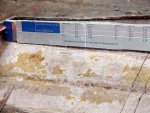
Pics of the "inside" part of the patch, from the outside.

Lengthwise view:

20130413_162554.jpg

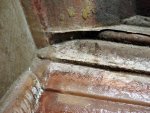
Side view. The chine isn't lookin' too bad.

20130413_162609.jpg

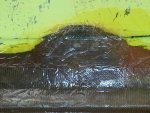
And the wide section, original impact point:

20130413_162617.jpg
 

DHag

Petty Officer 2nd Class
Joined
May 29, 2007
Messages
166
Patch that big hole!

Patch that big hole!

For the outside, I pretty much followed the same pattern as on the inside.

In this pic, I have the cut pieces of mat and cloth laid out, ready to use. The hole was 72 inches long, but the mat and cloth come in 50-inch wide rolls. So there had to be some overlap seams for each layer. More on that later.

You can see in this pic that the surface looks rough. That is from the plastic not being perfectly flat. Any little wrinkle shows in the surface. As I understand it, you're not supposed to have to sand the new surface before laying up more, but it doesn't hurt, either. It made me feel a lot better to take my orbital sander with 50 grit paper to this surface. It made it smooth, took out a couple of high spots, and gave a surface I knew the resin would bond to.

20130413_175626.jpg

Here's the fresh, wet patch, all done.

20130413_190820.jpg

And here it is covered with plastic. No matter how hard I tried, I could not get the wrinkles out!

20130413_192029.jpg

Next morning, plastic peeled off. The chine is very well defined. I won't do much to it when finishing. I'll sharpen it up some with some sanding, but not getting into the fiber. Then a thin, shaped layer of fairing compound. (Like Bondo on a car body, fairing compound is for smoothing, not building up.) It probably won't be quite like original, but I also don't think the boat's handling will suffer any.

20130414_084027.jpg

And the all-important impact point. The wrinkles are from the plastic. They'll sand out when it's time to finish and paint.

20130414_084046.jpg
 

DHag

Petty Officer 2nd Class
Joined
May 29, 2007
Messages
166
Patch that big hole!

Patch that big hole!

Here's a close-up picture of the fresh, wet patch, showing how I layered the mat and cloth. The arrows are pointing at the edges of each layer.

The CSM layer is there primarily to hold resin. It's chopped strands of fiberglass that are loosely laid together and held with some sort of glue. The glue dissolves once it's hit with resin. CSM holds a lot of resin, but adds very little structural strength. Apparently you want a good layer of resin at the base of the patch, 'cuz all the experienced experts say to start with a layer of 2-1/2 ounce CSM.

There is some disagreement about using CSM between cloth layers. The experts seem to be equally divided on that point. Since 1708 bi-axial cloth has a layer of 1-1/2 ounce CSM at its base, I chose not to lay CSM between 1708 layers.

You can see in this picture that I cut the CSM first layer 6 inches longer and wider than the hole, so there would be a 3-inch overlap onto the feathered surface of the hull.
The 1708 second layer is 1 inch narrower and shorter than the CSM layer, so there is about a half-inch inset from the edge of the CSM.
The 1708 third layer is another 1 inch narrower and shorter, providing another half-inch inset.

Finally, since the hole was 22 inches longer than the cloth pieces, I marked where you can see the top layer's seam. In the layup, I put the CSM's layer's seam near the stern, the second seam toward the bow, and the third layer's seam toward the stern.

The purpose of this layup pattern is to get the new material to be level with the original hull, which has been feathered out from the edge of the hole. The overall patch is 6 layers, with the original hull structure sandwiched between. It's probably stronger than original, which was built with blown-in strands and resin, and a layer of roving.

Amazingly, as you run your hand over the edges of these layers, it feels flat. Never woulda thought that.

CloseUp.jpg
 
Last edited:

DHag

Petty Officer 2nd Class
Joined
May 29, 2007
Messages
166
Starting on Stringers

Starting on Stringers

I've gotten started with the stringers. I decided to make the stringer cores from foam instead of wood.
-- Foam is easier to cut and shape.
-- Foam is much, much lighter.
The only caveat I could find for using foam is that it is probably necessary to lay an extra layer of glass over them, since foam will not contribute anything to the strength of the stringer. So I bought enough glass to lay on three layers instead of two.

A little background-- One thing I did when I cut out the old deck and stringers was to leave some of the edge of the deck around the outside. Now, this gives me a guide for how to build the stringers. These two pics show this--

01-DSC06031.JPG 02-DSC06032.JPG
 

Woodonglass

Supreme Mariner
Joined
Dec 29, 2009
Messages
25,924
Re: 1979 Champion Bass Boat - Tear Down and Restoration -- with PICS

Uhhm if you're going to make foam filled fiberglass stringers the wall of the stringers should be a minimum of 1/4" thick and that will require about 5 layers of CSM and 1708
 

DHag

Petty Officer 2nd Class
Joined
May 29, 2007
Messages
166
Starting on Stringers

Starting on Stringers

Here is the stringer layout that I drew up before cutting out the stringers. Notice that in the front section (the right side of the picture) there is one rib going across the hull.

stringers.jpg

Triton boats have a reputation for being exceptionally stiff compared to other makes. I went to Triton's web site to see if they gave away any secrets about this. At that time, they had pictures of Triton boat hulls without their caps. I noticed two things. 1) Triton uses foam cores for their stringers. And 2) The only real difference between the Triton stringer/rib layout and the layout in the picture above is that Triton has TWO ribs in the front section.

So... Before I got started, I measured out where the ribs need to be laid. Of course the ribs in the rear section must be positioned just right so the rear live well will fit between them. In the front, instead of one rib, I have laid out two ribs.

I marked the ribs' positions in the hull with a Sharpie marker.

03-DSC06033.JPG 04-DSC06034.JPG
 

DHag

Petty Officer 2nd Class
Joined
May 29, 2007
Messages
166
Starting on Stringers

Starting on Stringers

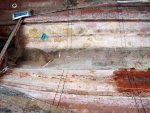
I assume this is normal. I noticed that the stringers were laid out "generally" in the hull's chines. I started with the very rear section, which originally had four narrow stringers under the two rear decks. (The bilge between them was open, of course.)

Since there are six chines, I decided to put six stringers here. This is the rear pad where the boat rides at speed. I noticed when I worked on a hull before that it was quite easy to press the hull up in this area. Not surprising, since the stringers were all thoroughly rotted and broken loose. So I think some extra strength in this area is in order.

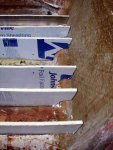
Here's my cutting tool. It's a disposable cutter from the local parts store. When the tip gets dull, you just snap it off. It's flexible enough to cut curves, stiff enough to cut straight. Quick and easy for cutting the foam. A cinch for fitting the rear of the stringer core to the curved shape in the end of the bilge.

05-DSC06035.JPG 06-DSC06036.JPG 07-DSC06037.JPG 08-DSC06038.JPG

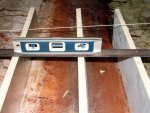
One problem I noticed in this boat was that even though the bilge was open back there, water could pool on the side decks. So what I am doing is sloping these decks a little, down toward the bilge to help them drain. I leveled the boat side-to-side, then laid a level across the three stringers. See the level is down toward the center of the hull by a full bubble.

09-DSC06040.JPG
 

DHag

Petty Officer 2nd Class
Joined
May 29, 2007
Messages
166
Starting on Stringers

Starting on Stringers

Someone may ask or comment about the foam, so I'll try to answer ahead.

The most common foam boards are polystyrene or polyurethane. The problem with these foams is that fiberglass resin will cause them to melt, so they don't serve very well as molds for fiberglass. Unless they are painted or coated in some way.

The test for whether a foam will stand up to fiberglass resin is if it will dissolve in acetone. Acetone is a very aggressive solvent that will melt many different kinds of plastic. Find a foam that won't dissolve in acetone, and it will work for fiberglass molding.

The foam I am using is polycyanurate. It doesn't dissolve in acetone.

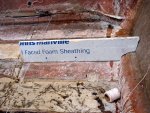
Notice this foam is covered with aluminum foil. It's used most often for an insulating layer under home siding. Most guys who use this will peel the foil off. But really, I don't care how well the fiberglass adheres to the foam, because the foam won't contribute and real strength to the stringers. It's just a mold, and later will add some flotation.

This foam is 3/4" thick, the same thickness as "1 by" lumber, and half the thickness of "2 by" lumber. In my mind, this is handy for making the long stringers, which must be spliced together. The stringers are longer than the foam sheets. You'll see this in the next post.

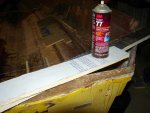
To glue the pieces together, I'm using 3M "Super 77" contact cement. This is their heaviest-duty contact cement, used in cars for sticking up headliners.

10-DSC06041.JPG
 

Woodonglass

Supreme Mariner
Joined
Dec 29, 2009
Messages
25,924
Re: 1979 Champion Bass Boat - Tear Down and Restoration -- with PICS

IMHO you really need to do some research on Foam filled stringers (FFS). What you are attempting to do is not going to work, again, my opinion. Typical FFS are 3-4" wide and as stated before the walls are a minimum of 1/4" thick. and have wide tabbing to the hull. Thin stringers such as yours, require the rigidity of the wood to transfer this rigidity to the hull and provide strength. Without this the hull will have a lot of flex. Are you planning on using the 2 part pour in foam to fill the hull?
 

DHag

Petty Officer 2nd Class
Joined
May 29, 2007
Messages
166
Starting on Stringers

Starting on Stringers

It was all easy enough to shape and fit the short rear stringers. But I noticed right away that stretching a string across wasn't going to work so well for the long front section stringers.

11-DSC06042.JPG

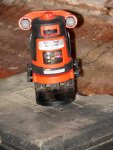
I pondered this for a bit, then remembered a tool that was hiding in the back of my tool cabinet. It's a Black & Decker "Crossfire" laser level. It will project a horizontal level light, a vertical plumb line of light, or a crosshair.

I had already leveled the rear, so I laid a level across the front rib that I had left in place. I adjusted the hull so it was level side-to-side. Then I set the laser level in the center of the hull, and adjusted the level of the hull front-to-back until the laser's line was projected along the original deck line. Finally, I adjusted the laser down until its line was just below the deck line. In the second picture here, you can see the laser line along the side of the hull, just below the deck line.

12-DSC06045.JPG 13-DSC06046.JPG

I cut and spliced the stringer core for length, and made it wider than it needed to be. Turns out I made it a LOT wider than it needed to be. Here you can see the stringer core in place in the hull, and the laser line shows where it needs to be trimmed off. I marked several dots along the laser line using a Sharpie marker. Then I connected the dots, and cut it to width.

14-DSC06047.JPG

And there's the first stringer core, for the outside starboard stringer, as perfect as I can make it. I left the laser level in place, and I'll use it on the remaining three front section stringers.

15-DSC06048.JPG

Interesting, but really no surprise. The stringers are taller in the rear than in the front, meaning the rear area decks were higher than the main deck. I guess there's no real reason for them to be on the same level.
 

DHag

Petty Officer 2nd Class
Joined
May 29, 2007
Messages
166
Re: 1979 Champion Bass Boat - Tear Down and Restoration -- with PICS

Uhhm if you're going to make foam filled fiberglass stringers the wall of the stringers should be a minimum of 1/4" thick and that will require about 5 layers of CSM and 1708
As I've researched this stuff, I have discovered one thing for certain-- There is a wide range of opinions between people who are highly experienced with fiberglass. Here is a quote from "The Hull Truth" boating forum, from a thread "Using Foam for Stringers," from one of their experienced builders:
Four layers of 1708 or 1808 biax is usually stiff enough up to about 18" in height.

I also found that Creative Foam Products' "Sigma System" PreForm Stringers are made with only two layers of 12-ounce biax, regardless of how tall they are.

My boat is only 16' 8", longest stringer is 10 feet, and only 6 inches high at the deepest point.

It's the combination of lots of this kind of info that I decided on three layers. I appreciate your input, though.
 

DHag

Petty Officer 2nd Class
Joined
May 29, 2007
Messages
166
Re: 1979 Champion Bass Boat - Tear Down and Restoration -- with PICS

IMHO you really need to do some research on Foam filled stringers (FFS). What you are attempting to do is not going to work, again, my opinion. Typical FFS are 3-4" wide and as stated before the walls are a minimum of 1/4" thick. and have wide tabbing to the hull. Thin stringers such as yours, require the rigidity of the wood to transfer this rigidity to the hull and provide strength. Without this the hull will have a lot of flex. Are you planning on using the 2 part pour in foam to fill the hull?
I've researched the snot out of this. I've read literally hundreds of pages from dozens of authorities. The only thing I saw that was really any different is the PreForm stringers are typically wider at the bottom than at the top. But the company who makes them says that is so the bottom angles are not square, to make it easier to mold the glass into the bottom corners. There's no physics behind that shape to make it any stronger.

Also, since the foam cores don't offer any support, but act only as molds and flotation, there is no physics advantage to making them wider.

Also please note-- I'm not making these wider than the original wood stringers. But I am adding more stringers and ribs than original, in the most stressed areas. In the rear pad area, I'm building 6 stringers instead of the original four. In the front section, I'm building 2 ribs instead of the original 1 rib.

Yes, I'm going to use the pour-in foam in every section. But, I am checking with a local insulation company that injects this same foam into the walls of buildings. Just checking to see if they would inject it into my hull when they are on a job site, possibly saving some bucks. Same foam, different installation method.
 

Woodonglass

Supreme Mariner
Joined
Dec 29, 2009
Messages
25,924
Re: 1979 Champion Bass Boat - Tear Down and Restoration -- with PICS

There's no physics behind that shape to make it any stronger.

Are you Certain about this!!!!

Don't You think that if the Major Boat Mfg's could make stringers with this Cheap foam that you are using instead of using wood they would do what you are doing. Why wouldn't they? They design their boats and use the materials they use for a reason. The design engineers have reasons. Making drastic changes such as these without proven engineering facts is not advisable. I wish you well but feel you are creating an unsafe craft. For your deck to attach to the stringers and bulkheads correctly they must all be of uniform height.
 

DHag

Petty Officer 2nd Class
Joined
May 29, 2007
Messages
166
Re: 1979 Champion Bass Boat - Tear Down and Restoration -- with PICS

... but feel you are creating an unsafe craft.

I bought this boat used. It truly proved the adage that "when you buy a used boat, you're actually buying a used motor and the boat is free." I ran this boat for five years with all the stringers and the transom completely rotted. I mean so rotted and so full of water that I could literally squeeze water out of the wood like a sponge, with my bare hands. The stringers' fiberglass had been torn away from the hull, probably from the water in the stringer cores freezing and thawing winter after winter.

So basically, the boat had NO stringers. The deck was actually being held up because a previous owner had "fixed" it, and spread a solid layer of adhesive between the upper shell's floor and the hull's deck! The transom was mush between the hull and the inner wall.

The boat ran and handled quite well (and seemingly safely) in this condition. (I realize, of course, that it wasn't safe.) The only reason I got into this was because a previous owner had done a half-a** job of repairing the broken hull, which gave way. I could reassemble the stringers and hull with Tinker Toys and duck tape, and it would be stronger than it was.

Woodonglass, I truly appreciate your opinions and input. I have followed many of your guidelines. (I even noticed when you recently changed your stringer layup instructions, to lay biax over the top instead of shredded CSM.) Many of your comments have sent me off on even deeper research.

Please don't suggest that I have not researched this. I have researched it heavily. This is not the only boating forum on the Internet with people who are well experienced with fiberglass. I have searched and read every forum I could find, every manufacturer's web site I could find, every supplier's instructions I could find. What I am doing is well within all those specs and guidelines, except (apparently) yours. You didn't like my choice of wood for the transom (rot-proof pressure-treated plywood instead of marine plywood (which both use the same glue, BTW)). You don't like foam cores for stringers. I can appreciate that. But don't tell me I haven't really thought this through.

It may well be that the reason your work doesn't fail is because you over-engineer and over-build. Nothing wrong with that. But I also have to consider that my budget constraints are very tight. I was delayed for 6 months on this simply because I had to wait until I could buy the fiberglass. I can't afford to buy more.

As for the "physics" of the stringers, my college degree is in Chemistry and Physics. I know a little bit about that stuff. The forces involved are not side-to-side, thus the trapezoidal shape for a stringer is not necessary. In fact, I found many references to making stringers out of single vertical sheets of plywood, with solid wood "pads" on the top to support the deck, and no fiberglass!

For your deck to attach to the stringers and bulkheads correctly they must all be of uniform height.
Thus my use of a laser level to line them up.
If you're referring to the main deck needing to be the same height as the decks in the stern area, that apparently is not true. These were never connected, and the deck lines in the hull are at different heights by about an inch. The original design of the boat had no deck in the section holding the rear live well, because the live well almost reaches the hull itself. It was just open area between stringers. At least I'm going to cover the side areas and fill them with foam. That's more than Champion did out of the box.

This is my boat. I plan to never sell it. At my age, I can't see ever buying another boat. The only upgrade I can see is that I might re-power sometime later, to a motor with direct injection so it will start quicker, and that has a real trim/tilt system, instead of just a trim system like this one has. Anyway, if it meets my standards (which actually are pretty high), then what does it matter? Whatever I do, it's going to end up lighter and stronger than the day it came out of the factory, with zero risk of rot ever occurring again.
 

Woodonglass

Supreme Mariner
Joined
Dec 29, 2009
Messages
25,924
Re: 1979 Champion Bass Boat - Tear Down and Restoration -- with PICS

If I offended in any way it was not my intent. The safety of the boat and it's future passengers was my only thought during this entire process. It's your boat and you are free to do as you wish. I will respectfully withdraw from the discussion.
 

DHag

Petty Officer 2nd Class
Joined
May 29, 2007
Messages
166
Re: 1979 Champion Bass Boat - Tear Down and Restoration -- with PICS

If I offended in any way it was not my intent. The safety of the boat and it's future passengers was my only thought during this entire process. It's your boat and you are free to do as you wish. I will respectfully withdraw from the discussion.
Please don't withdraw from the the discussion. Your opinions are valuable, and have sent me down the research road many times.

The offense I felt was when you said that I need to do some research on FFS. When the truth is that I have months of searching and reading on FFS behind the decisions I have made. I have no doubt that your experience is exceptional, and the glass work you do is downright bulletproof. Please express your opinions about how things should be done. But please also respect my decisions which are, in fact, based on tons of personal research.
 

aftermath431

Cadet
Joined
Jul 31, 2013
Messages
10
Re: 1979 Champion Bass Boat - Tear Down and Restoration -- with PICS

Hi just wanted to know if you ever finished the 1979 Champion and if you have a few pictures?
 

kungpaoshizi

Petty Officer 1st Class
Joined
Apr 29, 2013
Messages
221
Re: 1979 Champion Bass Boat - Tear Down and Restoration -- with PICS

I too might be restoring the transom area in my boat soon, though I might try to push it off as long as I can.. :)
Nice work I've seen so far, would love to see it completely done!!
 

DHag

Petty Officer 2nd Class
Joined
May 29, 2007
Messages
166
Re: 1979 Champion Bass Boat - Tear Down and Restoration -- with PICS

Hi just wanted to know if you ever finished the 1979 Champion and if you have a few pictures?
I too might be restoring the transom area in my boat soon, though I might try to push it off as long as I can.. :)
Nice work I've seen so far, would love to see it completely done!!

Sorry, not finished. Life has a way of interfering sometimes. For me, it happened to be surprise major surgery I had to have. I'm now in recovery. Still waiting for some final words from the docs. But looking good.

As for the boat, I have restarted work on it. Right now, I am rewiring it. All new wiring, switches, layout.

Here's the plan I have laid out, for completion by the end of October. Late October or early November is the target for shooting the new paint. Here where I live, there will be about two weeks with temps in the 70's to lower 80's.
  1. Rewire the boat. Everything. Should have some pics soon.
  2. With wiring out of the way, lower the top section to the lower.
  3. Pull in the sides of the lower section so the top and bottom fit together.
  4. Lay the 4 cross-members in the hull.
  5. Lay the new deck and fill the lower flotation foam.
  6. Sand all the old finish, and the new glass outer surface.
  7. Fill in old holes and markings on the upper section.
  8. Paint upper and lower sections.

After I get the paint shot, then all that is left is to reassemble it. Temperature will not be critical, so I can fire up enough heat in the garage for working comfort. I should have it ready to launch in April.

I've got some pics and some catch-up. I'll get that posted....
 

DHag

Petty Officer 2nd Class
Joined
May 29, 2007
Messages
166
Finished Stringers

Finished Stringers

I was finally able to get the time in to finish glassing the stringers. Here's a picture. Amazing to me how transparent the fiberglass is. Three layers of 1708 cloth, and you can still clearly see the foam's brand markings. That is the primary test of if you have enough resin in the glass cloth. It turns transparent.

Stringers2.jpg

The stringers are not "connected" in the middle because there are four "ribs" (crosswise stringers) that need to be put in place. At each point where stringers end in the middle of nowhere, a rib goes across the hull. Plus one 2 feet from the front. Once the ribs are in place, all will be tied together.

I have no pics of doing the work because I could not (would not) try to use my camera while working with resin. It was a big mess on my first stringer, and got really easy (and pretty clean, too) as I progressed. Even then, too much resin on my rubber gloves to work my camera.
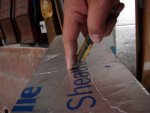
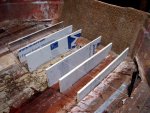
I won't try to explain the how to. There are a lot of experts on-line who tell how this is done. There's no shortage of sources from glass manufacturers, boat forums, and free-lancers. The only real disagreements I was able to find was in how many layers of resin are needed.

Woodonglass is a greatly experienced expert in these forums that I respect. He said that I needed 4 or 5 layers of 1708 over foam. But, he also does not believe that foam is good enough at all. His opinion is that I should use wood because the manufacturer used wood originally. His opinion is worth considering.
Another equally experienced expert that I found in other forums told me that foam-cored stringers were perfectly fine. His experience said that 3 or 4 layers of 1708 over foam could support stringers up to 18 inches tall. His opinion is worth considering.

So I have tried to balance between the two experts, and come up with a layout that will work well and satisfy my needs and expectations. I think Woodonglass wants to be absolutely sure that there is no compromise, no chance at all for failure. As a result, it may be that he actually over-engineers his projects. That's not a bad thing! On the other hand, the other guy may be too conservative, and the quality may not be high enough. It may be that he sells stuff off before it can fail, so he doesn't realize any failure risk. Yet his experience indicates that's probably not the case.

So I chose to split the difference. My tallest stringer is only 8 inches, and the longest stringer is only 3 inches tall. I chose to use 3 layers of 1708 cloth on all stringers. I followed the resin manufacturer's mixing instructions to the letter. Pot life on my resin mix was about 20 minutes. Working time was much longer, so I could really work out any air bubbles. I even had time to lift and reposition a piece of glass if I didn't get it set in place correctly. (That happened about 4 times.)

Basically, my stringers are 3 times stronger than the other forum's expert recommends, and about 3/4 as strong as Woodonglass's recommendations (only because I used foam instead of wood). I think it will be in great shape longer than I will be.

I ran out of fiberglass, so I have to buy about two more yards to finish the ribs and the deck. I bought everything from US Composites. Great service, best prices, excellent product. But the last two yards I will buy from a local boat dealer who does glass repairs. Almost twice the cost per yard, but no shipping, and shipping is expensive because glass materials are heavy.

Anyway, I will finish the ribs once I have completed the wiring and get the dimensions locked.
 
Top