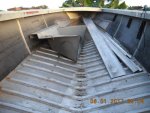
1977 21' Starcraft Mariner Restoration

64osby

Admiral
Joined
Jul 28, 2009
Messages
6,799
The bow cap is a PITA to remove. I had grabbed one in the spring (and a set of caps) from a junker. Have been trying to find a shop who would make new ones.

So far it takes about $4k in upfront costs for molds. Then you pay by the piece. If 40 or 50 sets (caps) were ordered someone could break even (maybe at $100 per cap).

If I could find the original molds the cost might be different. Still looking, some shop in SW MI used to be the supplier. Just haven't found them, or the molds, yet. Most of these shops went belly up when the auto industry flopped a few years back.

Nice Mariner, will be watching with interest. Someday this will be a must on mine.
 

Jim_the_Islander

Seaman Apprentice
Joined
Jun 25, 2017
Messages
38
Got the bow cap off thanks to Watermanns description, did not realize there was a hook on top of the rub rails. It was on there pretty good got it off without breakin it thank goodness. Having a hard time finding the transom caps though, found some pictures last night of what they are supposed to look like and may have to get some transom caps made. Not finding a fuel tank that I want either so maybe I can get the caps made the same time I get the custom AL fuel tank made.

The rub rails seem to be on their pretty tight, hopefully will get those pulled back this weekend and get the old transom out. Found a supplier of marine plywood in Cocoa FL called "Inland Plywood', just have to figure the thickness out. Figure epoxy and glass mat on both sides of the transom is gonna take up at least 1/4" total of the thickness of the transom. The front and back will get some heavy chopped glass mat and the edges will get lightweight woven mat epoxied on.

This will be my third boat that I have rebuilt, hopefully this is my last one. Was kind of dreading doing this one because I knew this one was going to take quite a bit of cash to get it the way I wanted. Good thing the Mrs. doesn't realize how much...ha ha ha. :)

Nice Mariner you have 64osby, when you google images for"21' StarCraft Mariner", yours is one of the first ones to pop up. Like that its very close to original. Good job taking care of that one.

Have a great weekend every one.
 

Watermann

Starmada Splash of the Year 2014
Joined
Jan 12, 2013
Messages
13,753
Glad to hear you got that cap off in one piece, they are a bear to get loose.

I'm not sure what the other boats were you worked on but with this old tin the wood transoms are normally just sealed with either Spar urethane, epoxy resin, paint or a combination. I've just sealed my transoms with 2 coats spar, primer and a couple coats of paint, then some more spar if it's exposed and can be seen like my SN was. Any sealing you do will be 100% better than nothing which is what the factory did. It just sounds to me like a bunch of toxic work to use glass is all.

Personally I've never spent better money than on my boat restos. ;)
 

64osby

Admiral
Joined
Jul 28, 2009
Messages
6,799
Thanks Jim. We like it.

It looks original because it is. The PO(s) took great care of it. We have done a few comfort improvements,

Don't post much, but will be checking in to watch your progress.

I agree with H2Oman, spar varnish transoms are a great path for Starcrafts, or any Tin boat.
 

PikeHunter431

Petty Officer 2nd Class
Joined
Sep 8, 2015
Messages
171
Welcome Jim. Great project you have started. I'll be looking forward to watching the progress.
 

Jim_the_Islander

Seaman Apprentice
Joined
Jun 25, 2017
Messages
38
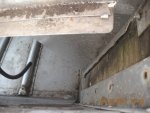
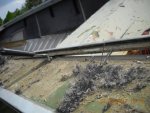
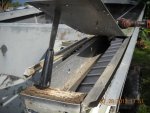
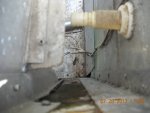
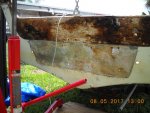
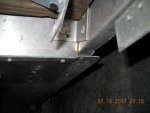
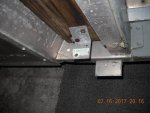
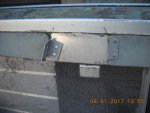
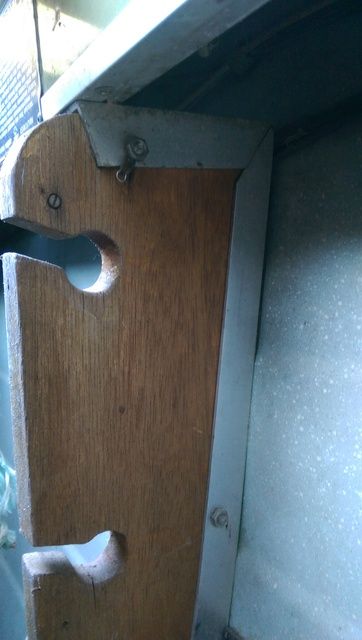
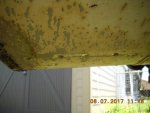
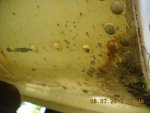
Recently got a little work done in between the deluges of monsoon season. The gunnels are starting to come apart. And noticed that the original rod holders underneath the gunnels amidships actually gave support to the inside of the gunnels. Does anyone have photos of the original rodholders? Would like to see the design of how the tops of the rodholders were cut.
L6CDD0k.jpg 1KfmVyU.jpg W4KlQEC.jpg hj0vCwr.jpg
 

Watermann

Starmada Splash of the Year 2014
Joined
Jan 12, 2013
Messages
13,753
The joy of tearing down and finding things to clean, repair, redesign, make better... it's an art form. :lol:

2 piece gunnels, my SS has them as well, lots of 5/32nds blinds to replace, I even added a bunch to help beef them up.

Hardly any Mariner guys around here to ask specific questions, in fact Os is the only one I know of.
 

Jim_the_Islander

Seaman Apprentice
Joined
Jun 25, 2017
Messages
38
Can see where those clecos will come in handy when reinstalling the gunnel top.

Will have to add some blinds beside the existing ones, the originals in a few places were right on the edge of the angle. Like you said, its going back together better, stronger , faster than it was before....maybe not faster!

Your right, there are a few Mariners on here but not many. Therefore am taking a lot of pictures because I know I will forget how it goes back together. The photos will help a lot. Cant wait to start counting how many blinds and solids will need to order (sarcasm).

Am also looking for ideas on what type of AL to get to support the rear of the transom at its sides. Some C channel maybe? Not sure what was their originally as it was long gone. Whatever was there did not really have that great of a connection.

Lots of work to do still, didn't get the splash well off yet but am close. And a little tip for removing carpet off a boat, sharpen your scraper first, it really makes a difference.
 

Jim_the_Islander

Seaman Apprentice
Joined
Jun 25, 2017
Messages
38
The splash well is off and the "original" transom is out. It has the separate pieces for the top of the transom. Why its called a "2-piece" IDK, its definitely 3 pcs.

Some pitting as expected on the inside skin. How have you guys cleaned the inside of the transom skin, with the pitting don't want to go too much mechanical removal. Maybe some S.O.S pads. or stainless grill pad better yet.

Having trouble locating the marine plywood, it will be easier going to the big box store and getting 3/4" marine ply and gluing it together to make 1 1/2" for the transom. Would sikaflex make a good adhesive or 5200? What have you guys used? cdKW81E.jpg gtt3nCr.jpg
 

Ejipner

Petty Officer 2nd Class
Joined
May 26, 2017
Messages
114
Hey Jim did you take any pictures of taking the splash well off? How hard was it? I'm about to be doing that next weekend or after work this week. It's looks great. Keep up the good work.
 

Watermann

Starmada Splash of the Year 2014
Joined
Jan 12, 2013
Messages
13,753
Jim there's 100's of threads here with volumes of info on everything under the sun in regards to restoring these old boats. Branching out to those threads and seeing what others do also brings them to your thread to offer their advice when you post there. (don't post in threads over 90 days old)

Removing corrosion from the inner transom skin is a tough process that requires power tools. I've used a fine wire wheel to clean the skin on my 3 restorations. I know many have the phobia and say not to use steel wheels, to use either nylox or stainless. I use steel wheels without fear because every aluminum part on these boats have had steel touching them. What do you think the bauxite ore is melted in? Cast iron pots. What are the rollers made of in the foundry? Steel. What are the shears made of that cut the AL? Steel. What are the forms made of that stamp the AL ribs and create all the bends? Steel. I wouldn't go using a steel wire wheel on a rusty steel trailer and then use it on my boat that's about as far as my phobia against steel goes. The fine wheel won't remove material that is solid, only the corrosion.

Once the corrosion is removed from the pits with the wire wheel I use cleaning vinegar in a spray bottle to help neutralize the highly alkaline corrosion and scrub it into the pitting with a wire brush before pressure washing it with fresh water. I fill the pitting with marine tex, some use JB weld but it's a bear to sand. Once I have the inner transom pitting skinned then I fill unwanted holes with JB water weld, sand them down. Lastly I wipe it down good with solvent, shoot self etching primer, regular primer and then paint. If the factory did a nice layer of paint on the inside and sealed the wood better there would be far less issues with this type of corrosion.

The finished inner transom on my V5 SS that's ready for the wood to go in.

y4meQ9gey6pNtZ5h5BASasmY6x2DhxxO-0nwjKJbd6Ro4g-awigqfjU2BfMwatLjmOGnlxPd8_H2ynPzHdZNouFqcOEufoeEft51CVeV6jty--3Sl6p2LXITevAePX-qWl8wHoCKu39B9C0-kqGqytGwd-N8mQ9qjDfsq2STmXr6zY4vKaUmGoi-_1aOS-4Ha9xofql5UeX-tEVK0wOMek57Q


Here's a before. All the discoloration you see has to come off to bare AL, you can see where I've been working on it a little.

y4m-TR66-xoJsdpwAgIAt7JVnkgFIetB_cjaIgpI9FgDGbSShk12IprGVJt1VMBIxmaC3du3qbOpM5wXZXoWBy36uzZntENqiyfksVSRqATHjCPWhyfeoFrPI2OszhqZWAYbM4SSkoomgMcQWxd6XrQp_d2ithRiEwsXQJWEDPkfAbPAVZP1cRG4Jwyd-zhf9Kd1w3H09y-OzA5WaVaCYTpeg
 
Last edited:

Jim_the_Islander

Seaman Apprentice
Joined
Jun 25, 2017
Messages
38
Ejipner, taking the splash well off was pretty straightforward, you have the screws holding it to the transom at the bottom and screws holding it to the port and starboard side of the transom. Then there are quite a bit of blind rivets holding it to the underside of the gunnels. Then you have the brackets attached to the fore side of the splash well attached to the gunnel with solid rivets. The solids are a little harder to get off because of their placement, barely had room for my grinder to cut off the bucktail ends.

Not too difficult to remove, a little hard for me to get underneath and drill out the blinds and take out the screws holding it to the transom as am not as flexible as the younger me. Just be careful and have some temporary support under the fore end of the splash well after you remove the last of its supports so that it doesn't drop suddenly. Removed the solid rivets last on the gunnels.

Really nice job on the transom skin, Watermann. Going to have to check out that V-5 thread. Did do some searching on here last night, but only have so much time to search. Sometimes its easier just to ask a question. OGzp1AH.jpg zulVIi4.jpg f17ilCV.jpg
 

64osby

Admiral
Joined
Jul 28, 2009
Messages
6,799
Jim, No special cut on the rod holders, it is framed with aluminum on the top and the hull side. The aluminum channel is bolted to the gunwall. The channel also has on rivet attaching it to the hull on the bottom third of the rod holder.


Watermann

Starmada Splash of the Year 2014
Joined
Jan 12, 2013
Messages
13,753
Yeah so photobuttket won't allow 3rd party pic hosting now.
 

64osby

Admiral
Joined
Jul 28, 2009
Messages
6,799
Yeah, thanks BWR. Opened it on my phone, No pic. Posted a link above. See if that works.
 

Jim_the_Islander

Seaman Apprentice
Joined
Jun 25, 2017
Messages
38
Ya 64, no pic, my son told me about "imgur.com" for hosting pics. Shame photobucket started charging for 3rd party hosting. Guess its better than them pulling the plug altogether.

Next week will get the boat undercover to keep rain out and be able to maintain progress in cleaning the inside of the boat.

Ordered my rivets yesterday after trying to count them. Counting revealed that I have to replace the rivets attaching the transom knee brace to the bottom of the boat. About half of them were suspect. The rivets attaching the knee brace to the transom skin are solid. Should be able to pull back on the transom skin and cleanout underneath the knee brace. Once that's done will be able to install the new transom wood.
Ko7GPvS.jpg
K1Y9aKi.jpg


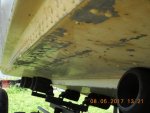
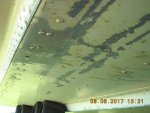
Counting rivets revealed why you don't use roller trailers on a metal boat especially. Rollers are good for the keel and that's it. Am removing the rollers soon and adding bunks to the trailer even though this trailer is only temporary.
LG4LSIb.jpg
PYqgLwM.jpg
mkvL51X.jpg


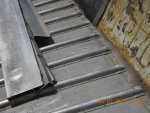
This needs to be pounded out, I'm guessing, with three rib ends lifted up and have some sheet reinforcement added to this area. Luckily the damage ends right at the end of the factory hull side reinforcement panels which will be lifted up. Not sure what gauge sheet to add. There are two visible creases on the inside. No breeches or cracks but obviously all the solid rivets need replaced. Any other suggestions would be appreciated.
 
Top