1969 Glasspar Tacoma Transom and Deck redo...

r16409

Seaman Apprentice
Joined
Jun 4, 2006
Messages
45
Re: 1969 Glasspar Tacoma Transom and Deck redo...

Hi,

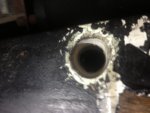
Back at it and started to grind off the "lip/edge" where the old deck edged up to the hull because I actually ground a slit/hole thru and rather than try to fill/build it back up and worry that I may have ground a few others areas thin.. I am pretty sure this was where the filet, (peanut butter), was used to smooth out between the side of the deck and hull. The plan is to grind the lip/edge flat and lay some strips of fiberglass to thicken it up then lay the deck down and re-do the filet.

Here is a picture showing the lip/edge.

http://s787.photobucket.com/albums/...spar Tacoma/?action=view&current=P9300087.jpg

Any words of wisdom or pros/cons of grinding the lip/edge off?

Thank You
 

r16409

Seaman Apprentice
Joined
Jun 4, 2006
Messages
45
Re: 1969 Glasspar Tacoma Transom and Deck redo...

We have made some good progress. Updates below.

We have decided to remove the old peanut butter build up "lip" ,where the old deck butted up , then glass in a 6'' strip of 1708 all around the side of the boat where we ground off the lip and where the deck will set. I had ground a few spots low and we wanted to make sure that we never have any issues and also try to make the point where the deck touches the inner hull stronger.

Glass 6' strips of 1 1/5 OZ CSM over where the stringers go to thicken it up. We then wrapped all stringers in CSM 1 1/5 OZ then bedded them in PL Glue. We propped the stringers up with 1/4'' Foam padding so we could adjust the height to compensate for any bumps below. If I had to do this over I would spend more time "carefully" grinding all the areas where we removed the old stringers from makig sure to get all the old wood/putty etc without digging into the hull! Still would have thickend it up however with the CSM. We had a heck of a time getting everything level. Once the stingers were bedded we went up the sides with CSM then 1708. Unbelievable how strong they are.

We also covered just about every inch on the inner hull with 1708. It use to flex somewhat but now you can bounce on the hull and it is solid.

We spend quite a bit of time sanding/leveling, tweaking the tops of the stingers to make sure they are all level and there is a slight come for the deck to shed water to the sides.

Still need to install a few bulkheads and glass them in. Then we will fit the deck and glass the bottom with 1 1/2 oz CSM then the top with the same plus 1708. The deck is the same material as what I used on the Transom, (3/8'' Russian Birch), and I a bit concerned that it will have to much flex in it. We will see how the 1708 does it. Went back and forth on weather to use this or a thicker 1/2 '' deck but figured that we wanted to stay with the original spec and that it had to be somewhat good since it lasted about 30 years. We still need to decide what material to adhere the deck to stringers. Current thought is to use PL glue along the tops of the stringers then strip of 1708 along the edge of the deck and to avoid any screws in deck/tops of stringers.....

It is gong to wind up taking between 12 -15 Gallons of Resin. At about 150.00 per 5 gallon it adds up quick but plan on keeping and using the boat for a long time....

Photos are too big to upload here so here is the link to the updated album.


http://s787.photobucket.com/albums/yy156/socal_23760/1968 Glasspar Tacoma/

Any comments/suggesting much appreciated!

Thank You
 

Attachments

  • 4photo.jpg
    4photo.jpg
    145.1 KB · Views: 1

jbcurt00

Moderator
Staff member
Joined
Oct 25, 2011
Messages
24,874
Re: 1969 Glasspar Tacoma Transom and Deck redo...

Welcome back

If you are concerned about the rigidity of the deck, might add 1708 after the CSM on the down side, and add CSM before the 1708 on the topsides of the deck... Shouldn't thicken it up as much as jumping up to 1/2" and still 'match' the original spec...

Might be this guy:
attachment.php


for Halloween? Yikes :D
 

Woodonglass

Supreme Mariner
Joined
Dec 29, 2009
Messages
25,924
Re: 1969 Glasspar Tacoma Transom and Deck redo...

Photobucket will Automatically resize your photos when you upload them.
Here's how.
At the top right of Photobucket you will see your login name with a down arrow. Click the down arrow and click on Account Settings. The account settings window will open. There will be a menu bar at the top of the window. Click Album Settings. In the Album settings to the right of Upload options click View Upload Options. iBoats likes 640x480 pic size so select it from the menu then save your changes. From now on all your pics will be uploaded to that size. You can now hover over a pic, and when the pop up window appears, click the IMG Code window (the bottom one) and it will say "Copied". Now return to iBoats and paste the code into your iBoats post. That's all there is to it!!!
 

GT1000000

Rear Admiral
Joined
Jul 13, 2011
Messages
4,916
Re: 1969 Glasspar Tacoma Transom and Deck redo...

Hi and welcome back,

Great to see you still "grinding" away at this project...:rolleyes:

Just got all caught up with your Photobucket pics...You have made some really awesome progress...

Looking forward to more...:D
 

r16409

Seaman Apprentice
Joined
Jun 4, 2006
Messages
45
Re: 1969 Glasspar Tacoma Transom and Deck redo...

Thanks for the advise on the csm/1708 combo on the deck. We may wind up doing that.

Stringers and Bulkheads are in placed and glassed in. Took much longer than anticipated but it seems to have turned out well. We had a problem with the drain hole. Turns out because we "thickened up the bottom with additional layers of glass the old hole in the shell does not line up. We will have to relocate about 1/4'' so it will not intersect with the back of middle stringer or too low. The price we paid for "thickening" up the bottom of boat with additional layers of glass. I think it will be worth it knowing this thing will hold up to the chop full of gear! Hopefully have the deck cut out and bottom glassed in the next few days. Getting close! Once deck is glassed on bottom we will determine if we want to add 1708 on bottom as well as the top. We did wind up adding more cross-members then original so the deck has more support, (included in updated pictures). Much time was spend on the rear cross-member getting everything to line up...

updated album below

http://s787.photobucket.com/albums/yy156/socal_23760/1968 Glasspar Tacoma/
 

Woodonglass

Supreme Mariner
Joined
Dec 29, 2009
Messages
25,924
Re: 1969 Glasspar Tacoma Transom and Deck redo...

Here's my recommendation. Mix up some structural Peanut Butter, (Resin, Cabosil and small cut up strands of CSM and or Cloth fibers and mix to consistency of Peanut Butter and fill the Hole completely. Then using a Drill Bridge or Guide, redrill in the location of choice.
 

r16409

Seaman Apprentice
Joined
Jun 4, 2006
Messages
45
Re: 1969 Glasspar Tacoma Transom and Deck redo...

Thanks for the advise on filling and re-drilling. I think will be ok with the first hole.

I managed to get a 3/4' '' hole drilled thru the original outer shell hole. After all the work rebuilding the transom I want to make sure I do not leave any chance for water to weep in from the outside or the inside under the deck. I actually thought of not putting in a drain hole at all below deck but better to do so in case water ever gets in and needs to drain... I have read thru the other threads on different sleeve options, (brass and how to best flare, plastic etc), but I am wondering if I can leave the drilled hole at 3/4'' or if I will need to drill bigger go accommodate for the outer diameter of the sleeve? Also wondering if anyone goes without any sleeve at all and lines the walls of the hole with epoxy, resin, gel-coat etc?

Was hoping to avoid drilling any bigger as I am close to bottom of transom and side of middle stringer. Posted pictures of hole from outside and inside.

Updated photos here showing the drilled out hole.

http://s787.photobucket.com/albums/yy156/socal_23760/1968 Glasspar Tacoma/
 

Attachments

  • photo15.jpg
    photo15.jpg
    140.4 KB · Views: 0

r16409

Seaman Apprentice
Joined
Jun 4, 2006
Messages
45
Re: 1969 Glasspar Tacoma Transom and Deck redo...

We wound up drilling the 3/4'' hole to a diameter of 1'' so we could go with a standard Brass Sleeve and so we could get the hole straighter - we used a 2x4 and traced in the angle from the 3/4' hole then drilled a hole in the 2x4 and then attached that to the transom with c-clamps to use as a jig after which we drilled the 1'' hole. We then the entire area applied resin and then after it cured we sprayed all around the inside and outside of the hole with Gelcoat using a PreVal sprayer. We then coated with 5200 and installed the sleeve and used the bolt with washers on one side and nut with cone on top to start the flange, (as described on different posts here at iBoats). Only thing I can say is that hole is not at a right angle and goes to the side a bit but we have it fairly close to the bottom of the hull and to the center to capture water. A bit of compromise in location to make sure it drains water better was a good choice, (hopefully water will never get in there!). I will post some pictures in the next few days...


The next update is that we have the deck ready to be installed. We glassed the bottom with 1 1/2 OZ CSM and have two pieces as one so we will be installing it as one piece. Spent much time making sure all the stringers touch deck at the right spot to maintain a "crown" allowing water to drain to the sides. There are few spots that are just a tad (less than 1/8''), high and you can feel them when you walk on the deck and the sides are weighed down with bricks along the perimeter. I'm still pondering weather our choice to use only PL Glue over the stringers and 1708 along the edges is the right thing to secure the deck for years to come? If anyone can speak to this would be greatly appreciated. Just not very confident that the PL glue will hold over the long haul with out some help via screws. We were going to lay high beads of PL Glue and gently set the deck in and only slightly push down in all the right areas so the PL Glue would not all squeeze out but rather take up any gaps. The concern is that the glue will fail and the deck will start to come up.

Thanks for any feedback.
 

r16409

Seaman Apprentice
Joined
Jun 4, 2006
Messages
45
Re: 1969 Glasspar Tacoma Transom and Deck redo...

Pictures of Brass Sleeve after installed from outside and inside. Still need to do some cleanup and a bit of sanding on area where we Gelcoated.
 

Attachments

  • photo18.jpg
    photo18.jpg
    130.6 KB · Views: 0
  • photo19.jpg
    photo19.jpg
    151.8 KB · Views: 0

r16409

Seaman Apprentice
Joined
Jun 4, 2006
Messages
45
No Title

Hi and sorry for the delay in updating this thread/project - life's twists and turns....

After completing the transom, deck and stingers we rolled on our gelcoat and replaced the cap and installed a larger rub rail I found at one of the local boat salvage yards. We had a 25HP 2 Stroke which seemed a bit too heavy, (top of the transom was a bit close to the water line), and and at higher speeds it just seemed a bit unstable . We were not sure if we had done someting wrong affecting the planing charactistics or if that is just the nature of the older Glasspars. A few folks with eperience with these classics did say that had a tendency to get unstable, (twitchy), at higher speeds. I finally found an 18HP Tohatsu and that seemed to have a good weight/power ratio and still gets up plane with 2 adults, live bait tank and fishing gear. I did get out on a few fishing trips, (using ice chest for a seat), and managed to land a BlueFin Tuna on a recent solo mission that took me 6 miles off Dana Point Ca. On another trip I had her out 14 Miles, (tandam trip this time), in some 2 lto 3 foot swells with some white caps and I must say that I was amazed how well she cut thru the chop and stayed relitavley stable. The extra thich hull was so obvious as we cut/bounced thru the chop. You could definetley feel it!


Any input from anyone with experiene on how the older glasspar tacoma handles, (speed/chop), woud be much appreciated.

Picture attached is of the recent catcch.

I will also post some details on some of the misc tasks such as drain plugs, bilge debate and splash well drain debate....

Next project will be the seats - still debating weather to go with a bench or 2 pedistals.
 
Last edited:
Top