1967 Starcraft Jet Rebuilding

catbones

Petty Officer 1st Class
Joined
Jul 15, 2012
Messages
319
Re: 1967 Starcraft Jet Rebuilding

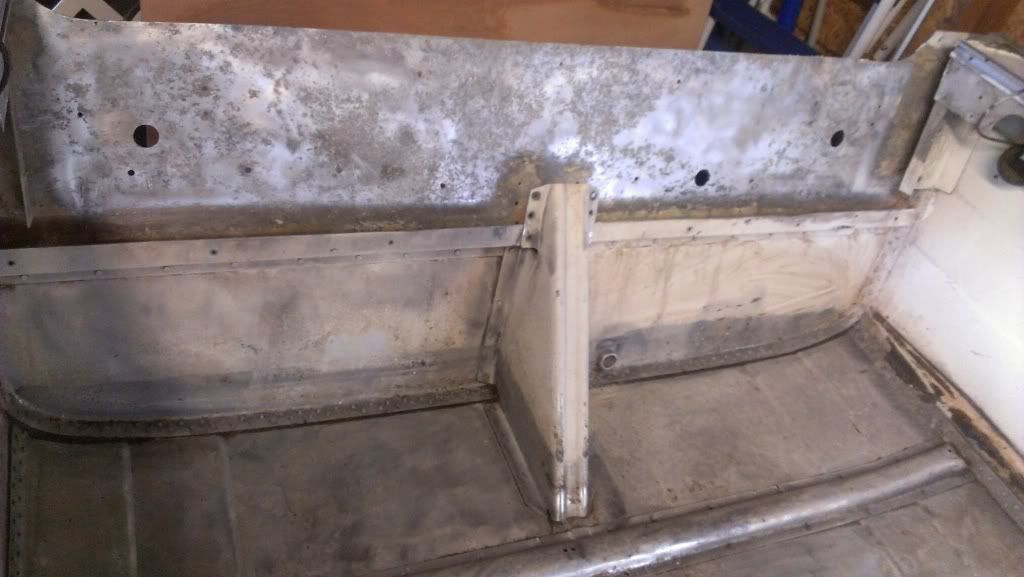
Just a small quick update, seems as soon as I hit the store for some good wood, the weather went down the hill. Winter, please leave! Ahh, it's May... hopefully June and July will even out temp wise. I've also decided that with my wife now working 2 days a week, kids going off school for the summer, I might have less time then I want... btw, wife decided to tear down the kitchen (again) .. so remodel in progress and in between my plans. As you know, Happy Wife, Happy Life :)

So back to the decision making, I decided that if all goes well just maybe she will see splash this year if not, I won't rush her and just take my time to make things work.

Starting next week, it's time! Gotta finish bolting the hull up then paint... Ferrari bright red with black some where, still going through few drawings here of ideas.
 

jbcurt00

Moderator
Staff member
Joined
Oct 25, 2011
Messages
24,878
Re: 1967 Starcraft Jet Rebuilding

I'd suggest this instead:
[h=1] 23/32 in. x 4 ft. x 8 ft. BC Sanded Pine Plywood [/h]
[h=2] Model # 166057[/h] [h=2] Store SKU # 166057[/h]
In stock at the north Buffalo, NY (Store # 1234) nearest Kenmore......

The red oak ply is INTERIOR grade... The BCX is exterior grade... Even though you should seal the plywood, you want it made w/ waterproof glue......
 

lakelover

Rear Admiral
Joined
Mar 26, 2003
Messages
4,386
Re: 1967 Starcraft Jet Rebuilding

I second using the exterior plywood for your transom. I confess to using interior grade 1/4" oak ply as my dash overlay piece, it was the only affordable thing I could find with the dimensions needed and look I liked. I had to keep the thickness down to accomodate the accessories that would be mounted thru the dash. But it is well sealed and essentially always protected from the elements. Otherwise, everything else made of wood in the boat is sealed exterior ply. Any laminations are glued with Tite Bond III.

I'll be curious to see your painting scheme, sounds like it could be pretty cool! Hope it warms up again soon, this morning in NY, it feels like winter tried to come back!

Keep up the good work.
 

catbones

Petty Officer 1st Class
Joined
Jul 15, 2012
Messages
319
Re: 1967 Starcraft Jet Rebuilding

Hey guys, nice to see you again. Thanks for the suggestions. Speaking of sealing, I completely forgot what I got for the transom to seal it with couple layers. Going to have to look through the supply in the garage lol.. Thanks winter, again! It's like starting from scratch... Grr
 

catbones

Petty Officer 1st Class
Joined
Jul 15, 2012
Messages
319
Re: 1967 Starcraft Jet Rebuilding

Hey, how are ya? Yes the theme I'maafter is Ferrari theme. Got some good ideas to follow inspired by others. If all works out with my dash drawing, it will look really really cool. Hope doesn't take too long for me to do that. I'm still trying to locate a set of yellow backed gages.

It'll be like a vintage ferrari feel.. Wish the so 400 - 700 horses I could pop in this puppy. Lol
 

jigngrub

Fleet Admiral
Joined
Mar 19, 2011
Messages
8,155
Re: 1967 Starcraft Jet Rebuilding

Horse power and speed are over rated... slow down and enjoy life!;)
 

catbones

Petty Officer 1st Class
Joined
Jul 15, 2012
Messages
319
Re: 1967 Starcraft Jet Rebuilding

Alright, so with three kids running crazy outside with the beautiful day today, boy was it gorgeous day and pretty much clean calm waters on the Niagara River, yes had to visit the river before the kids wen't crazy.

Anyways, with them going nuts, I was able to grab some time to finish off with the bolts. I think they are all pretty much tight as much as possible and have enough of 5200. As you guys know, I was on the fence with having a bare bottom hull, but that'll be black since its pretty rough down there from previous owner. Here's few shots;

IMG_20130516_105943.jpg

IMG_20130516_105952.jpg

IMG_20130516_110006.jpg

IMG_20130516_110012.jpg

IMG_20130516_110051.jpg

Bloody mess with all that 5200.. :) Next, I've got to Gluvit the interior and fill her up, check for any leaks that I might of missed. Then, primer the interior all around and move on to next step --> Transom
 

catbones

Petty Officer 1st Class
Joined
Jul 15, 2012
Messages
319
Re: 1967 Starcraft Jet Rebuilding

Believe it or not, that 5200 is still drying with the humidity (I'm guessing being at fault) last week.
 

jbcurt00

Moderator
Staff member
Joined
Oct 25, 2011
Messages
24,878
Re: 1967 Starcraft Jet Rebuilding

More likely cool temps. 5200 cures underwater...... The moisture should be helping it cure...... Sticky sticky though.....
 

catbones

Petty Officer 1st Class
Joined
Jul 15, 2012
Messages
319
Re: 1967 Starcraft Jet Rebuilding

Hi All,

Geez has it been long time since I was here... looking like there is many new members this year too. Glad to see that. I'm back on the block, had a few emergencies and well had to replace my truck with something little better and chunky, "Big Red" as I call it... the tranny on my 07 Torrent started having an issue and after $2k + labor well, lets just put it that everything else started to take its turn... never put a thing into the vehicle until now, it started going down the hill, so off I went, sold and got what I could afford, Big Red! Big Red is a 04 Chevy Astro AWD which is better for the boat not like it ever mattered, but the TT loves it.

In any case, since my $2k transmission funding.. it took a nice big chunk out of my time and out of my saved $$$ for PiPPi. It was also the time since my wife decided I had to make her happy completely redoing the kitchen. Happy Wife, Happy Life.. right fellas.

Now I've got some time in return for my Pippi and hopefully she will see a splash this year before it all ends. I've got to also refresh my memories and inspirations putting her back together right. Any help would be appreciated.

How many coats of what do I put on the transom wood boards (going with 23/32 in. x 4 ft. x 8 ft. BC Sanded Pine Plywood-166057 at The Home Depot as it was suggested) and do I just splat 5200 between the aluminum and the boards, then put bolts in with more 5200 on em?
 

jigngrub

Fleet Admiral
Joined
Mar 19, 2011
Messages
8,155
Re: 1967 Starcraft Jet Rebuilding

Not many people use 5200 to bond their transom pieces, most use Titebond 3, Gorilla glue, or PL premium waterproof adhesives.

For sealing the transom wood before installation you can use epoxy resin (the best), spar varnish or exterior grade spar urethane, or even just a good grade of exterior oil based paint. Whatever you use, apply multiple coats... 3 or more.
 

catbones

Petty Officer 1st Class
Joined
Jul 15, 2012
Messages
319
Re: 1967 Starcraft Jet Rebuilding

Not many people use 5200 to bond their transom pieces, most use Titebond 3, Gorilla glue, or PL premium waterproof adhesives.

For sealing the transom wood before installation you can use epoxy resin (the best), spar varnish or exterior grade spar urethane, or even just a good grade of exterior oil based paint. Whatever you use, apply multiple coats... 3 or more.

Hey, nice to see you again around here :) how ya been?

Btw, I was actually wondering what to use between the aluminum and the transom pieces :) I was thinking 5200... Titebond 3 will be my choice for joining the two transom pieces together and spar varnish (exterior) couple coats on it. Still gotta see if I've got all the leaks and gluvit. I'm hoping all this stuff happens this week comin'

Thanks for the reply :)
 

jigngrub

Fleet Admiral
Joined
Mar 19, 2011
Messages
8,155
Re: 1967 Starcraft Jet Rebuilding

Nothing between the transom skin and lumber, that's for fiberglass boats. The motor mount bolts and other assorted hardware (tie down U bolts) and such will hold it quite securely.

Edit:

Couldn't quite remember your transom configuration so I looked back in your thread:
IMAG0315_zpsb91b3bcc.jpg

The "Z" angle at the bottom of your transom piece and the knee brace bolts will hold your transom along with everything else that'll be penetrating it. Just use the 5200 to seal all penetrations and you'll be good to go for a very long time.
 
Last edited:

catbones

Petty Officer 1st Class
Joined
Jul 15, 2012
Messages
319
Re: 1967 Starcraft Jet Rebuilding

Nothing between the transom skin and lumber, that's for fiberglass boats. The motor mount bolts and other assorted hardware (tie down U bolts) and such will hold it quite securely.

Edit:

Couldn't quite remember your transom configuration so I looked back in your thread:
IMAG0315_zpsb91b3bcc.jpg

The "Z" angle at the bottom of your transom piece and the knee brace bolts will hold your transom along with everything else that'll be penetrating it. Just use the 5200 to seal all penetrations and you'll be good to go for a very long time.

Thanks for the hint, didn't someone on here rebuilding hammered it with 5200 between there? I so thought that. Anyways, will do so, nothing in between the transom and lumber, just 5200 bolts and all other accessories. I've got quite the amount of Gluvit to do on the hull this week and water leak check. Thank you again and everyone else for hanging around.
 

lakelover

Rear Admiral
Joined
Mar 26, 2003
Messages
4,386
Re: 1967 Starcraft Jet Rebuilding

Constructing and sealing as jigngrub suggested will serve you for a very long time.

I'm not completely familiar with your aluminum bracket where the bottom of the transom board sits, but if it doesn't have some small drainiage holes drilled in the bottom of it, I would drill some. Water will get in there and you want it to be able to drain out. I wouldn't seal the board into the bracket with anything, just attach with SS screws dipped in 5200.
 

catbones

Petty Officer 1st Class
Joined
Jul 15, 2012
Messages
319
Re: 1967 Starcraft Jet Rebuilding

This sucks, driving down today I've noticed a nice form but need lovin 18' StarCraft deep and beautiful with 95 evin. Guy wanted $1k for it.... Wish I was done with the current project and had room for more :) ahhhh... OK gotta love my current vessel though.
 

catbones

Petty Officer 1st Class
Joined
Jul 15, 2012
Messages
319
Re: 1967 Starcraft Jet Rebuilding

Quick question, what would you guys get that local HD or LS would have thickness wise for floor, console and side walls? any suggestions? I'm thinking I will add extra side walls to cover up the aluminum, install speakers in the back, etc..
 

jigngrub

Fleet Admiral
Joined
Mar 19, 2011
Messages
8,155
Re: 1967 Starcraft Jet Rebuilding

Console and decking, 3/4" would be my choice.

Sidewalls doesn't have to be that stout, I believe I'd go with 3/8 for ease of installation.
 

catbones

Petty Officer 1st Class
Joined
Jul 15, 2012
Messages
319
Re: 1967 Starcraft Jet Rebuilding

Console and decking, 3/4" would be my choice.

Sidewalls doesn't have to be that stout, I believe I'd go with 3/8 for ease of installation.

Sounds like what I was thinking, trying to find something that has same type of treatment as for the transom. If not, just go with regular stuff and cover it well with couple coats of sealant and paint. Been getting few Bayliner ideas on their bow riders for interior stuff, like seating and console, walls... etc.. just to bring everyone up to speed on my ideas. Still going with red/black/white colors.
 
Top