Re: 1964 Larson 16' All American Project
I would love to hear a little more about the bilge part of your project Jeff. If you have any tips or wisdom that would save me some time I would appreciate it!
Well since you asked.
1. What I found on my boat was that the floor rot started at the bow and progressed back to under the lounge seats. I believe this was because water under the floor wanted to settle at the lowest point in the hull which is the deep V at the bow. The original bilge in the Larson had 3 holes leading to the under floor areas, so any water that entered the boat from above, such as rain, water spray, or people getting back in the boat after being in the water, would flow back under the floor. I didn't want this, so I re-designed the bilge.
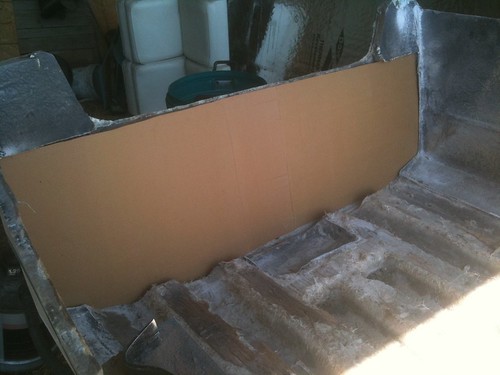
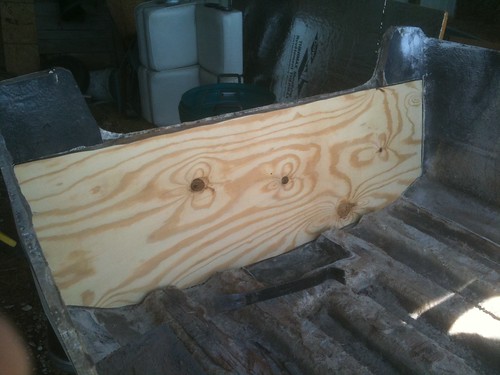
First, as you can see in the pictures I posted, I cut the center stringers back to fit the new bilge. I laminated a couple of 3/4 plywood pieces together and shaped to fit the hull across the cut end of the stringers between the 2 outside stringers and even with the top of of all of them. This then became not only the front wall of the new bilge but also a cross-member to support the floor. I then built a 2 sided box with a 3/4" bottom to fit between the bilge front wall and the transom. The box sides form the side walls of the bilge which I dattoed into the front wall piece and cut the rear of to match the transom angle. After grinding the inside of the hull flat where the bilge was to be mounted, all was glassed into place. Hint: The hull is flat where the planing plate is. Best if bilge is made no bigger than this area which makes for a maybe overly large one anyway. Personal choice here.
Now, this is where I fixed the problem of water going under the floor from the bilge. My bilge is actually 3 bilges. One open and exposed from above for any water coming in on the floor to drain into, but with no openings in it to the under floor area. To either side of the open bilge is an enclosed bilge sealed from the forward under floor area by the bilge front wall. That is except for a short piece of 1" PVC pipe that extends through the front wall at the lowest point in each side bilge which is up against the outside of the side walls of the center bilge. To each of the pipes a 45 degree joiner with another short pipe extenting into each side bilge and rising up and against the side wall. What this does is makes a one way valve essentially. When the boat is being trailered up the ramp or a hill, or has the bow tipped way up, or during accelleration to get on plane, water flows from the front under floor space into the PVC pipes, up the 45 degree hills, and falls into the side bilges. Once there, the water can not flow back out the pipes as it can't rise up to get back into them. I then have 3 drains in the transom; 2 gar-board style drains for the side bilges and 1 regular drain for the exposed open bilge that uses the typical rubber drain plug. I only rarely check the side bilges for water as there should not be any there unless there is a leak somewhere through the floor or hull.
As long as I had the floor out, I also installed a PVC pipe under the floor from the bow back to the exposed bilge. This will serve as a drain pipe for an anchor locker should I ever decide to put one in.
In the end this is probably all overkill, but hey, it is my boat and it was kind of fun designing it all.
Now some other tips.
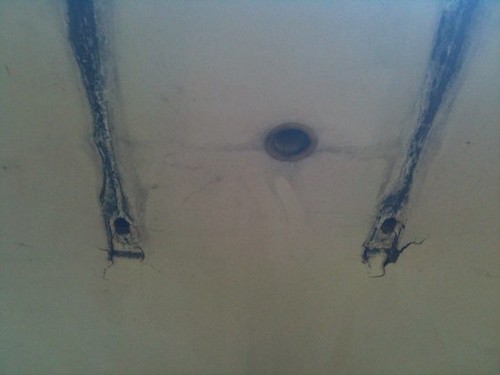
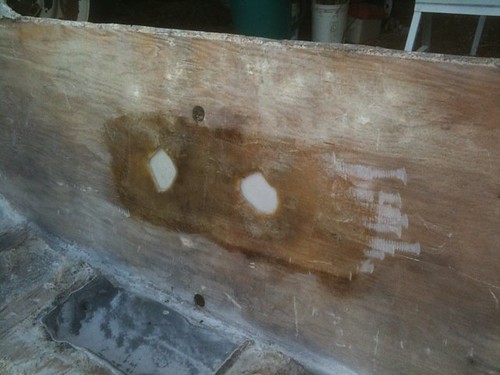
1. Water most often gets under the floor, other than through the bilge, from around any mounting bolts penetrating it, such as for the seats, battery, or gas tank. I avoided any holes through my new floor by making mounts from 1/2" plywood and installing stainless T-nuts from the back side before the mount is epoxied to the floor. You can see this in done for the gas tank mountings in the one picture showing the exposed bilge. Threading nylon screws from the top into the T-nuts and placing a small piece of painters tape over the bottom of the nuts will keep the epoxy from getting into the threads as the mount is epoxied to the floor. Epoxy does not stick to nylon or to the sticky side of blue painters tape either.
2. To prevent water damage to the wood in the transom where engine mounting bolts, drain holes, and tow rings mount through it, create a thick epoxy lined hole for each. Should any water leak past the sealing for any of these, the wood will be protected from the water. To do this, bore the 1/2" oversized holes in the wood on the inside of the transom for any bolts or drain holes that are going through it, but not through the fiberglass outer skin. You can do this by first drilling a 1/4" pilot hole straight through from the outside of the transom to the inside of the boat in each location. The outside skin will have only the actual size hole needed through it or if a new hole, the 1/4 pilot hole. Then with a hole saw 1/2" bigger than the final hole size and with tape placed around it to mark for the thickness of the transom less the width of the outside skin bore from the inside of the transom to the inside of the fiberglass skin. It is better to go a little shallow here instead of too deep. Use a flat bladed screw driver to break out the wood plug the hold saw made until the end of the hole is only the clean fiberglass skin. Place blue painters tape over each hole on the outside of the transom. Fill each hole from the inside of the transom with thickened epoxy. You can use a piece of blue painters tape on the inside covering all but the top of the hole to form a dike to keep the epoxy from flowing back out. Tipping the bow of the boat up helps with this. Fill each hole in stages only 1/3 to 1/2 full letting the epoxy harden in between as too much at one time will cause the epoxy to flash over in the hole (overheat and foam up). If this happens you'll need to bore the epoxy out and start over. When complete, drill correct size holes straight through from the outside of the transom. And there you have it, each hole will be sorrounded with 1/4" of epoxy protecting the wood from any water intrusion and thus rot. Why epoxy resin? Well it adheres far better than polyester resin to about any surface and unlike polyester, it remains adhered to wood even if the wood should get wet.
3. Underside of floor does not need to be fiberglassed. A coating of epoxy resin will make the floor last for at least several life times. To save money, polyester resin will work also, but as noted above, is not as good. Personal choices for much of any of this. Original floor lasted decades in my boat with no coating on the underside at all.
-- Jeff
Geez, wrote a book here. Well, you asked. I could go on forever.