pekstrom,
Bravo on your efforts! In about two years I'm going to have the time to start a boat project. In the past I've only considered a rehab project. This because as a kid we built two boats and it seemed like it took forever to complete them. But looking at your build thread I perhaps don't have the timeline in my memory correct. This to say you have given me food for thought and so I'm thinking why not a PM38?
One question, did you use the jpeg plans as is from the link you provided is or did you find plans from another source?
Allow me to say that I'm very impressed with your work and look forward to hearing about your splash!
ON EDIT: back in the 60s and 70s high quality homemade boats were rare but not unheard of. Today it's very rare to see even a wood hull never mind a homemade one. There is nothing quite like the feeling of pride you get on the water in a boat you built.
One of our boats we made my Dad let me drill, countersink and drive home all of the screws in port side floor, my brother did the other side. Used a bit and brace for the brass slot-headed screws. I would think about that every time we were out in that boat. Having a major part in the build was very heady stuff for a 11 year old boy. But of course I did exactly what my Dad told me to do which isn't the same as what your have created.
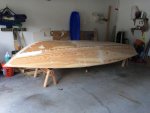
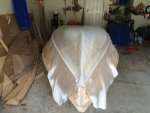
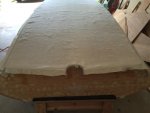
I've gotten her sanded nice and smooth below (above since she's upside down) the spray rails so moving on to the fiber cloth. I'm liking the wide cloth I got. No overlap in the center will hopefully lead to a nice and smooth bottom. I'll leave it like this overnight and am planning to do the first epoxy cover tomorrow. Should give it time to smooth out a bit more.
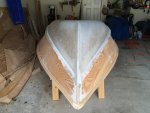
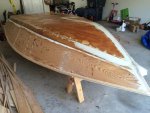
Thanks all. It did turn out nice overall. But those edges on the overlap across the bottom, and some places along the chine edges turned out to be more difficult than I expected. The cloth kept moving for me and I ended up with some bubbles. I tried a few methods to hold it in place, including tape, but the cloth just tended to come apart and still move. I was looking around on the net and came across the method at the link below. Is that something that could work for edges like the chines and the overlap? I'm guessing the epoxy will hold things together?
http://epoxyworks.com/index.php/sharp-fiberglass-corners/