72 Thunderbird Formula w/twin 165hp Mercs

Mark72233

Ensign
Joined
Jul 11, 2014
Messages
926
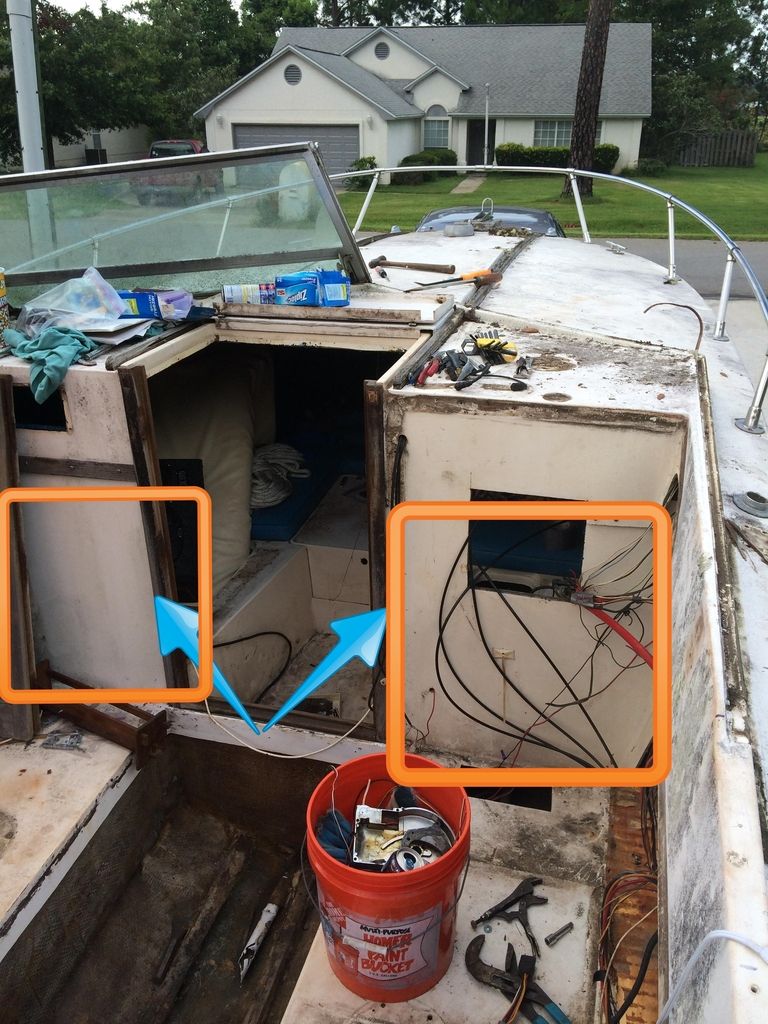
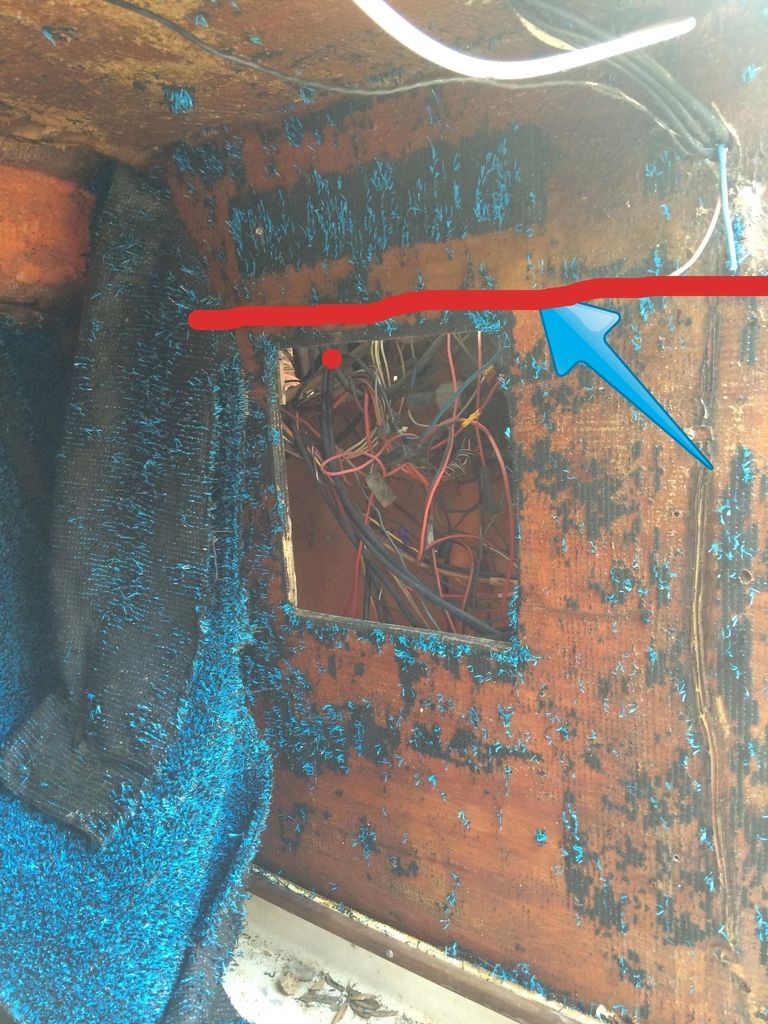
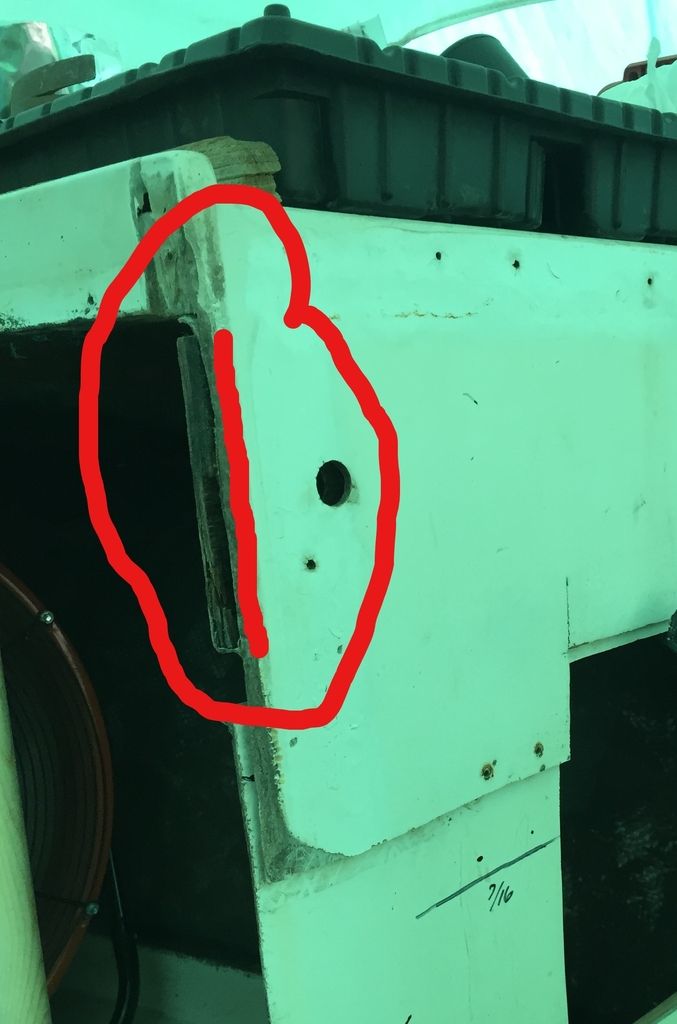
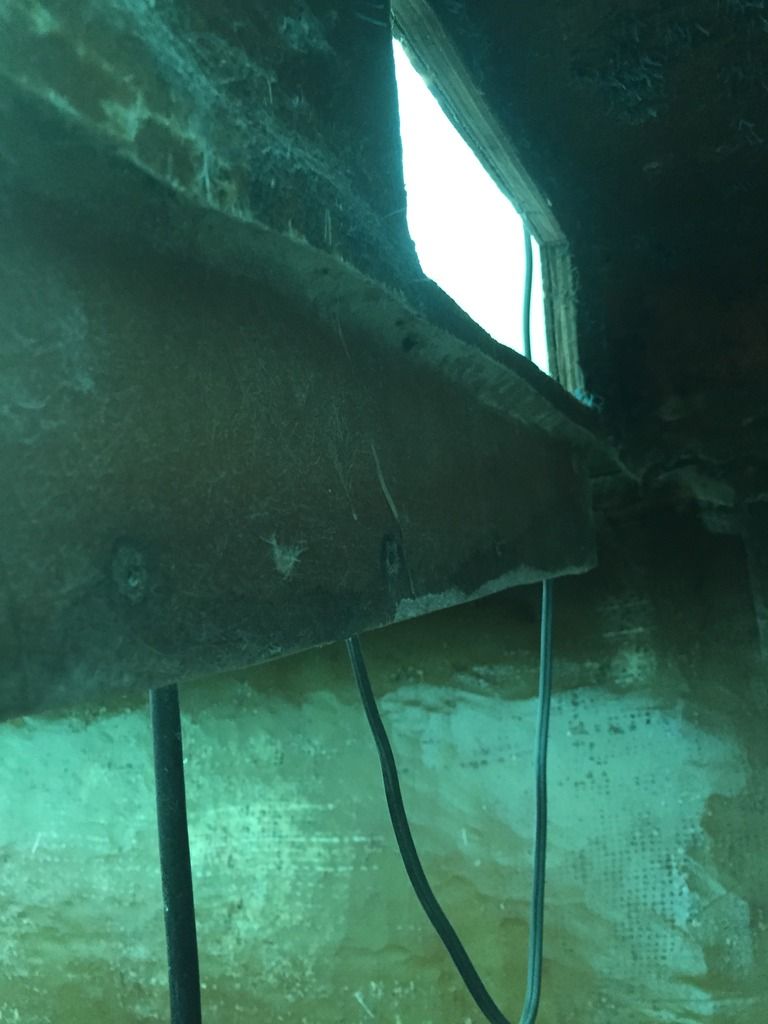
This is the back side of the starboard panel as you go into the cabin. The picture is from the tear down time frame. Anyway, where the red line is at is where the panel is fiber glassed to the cap section right behind and under the console. The top part is also backed by a piece of 1/2 plywood that at water damage so that also had to be removed on both port & star.

Its kind of nice working on something besides stringers, bulkheads or decks.
 

johnzonh

Petty Officer 2nd Class
Joined
Jun 11, 2008
Messages
137
Hi mark..also accidentally ran into this story...have been mesmerized for the last half hour reading through your progress and admiring the work. I have to redo my deck next year and you have set the bar waaaaayyyyyyyyyyyy high for the rest of us :) nice work. Permission to come aboard?
 

Mark72233

Ensign
Joined
Jul 11, 2014
Messages
926
Welcome aboard Johnz, New Hampshire wow I have always wanted to visit that part of the country. My dad was USAF and we lived up in western Pennsylvania for a year but I have never been any further north east.
 

Mark72233

Ensign
Joined
Jul 11, 2014
Messages
926
Ok, I had a plan for this past weekend to work on the boat and get certain things done but as always that never works out. I wanted to get the two panels installed right and left of the entry to the small cuddy cabin, paint the deck and install the hatches. Well as I looked at where the hatches go I realized I need to provide a little more support behind the panels and seal up some areas so water would not be able to intrude into these areas.
So I sealed up some doubled layers of 3/4 ply, installed them in the gap and covered them with CSM. Its not pretty but it will be behind the panels and never to be seen again and yes that is blood the boat has gotten me again. Truly we do give blood.sweat and tears doing these restores.
I also got the small back panels PB'd on the inside on each side.
Now that that is done I can finally try and install the panels using PB to attach them to the cabin section and sides of the hull. I will then cover it with CSM attaching it to the deck,sides and cabin area. I also covered the inside walls with a layer of CSM. I ground off a layer getting everything cleaned up so I wanted to add back a little thickness and clean it up a little.
 

kcassells

Fleet Admiral
Joined
Oct 16, 2012
Messages
8,600
Amazing what a little or lot pb can do to make everything come back in order. Looking good to me. I diddled with the keel this weekend and got the second
layer on. The weather here is just nice. Little low on da glue and glass at the moment.
I better get some side work kickin!
 

Mikeopsycho

Senior Chief Petty Officer
Joined
Feb 6, 2014
Messages
738
You may not have gotten what you had planned done, but you did get quite a bit accomplished, and it is progressing nicely. Blood, sweat, and tears is right! That's the cost of fixing up old boats. :D
 

Mark72233

Ensign
Joined
Jul 11, 2014
Messages
926
Installed the starboard panel last night. After replacing the rotted wood and grinding everything clean.

I used PB to attach it to the hull as well as the top and bottom. Then stainless steel screws and clamps to hold it in place.
Once it hardens I will attach further with some CSM or 1708.
 

Mark72233

Ensign
Joined
Jul 11, 2014
Messages
926
Ok the PB holding the panels on has hardened. I put a little more in places to fill voids and transition onto the deck and sides.

Then I took the 5" orbital sander with 100 grit and lightly sanded everything.
I hate fiberglass itch. After that I vacuumed everything clean and used acetone wiping down everything twice with two different rags trying to get it cleaned up before I painted it. Since I have way to much Bilgekote I painted it with that.
I still have to do a little more fiberglassing up front so I stopped a foot before the panels.
 

archbuilder

Vice Admiral
Joined
Sep 12, 2009
Messages
5,697
Very nice work as usual Mark, you are flying along! I have been pondering painting or gelcoating Fugglys bilge. I like white, but I always seem to drop the oil filter, full of oil into the bilge. I was thinking about an off white or something. What are your thoughts on the bilge coat vs gelcoat?
 

Mark72233

Ensign
Joined
Jul 11, 2014
Messages
926
Thanks for checking in Kc and Dirty, arch so far so good with the bilgekote but I won't know until I start putting in the engines and dropping tools, parts and fluids. It is very glossy and gives me the impression that oils won't penetrate it. I am not concerned as much about the deck because I bought some plastic like foot square interlocking tiles that woodonglass suggested might be interesting and I agreed with him and bought enough to cover the entire deck. Today I got away from the boat itself and started working on the console piece. It's a mess. I need to post some pictures and get some advice. I removed the two pieces of 1/2" rotted ply and replacing with either 1/2 or 3/4" resin coated ply. I want to fill up most of the old holes cut into it and start out with a clean slate. I am leaving the holes for the 2 trim pads, steering box and throttles. I know I can fill them in using PB on the smaller holes and CSM on the big ones but it is going to come out a little rough looking. Anyway I will get some pics up here and show you exactly what I am talking about. Hope everyone is having a productive weekend. Since a bunch of folks decided they wanted to come down here to Panama City Beach this weekend to something they call Freaknic and take over the beaches I get to work from 8p until 5am tonight in case the beach cops call for help from the city cops where I work at. Freaknics saying is "Everyone has a little freak in them". Spring break and summer in general around here has really gotten out of hand.
 

Mark72233

Ensign
Joined
Jul 11, 2014
Messages
926
Decided to mess with the outer skin of the transom and look at attaching the gimbal housing to the transom. I also need to drill out the holes through the transom. As I was sanding down the hardened PB left over from the transom install I noticed small depressions in the fiberglass where the old gimbal housing had been mounted to the transom. The old gimbal had corrosion that developer between the skin and the backside of the gimbal, oxidized aluminum that swelled over the past 4 decades causing these depressions. The depressions are about 2-3 inches in diameter tapering down towards the old gimbal mounting bolt holes and most are as little as 1/32 of and inch but some are at 1/16 and the ones at the bottom are close to 3/16 of an inch. I want to prime and paint the transom before I attach the Gimbals. Is there a good way to fill in and level these depressions. Also I don't want to gelcoat the hull just need a good solid paint. I am painting the hull a dark blue almost black color.
 

Mark72233

Ensign
Joined
Jul 11, 2014
Messages
926
I also finally took a good look at both of the gimbal I took off the boat and wow they are a mess. The front side which would be the side touching the outside skin of the transom are completely corroded away which is what caused the depressions. I realize I won't be able to use them at all and all the attached pieces are shot. I ended up pulling what I could and tossed both of them. I do have one replacement off one of the donor engines I picked up. It looks to be the same as the ones that came off the boat originally and was used in fresh water.
The second one I have from the other donor engine was also from fresh water and really looks clean unfortunately it is a newer version. Bolt pattern is different and the gasket that seals it to the hull is like a rubber gasket set in a channel. It also has the two trim sending sensors one on each side. I guess a Gen 1 or 2. I wish I could use it but it will go on Ebay for a quick buck and now I have to start looking on Ebay for a replacement.
 

bigdirty

Senior Chief Petty Officer
Joined
Oct 4, 2013
Messages
652
Personaly, id go with the newer alpha style gimbles.. If you are going to be buying one more anyway.. And I don't have the specs close at hand, but I think that transom is a bit on the extreme end of the merc specs for flatness.. I would probly be filling/glassing over them and predrilling for the "new" gimble housing/transom assembly's. I'm guessing then your originals are 'MR' or R drives, pre alpha.. Why not update to alphas anyway, after all this work? :lol: I also think the 'newer' drives, with the channel /o-ring type seal are a bit more forgiving of slightly uneven surfaces..
 
Last edited:

Mark72233

Ensign
Joined
Jul 11, 2014
Messages
926
Dirty, I wouldn't mind upgrading but I already have one gimbal and the 2 outdrives that go with them plus I already bought all the associated pieces and parts like bellows, gaskets, bearings and such and I don't know if they are interchangeable. I found another complete gimbal on eBay that was used in fresh water and looks very good for $260 so it is now on its way here.
 

WOEISMEIGOTTA470

Petty Officer 1st Class
Joined
Aug 31, 2012
Messages
375
Hey Mark, you forget about me? :laugh:
I might be able to hook you up dude, I have a very clean gimbal housing for MC-1 I'm looking to sell...
 

Woodonglass

Supreme Mariner
Joined
Dec 29, 2009
Messages
25,924
Decided to mess with the outer skin of the transom and look at attaching the gimbal housing to the transom. I also need to drill out the holes through the transom. As I was sanding down the hardened PB left over from the transom install I noticed small depressions in the fiberglass where the old gimbal housing had been mounted to the transom. The old gimbal had corrosion that developer between the skin and the backside of the gimbal, oxidized aluminum that swelled over the past 4 decades causing these depressions. The depressions are about 2-3 inches in diameter tapering down towards the old gimbal mounting bolt holes and most are as little as 1/32 of and inch but some are at 1/16 and the ones at the bottom are close to 3/16 of an inch. I want to prime and paint the transom before I attach the Gimbals. Is there a good way to fill in and level these depressions. Also I don't want to gelcoat the hull just need a good solid paint. I am painting the hull a dark blue almost black color.

Well, I AM just an Old Dumb Okie, and sometimes my Elevator don't go all the way to the top!!! But...to my way of thinking, and mind you I ain't an I/O expert by no means, but from what I've learned here on the forum and my research over the years, the things that ARE important for these things is Flatness, and Parallelism all around the keyhole. I ain't never installed one but ifn' that were mine, that wouldn't be flat enuf fer me!!!! I'll give you a call to discuss some methods to correct them dipsy doodles.;)
 
Last edited:

WOEISMEIGOTTA470

Petty Officer 1st Class
Joined
Aug 31, 2012
Messages
375
FYI- I also had depressions from years of wear. Mine wasn't out of flatness too much (maybe 1/16-1/8" max in places). I used high quality fairing compound which sands fairly easily. Using auto body sanding blocks I managed to get it pretty darn flat. I'd occasionally check with a straight edge, and on the last round of fairing I used a very wide spackling knife (about 10"). Once finished, I topped it with gelcoat for waterproofing and toughness. I still would like to apply at least one more coat of gel before a final sand and buff. This is just what I ended up doing to fix the problem, might not be the best method out there.
 
Top