1977 21' Starcraft Mariner Restoration

Jim_the_Islander

Seaman Apprentice
Joined
Jun 25, 2017
Messages
38
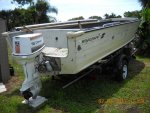
Hey y'all, Have had this boat a few years now and am finally going to start this project. This is to be my retirement boat. Hopefully its finished before I retire...ha ha.

Its a fresh water boat that I brought down to Florida to use in saltwater and am looking forward to the rebuild as this is my 3rd boat rebuild. My first aluminum boat rebuild (not counting my jon boat).

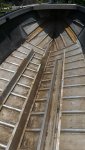
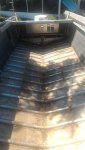
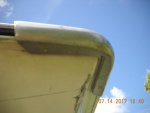
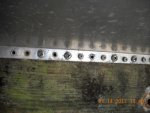
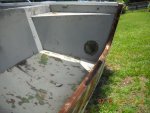
Lets get to it, here are some pics....
 

Attachments

  • photo269717.jpg
    photo269717.jpg
    58.7 KB · Views: 28
  • photo269718.jpg
    photo269718.jpg
    35.1 KB · Views: 9
  • photo269719.jpg
    photo269719.jpg
    47.1 KB · Views: 9
  • photo269720.jpg
    photo269720.jpg
    33.1 KB · Views: 9
  • photo269721.jpg
    photo269721.jpg
    34.4 KB · Views: 8

Candutch

Chief Petty Officer
Joined
May 8, 2015
Messages
637
Welcome to the Starmada Jim! That is a great boat for a project you have there and a good start on the tear down. Lots of great information and knowledge to help you along the way here.
I just finished what I thought my retirement boat was going to be but with 10 years to go and already scouring the classifieds I fear I may end up with another project before that happens.
Looking forward to watching your progress.
 

Watermann

Starmada Splash of the Year 2014
Joined
Jan 12, 2013
Messages
13,753
:welcome: to the tinsanity Jim,

Yeah you're off to a good start having a mucked out hull. Looks like next order of business will be that transom area.

fetch
 

Jim_the_Islander

Seaman Apprentice
Joined
Jun 25, 2017
Messages
38
Thanks for the warm welcome y'all. Know what you mean candutch, I still look pretty hard at the 22' center consoles when I see them once in awhile...

Ya the motor is coming off next, and then pulling the transom wood. The transom wood has some rotten spots on the bottom so it has to be replaced. When the transom is out then I will see how many rivets I will need for the whole boat.

So first will replace the transom, 2nd rivets and gluv-it at the same time. Then next will be deciding placement of the fuel tank and a fiberglass console.

Have a 90hp Inline six Mercury for repower, the Johnson needs too much work to get going.

Open to suggestions on where to put replaceable zincs.

Some other things on my wish list are; anchor rope locker in the bow (for 600' of rope), and a lift ring in front to use with a davit.

Any one install deck drains? Not used to a boat without scuppers, am not real crazy about cutting holes in the hull though. A live well would be nice but not sure how to place the intake for that either.

You can see someone robbed the corner braces and replace them with some dock bumpers. Are the corner braces supposed to be structural or can they be replaced with E-bay look-a-likes?

Thanks for the help y'all.
 

jbcurt00

Moderator
Staff member
Joined
Oct 25, 2011
Messages
24,871
Stern transom end caps are necessary, and hard to find. If you can find a set of similar one somewhere, use them instead of the dock corners.

A metal fab shop could probably weld up a decent set out of 1/4in flat AL stock.
 

GreenHoliday

Seaman Apprentice
Joined
Aug 5, 2016
Messages
42
I am missing the starboard end cap on my '76 Holiday. The transom beneath was definitely rotten, so I agree that they are necessary for keeping water out, if not for structure as well. One of the reproductions on ebay matched the measurements of my remaining port end cap. I can't speak to the quality of the reproduction because I have not pulled the trigger yet, but I seem to remember others posting that they were pleased with the product. FWIW, the seller has 100% positive reviews. I There are only 4 starboard caps left... I better jump on it before I advertise too much.

Search "Starcraft Boat Transom End Cap" (I'd post the link, but I don't know the forum policies on that sort of thing... sorry.) [FONT=&quot] [/FONT]
 

Watermann

Starmada Splash of the Year 2014
Joined
Jan 12, 2013
Messages
13,753
A Merc TOP guy huh, I have a 79 140 TOP with the ADI on my SS and so far it's been pretty reliable but I had to sink money into it for all new wiring and ignition parts.
 

Ejipner

Petty Officer 2nd Class
Joined
May 26, 2017
Messages
114
Looks like it's going to be a fun project. Takes lots of pictures for us. I'm especially interested in seeing the transom disassembly.
 

jbcurt00

Moderator
Staff member
Joined
Oct 25, 2011
Messages
24,871
....Search "Starcraft Boat Transom End Cap" (I'd post the link, but I don't know the forum policies on that sort of thing... sorry.) [FONT=&quot] [/FONT]

I dont think you should be overly concerned about buying 1 of his end caps. Might make bow caps too, IDK.

Good guy, hasnt been on Iboats in quite a while. Was a frequent poster while working on the Chief in his ebay ad pix.
 

Jim_the_Islander

Seaman Apprentice
Joined
Jun 25, 2017
Messages
38
Ha ha ha...those caps were gone last night...but if you look up aluminum corner braces there is a long list. Searching starcraft caps brings up a guy who makes caps that are "casted", curious if welded plate or casted caps are stronger.

Waterman just read your sticky post on "rivets", that's a very helpful post. All the rivets that are leaking or are loose I planned on replacing. Was going to try and rebuck all the rest...I know big job. Any thoughts on rebucking the rest of the rivets?

Now is the transom held in by rivets or bolts from the factory? Am seeing some bolts in there and am not sure if someone has tried to replace the outside wood on the transom and used bolts of some sort.

One more question, the floor joists (3 of them) are just for support of the floor? They aren't actually stringers for structural support, the ribs are for the structural support I believe. Am sure they give some structural support once the floor is attached. The middle joist am thinking of modifying to put in a belly tank in front of the console, that should be okay right?

Hope you all have a great weekend...cheers!:tea:
 

Watermann

Starmada Splash of the Year 2014
Joined
Jan 12, 2013
Messages
13,753
There's really no benefit re-bucking rivets that have no issue of leaking or being loose. If the rivet is tipped or damaged from impact and is leaking then it needs replaced not re-bucked. Rivets that are set and not leaking are fine as is.

The transom wood is in place by machine bolts through and wood screws., no rivets.

Everything in these boats add to it's integrity, ribs, deck supports, decking, side panels gunnels and so on. They all need to be in place and good condition.
 

Jim_the_Islander

Seaman Apprentice
Joined
Jun 25, 2017
Messages
38
So its past dark thirty here in Florida and was trying to get some measurements for planning purposes while cooling off with a couple frosty beverages.

How thick was the original transom plywood? It looks like 1 3/8". The plywood on the outside of the boat looks about 7/16'.

Am seeing 3/4" marine grade plywood at the local Homers but am thinking I may have to check around a few shops in the area to see where I can get some different sizes.

If someone can add what size plywood they used for their transom that also used epoxy and glass matt in the build that would be helpful as the epoxy and matt will add to the thickness of the transom and will have to be accounted for before making my purchase.

Have seen previously on here how the gunnel caps have to be disconnected and raised on the transom end for clearance to remove the old transom and install the new one. Looks like the splashwell is coming out too. Hoping I will be able to get enough of the old transom out intact that I can make a good pattern. Its not looking real good though. The top ends of the transom at the gunnels are pretty rotted, at least on one side.
 

Watermann

Starmada Splash of the Year 2014
Joined
Jan 12, 2013
Messages
13,753
Transom should be the same as all the other SC boats, 1.5" thick.

On my boats I remove all the bolts from the rub rail bracket and the rivets from the gunnels to remove them for clean up and repair. Then I replace the gunnels with all new rivets. Mine have all been loose and to not replace them is to have a weakness. I just put the new transom back in before replacing the gunnels.
 

Jim_the_Islander

Seaman Apprentice
Joined
Jun 25, 2017
Messages
38
No Title

Thanks for the heads up on the rub rail Watermann. Need some help on the removing the bow cap though. There are 4 rivets underneath the bow cap which are drilled out already but the cap will not budge and am afraid to put to much force on it as I don't want to break it as it is a cast piece. Did not see where it was attached by screws or bolts underneath. Maybe PO used some adhesive? Please any suggestions for removing the bow cap so I can get the rub rail off.

Here is a few pics, including the menagerie of screws holding the transom in. Am too old to be under the splashwell for too long trying to remove these. Luckily there is plenty of other things to work on allowing me to go back and forth from the transom area. Are these screws at the transom original? Found a couple that the heads were semi stripped out.

Thanks for the help y'all.
 

Attachments

  • photo270962.jpg
    photo270962.jpg
    16.1 KB · Views: 4
  • photo270963.jpg
    photo270963.jpg
    38 KB · Views: 4
  • photo270964.jpg
    photo270964.jpg
    40.6 KB · Views: 4

laurentide

Lieutenant Commander
Joined
Jul 24, 2011
Messages
1,869
Yep, those screws are likely original, and new ones will go back in after you replace the transom. Starcraft sometimes used whatever hardware was lying around, which may be why they're different sizes. I put some 5200 on the shanks when replacing them. You can cut the heads off if they're stripped with a cutoff wheel on a Dremel or grinder. Just don't cut the splashwell part.

Edit: those rusty steel ones should not be there.
 

Watermann

Starmada Splash of the Year 2014
Joined
Jan 12, 2013
Messages
13,753
Ah yeah the stubborn bow cap, had the same question in my Chief thread.You have to exert moderate prying force on the top side where it's hooked over the rubrail. I stuck a steel putty knife in the slot between the cap and bow deck, then put a thin wrecking bar between the putty knife and the bow deck and began tapping lightly seeing that the cap was lifting up and working it off evenly.

Hey on those SW screws, if you have a sawsall and a long metal cutting blade you can slide the blade between the transom wood and the SW and cut those stubborn screws. Just be careful to match the angle and not cut into the SW lip.
 

Jim_the_Islander

Seaman Apprentice
Joined
Jun 25, 2017
Messages
38
No Title

Thanks waterman, will try that on the bow cap. Made progress and got all the bolts and screws holding the transom in. Then I retreated from the heat and hit the shower, was a nice breeze again today but not a lot of clouds like yesterday.

The support bracket at the bottom of the transom was in pretty good shape. In my searches yesterday on iboats it seemed most peeps were broken near the top. Mine is a little bent at the top as seen in the pic. Am considering reinforcing it with a piece of angle aluminum as others have done as a repair.

The SW is all that's left to remove in order to start getting the old transom wood out, will attempt the bow cap removal again next , then the rub rail in order to get the SW out, lots of blind rivets on the SW, seems they could have used bolts on most of it.

Ya there was definitely more than an allowable amount of iron hardware used on the Mariner (shakes head). Fortunately no compromising problems found in the hull or transom so far(fingers crossed), no cracks, major pitting or seam separations. Seems this hull was rescued just in time.
 

Attachments

  • photo270986.jpg
    photo270986.jpg
    42.9 KB · Views: 14
  • photo270988.jpg
    photo270988.jpg
    44.6 KB · Views: 5
  • photo270990.jpg
    photo270990.jpg
    53.2 KB · Views: 5
  • photo270991.jpg
    photo270991.jpg
    43 KB · Views: 6

Jim_the_Islander

Seaman Apprentice
Joined
Jun 25, 2017
Messages
38
Looking at the center transom aluminum cap(the long u-shaped one) and it has a noticeable warp from the transom being bent back. Probably pulling the top of the knee brace out of shape a little as a consequence. Below is not a very good picture of the bottom of the knee brace from the side. It looks like it has pulled it up away from the bottom of the hull also, am supposing this was supposed to be flush with the bottom.

Not really wanted to remove the knee brace to bend it back, any other options or recommendations? Am thinking of adding additional angle AL aft to stern on top of the ribs and alongside the knee brace to give more reinforcement. IbioHS1.jpg ui7MPgP.jpg
 

Watermann

Starmada Splash of the Year 2014
Joined
Jan 12, 2013
Messages
13,753
The front of the knee brace is supposed to be like that to allow for water movement underneath it to the back of the bilge, see how it matches up to that limber hole fore of it.
 
Top